
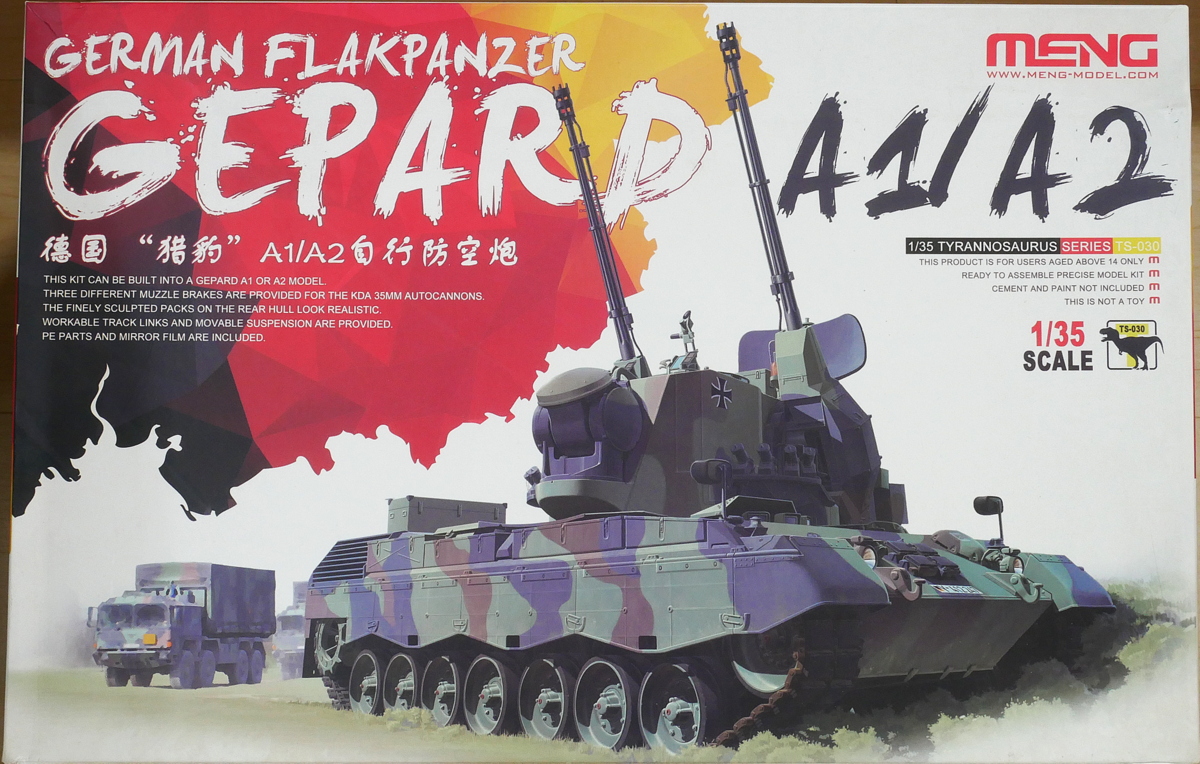
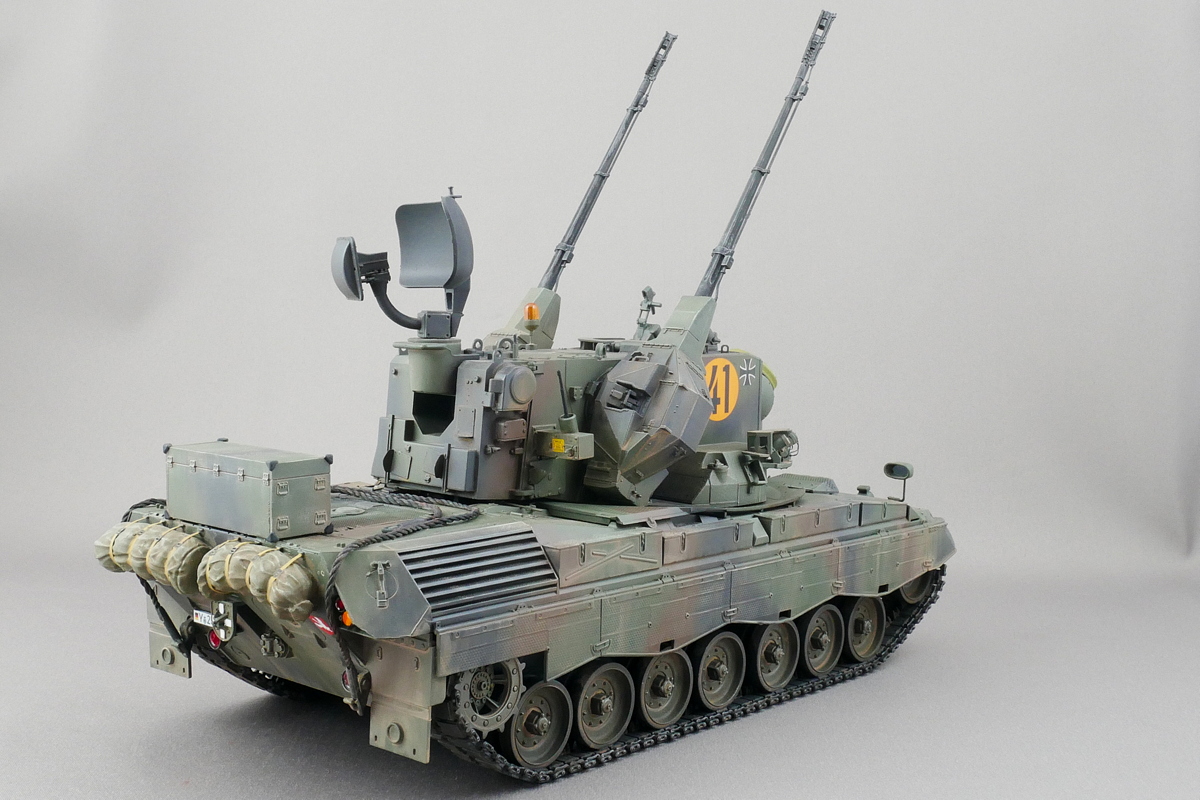
今回はドイツ連邦軍の車両を初めて製作します。ボックスアートは限界まで上向きな対空砲がなかなか製作意欲を掻き立てます。
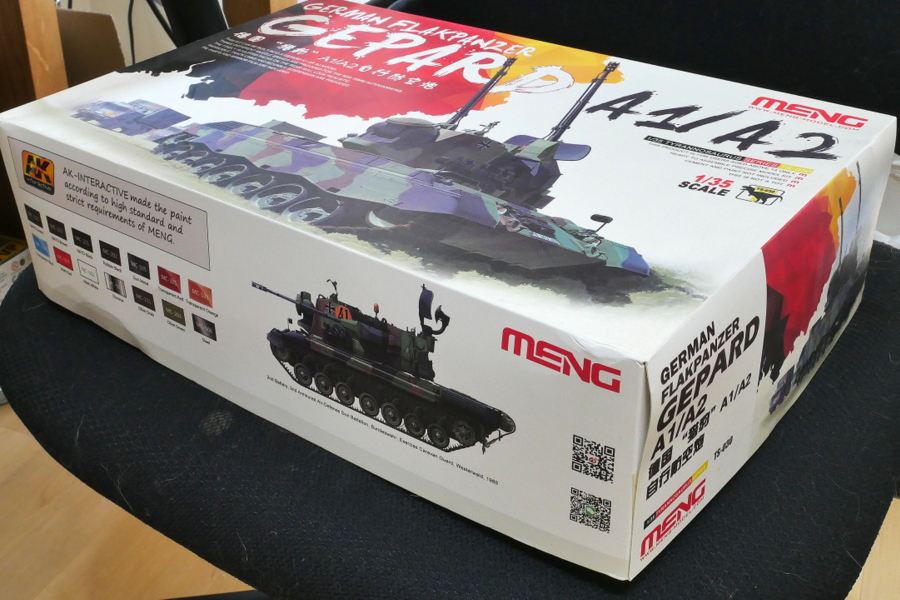
これも前回製作したヤークトパンター同様にボックスがけっこう厚いです。パーツがぎっしり入っていそうでテンションが高いときでないとなかなか開けて一気に組もうという気分にならないかも。ゲパルトの動画を見て気分をあげると良いでしょう。
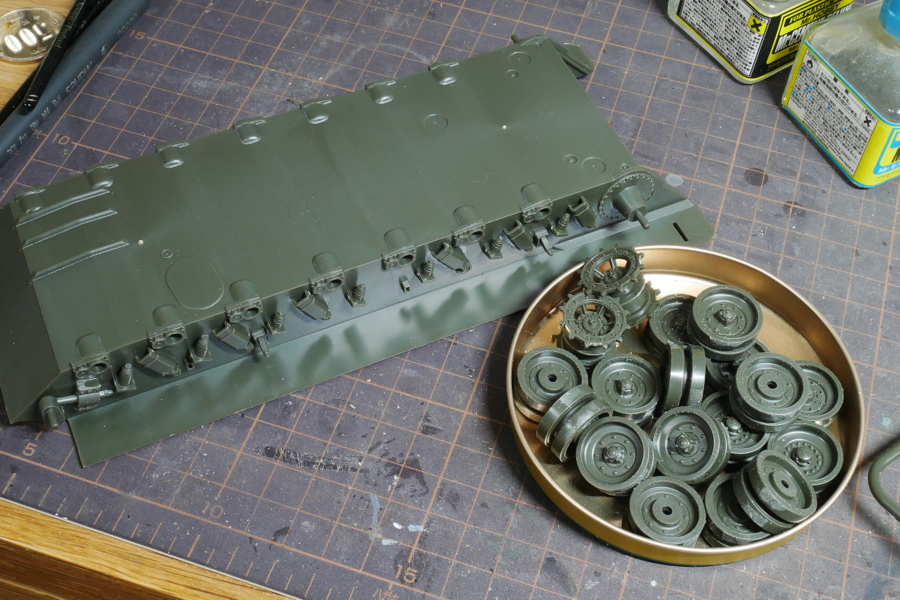
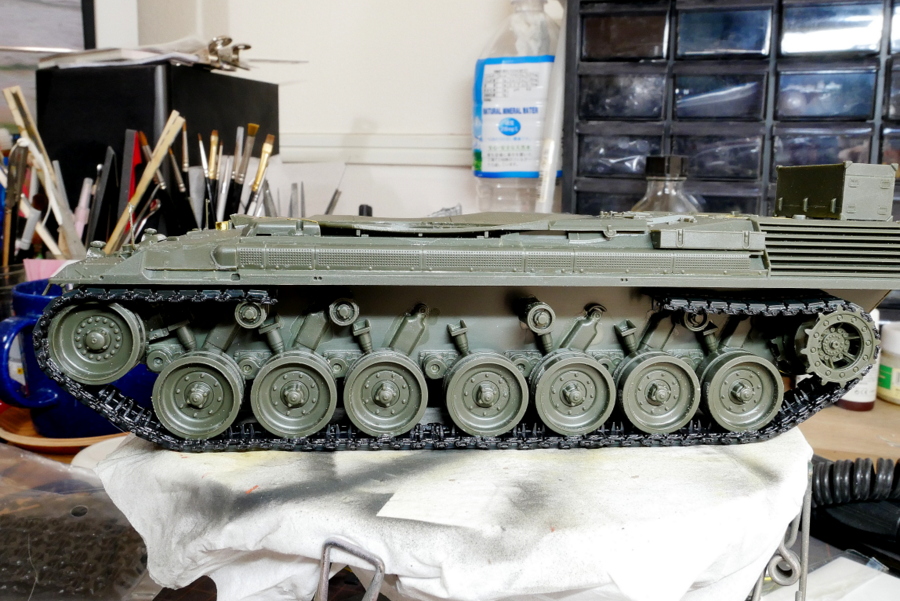
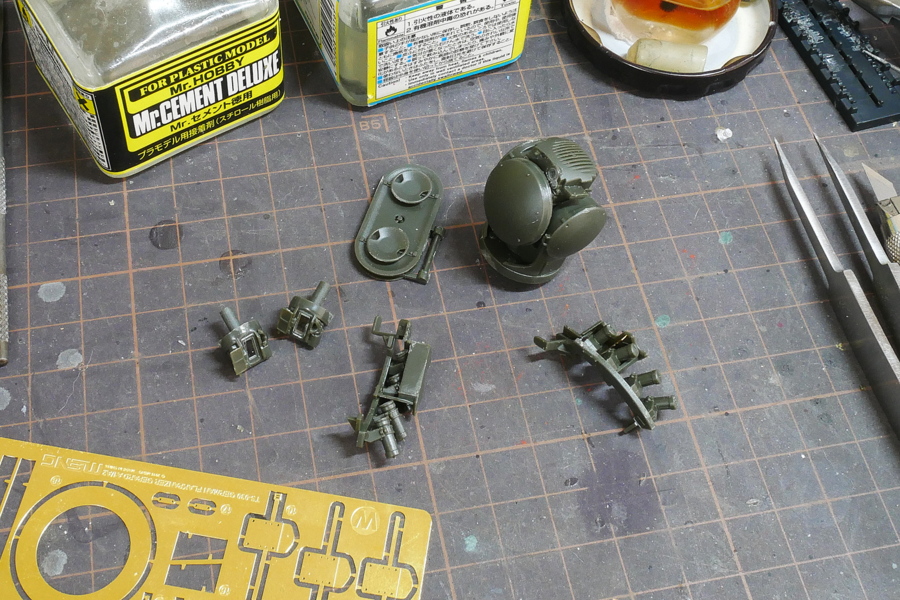
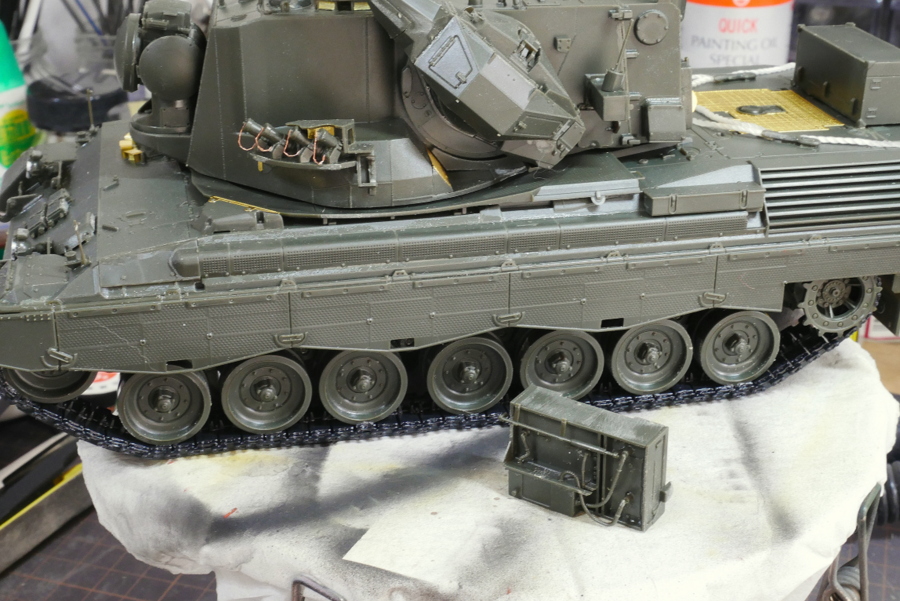
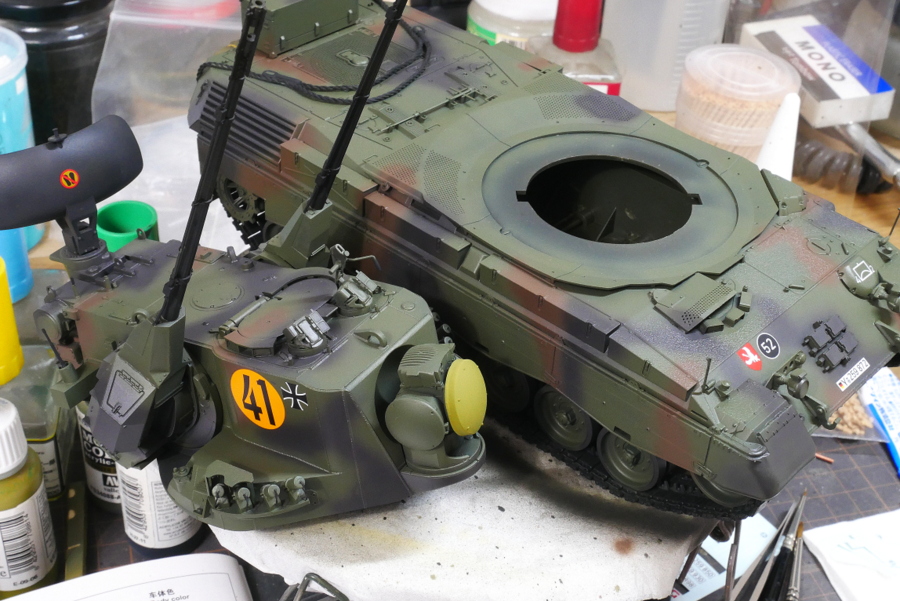
シャーシにはけっこうたくさんの細かい部品を取り付けます。たぶん転輪などに隠れてしまい、あまり見えないので取り付けなくてもいいかな?なんて思ったけど部品整形もそこそこにしてとりあえずは全部組み込みました。
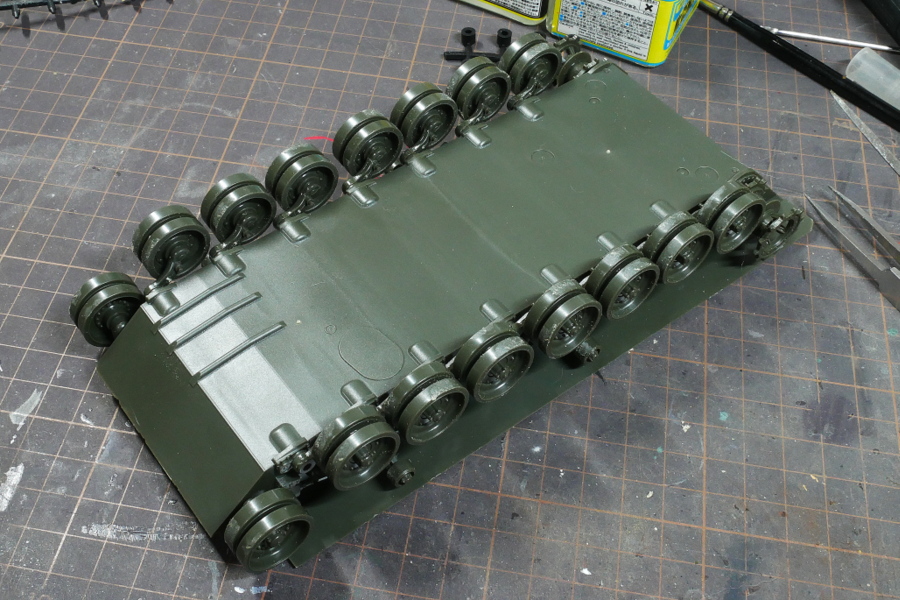
割と転輪を綺麗に揃えて組み立てることが出来ました。センターがずれると履帯がうまくハマらないからね。
五輪まであと一か月かぁ・・・。ウガンダの9人だけで醜態さらした組織委員会や政府が9万人もの入国をコントロールするなんて不可能じゃないかな。それとさ、濃厚接触者がたった7人のわけがなかろうに。十何時間も狭い飛行機に乗っていた全員が濃厚接触者ってことはないのかね。いまさらただの風邪とも思えないし。
(2021/06/25)
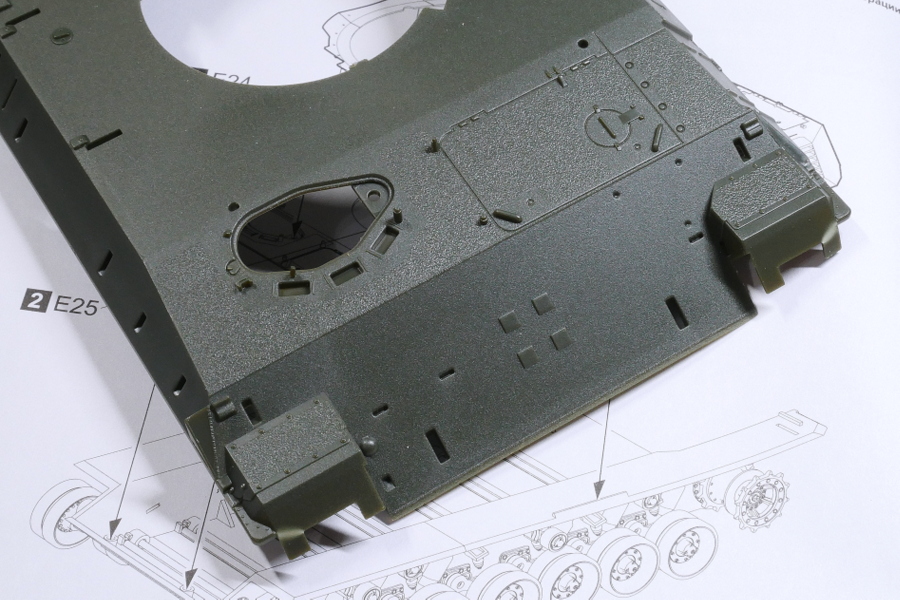
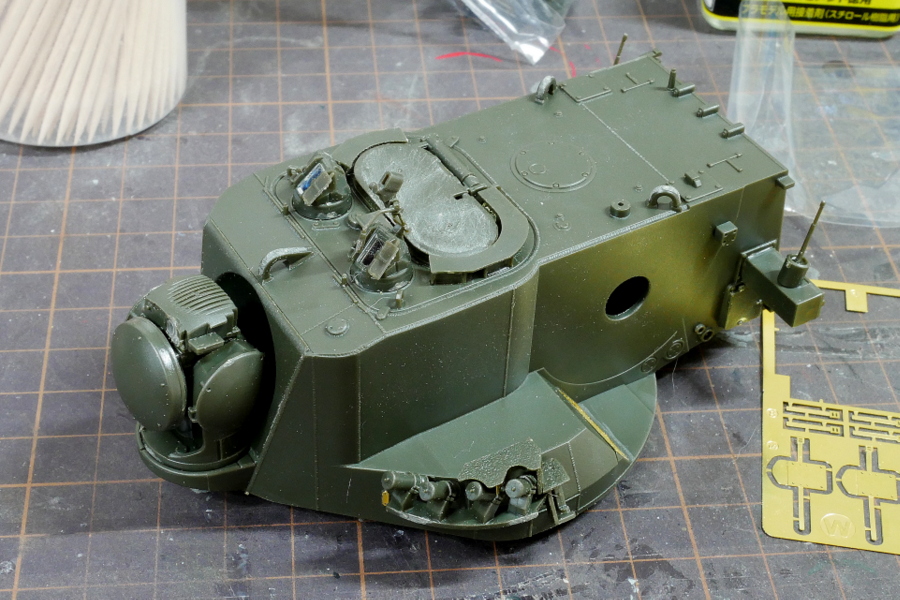
車両の上面には砂粒状のザラザラしたすべり止めがモールドされています。凄いね。
転輪を取り付けた後は車体部分はそんなにたくさんパーツがあるわけでもないのでけっこうすぐに組み立てられました。車両前部のハッチはいろいろと部品が接着されて複雑になるので結局は閉状態のまま接着しました。
昔のタミヤの組立説明書風のおじさんが説明しています。
実はこれ、サスペンションが可動するんですよね。というかシャフトがねじれて弾力で曲がる感じなので強度が心配です。履帯を巻き付けたら大量の接着剤で固定すると思います。
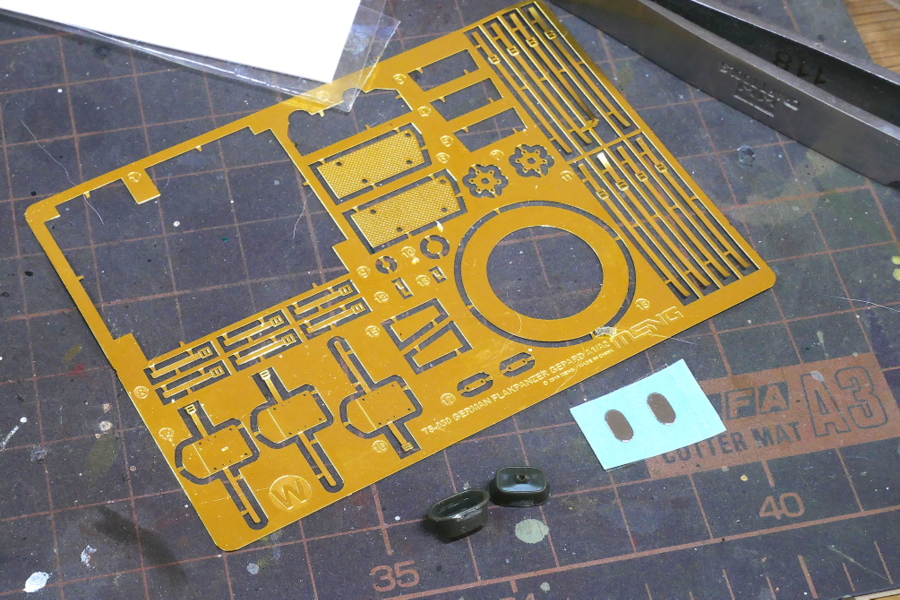
バックミラーのミラー部分には銀色のシールが付いていました。貼ったあとでマスキングゾルでマスクしようと思います。
先日は100m決勝など陸上競技をテレビで観戦していました。各選手の必死な顔を見ていると正直なところ五輪反対って言い難いですな。無観客が妥当なところだろうか。それにしても2着の選手に対するNHKのスルーっぷりが鬼畜レベル、過去タイムにより内定対象ではないとはいえ頑張ったのに可哀そう。一言くらい感想聞けよ。
それと最近騒がれていますが、もしも陛下が五輪止めようって言い出したら政府と実行委員会、都政までもが朝敵扱いになるんだなぁ、なんてことを思ってしまいました。
(2021/06/27)
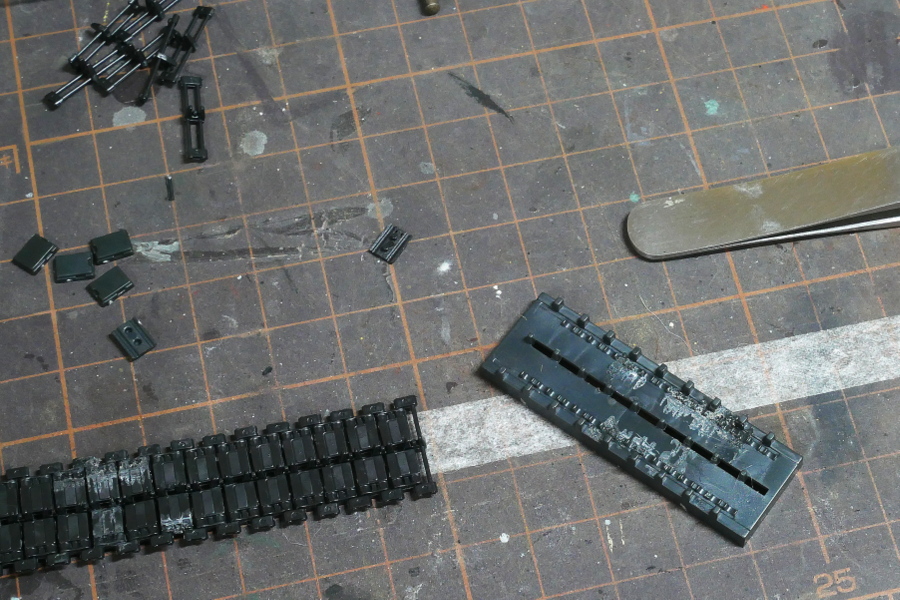
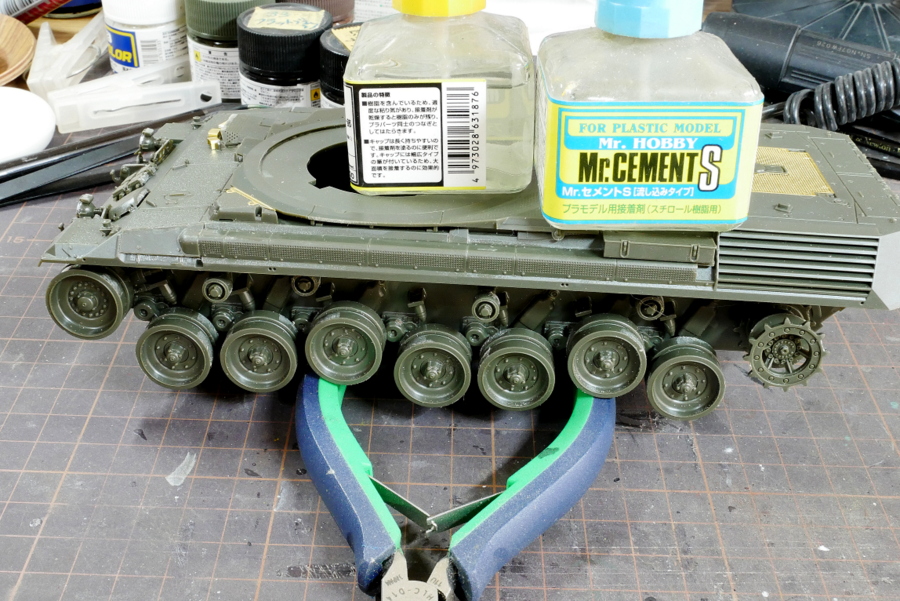
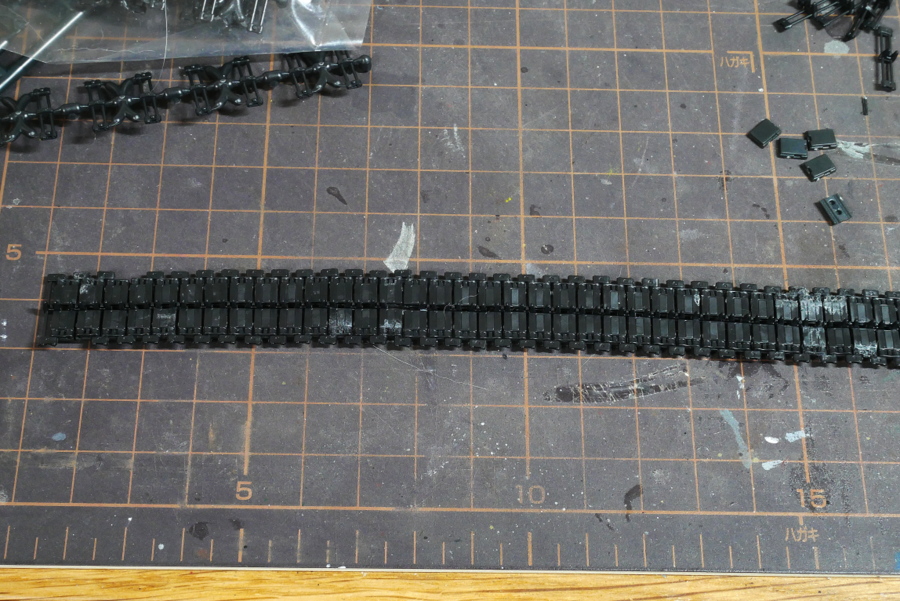
このゲパルト対空砲の履帯は組立が非常に面倒です。自分の中での連結履帯の限界はパーツを一つずつ切り離して片側分を並べて流し込み接着剤で一気組みするくらいまでですかね。今回のように専用の治具の上に並べてサンドイッチ状にパーツを挟んだりというのは手間過ぎますね・・・。
付属している治具には接着剤は厳禁です。でも細かい部品の固定が難しくてつい接着剤を使用してしまったら汚くなってしまい、部品を剥がそうとしたら粉々に破損。いまいち上手くいきませんでした。部品の精度自体はそこそこなので忍耐強く進めればいつかゴールが見えてくるでしょう。パーツ精度がボロボロだったら投げ出しているレベル。
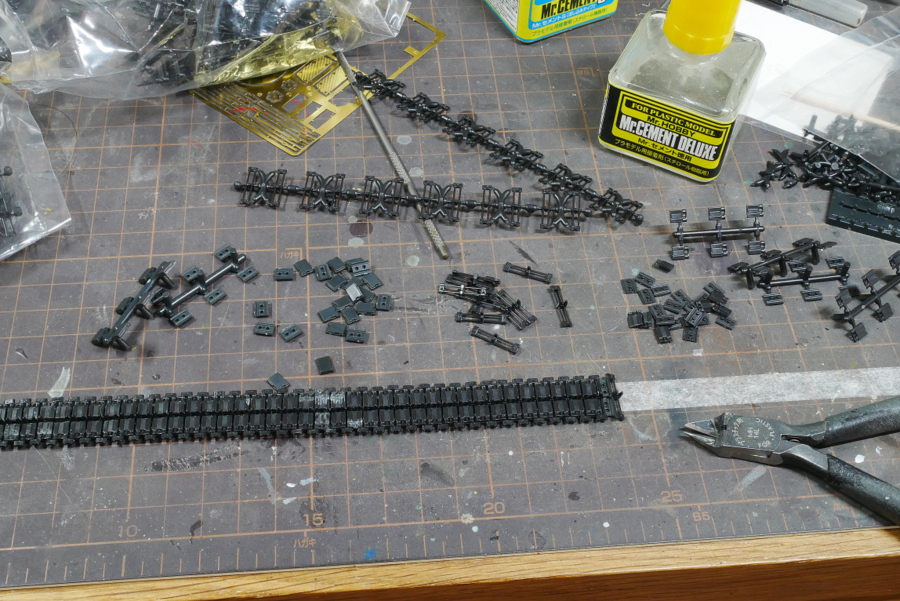
3回くらいは治具を使って繰り返し組み立ててみたものの、途中までは上手くいくのですがバラバラになったりして途中でムキーッって。1トラックにパーツ5個というのは大変だ。他のキットでレオパルト系を作ったことが無いので何とも言えませんけど、これはやりすぎだよ~。
履帯の上の方はサイドアーマーで見えなくなるのでこの辺で勘弁というところです。少し部品を余らせておけば反対側で失敗した時にリカバリーの役にも立つでしょう。

個人的経験から得られたコツとしては1トラックずつ接着しながら進めることと真ん中のくぼみにだけほんの少し接着剤を乗せて部品接着。転輪に履帯を巻いた後に一気にじゃぶじゃぶと流し込み接着剤を流したら強度も保てると思います。このさい転輪のサスペンション機能は無視して全部接着しました。車体下部の強度を優先です。だいぶ組立に慣れてきて根気を出せばこの大変な作業も完走できそうです。
(2021/06/30)
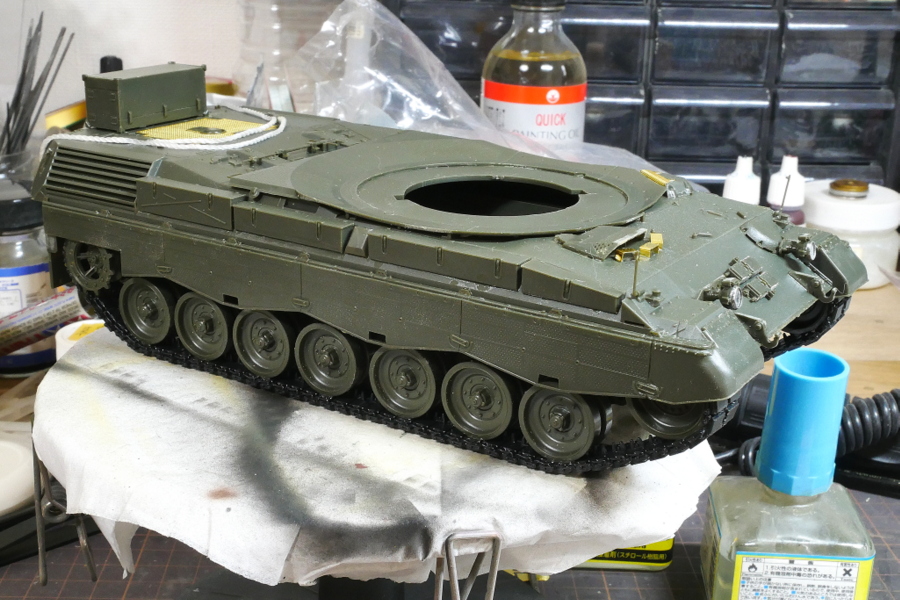
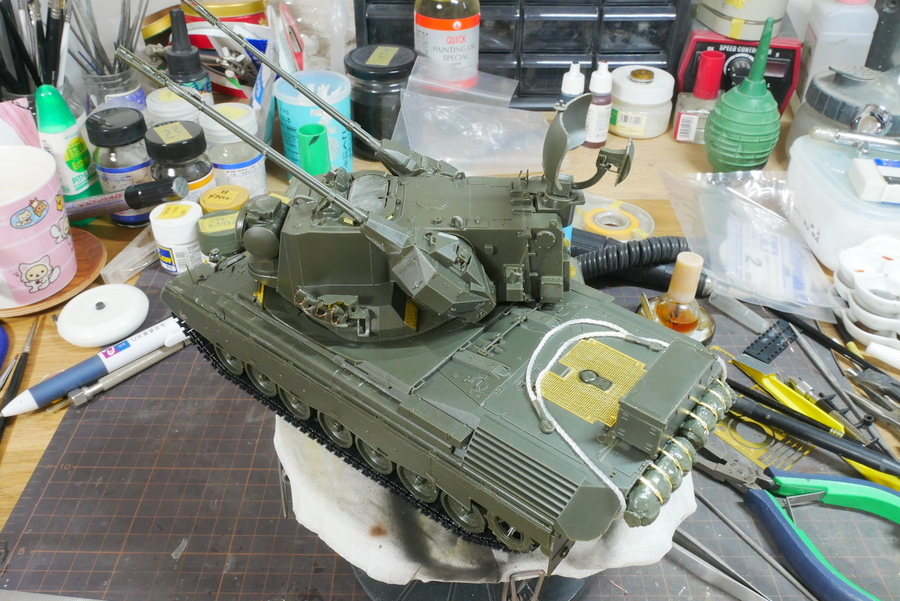
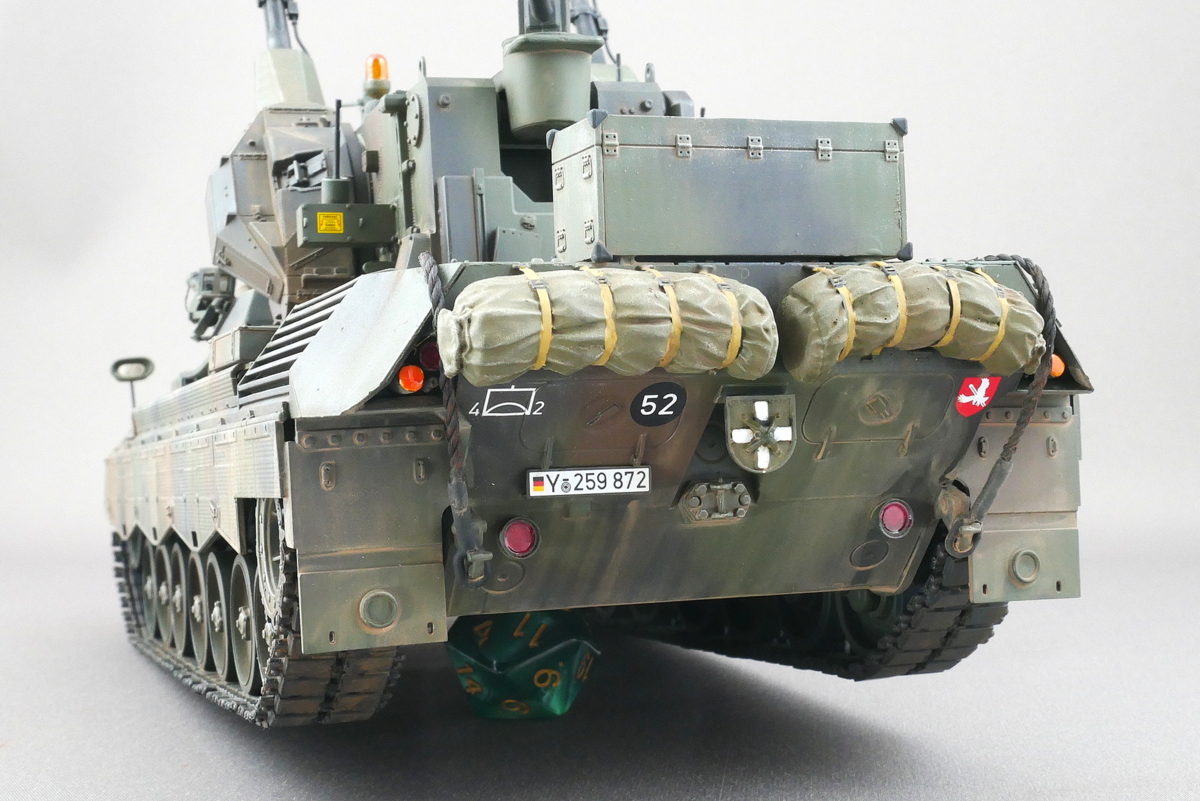
サイドアーマーを接着するとこんな感じになります。上半分の履帯は見えないですね。履帯の組立にはかなり苦労しましたが、何とか見れる感じにはなりました。
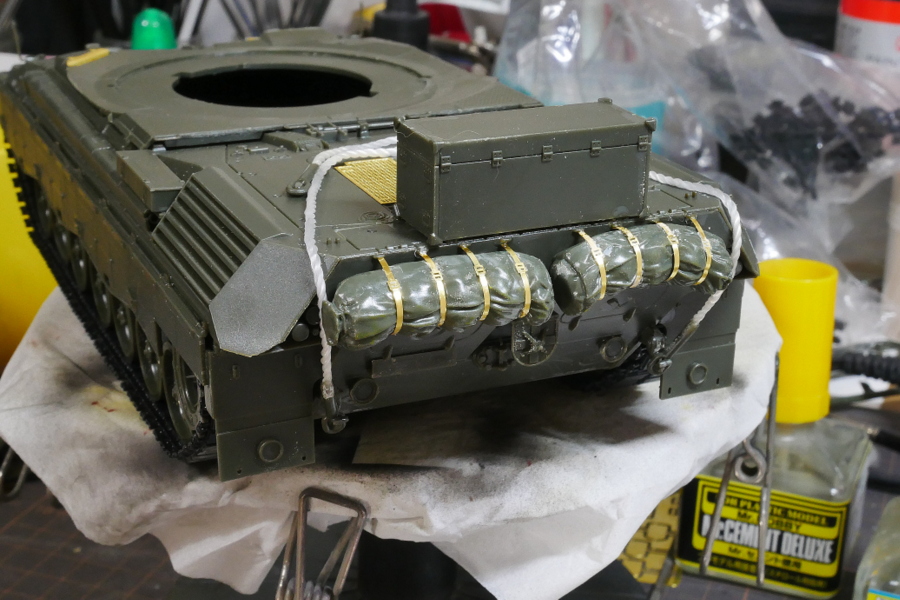
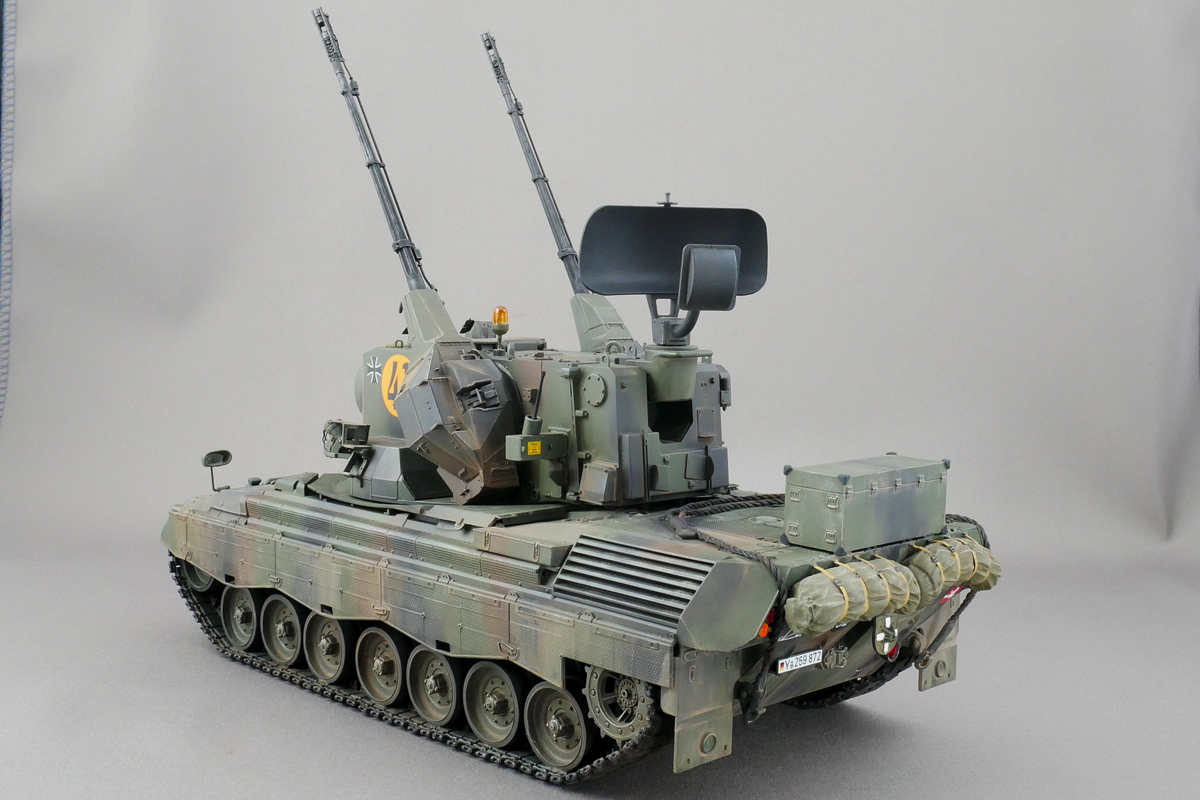
あとで気が付きましたが後部の寝袋のようなものがあるとデカールを貼るときに邪魔です。結局はデカールの位置を少しずらすことになるでしょう。多少はいいでしょ。
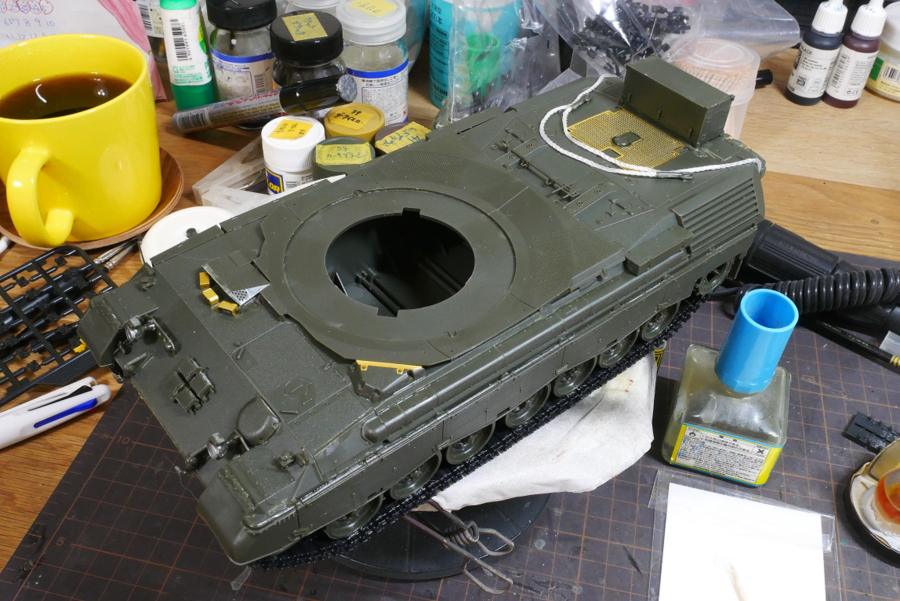
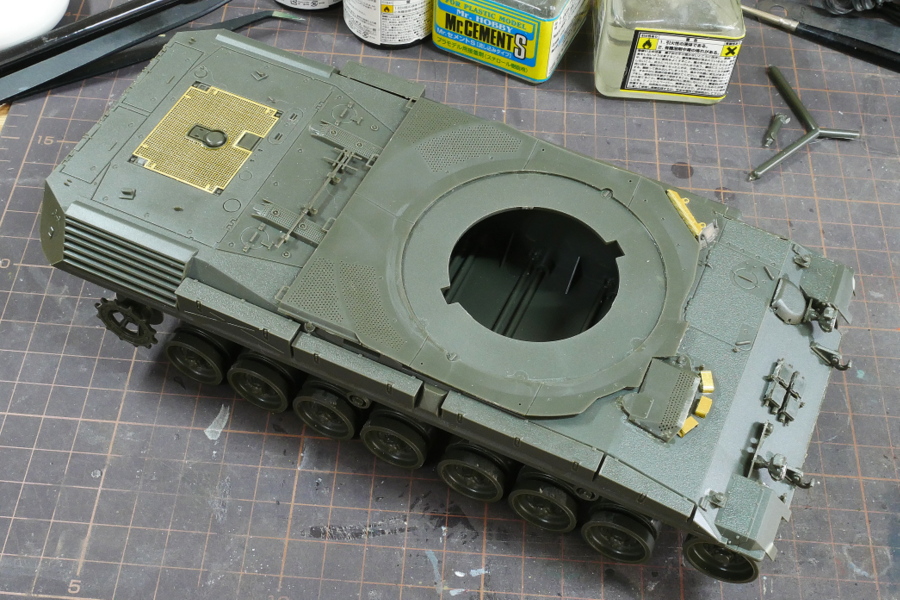
砲塔以外の部分の組立はほとんど完了しました。適度な量のエッチングパーツと質の良いクリアーパーツはけっこう組立が楽しめました。履帯以外は・・・。本来はA1型なら後部のトランクは不要でした。いまさら取り外すと汚くなりそうなのでこのままでいきます。
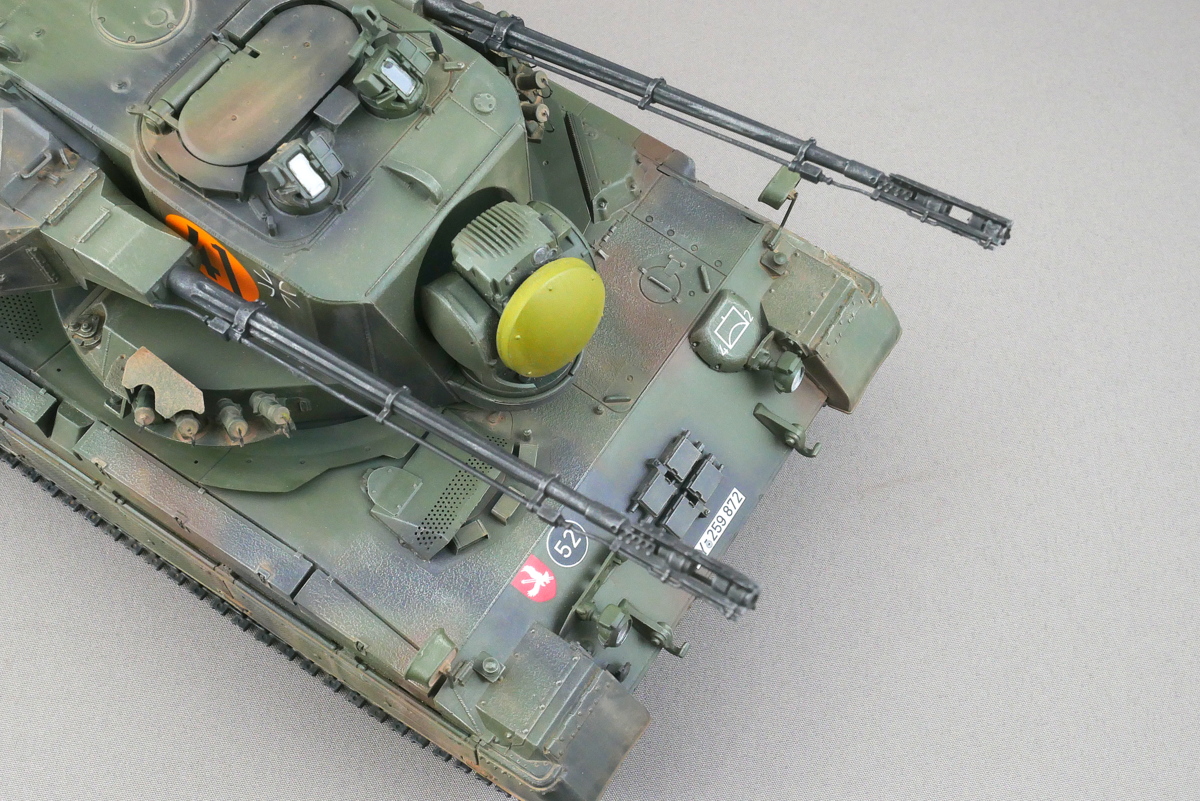
この辺からはゲパルトの一番の特徴である1対の対空砲と砲塔の組立です。はじめはどの部分にくっつくのかよく分からない部品を細々と組立中です。
A1型とA2型のどちらかを選んで製作できます。A2のほうが少し使用パーツが多いのかな。私の場合はA1型を選んだので割と不要パーツが多くなったみたいです。
(2021/07/02)
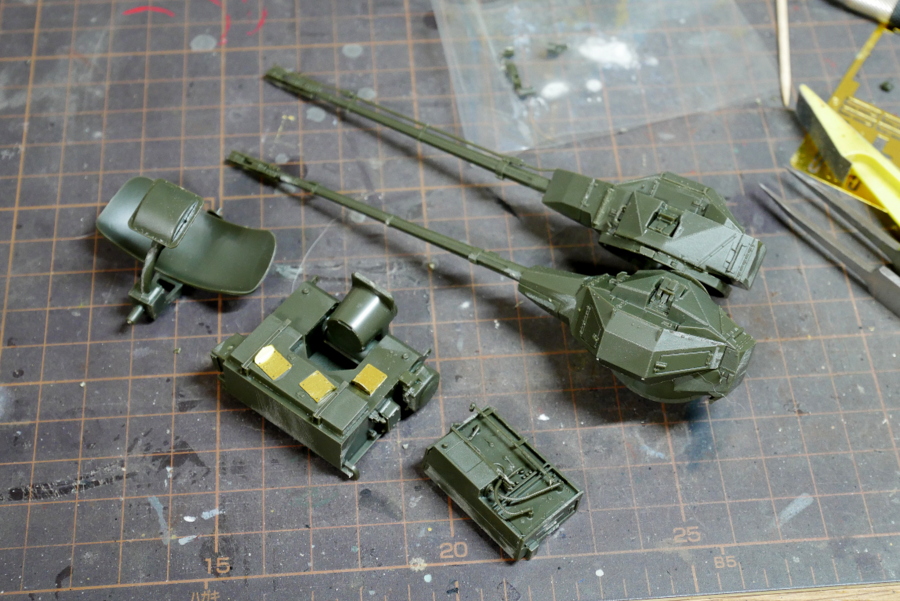
いいですねー。対空砲が格好良いです。いつぞやのパンダホビーのツングースカではこのあたりの工程はえらく苦労したのを覚えています。このMENGのゲパルトはすべてがとても組み立て易い。
左右の対空砲は内部でお互いを接着するような構造です。強度があまり保てないのでしばらく乾燥させておいた方が良いでしょう。完成後も両方の砲身基部を持って恐る恐る角度を変化させています。正直あまり動かしたくない部分です。
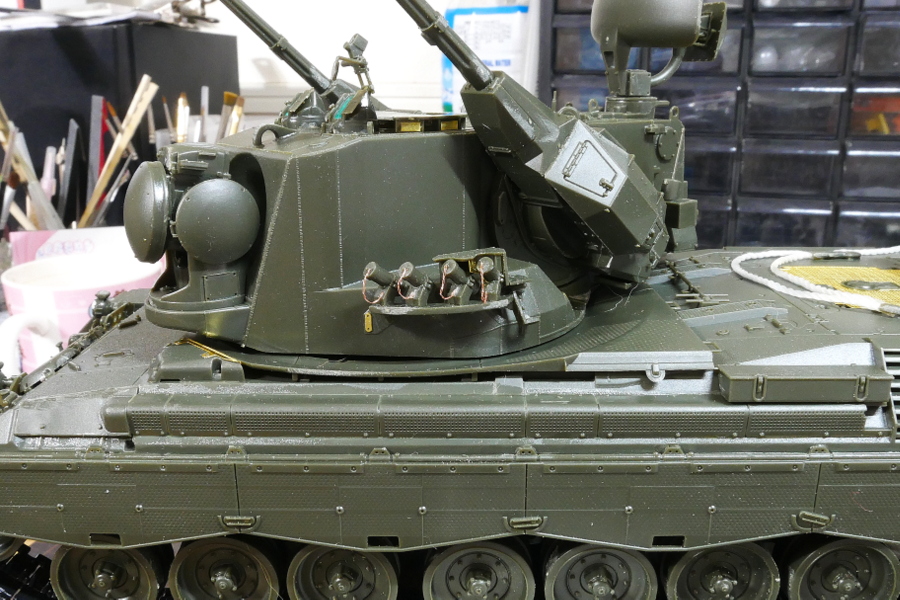
スモークディスチャージャーのチェーンは細い銅線をより合わせた後でペンチでつぶすと極細チェーンのような形状になります。それを適当な長さに切って接着すれば自家製の簡易エッチングパーツのようになります。
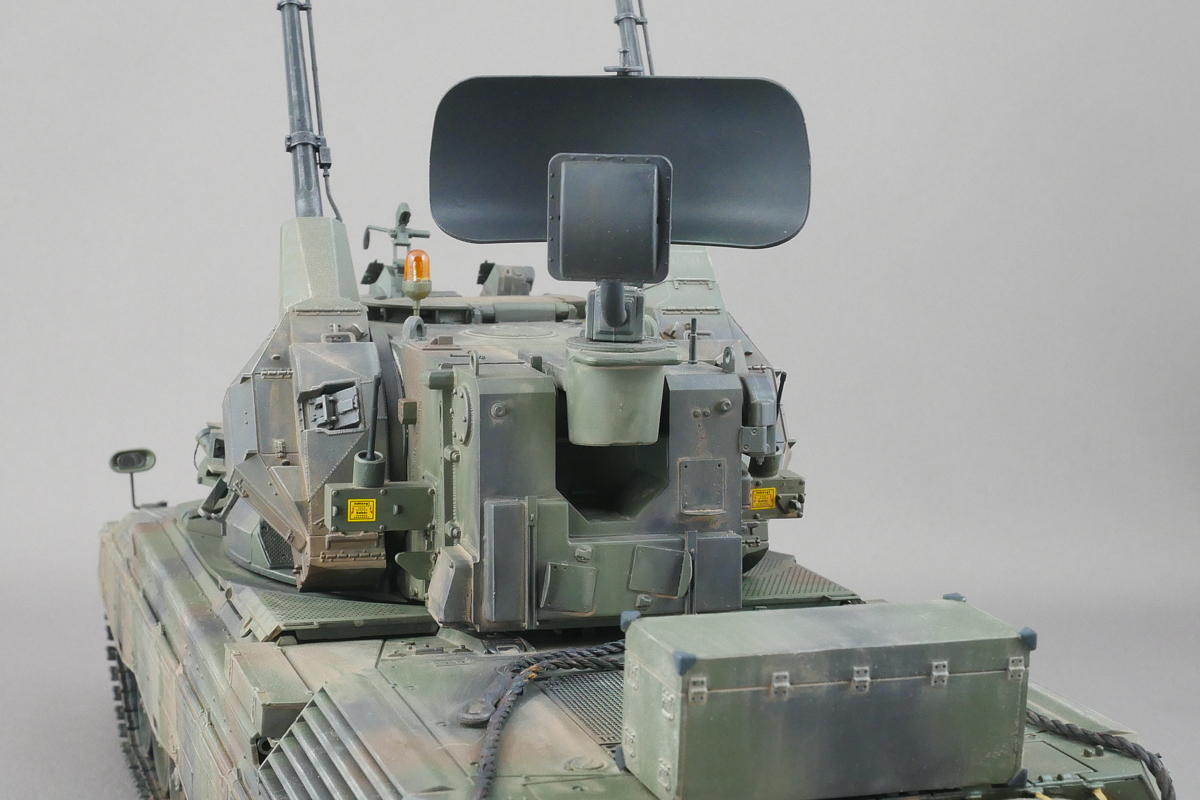
ヘッドライトやペリスコープなどけっこうクリアパーツを使用している部分があるので塗装前にマスキングテープやマスキングゾルでカバーしておきました。今回は接着したら壊れやすいバックミラーなどは未接着のままマスキングして最後に取り付けようと思います。
(2021/07/04)
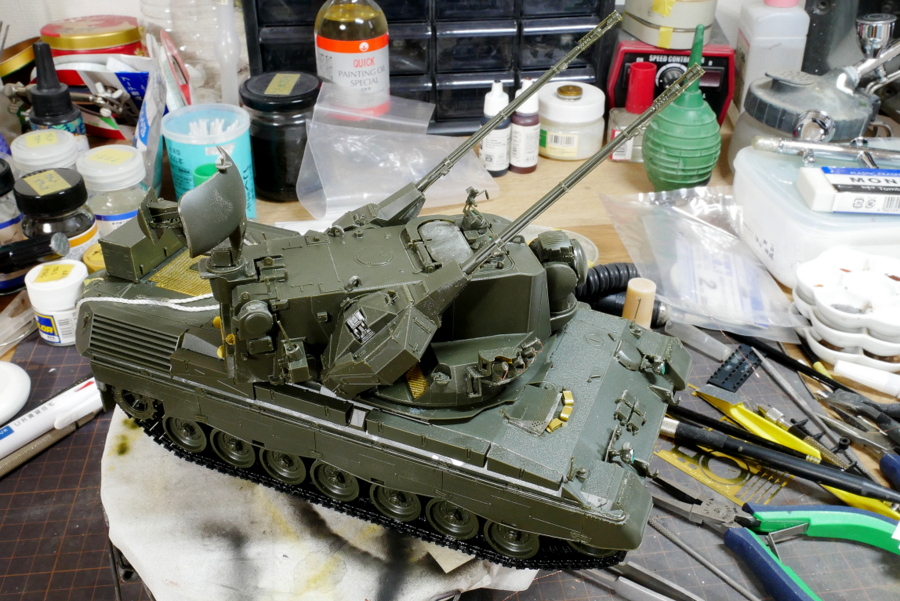
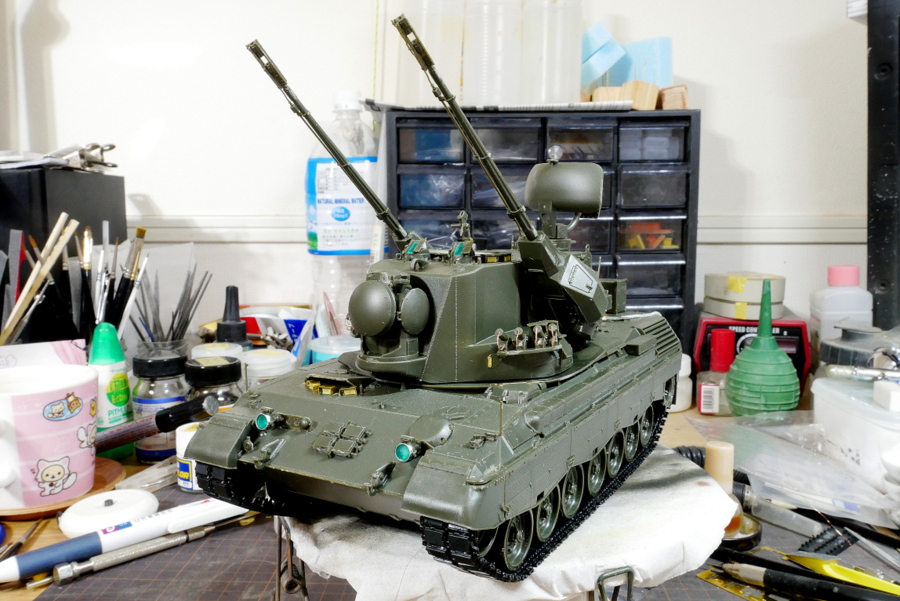
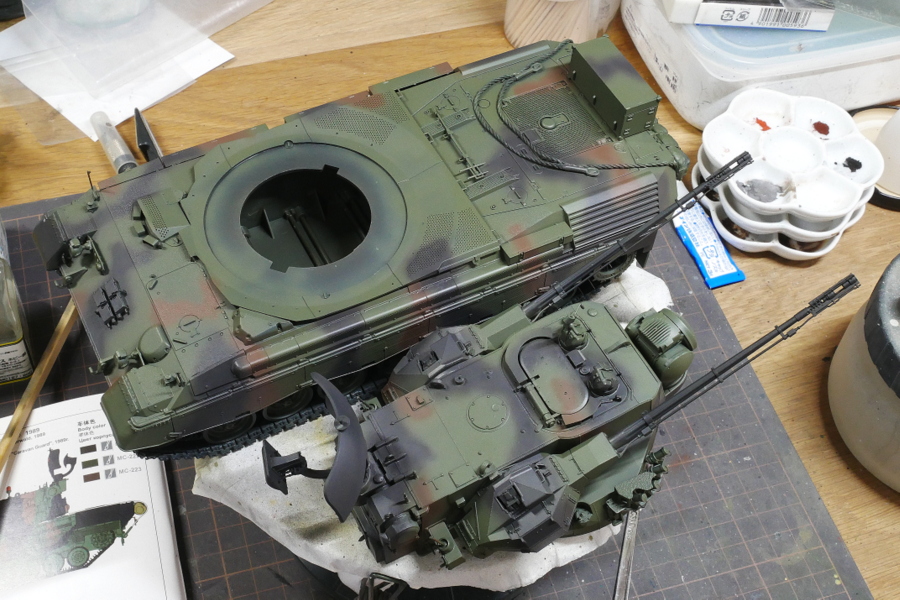
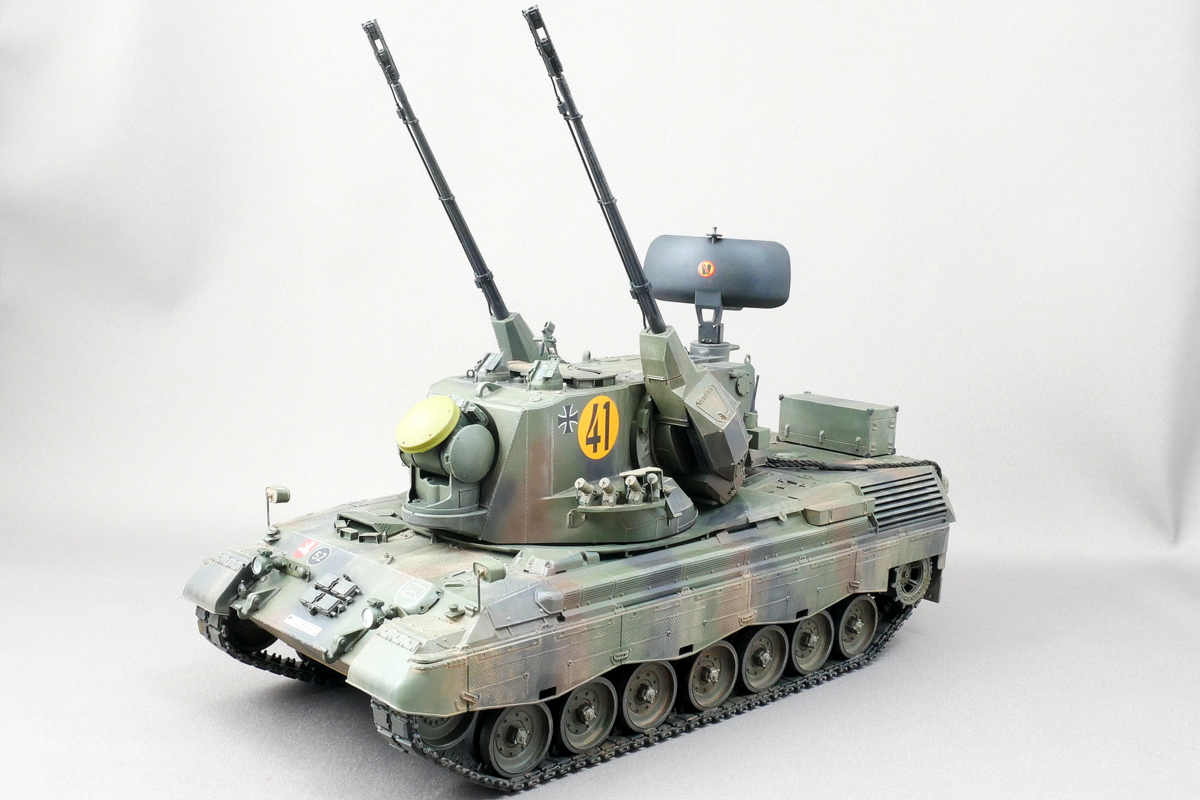
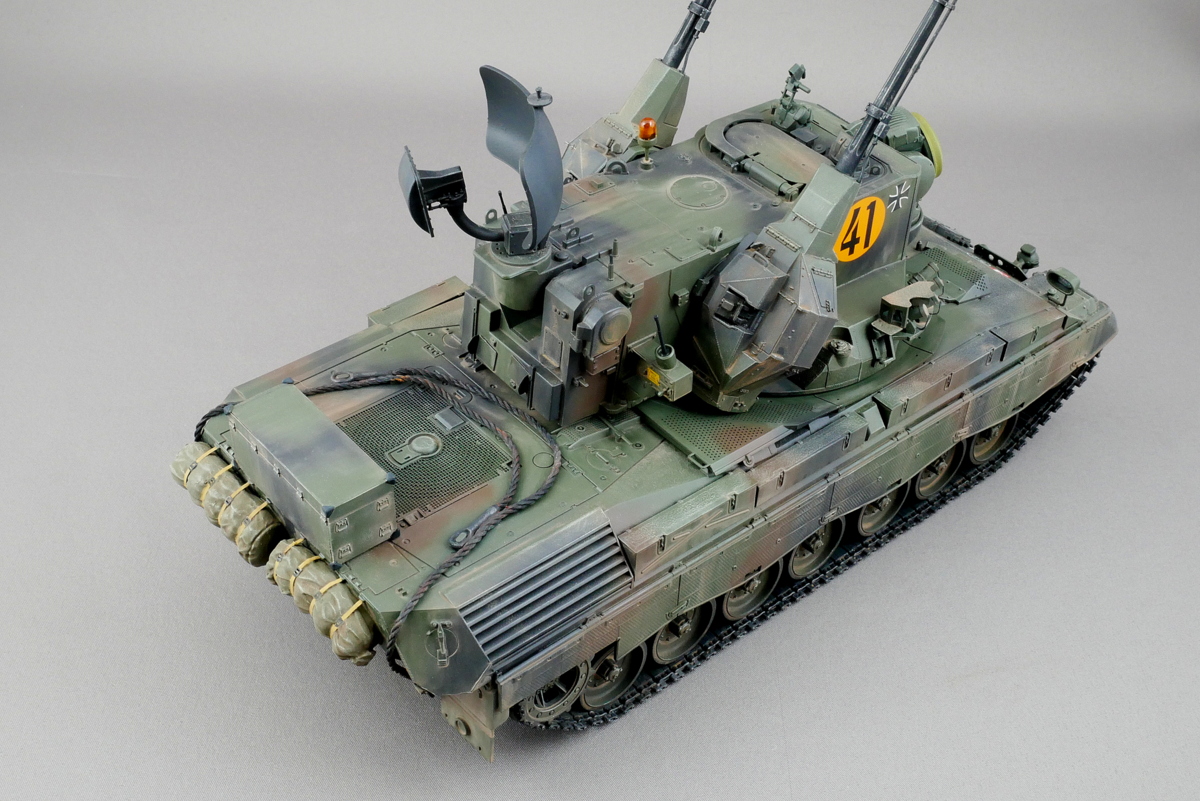
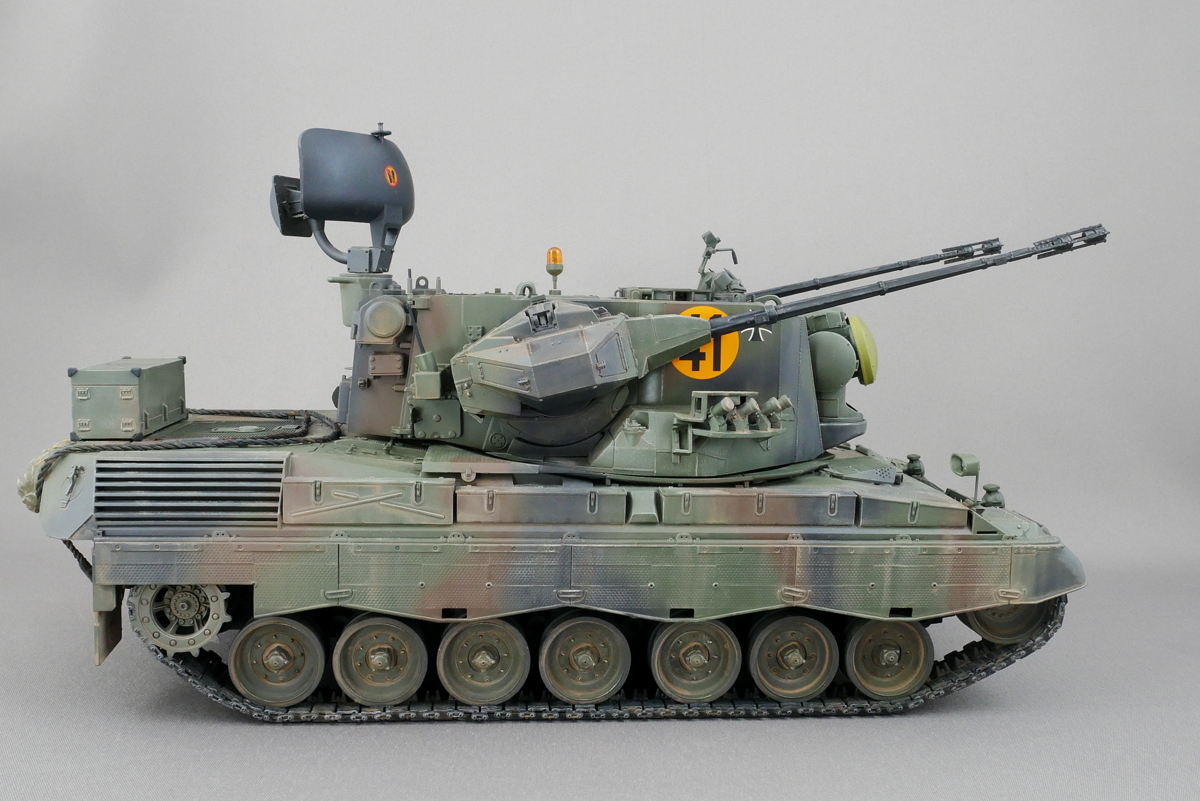
一応今回は砲身の角度が可動するので違う角度の砲身でも撮影してみました。
砲塔後部の回るレーダーの下にある後部パネル、これを閉状態で組み立てるならわざわざ内部を組み立てる必要ありませんでした。余っちゃいましたよ。でもこういう部分も再現してくれるのはMENGの意気込みを感じます。
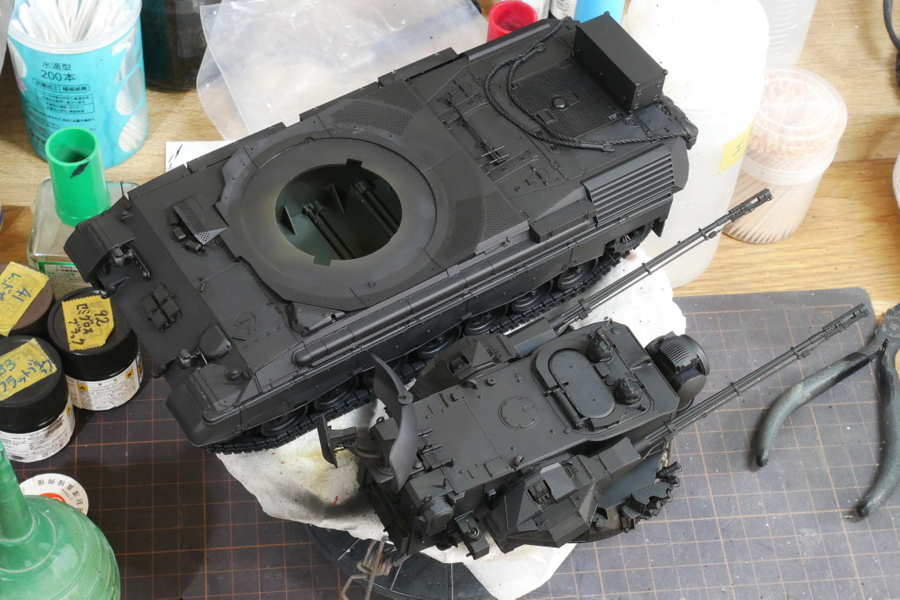
最初はつや消しブラックで全体を下塗りしました。
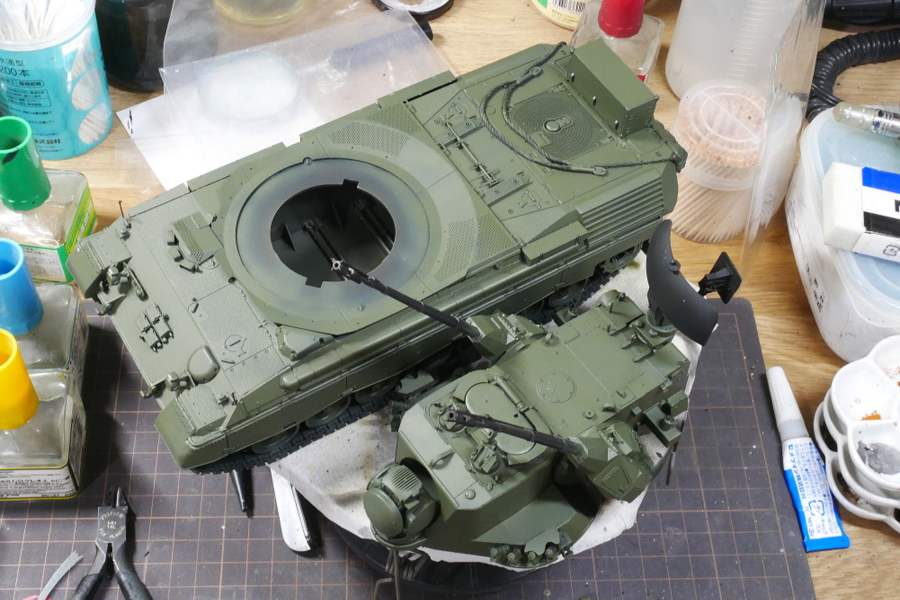
再びNATOブラックを迷彩色の一つとして使うのですが、まだ上手くイメージがわかないのでベースであるNATOグリーンで全体を塗装しました。あとで分かりますがNATOブラックはけっこうグレーのような色なのでつや消しブラックのままだと黒が強すぎるのかもしれません。
そういえばドイツ連邦軍の戦車は初めて塗装します。今までNATO軍AFV専用の塗料、NATOブラックとNATOブラウンとNATOグリーンは持っていませんでした。おそらく何かの近似色を代用しても問題なかったのでしょう。クレオスから以前はセットでリリースされていた専用色がバラ売りになったので試しに揃えてみました。それぞれテーアシュバルツ、レーダァブラオン、ブロンセグリュンとなっていました。銀河英雄伝説の帝国軍みたいなネーミングだな、コレ。自分は基本的に基本塗装はラッカーが慣れているので今回もクレオスで揃えました。タミヤからもNATOブラック、NATOブラウン、NATOグリーンと明解な色指定でラッカー塗料が販売されているので迷いましたけど使い慣れたクレオスで塗ってみます。WWIIドイツ迷彩色で使うダークグリーンやレッドブラウンとあまり違わない気もするのでもしかするとウェザリングをしたら使い分けてもあまり意味無いのかもしれない。
ゲパルトのキットに付属しているデカールを貼りました。このデカールはとても薄くて車体に密着するし発色もとても綺麗です。MENGは凄いな、と思ったらカルトグラフのデカールでした。MENGのキットを全体的に見ても高いレベルだと思います。だからこそカルトグラフに発注しているのでしょう。
(2021/07/07)
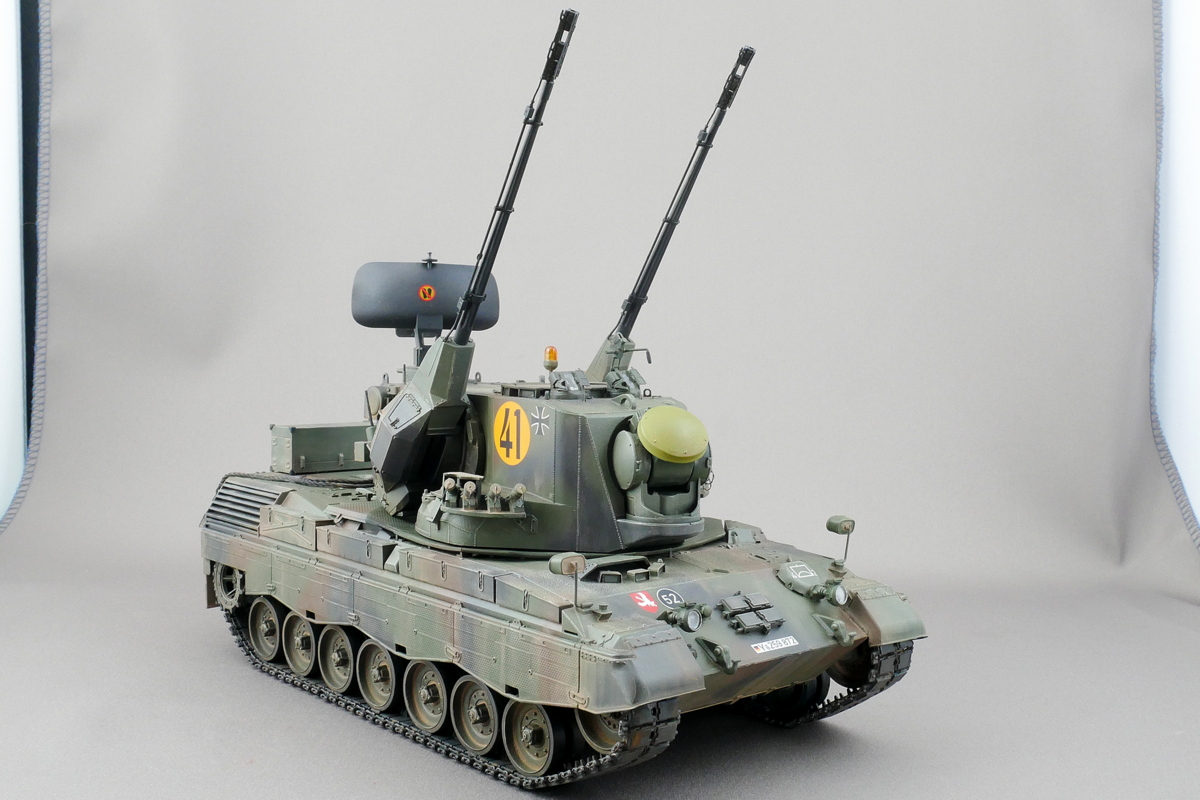
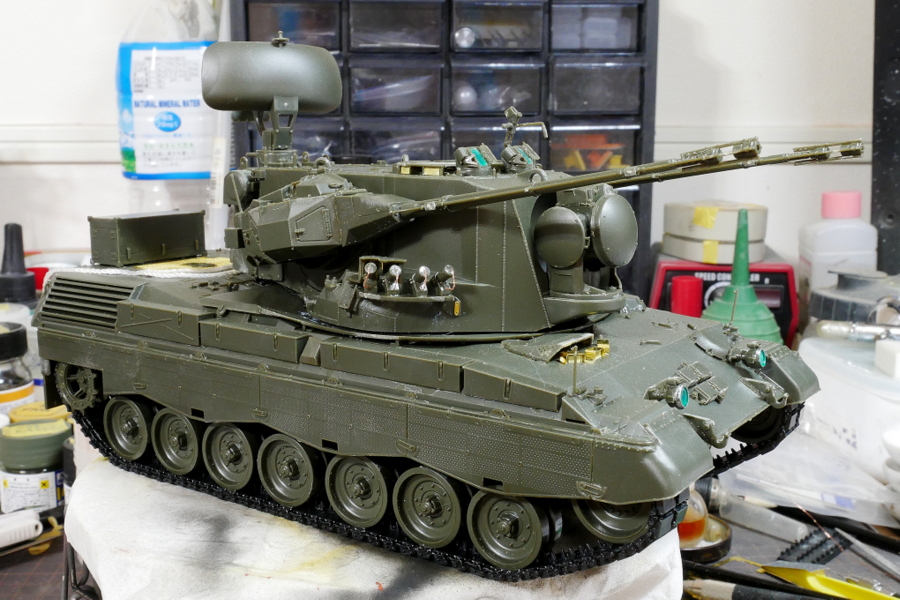
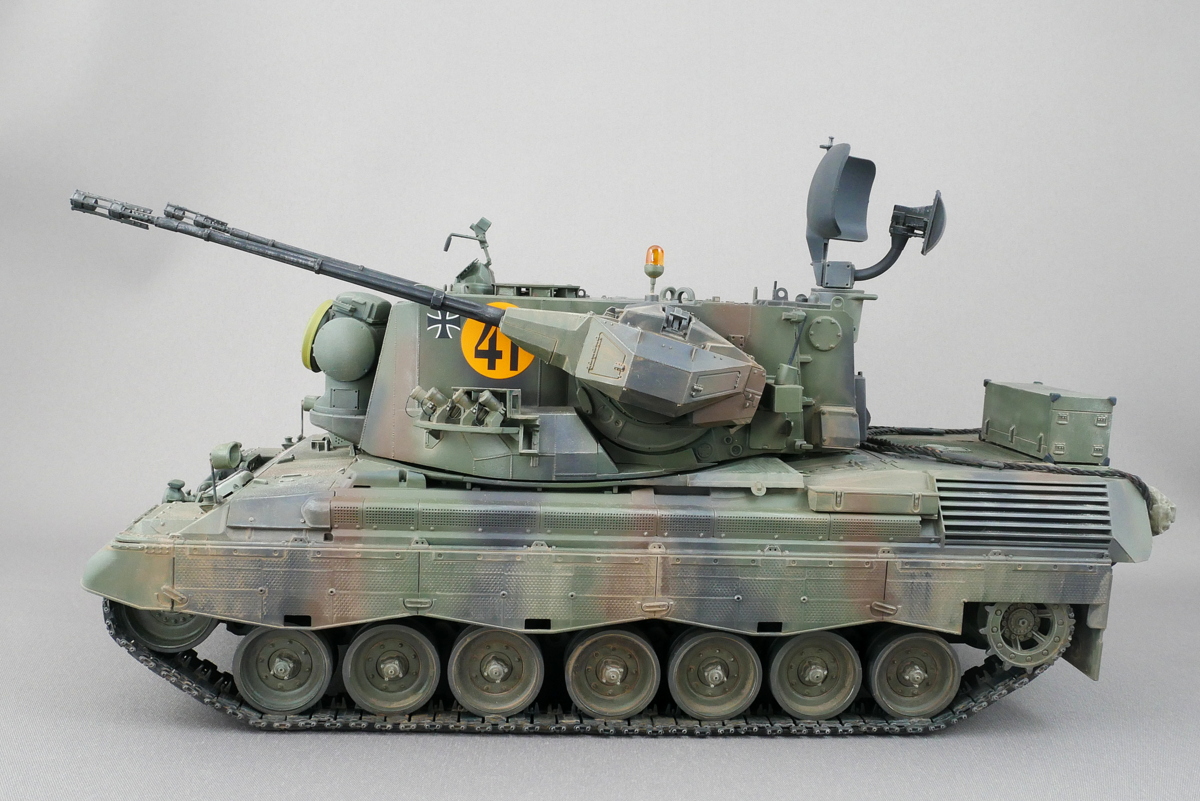
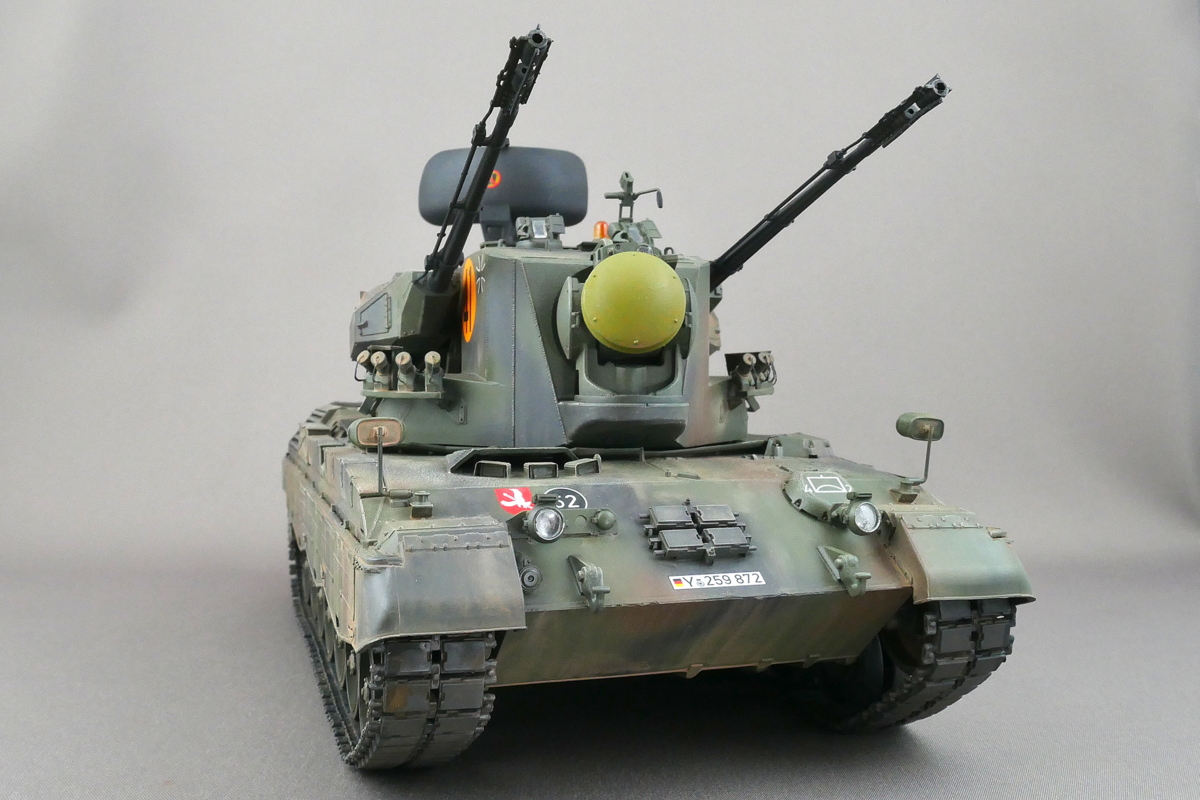
ゲパルト対空戦車がようやく完成しました。35mm連装砲を急角度で上を向けているとやってる感が出て格好良いです。射撃シーンを動画を見るとものすごい火力と連射速度です。
マーキングは1989年のドイツ連邦軍第2装甲対空砲大隊第2連隊ヴェスターヴァルト・キャラバンガードです。
1973年から西ドイツに配備が開始されて2010年には配備から外されています。ゲパルトにはスティンガーを取り付けたタイプもあるようですがMENGのキットでは再現されていないですね。
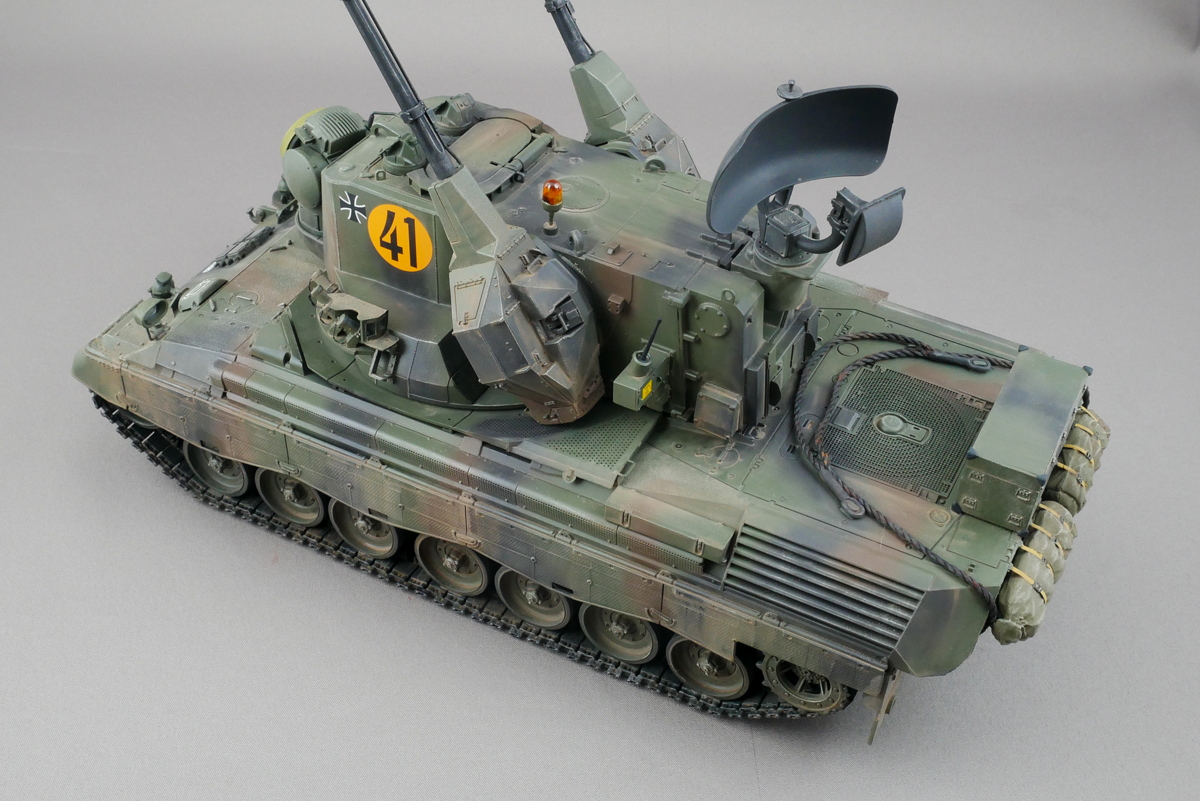
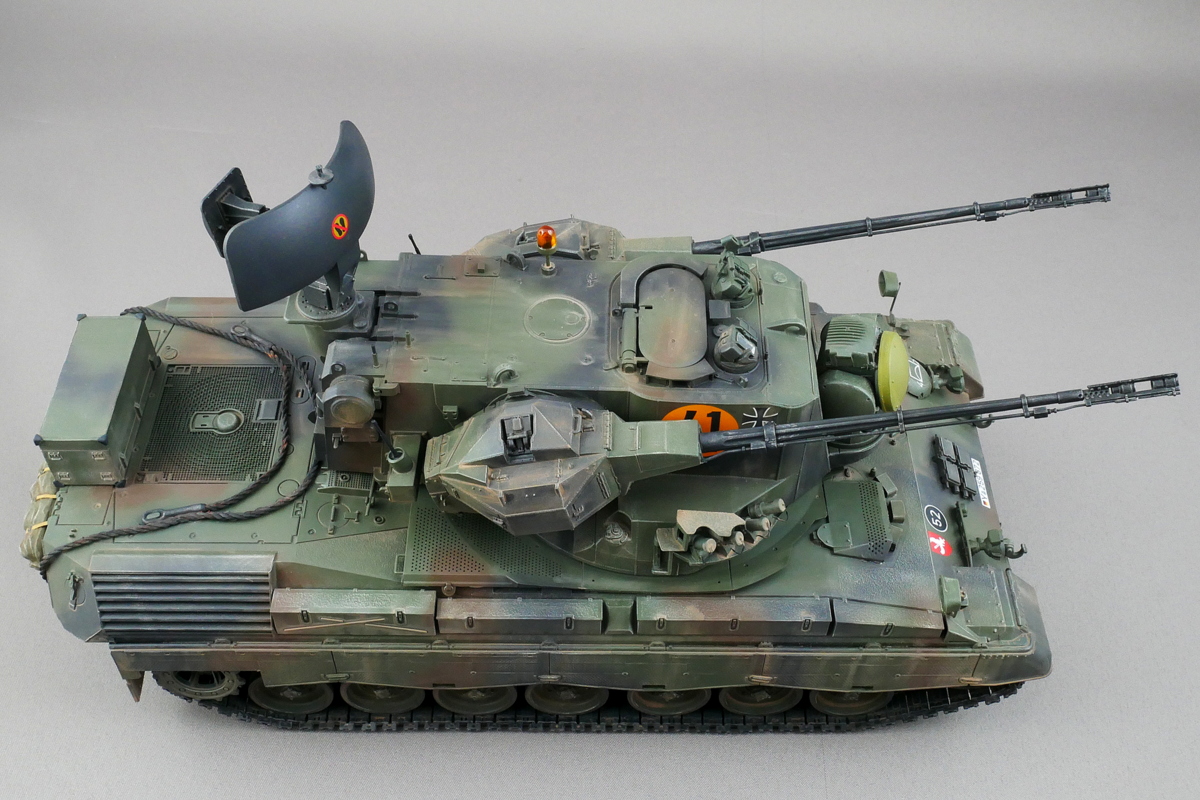
後ろに積んでいるのは何でしょう?寝袋かな、テントかな。この車両は3名で運用するので大きさの割に中では結構忙しいんじゃないかな。そのうちこういう兵器も一人で操作したり無人化が進んでくるのかもしれません。
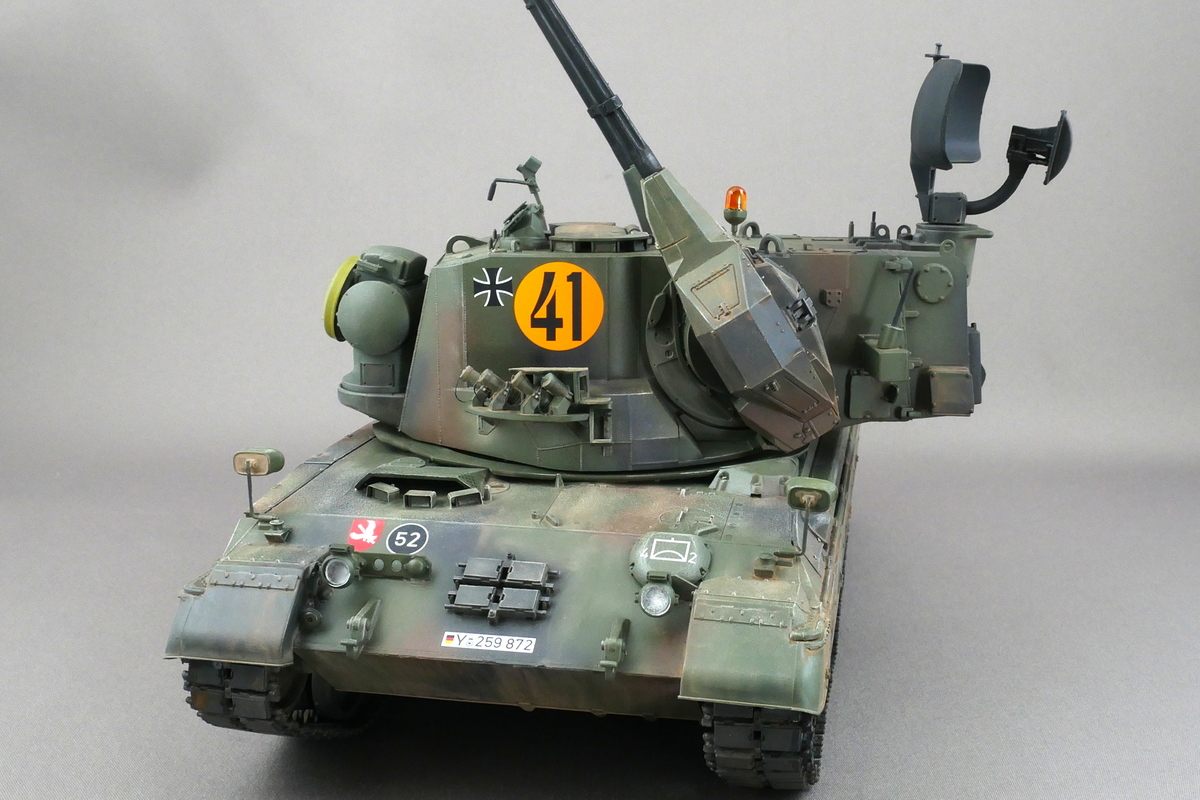
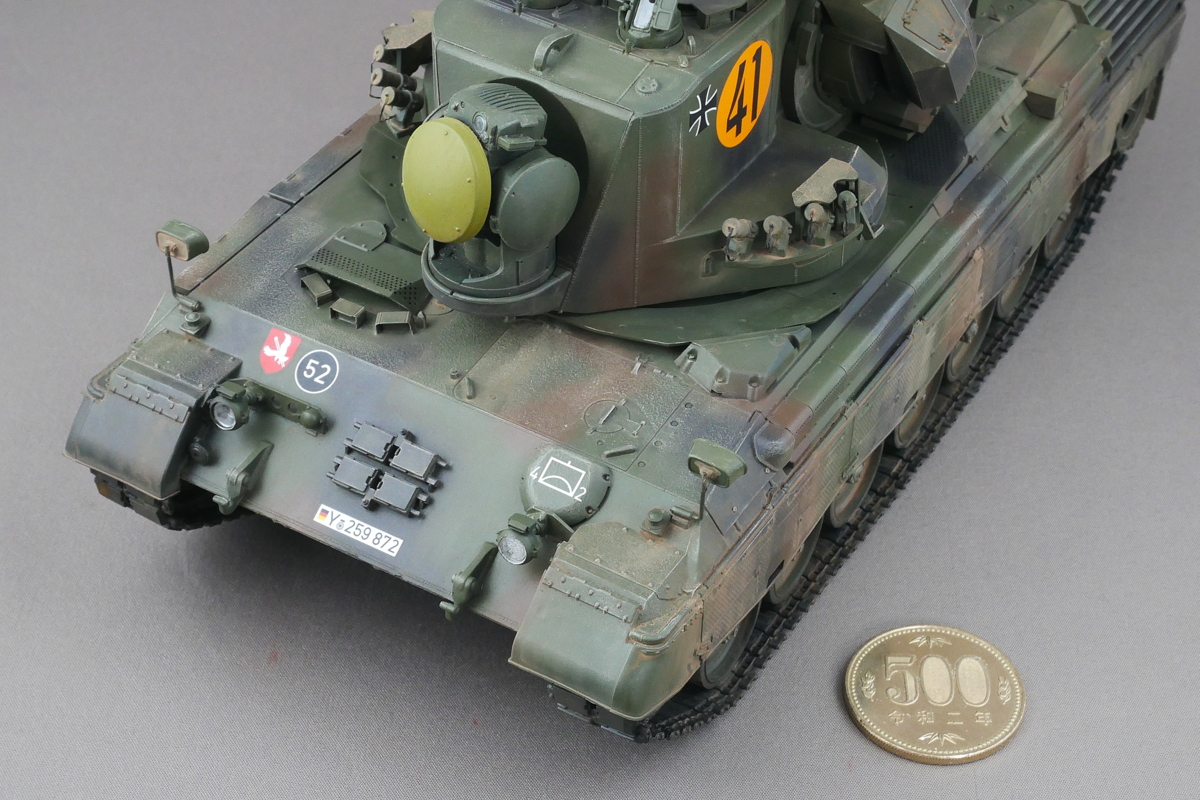
なにげにこのオレンジの車体番号が目立つので気に入っています。

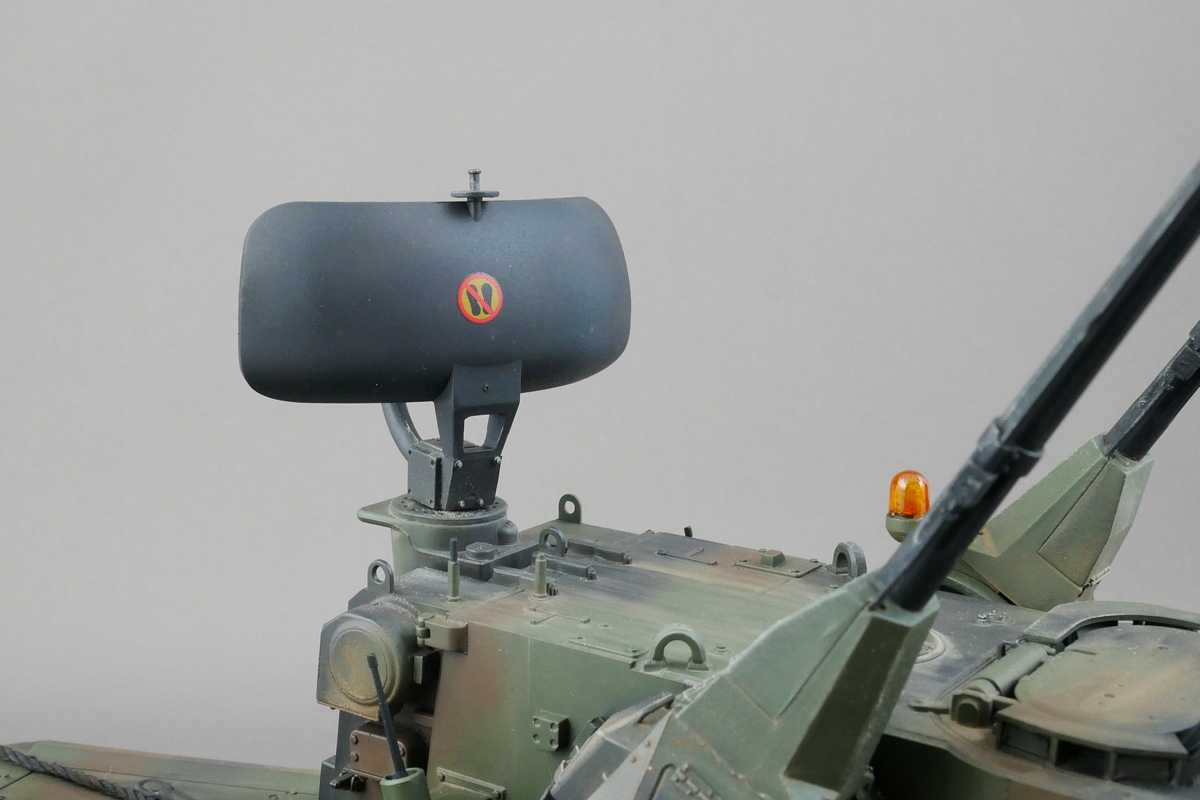
これは何のマークだろう。踏むな、じゃないよね。この前に立つなとかかな?
エリコン社製の35mm機関砲は優れた射撃統制システムを採用していて多くの国で採用されています。自衛隊でも自走高射砲に使われているようです。
ドイツではWWII中に38(t)軽戦車ベースの対空戦車としてやっぱりゲパルトと命名されたものがありましたっけ。日本だとWWIIで活躍した艦船がひらがなですけど多数が護衛艦の艦名として転生してますね。

作り始める前はなんか複雑な形状で難しそうだなーと思っていましたが思いのほか組立説明書は分かりやすくて順調に完成出来ました。
(2021/07/09)


コメント
こんばんは、「ゲパルト自走対空砲」完成おめでとうございます。
NATOの三色迷彩は大戦ドイツの三色迷彩とはまた違った格好良さです。
高射角の機関砲は対空戦闘だけでなく、市街地戦闘とかでも有用そうですが、実車は既に退役してるんですね。
記事を見てるとダブルピン式の連結キャタピラが難しそうです。
(自分も同社のM1A2やT-90Aと言ったダブルピン式キャタピラの戦車を積んでるので不安になってきました)。
履帯に苦労しましたが格好良いです。もう現用ドイツ車両は手元に無いんですけど機会があればMENGのレオパルトIやIIを作ってみたいです。同じ仕組みの履帯だとしても次はややスムースに組めそうに思います。
おはようございます。
ゲパルトはチーターの事だそうですが、言われてみれば
戦車の様な主砲ではなく、細い対空砲が何となくチーターのイメージです。
本文読んでて大戦中にもゲパルト名義の対空自走砲があったのは初めて知りました。
ドイツで国防軍と同じ名義にするのは珍しい感じです。
レオパルトなんかも個人的には国防軍時代からの継続で「Ⅶ号戦車レオパルト1」「Ⅶ号B型レオパルト2」とかにして欲しいです(笑)。
おはようございます。チーターだったんですね。タミヤのキットの頃から名前だけ知っていて意味まで考えたことありませんでした。そういえばレオパルトはWWIIドイツ軍には無かったですね。というか列車砲でレオポルドというのがあるのでそれと同じかもしれません。カタカナは発音によって微妙に変わりますからね。VII号戦車だとナチスドイツを引きずっているみたいでドイツ国内的にはちょっとまずかったのかもしれません。海上自衛隊の護衛艦もひらがなではなくて帝国海軍時代と同じ漢字で問題ないと思うんですけどね。
こんにちは。
自分もゲパルト対空自走砲自体は前から知っていましたが、ゲパルト=チーターと言うのはこの製作記事で興味を持って調べてみて知りました。
昔のタミヤMMの箱には横側に関連車両が載ってて、確かそこにレオパルト1とセットでゲパルトも載ってたので語呂が良いのもあって記憶に残ってたのでしょう。
パッケージサイドに関連車両を載せるのは子供心に購買意欲をそそられました(笑)。
兵器の名前とかは敗戦国側は大戦の影響を引きずっていますよね。
ヒトラーが直々に名付けた様なのは使えないでしょう。
(連合国だったロシアでも流石に「スターリン戦車」とかは使えなそうですが)
おはようございます。有名な将軍の名前など人物名を付けるのは各国でけっこうあるみたいですね。旧日本軍の飛行機や艦船のネーミングが好きですね。山や川などの自然の地名から取ったり歴史的由緒ある感じで良いです。