AFV Club 88 mm Gun and tried combining the artillery figure of the Dragon. I built it in July 2014.
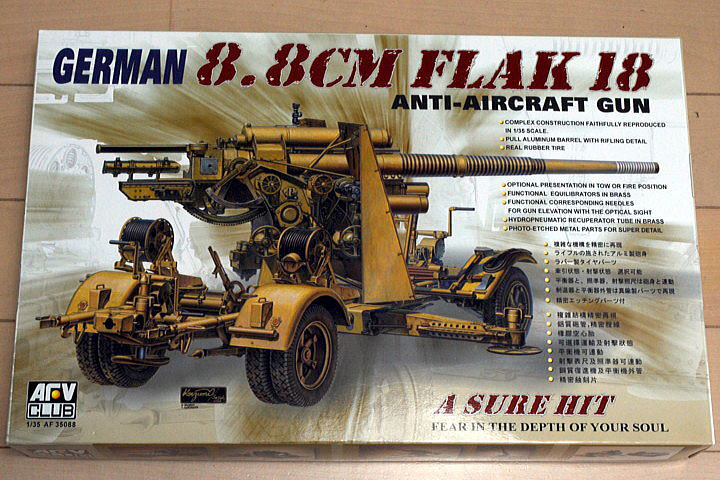 This kit was reputable in the released year 2005. At that time, it was chosen as one of the masterwork kits in the Japanese AFV model magazine. I intended to make it someday.
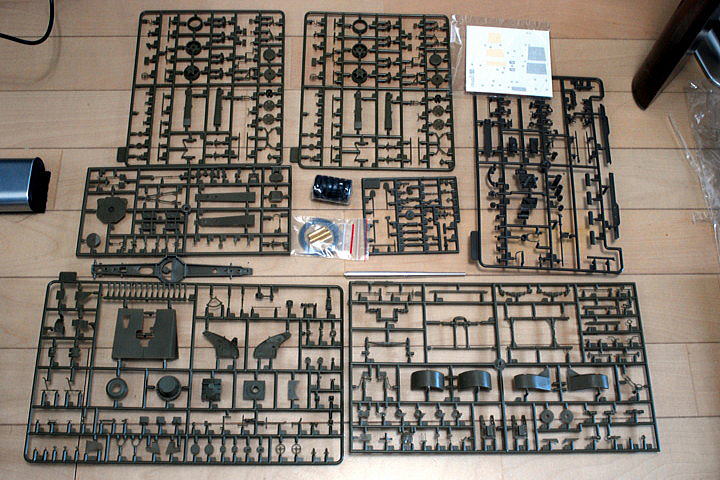 Artillery kits have many parts; some are made of metal, rubber, and vinyl. Mold is very sharp as other AFV Club kits.
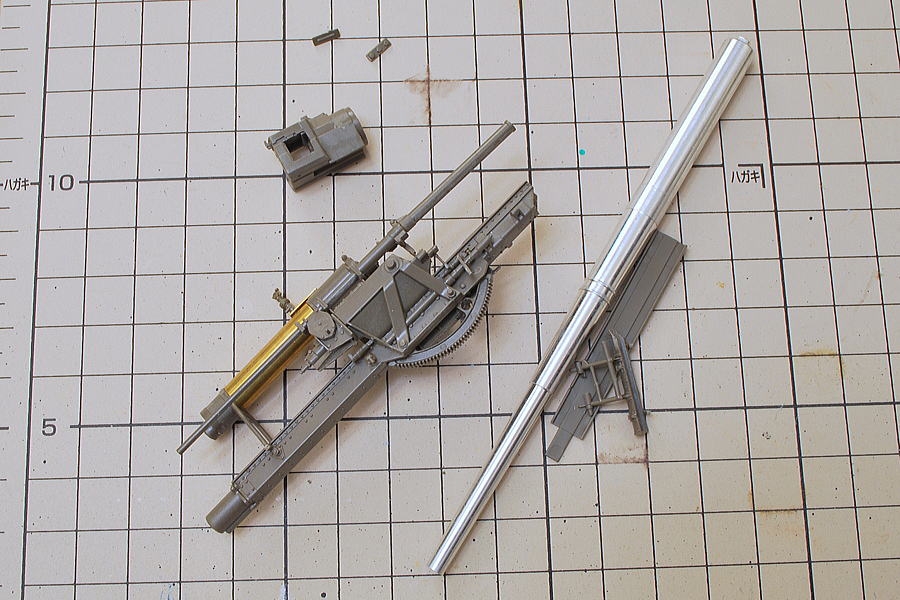 Like the past cannon kit I made, I don’t get many hints about what area I make in the process at the beginning. There are a lot of small parts. I assemble them carefully. At this stage, I’m a little worried about the parts not clearly indicated in the instruction manual. Finally, all modules can be installed to fit or not…
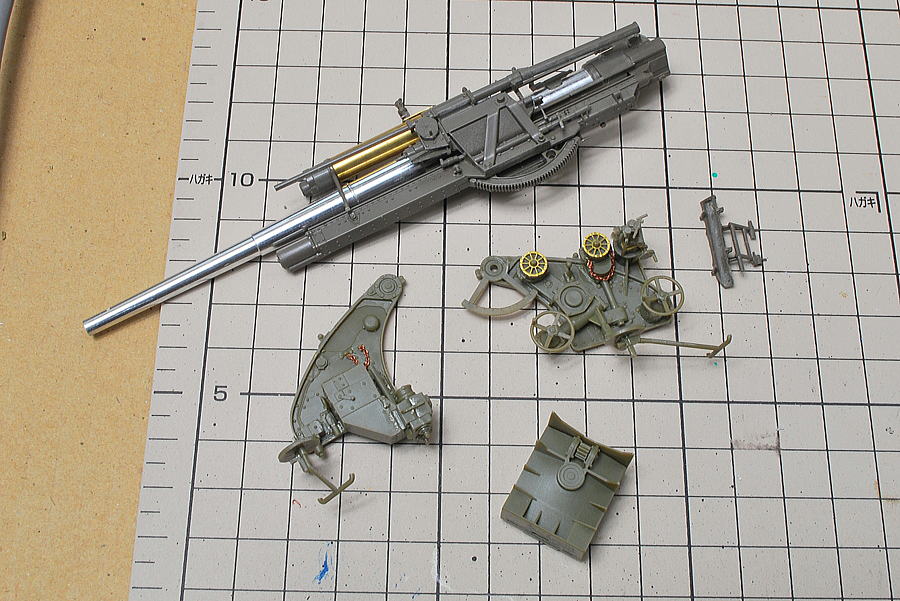 I was about to understand the whole mechanism. 88mm gun barrel has a powerful impression. I am thankful for being an aluminum gun barrel, there is no distortion, and it’s easy to assemble.
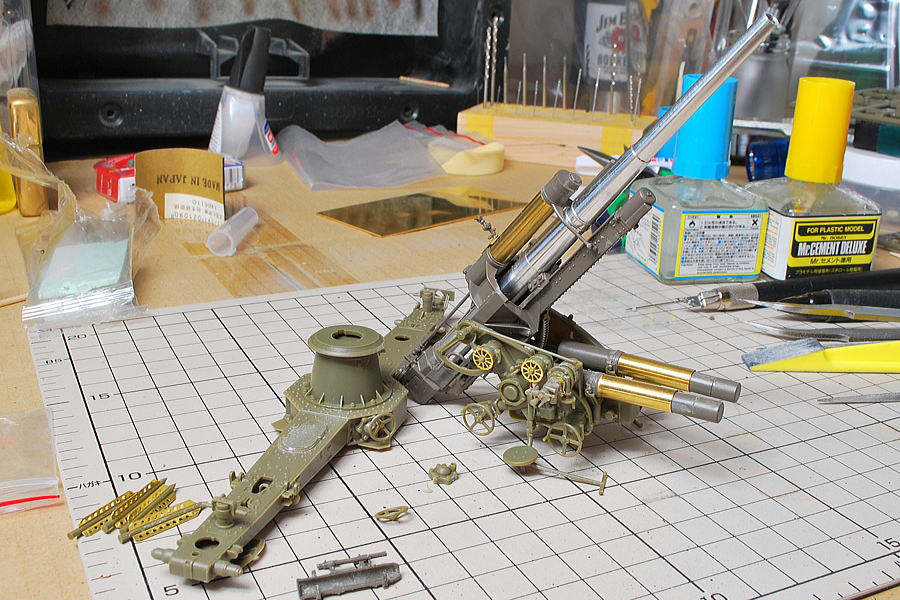 The gun part is almost completed. The feeling of multiple material kit assembled somewhat I did the fantastic work even it’s bare composting straight from the box. The assembly is hard work for the many small kits, but the instruction manual is easy to understand and has an accurate explanation, almost no worries.
Regarding the vertical angle, it’s movable, but I think I to fix it sometime after because it is easy to come off some joints.
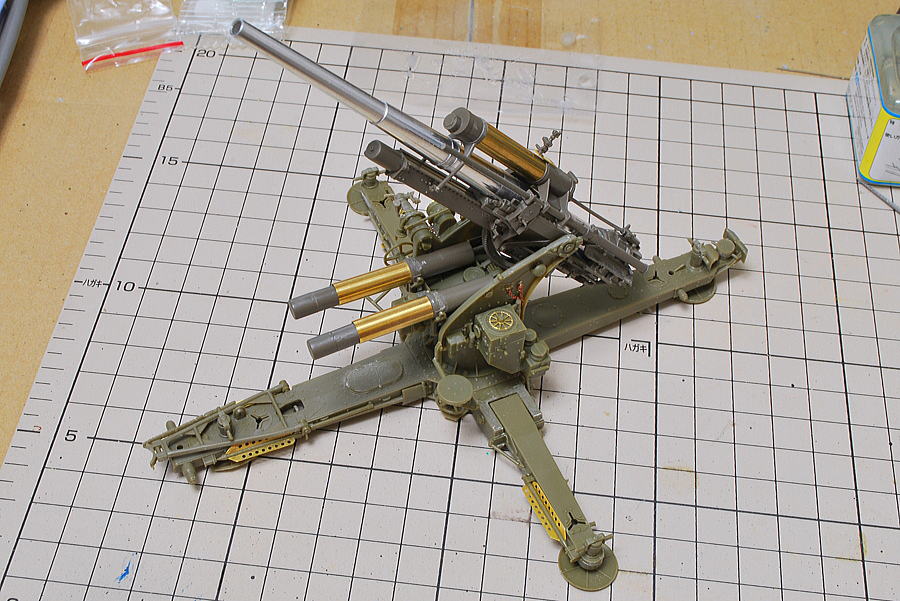 I was available to choose a transportation form or shooting position, this time shooting the photo. The remaining is a gun carrier; the same has many detailed parts. The very cool gun part was completed, and next, I would like to let stand by some artillery crew.
(19-July-2014)
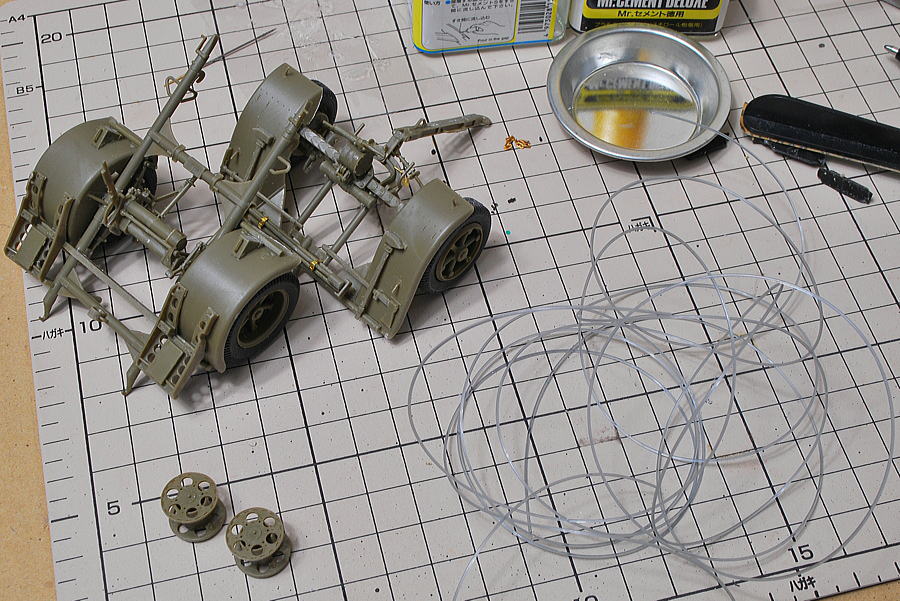 Gun career was almost completed, but a process to wind nylon cable on reels remains. This seems to be a complicated process… A career contains many small parts like the Gun itself, like I don’t know how to hold the finished work.
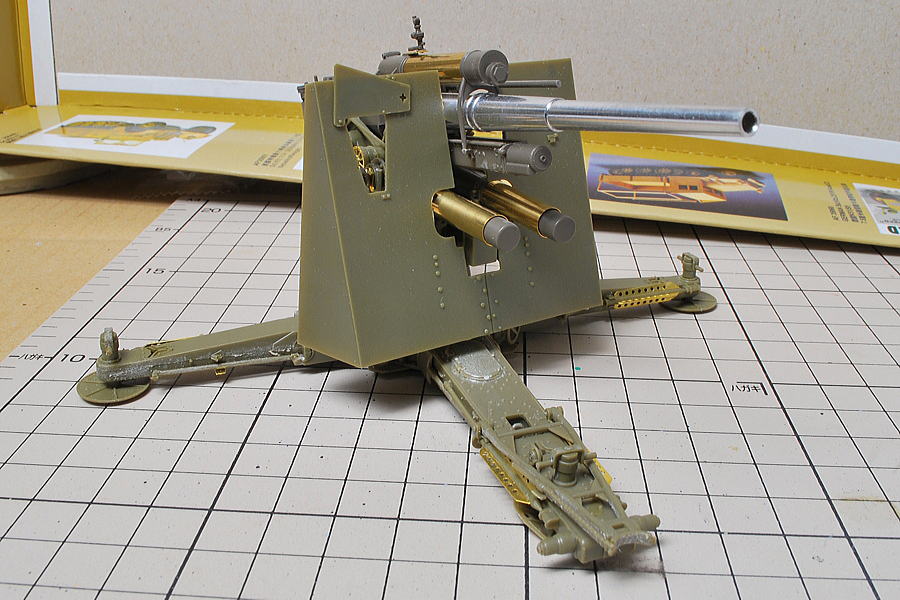 The main body of the antiaircraft gun was attached to a bulletproof board and was completed. Now still movable, the angle of the barrel is, any angle seems good looking, and if I fixed the angle, I wonder which pose is the best.
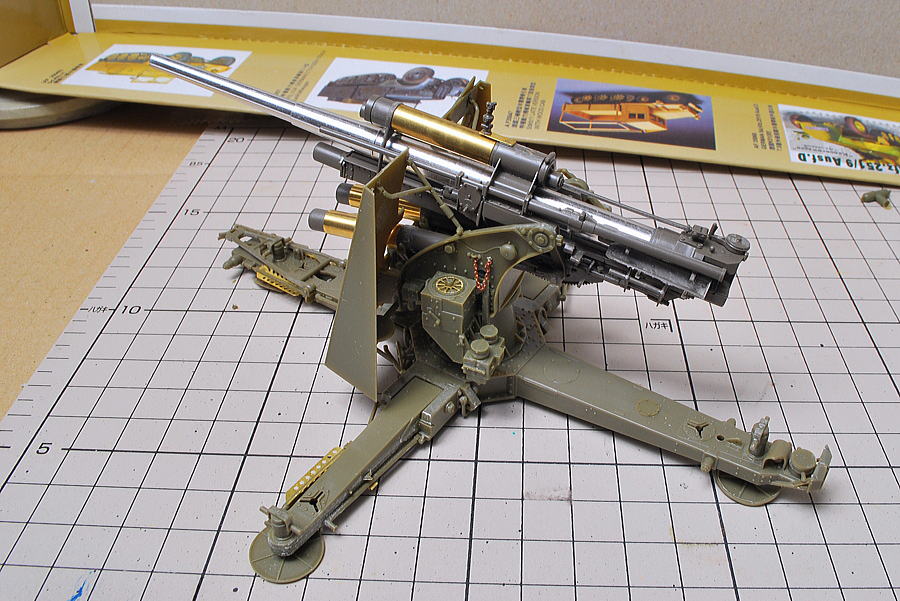 There are many complicated areas, and it seems difficult to do airbrushing properly.
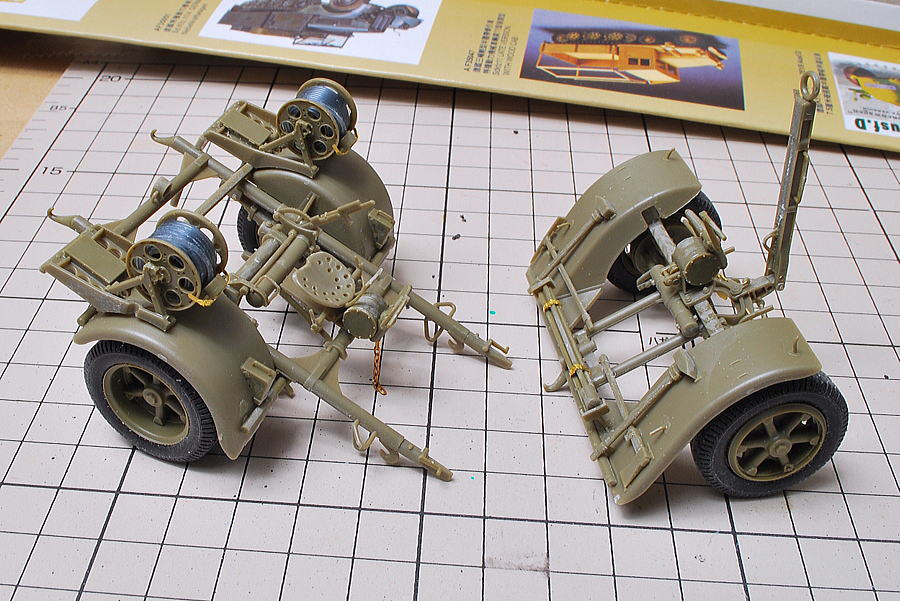 I could wind up the nylon cable safely. I recommend you use the adhesive while winding some points here and there to prevent them from loosening up and recoiling starting over.
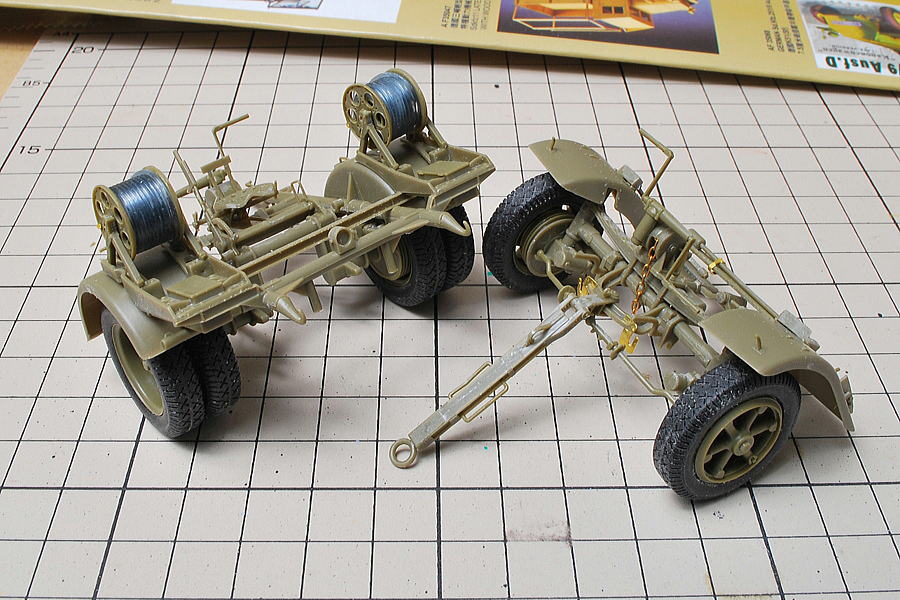 In the shooting position, this kit was divided into roughly three parts, front wheels, rear wheels part, and the antiaircraft gun main body.
(21-July-2014)
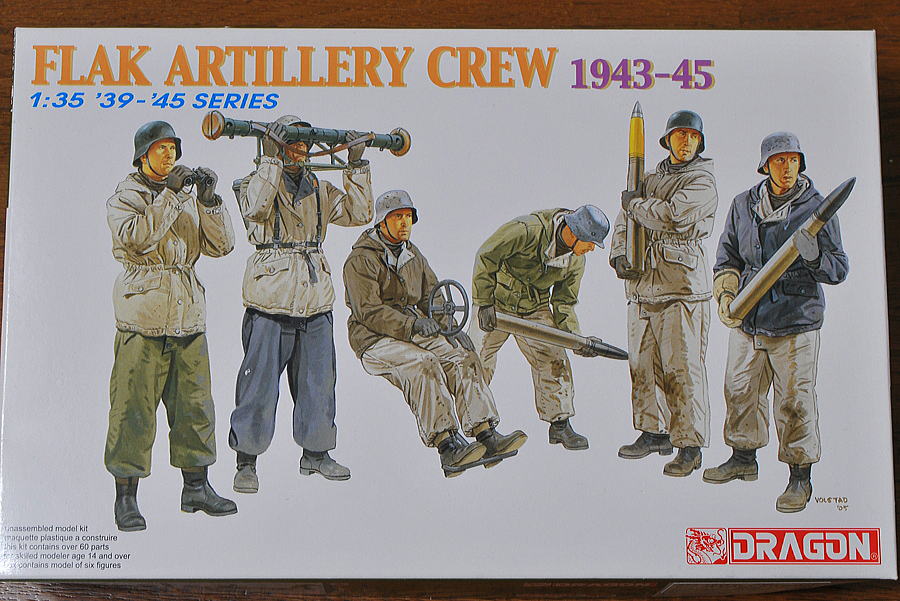 I have Dragon Model’s German Flak Artillery Crew set now; I’ll make this. One of the figures has already been completed with my past work, a sIG33 15cm infantry gun, so I’ll make the other five figures.
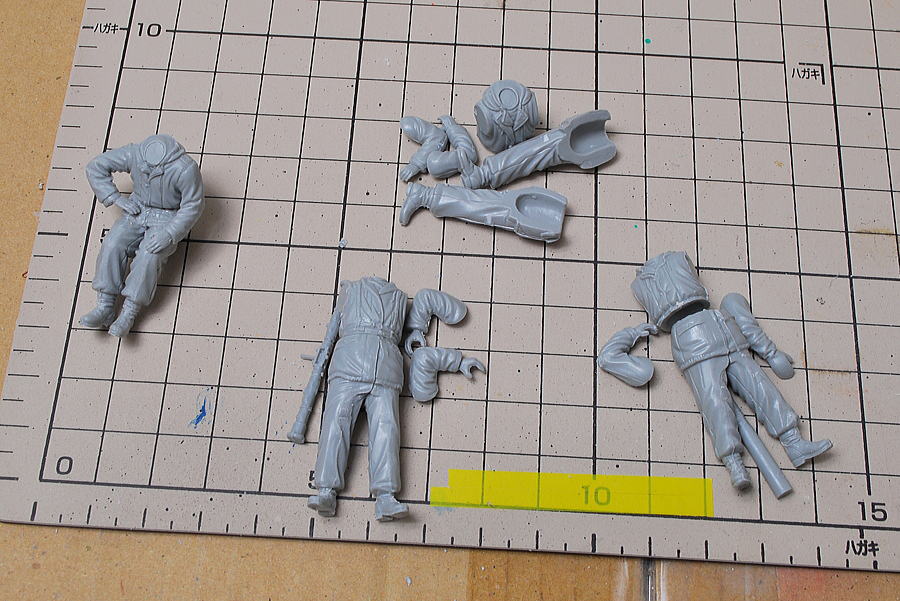 They wear winter clothes, so they look a little fat. There are many burr and dents and a gap on this kit. I need a little work to adjust them.
(24-July-2014)
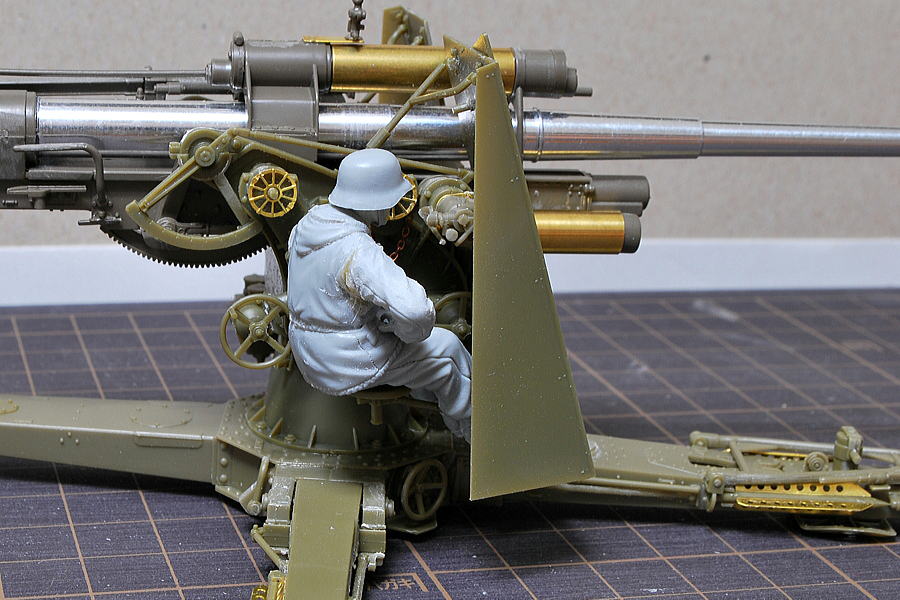 The sitting figure doesn’t show detailed expressions.
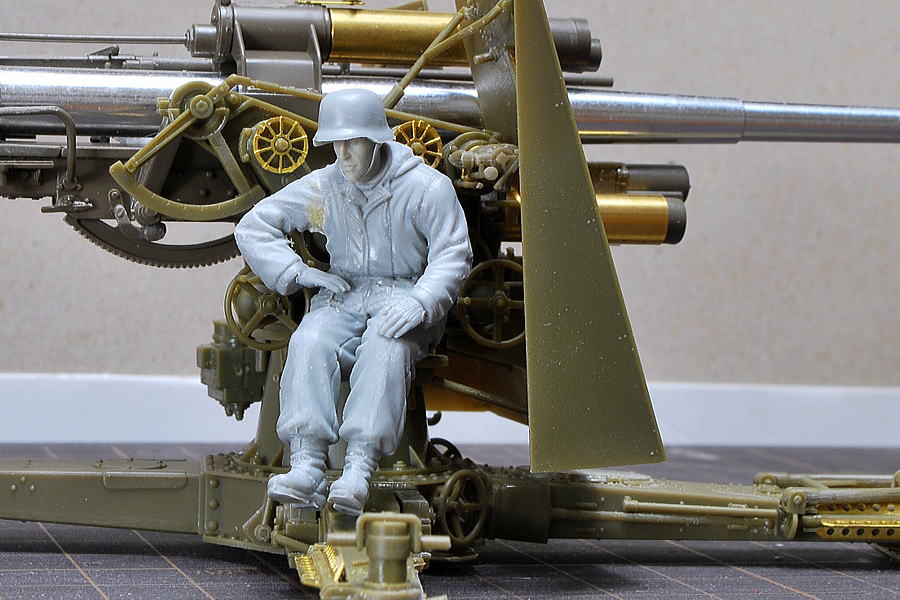 I changed the head to a resin one. He looks down a little and has quite fatigued.
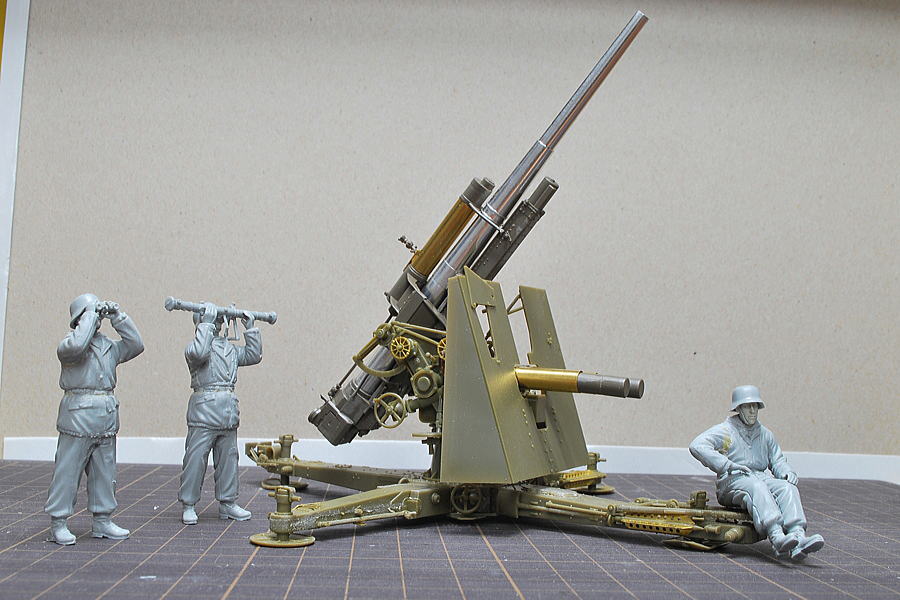 Regarding the two figures’ left side, I didn’t change the head to the resin because the faces almost hide. One figure looks through a rangefinder; the other is with binoculars. They are watching the enemy airplane approaching.
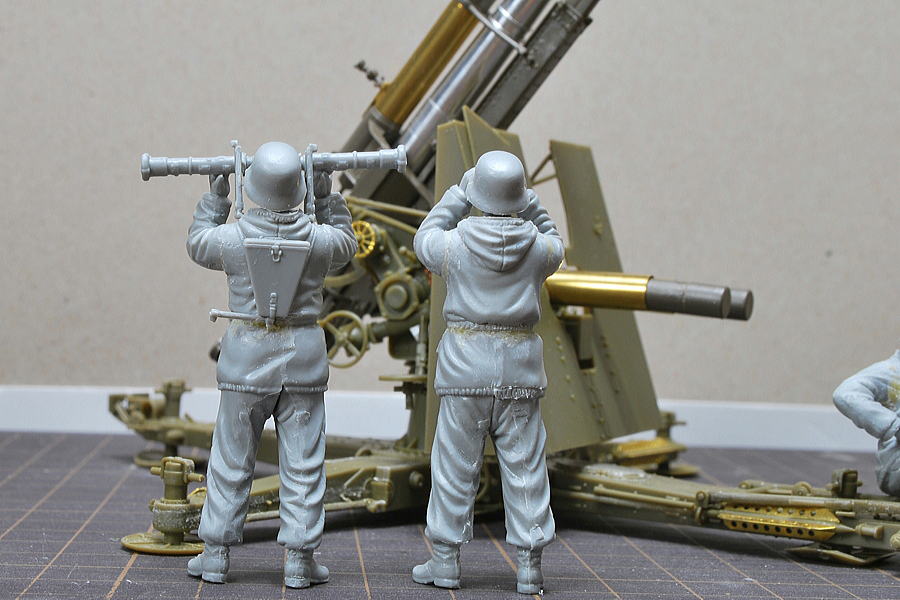 This is a backshot. I need to remove the parting lines more. Is the pose not very good? The figure’s poses are very nice.
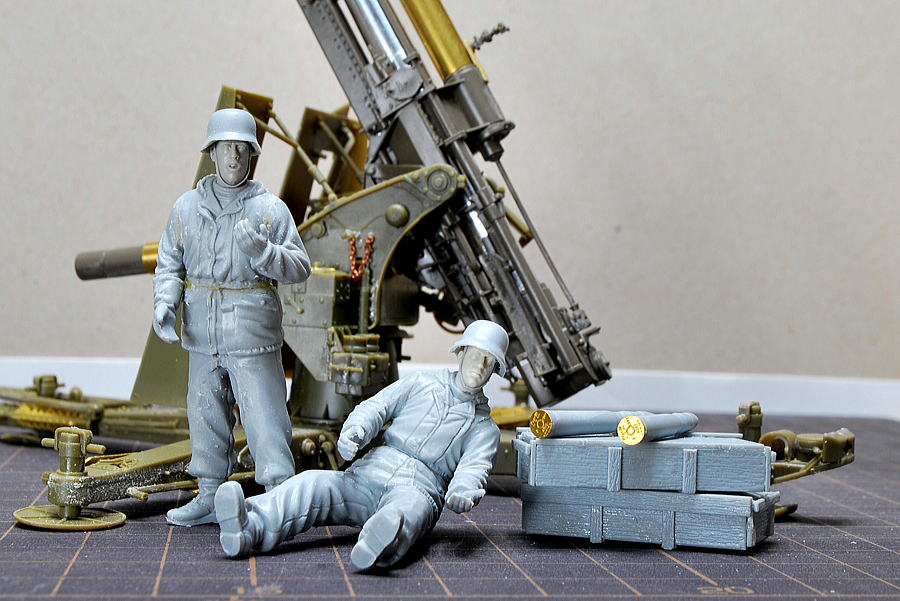 Two soldiers’ role in the ammunition loading. I use the photo-etched parts for a shell bottom. When set up to the loader’s hand, we can’t see them, but it’s luxurious detail up. The left figure is slightly gaining weight. He has no chin, which I am dissatisfied point. In the real world, not everybody is a handsome guy, so it’s OK.
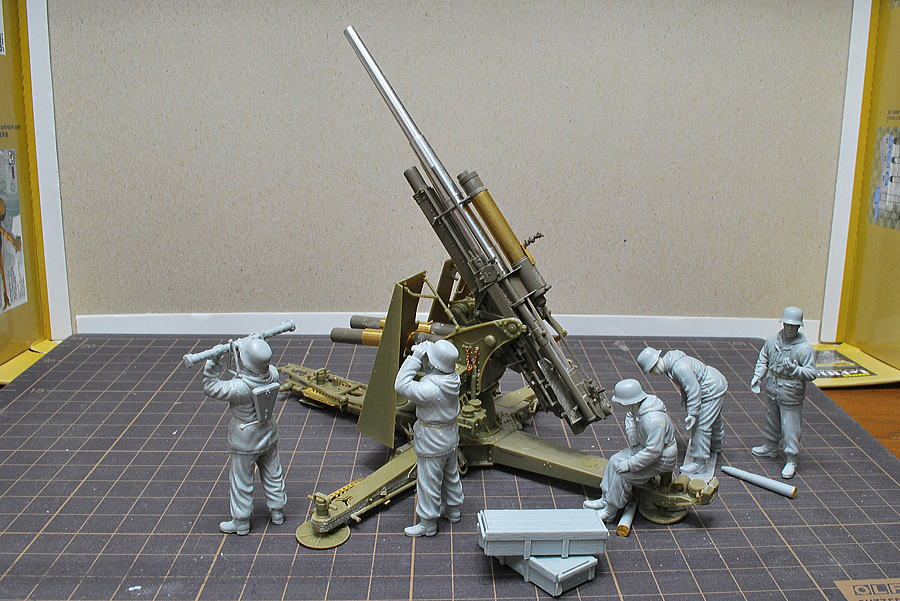 The figures standing positions are scattered but are more lively when it locates the only Gun. I think the proper operation of this artillery gun needs around ten soldiers, although I only set up five men. You can see this Gun is big, contrasting with the human height.
(24-July-2014)
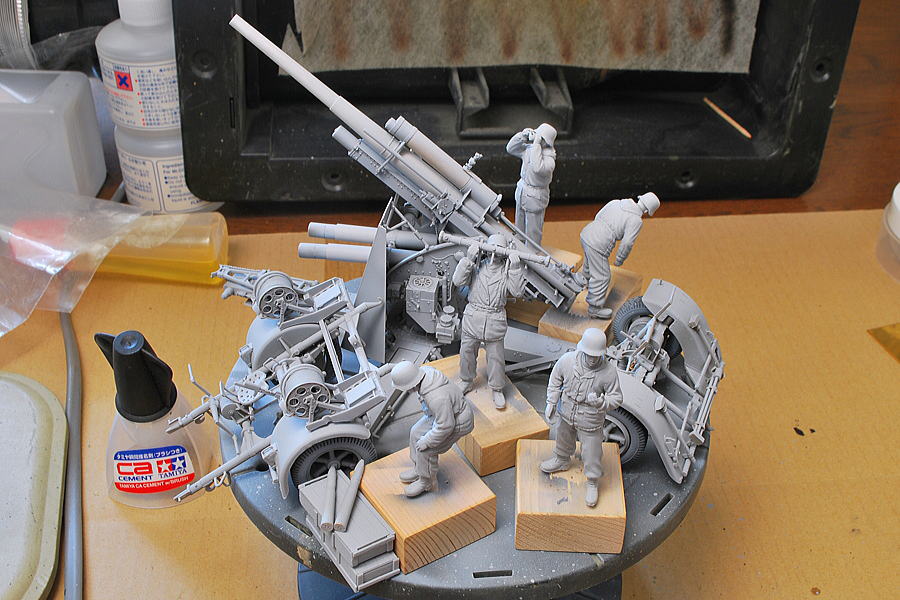 I had a question by e-mail on the necessity of surfacer overall. I blew surfacer before basic painting. I think there is merit to easy spread blowing, evenly same color tone, on the latter process.
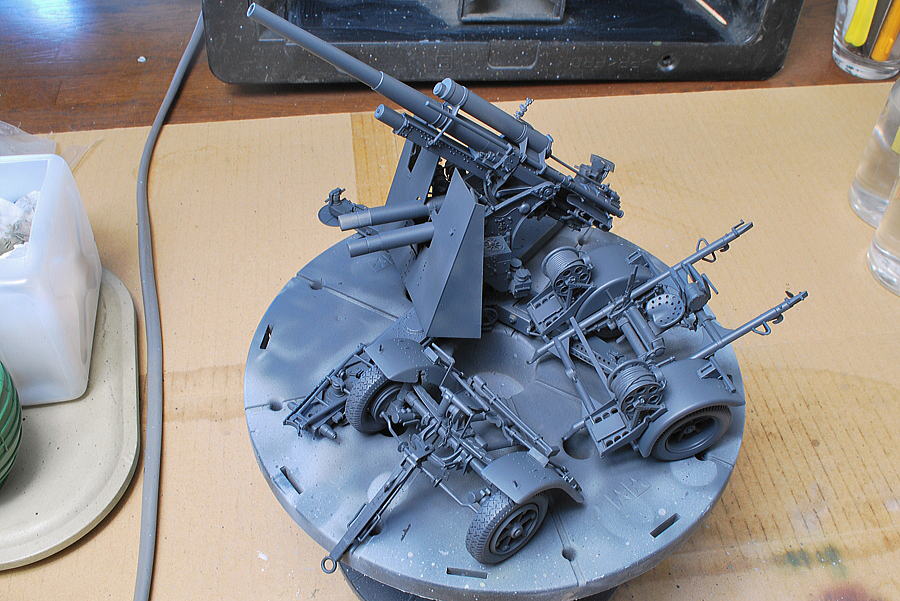 This time, the primary color is German gray.
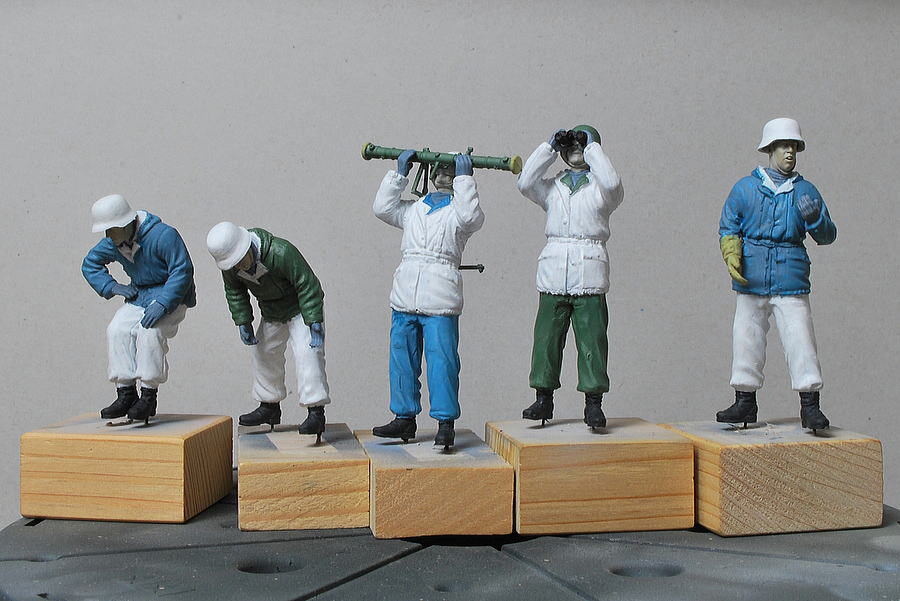 Figure’s primary paint by brush. But I suppose I should have done it with an airbrush, which makes it easier and more beautiful finish.
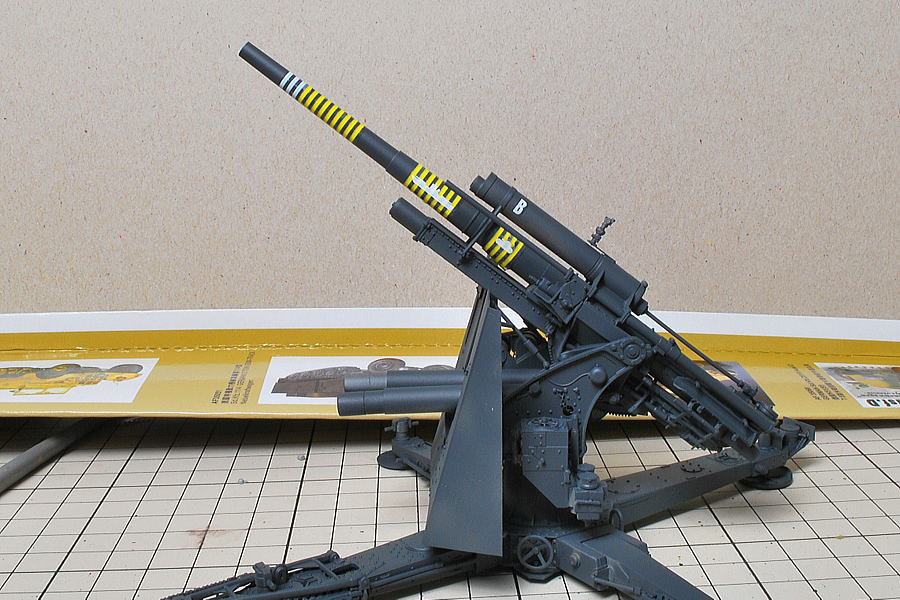 According to the manual, this marking’s Gun belongs to either place of the Eastern Front. There is the ship’s kill mark and the tank’s mark. I presume the lines with no mark are the number of shooting-down airplanes. It’s the warrior having a long military record. AFV Club’s decals are thin and delicate and need to handle very carefully.
(12-August-2014)
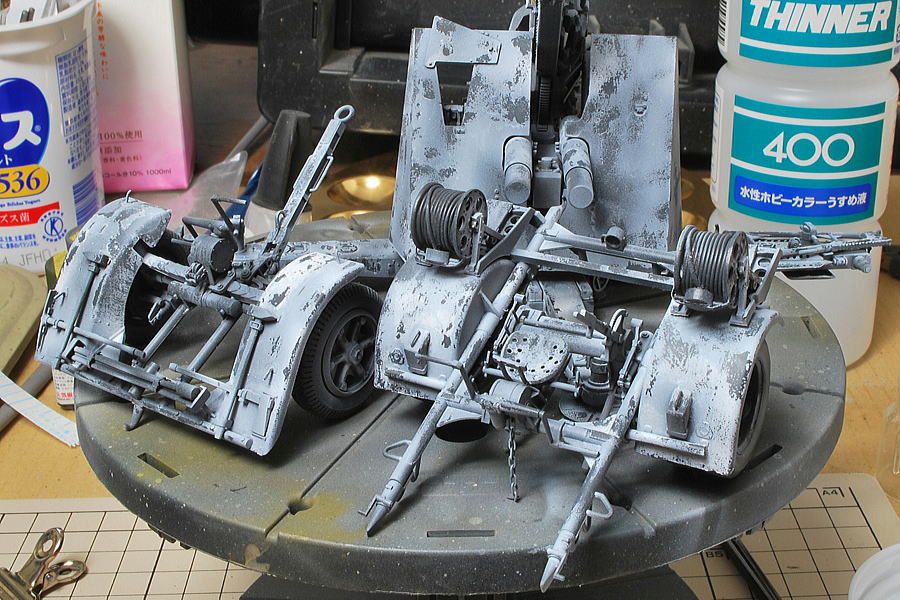 I continue to try the hair spray technique following the Pz. Kpfw III type H, which I completed last time. I blew the mat white thinly, and this matte white came off here and there. The base color, German gray, is seen randomly. I think the winter camouflage white might be easy to come off during the hasty emergency painting on the battlefield.
(14-August-2014)
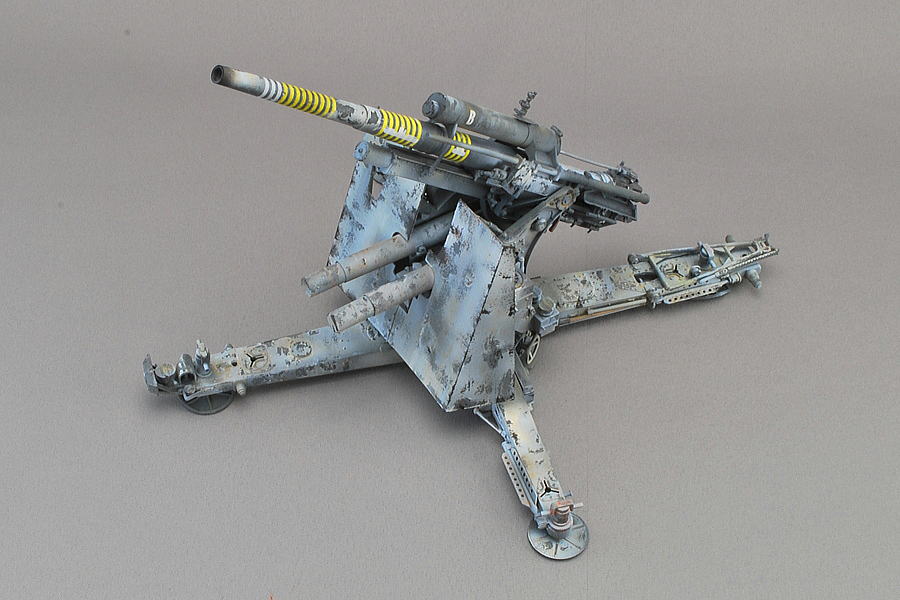 German 8.8 cm FLAK18 was finally completed. The 8.8 cm gun’s muzzle velocity was fast, and full penetration power was effective against enemy tanks. The effective range of the antiaircraft was around 7,000 m.
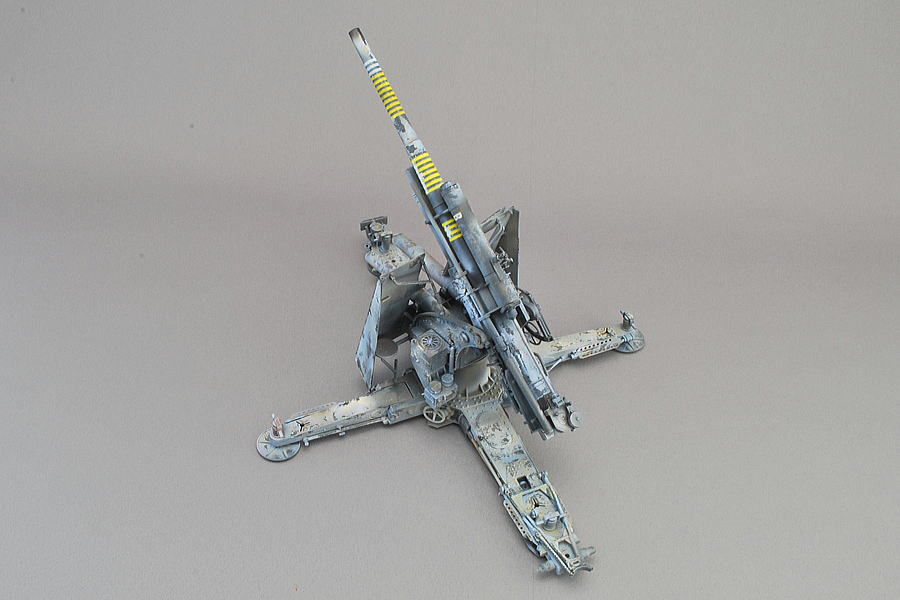 It may be said this Gun supported framework by the German army as it was equipped with the Tiger I and Tiger II (King Tiger).
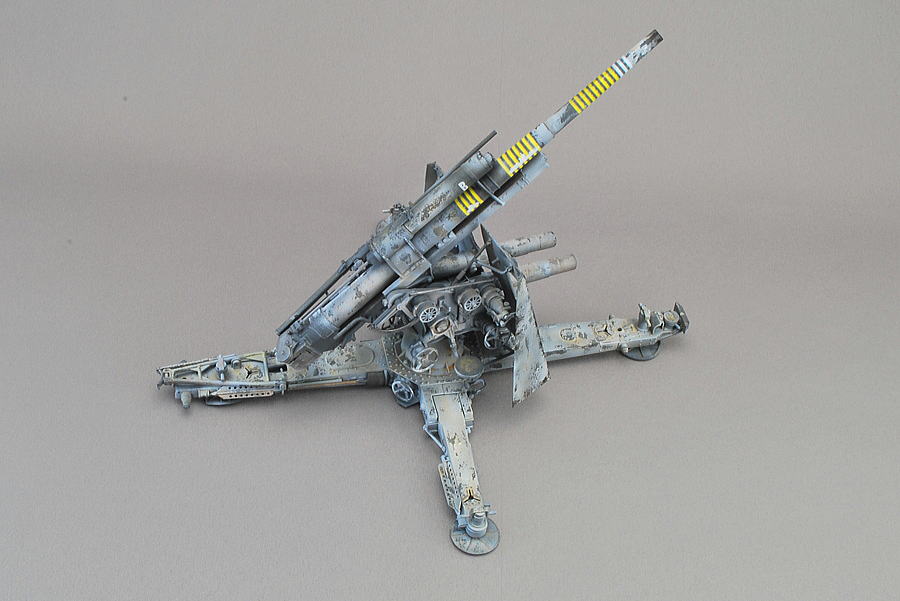 As I assembled it through hard-working, the size was more significant, and this anti-antiaircraft Gun had more presence than other small howitzers and anti-tank guns.
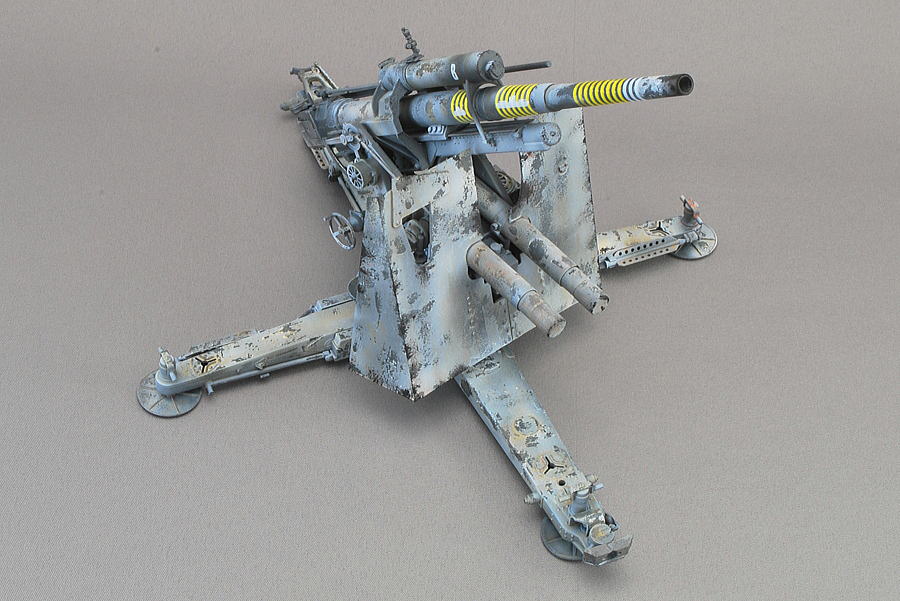 I blew the mat white slightly and peeled it off later to use the hair spray method as I wrote it in the making process. It’s very interesting to see the drastic effectiveness.
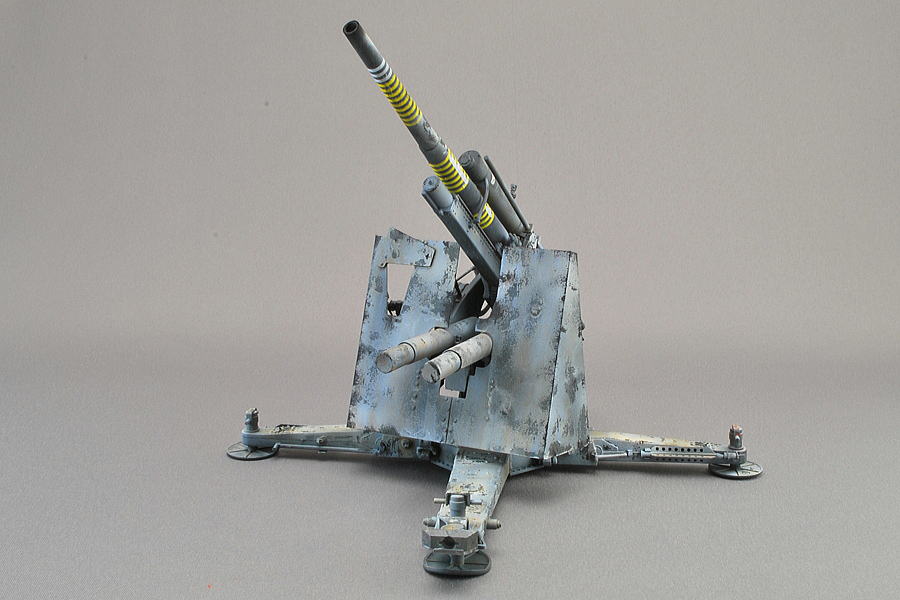 I had to tip together and attach some changes. But it is modest, not to become so noisy.
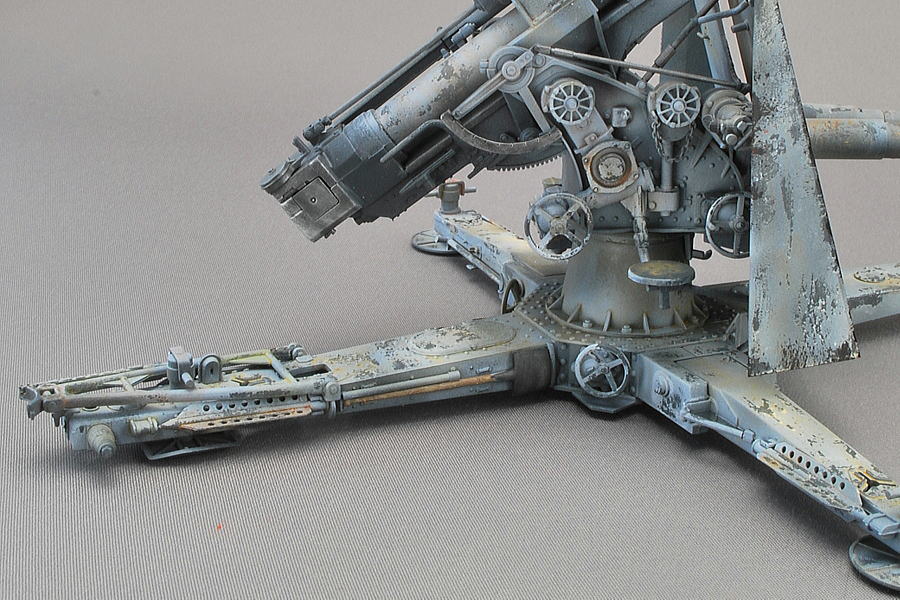 I shone the metal parts of the moving point with silver iron dry-brushing.
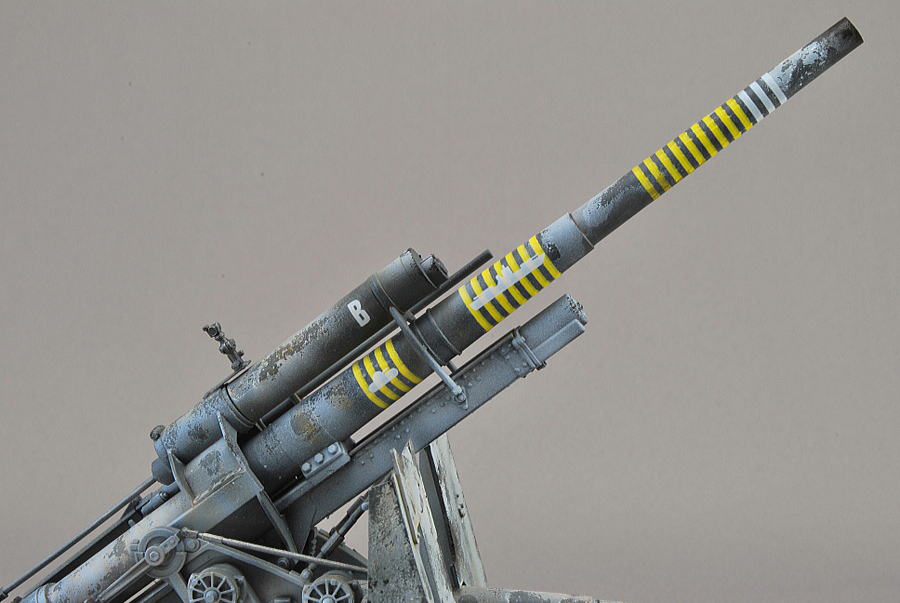 Yellow kill marks are outstanding; with this marking, I wonder if the winter camouflage is effective. But anyway, this marking is attractive for modeling.
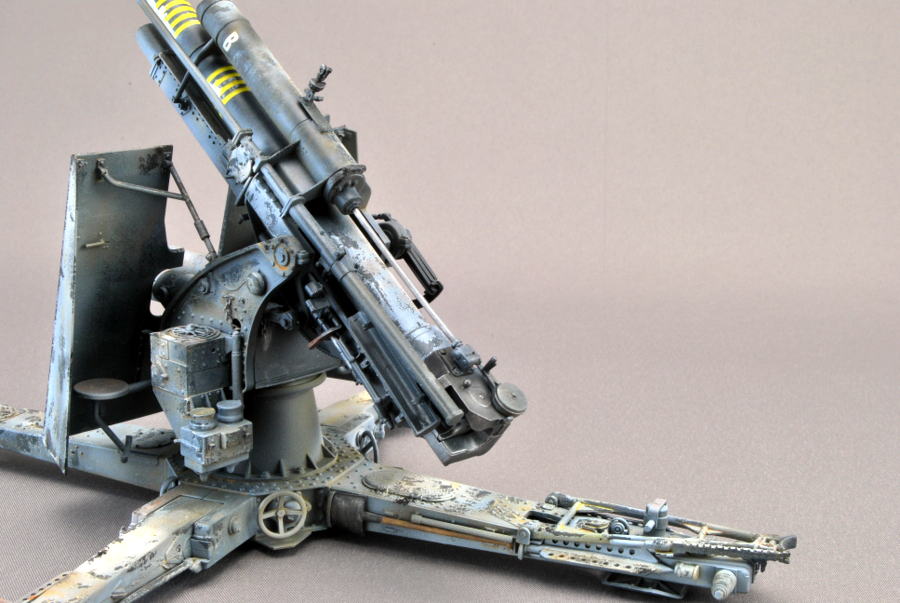 Because color depth was not reflected in the painting when it was only matte white and German gray, I did washing with brown and dark brown, and not too much was performed. Notably, the weathering effect comes out soon on the white area.
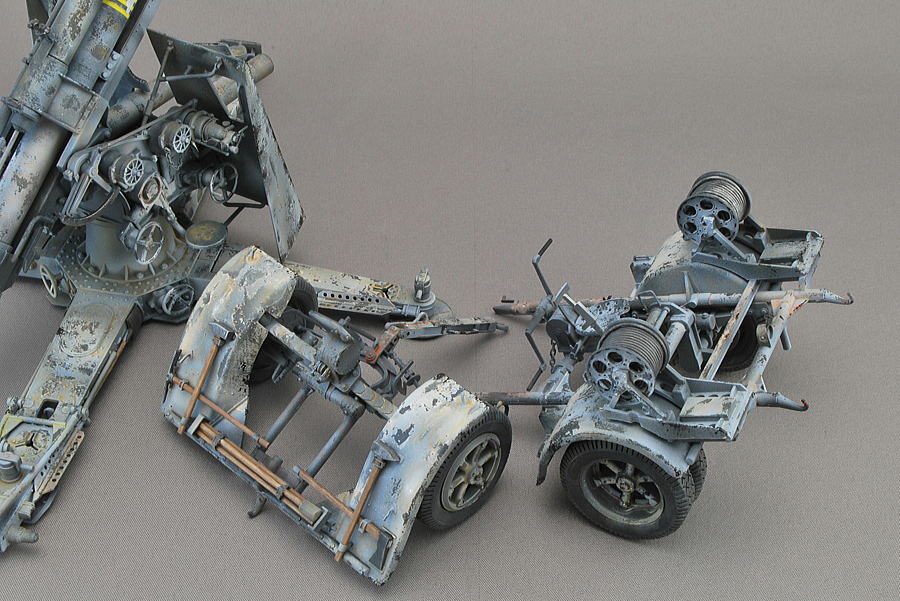 The vehicle has quite a careful parts composition. There are a lot of pickaxes and hammers because there were works in various ways when the crew fixed the Gun to the shooting position.
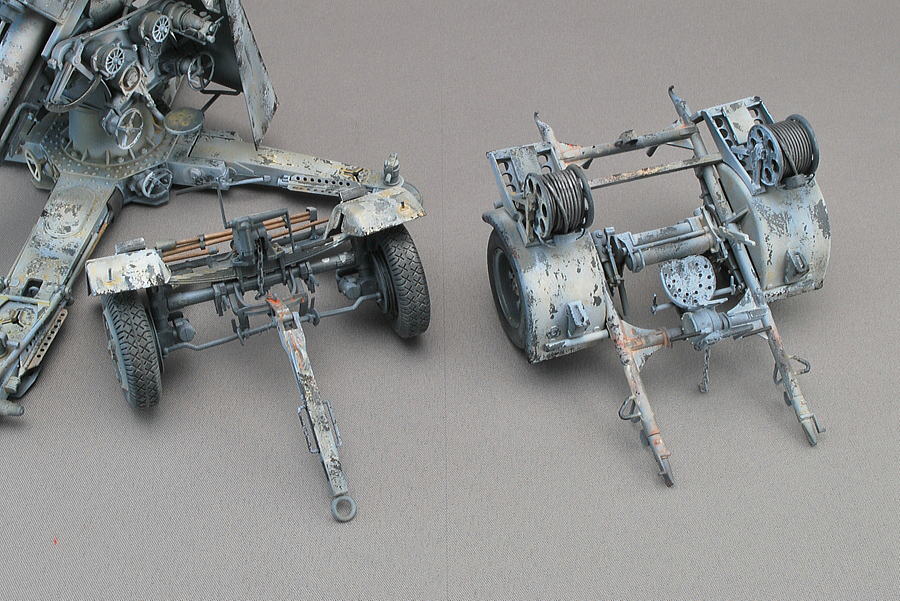 I performed peel-off white painting, tipping, and washing randomly on the surface offenders where the main area of the carrier vehicle was.
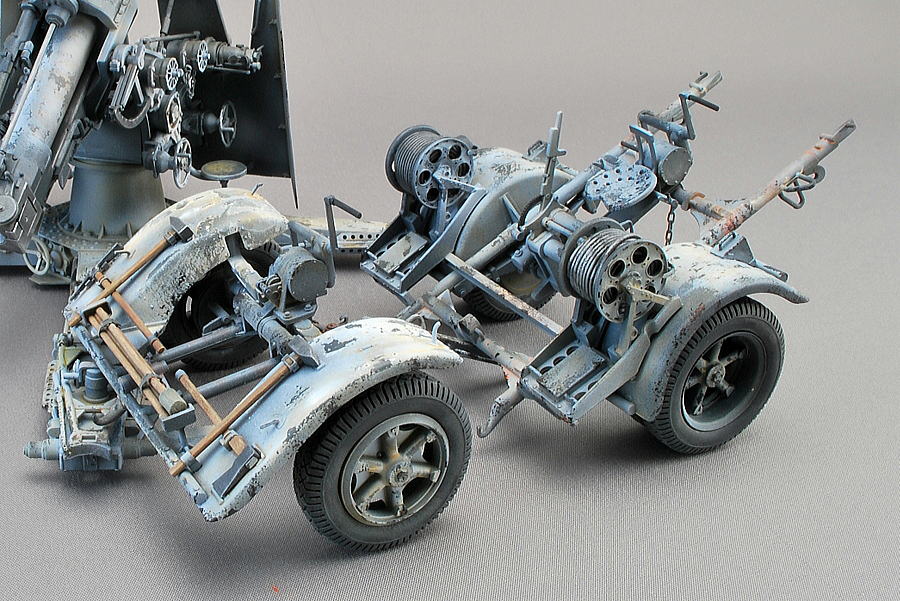 Tiny chains hanging down here and there were excellent. I think such a thing will improve accuracy.
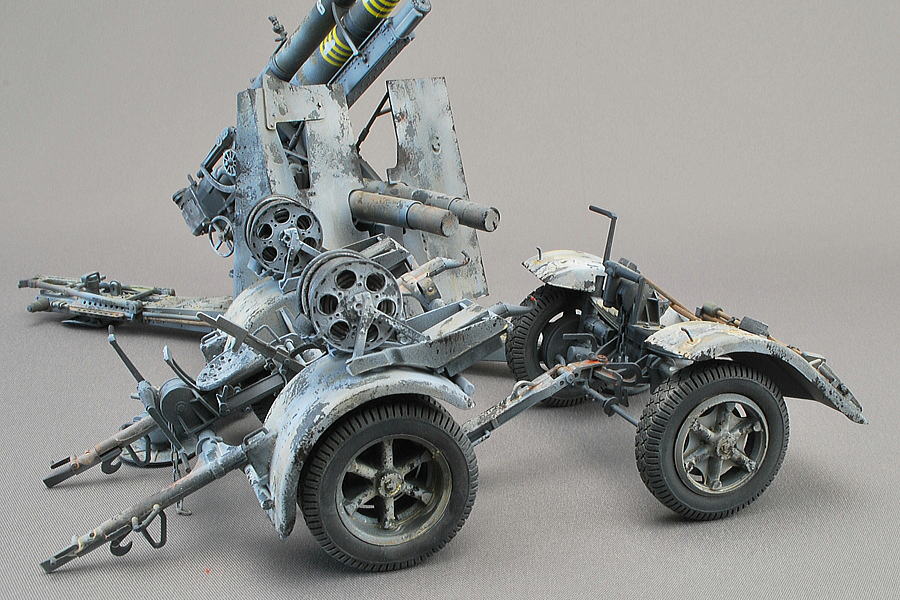 I had taken many similar photos.
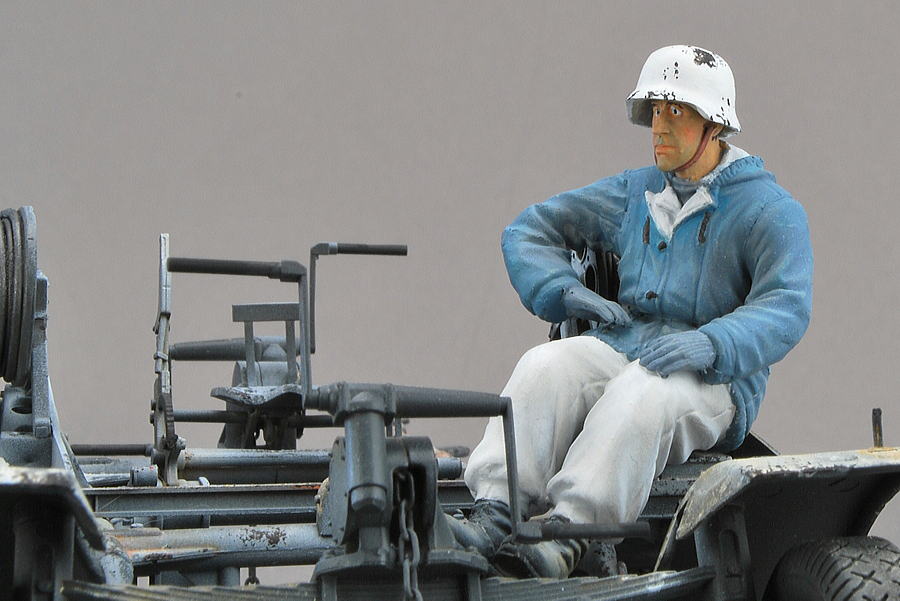 The aiming crew concentrates on discovering enemies. It is the slightly thin German soldier.
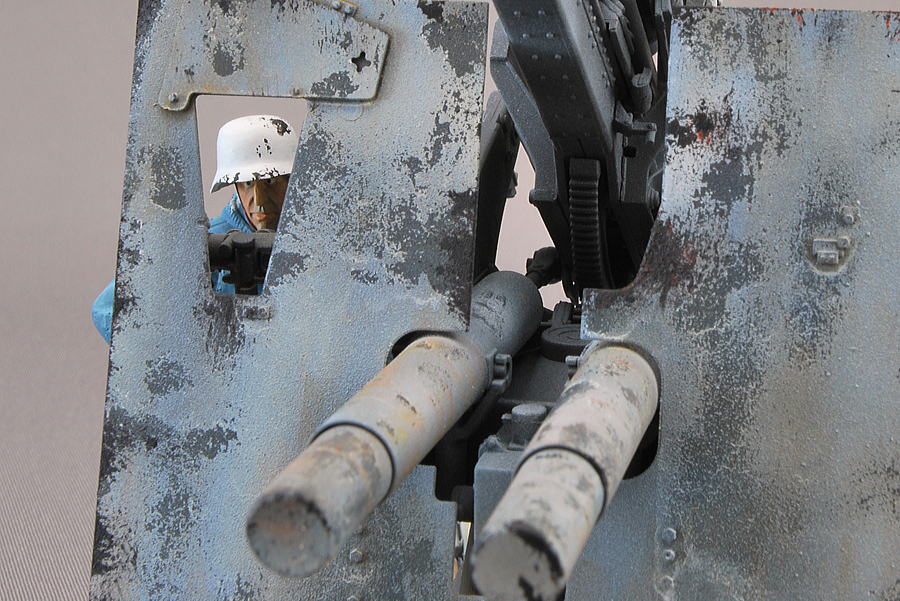 When looking through a bulletproof board, looking like a serious face?
 I painted the binocular lens clear.
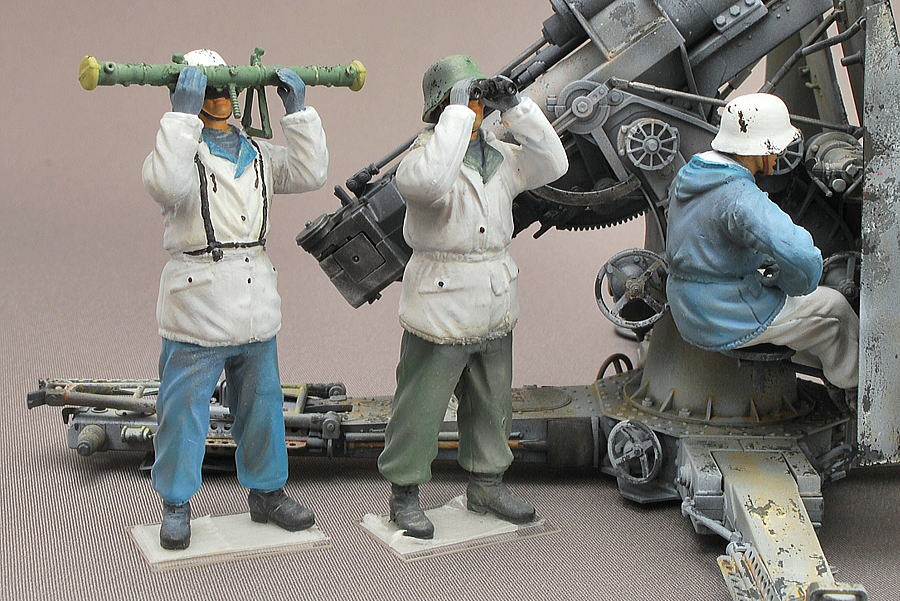
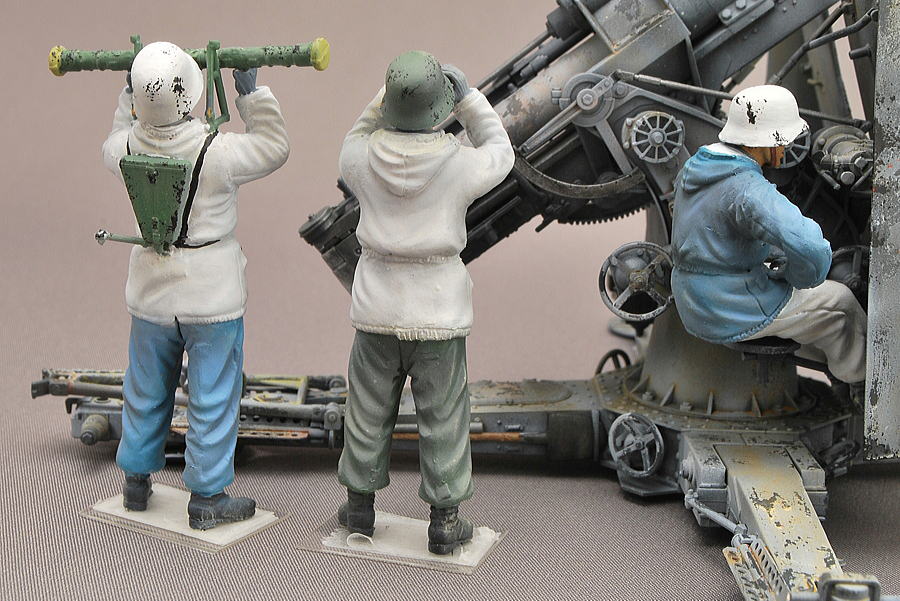 They are wearing heavy winter clothing and plump feeling. I paint the gradation of the clothing to use dark and middle colors. The wrinkles are highlighted with the brightest color. The figure painting is complex every time.
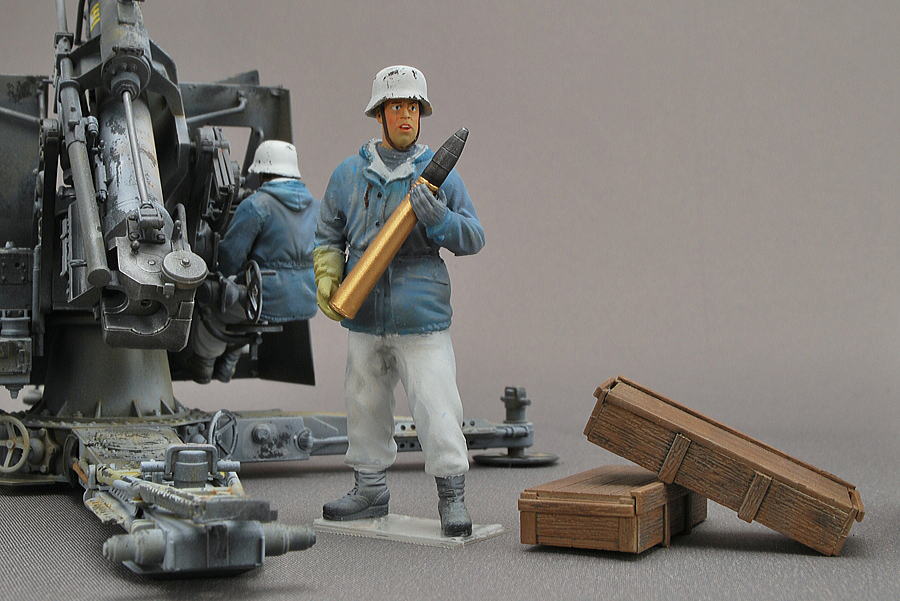 Before the painting, this guy was not so good-looking, a little fat, and had no chin. But after completion, the expression is friendly.
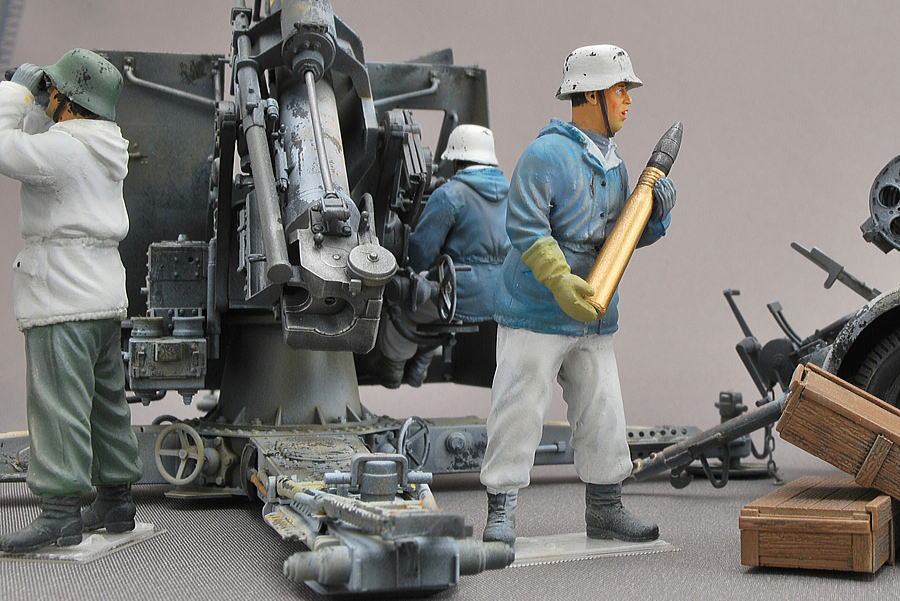 He fits the mitten on the right hand, which is like using a home bakery. It is a good atmosphere with metallic shining that gives a solid feeling. I think the shells are burnt and will become hot after shooting.
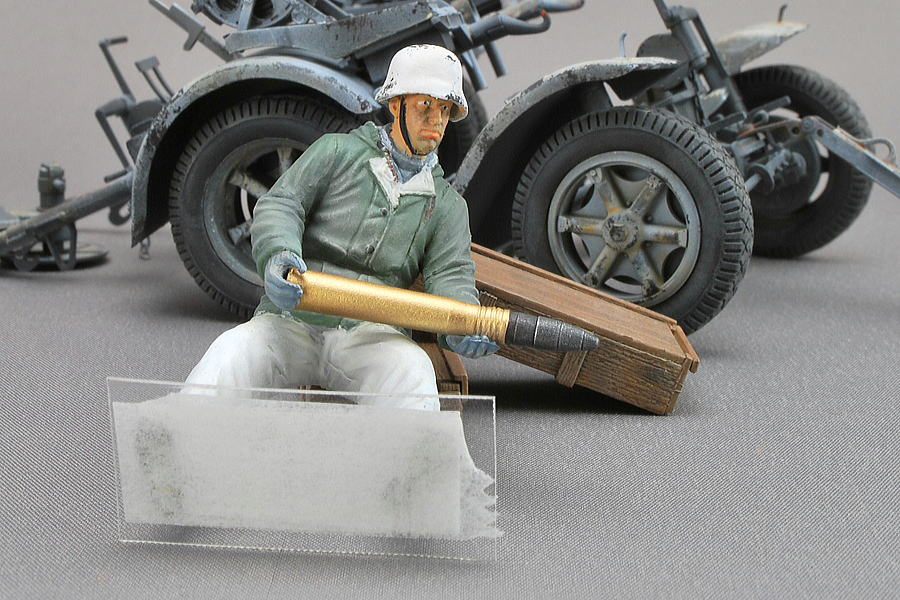 He is not a snowboarder; he ultimately turned to the bottom, so I took a photo like this angle… I want to paint my eyes with more power and need a more precise brush painting technique.
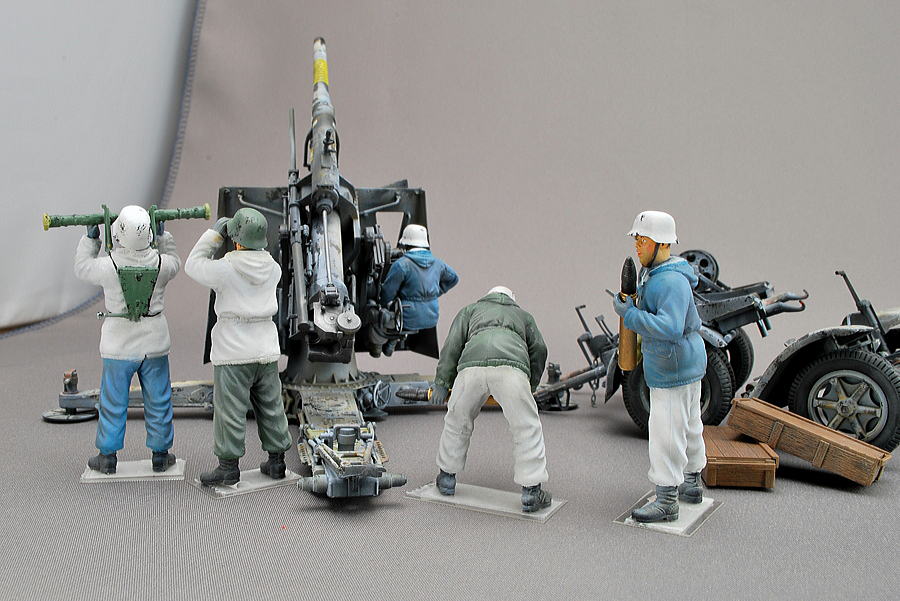 It is enjoyable to think about a layout in one way or another. The figure’s skin painting was mixed blue because it is the battle in cold districts, and I would like to express freezing, but almost the same as always…
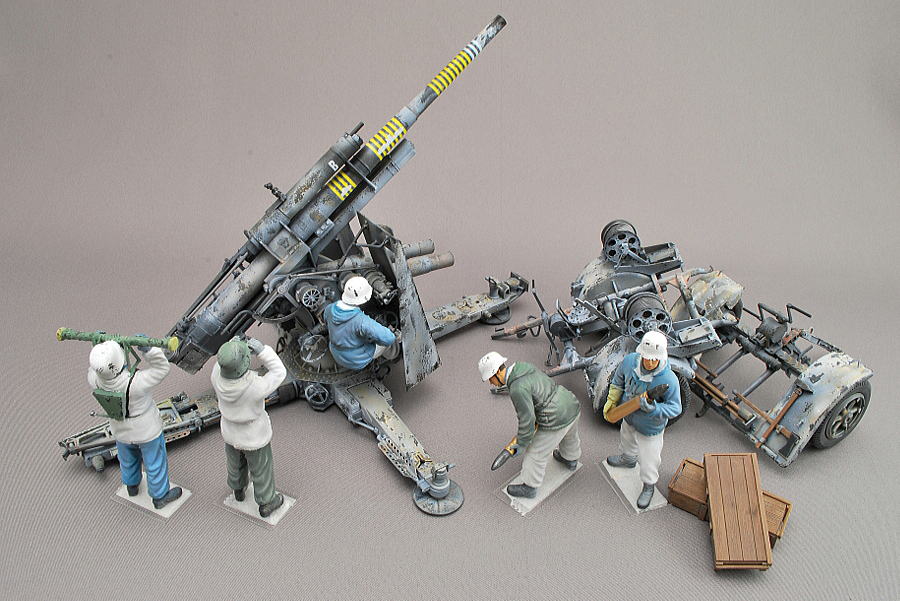 The main kit becomes the form to be divided into three and five figures; all in the photo are like this. This kit’s quality was unquestionable, and I enjoyed assembling it. I succeeded in the winter camouflage, so it looks good after displaying it.
(16-August-2014)


![Raiden [Jack] Type21 Mitsubishi J2M3 Japanese Navy Interceptor Hasegawa 1/32 Raiden [Jack] Type21 Mitsubishi J2M3 Japanese Navy Interceptor Hasegawa 1/32](https://i3.wp.com/kenta2222.com/wp-content/uploads/raiden21-23.jpg?w=120&resize=120,68&ssl=1)
コメント