
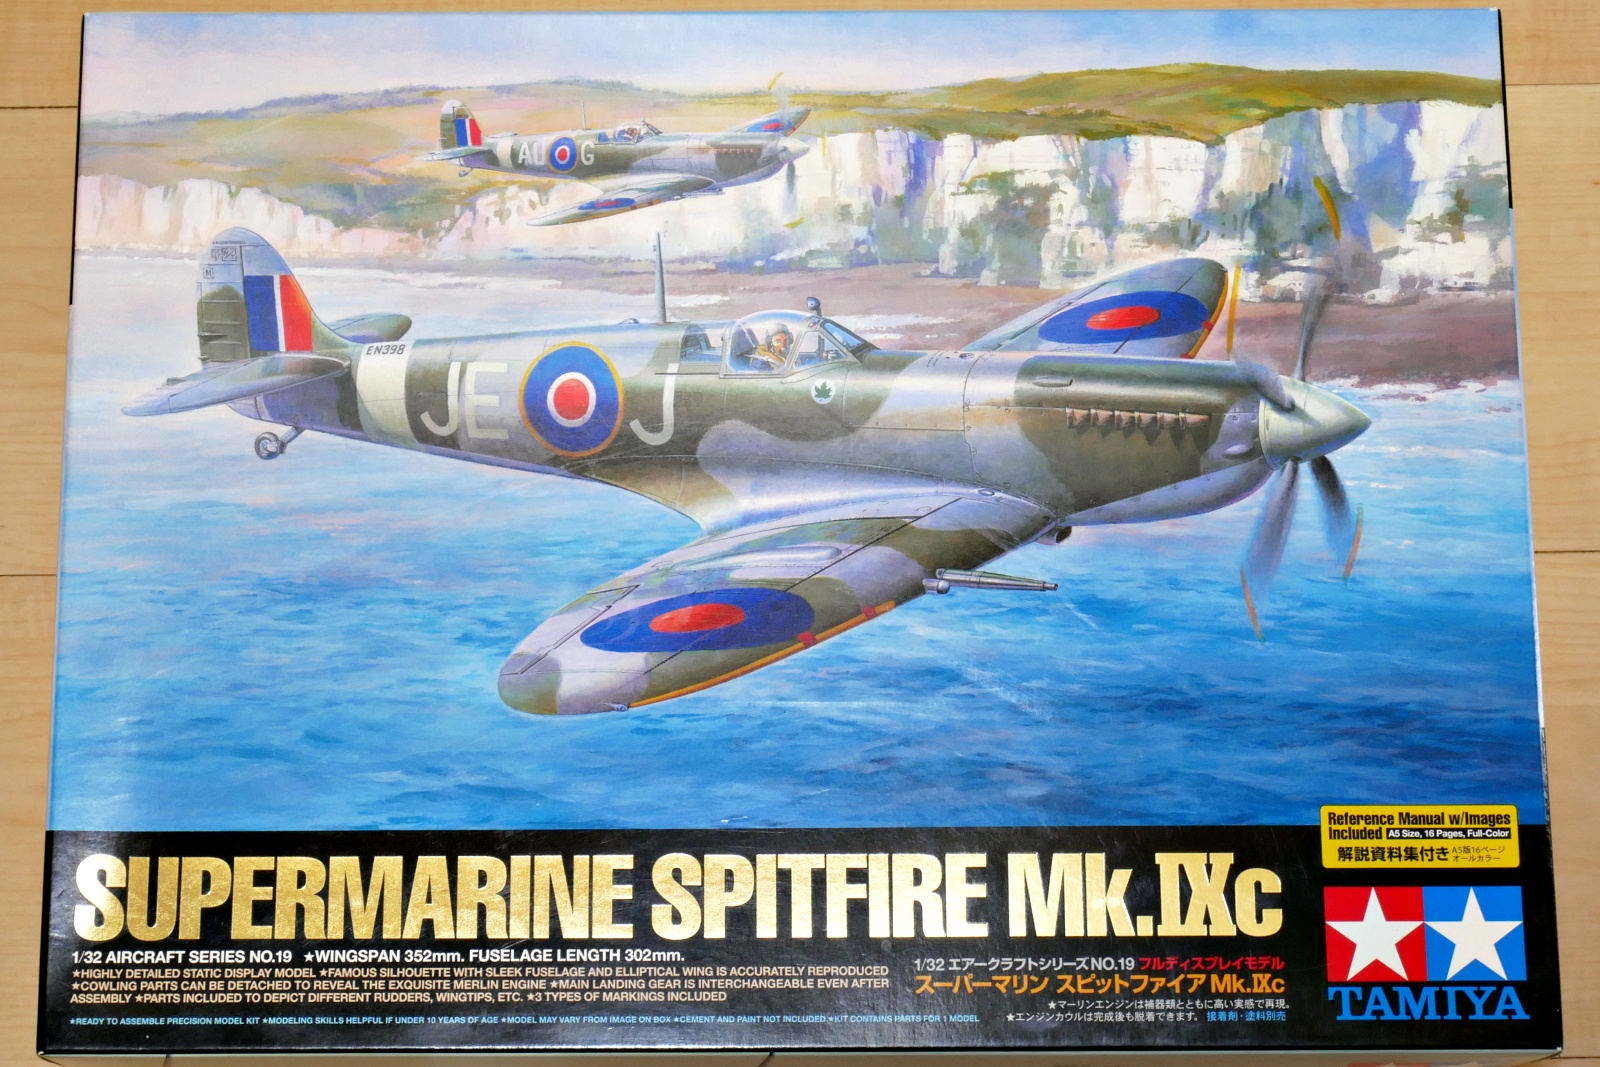
Now I’m going to make Tamiya’s big scale model, 1/32 Spitfire. I have been making some of them at 1/48, and I was thinking of making this kit from Tamiya when I have no stock of 1/48 scale. I finally decided to put nippers in the runner after buying it years ago.
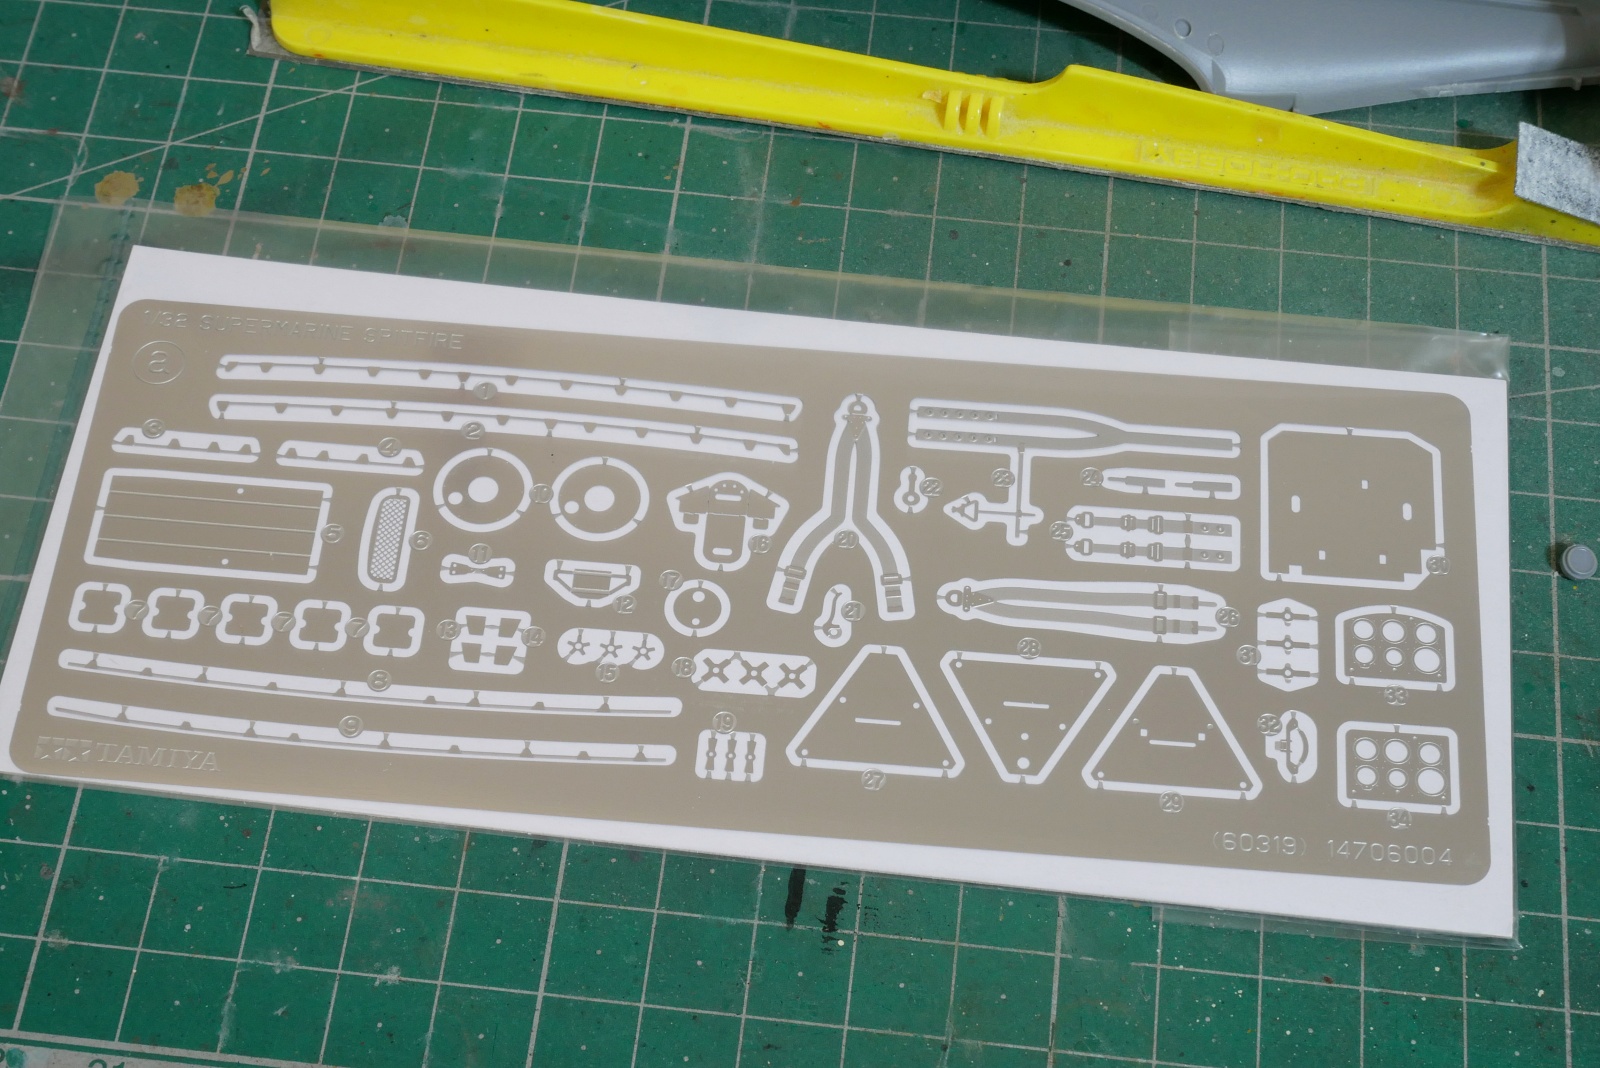
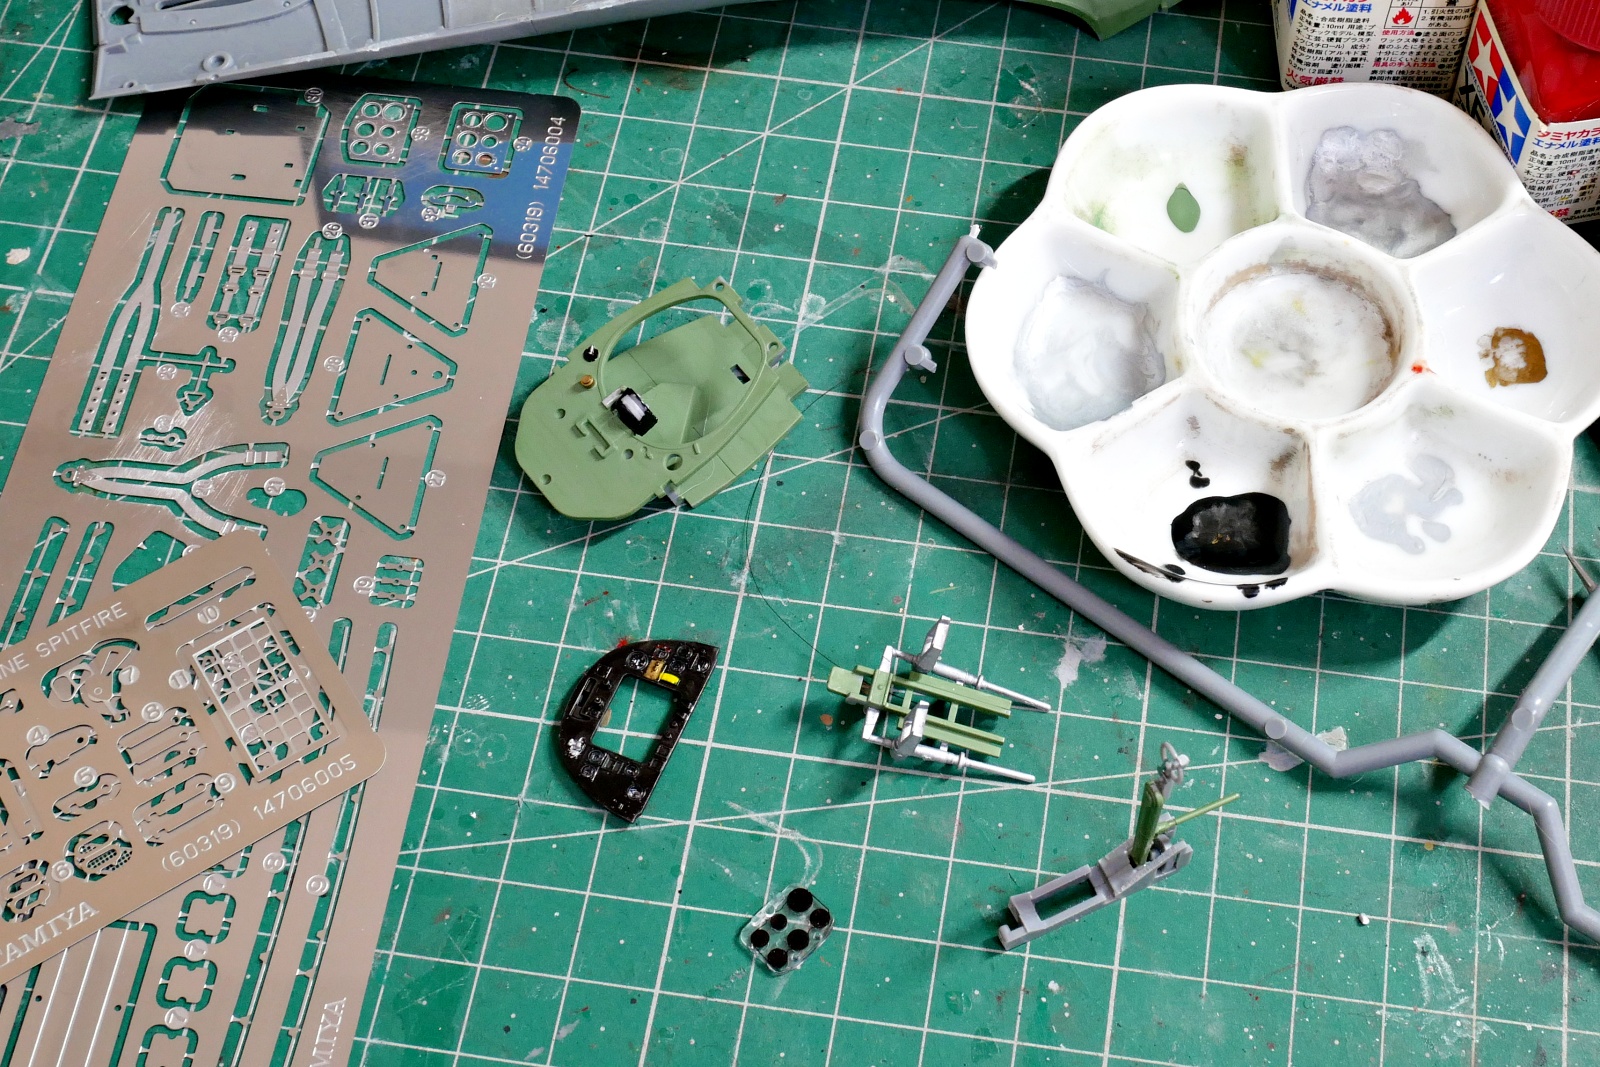
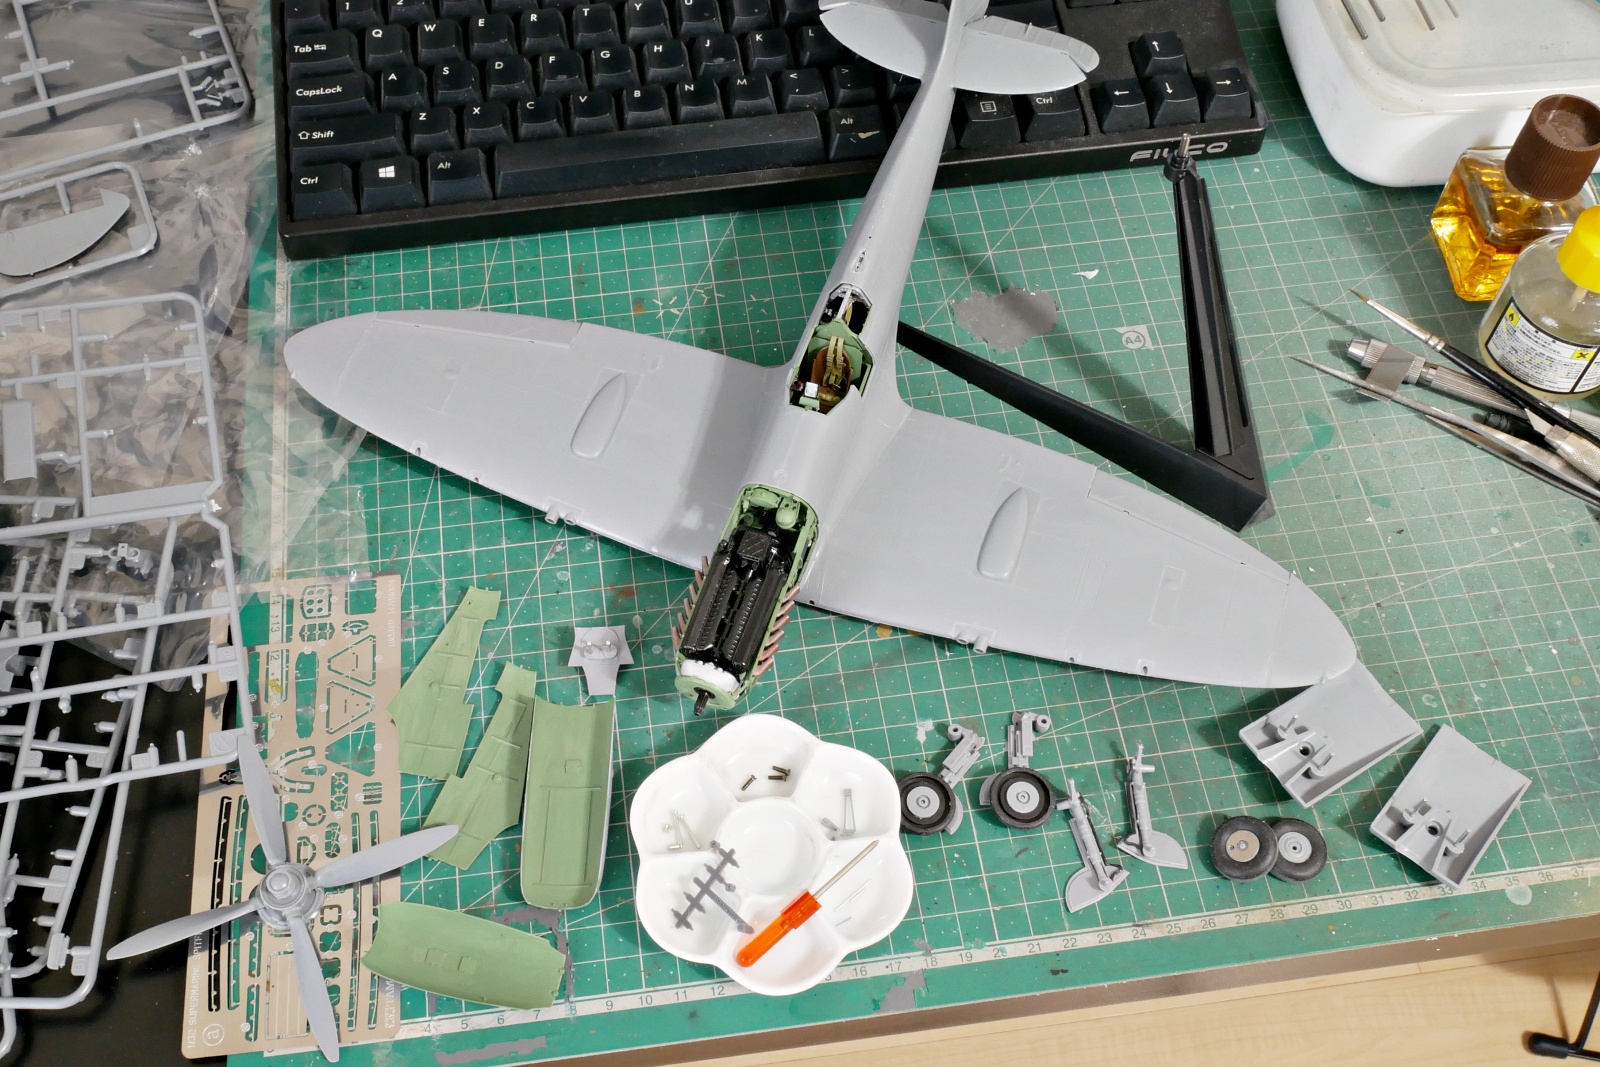
In addition to the etched parts, there were also fine metal parts and a miniature precision screwdriver. It’s kind of scary because I didn’t know what the gimmicks were before I bought the kit.
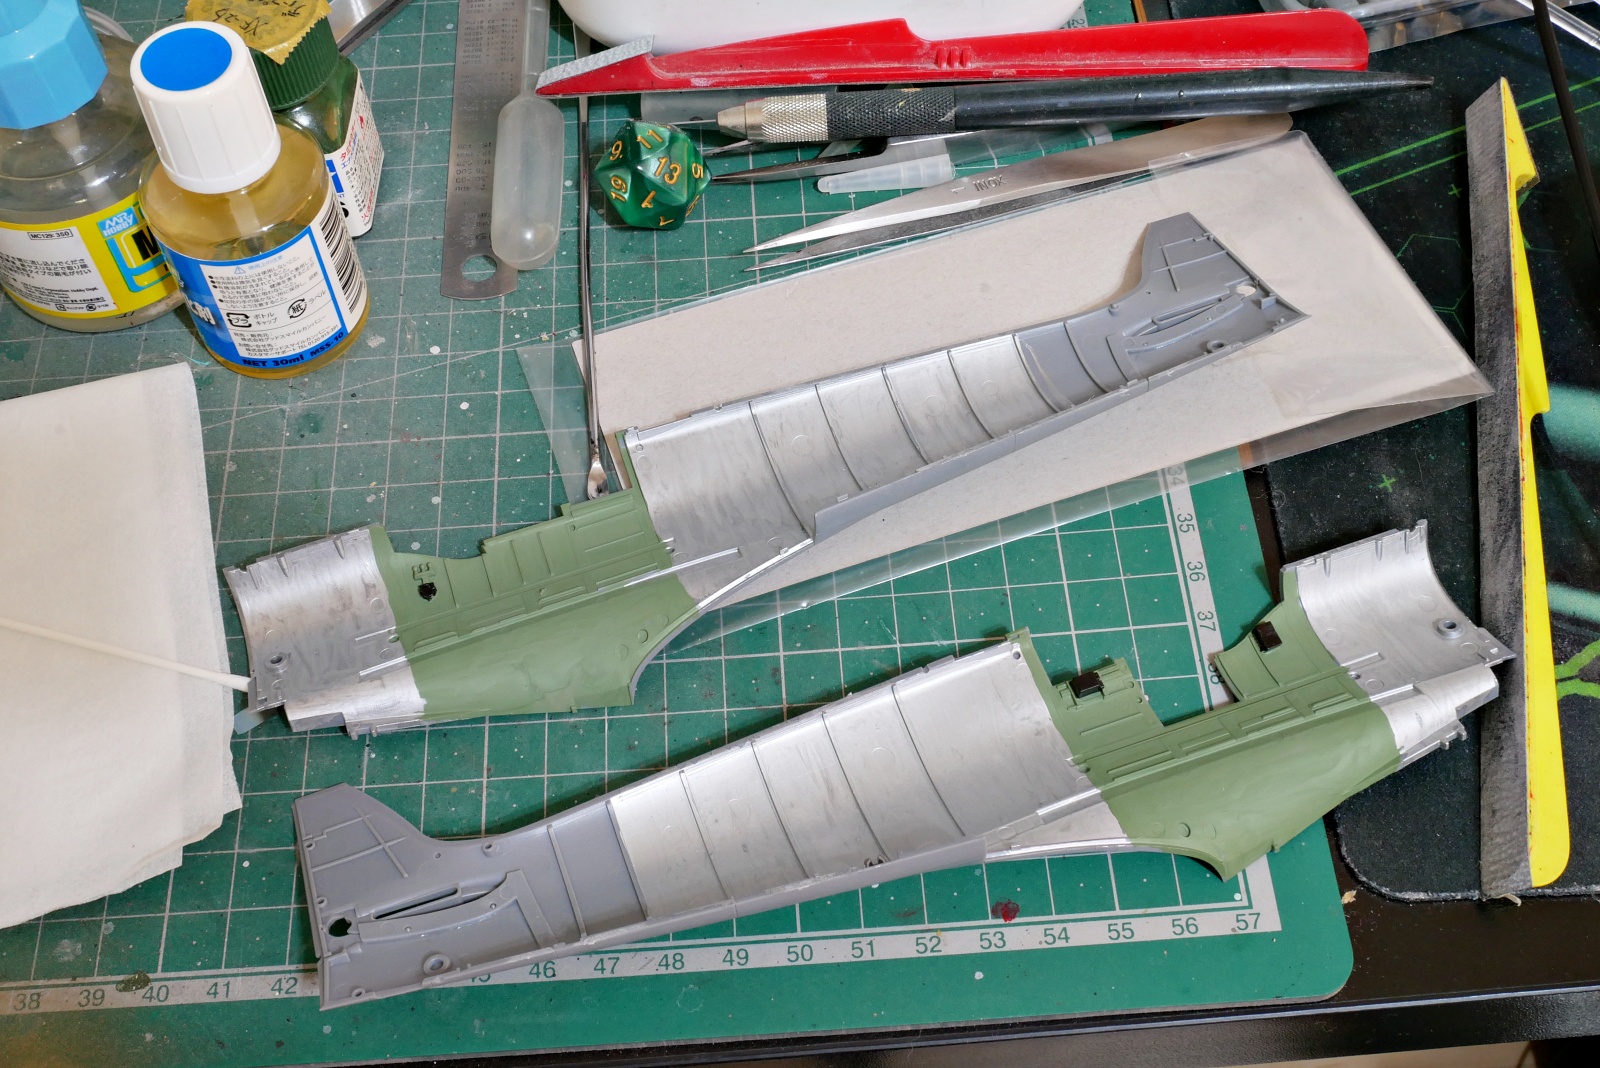
I’ll start assembling and painting from inside the aircraft. I think it’s better to paint the inside with a brush because there are quite fine lines. I lightly painted it with Tamiya enamel. As for Tamiya Enamel XF-71 airframe interior color, the color of the cap is too light, so I thought that this could not be used for British military aircraft, but when I tried mixing and painting, it seems to be much darker than the color of the cap, so there is no problem, so I think I will proceed with this. I thought it was important to stir and check the color.
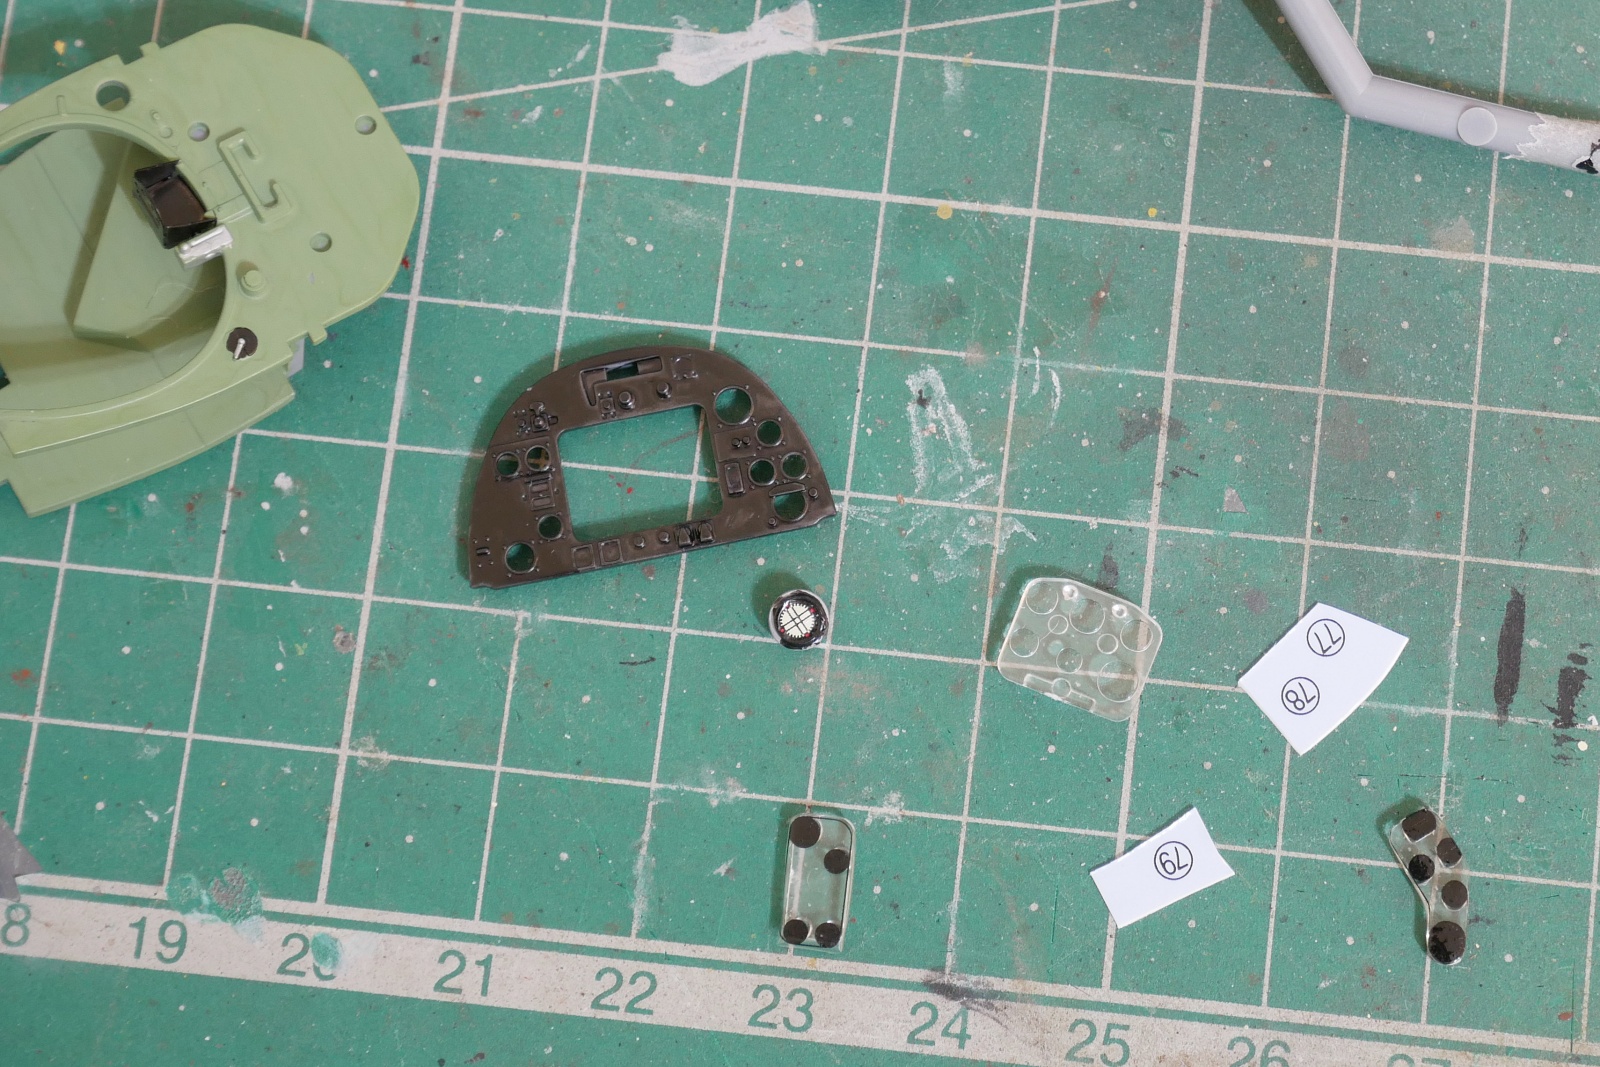
The assembly and painting of the cockpit are very detailed. This may be the first time I have ever made a decal from the back of a clear part and then inserted it into an instrument panel. This is also a lot of detailed work, so I would like to proceed little by little in parallel with the assembly by brush painting.
Most of the parts fit perfectly, so on the contrary, I get nervous and my hands shake. But it might be better to feel that I can make it easy and buy it again if I fail. Tamiya is relatively easy to get because its stock is in various places.
(2025/06/06)
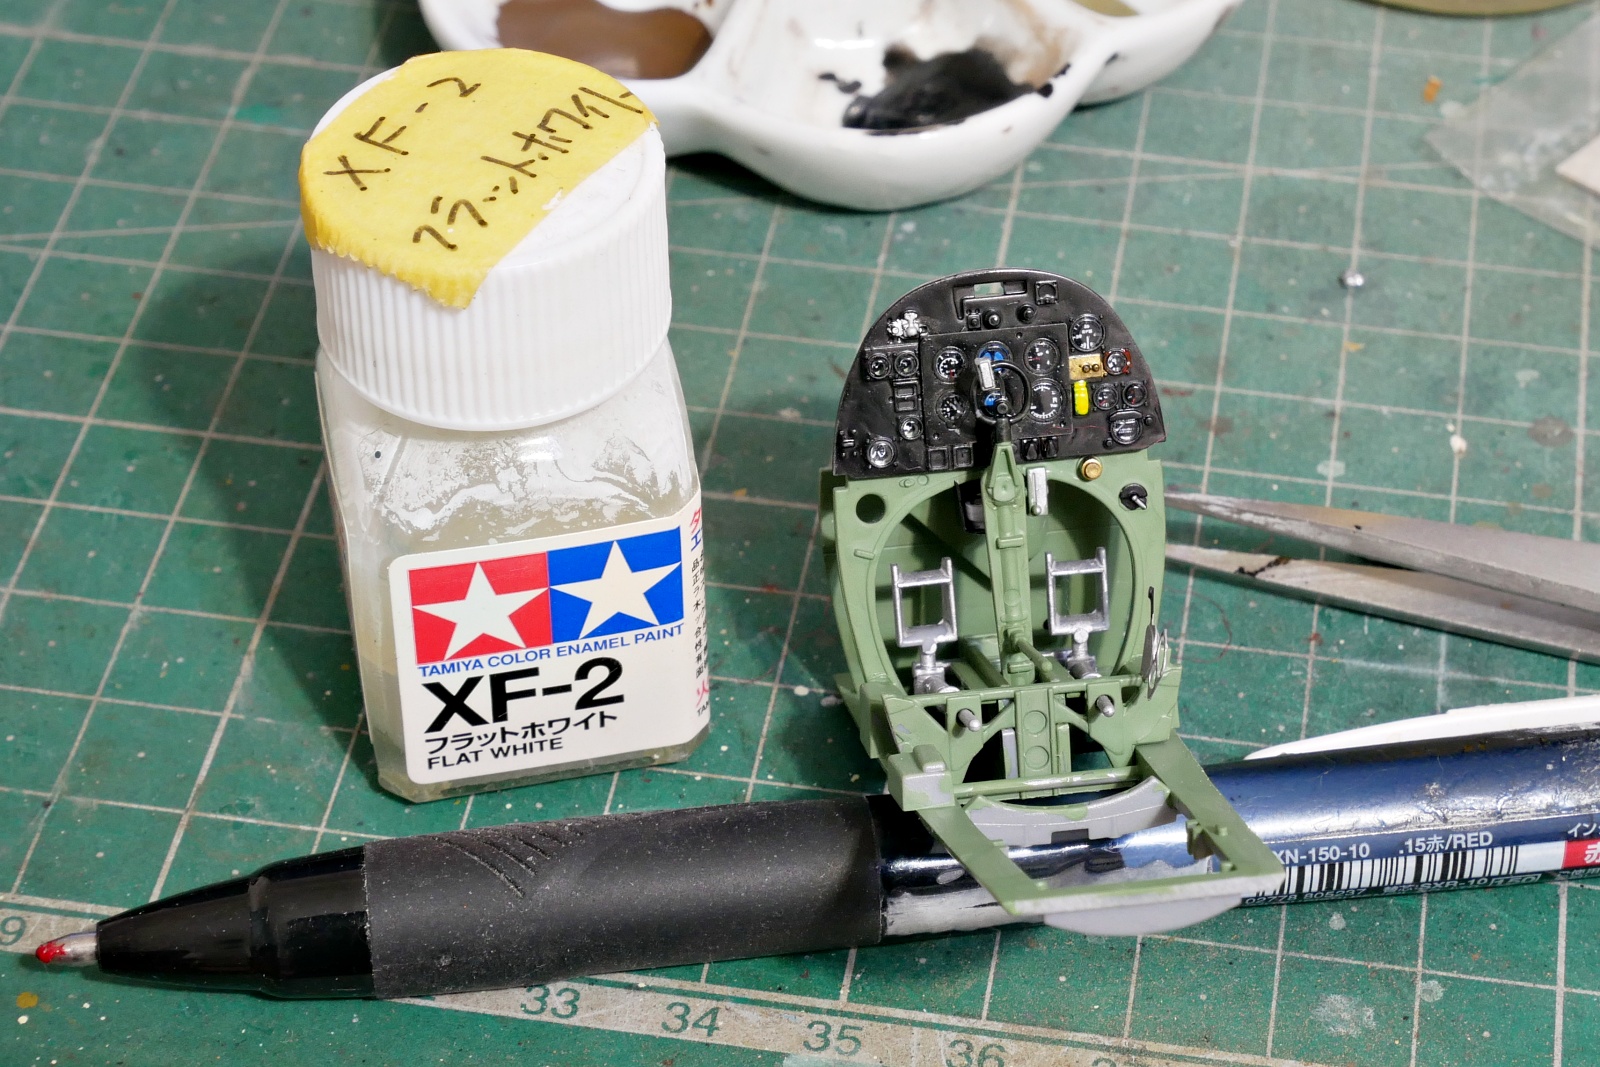
The cockpit panel is very sophisticated, this kit. I think the atmosphere of the meter seen through the glass is reproduced. It’s really well thought out.
I am impressed that Tamiya kits are well made.
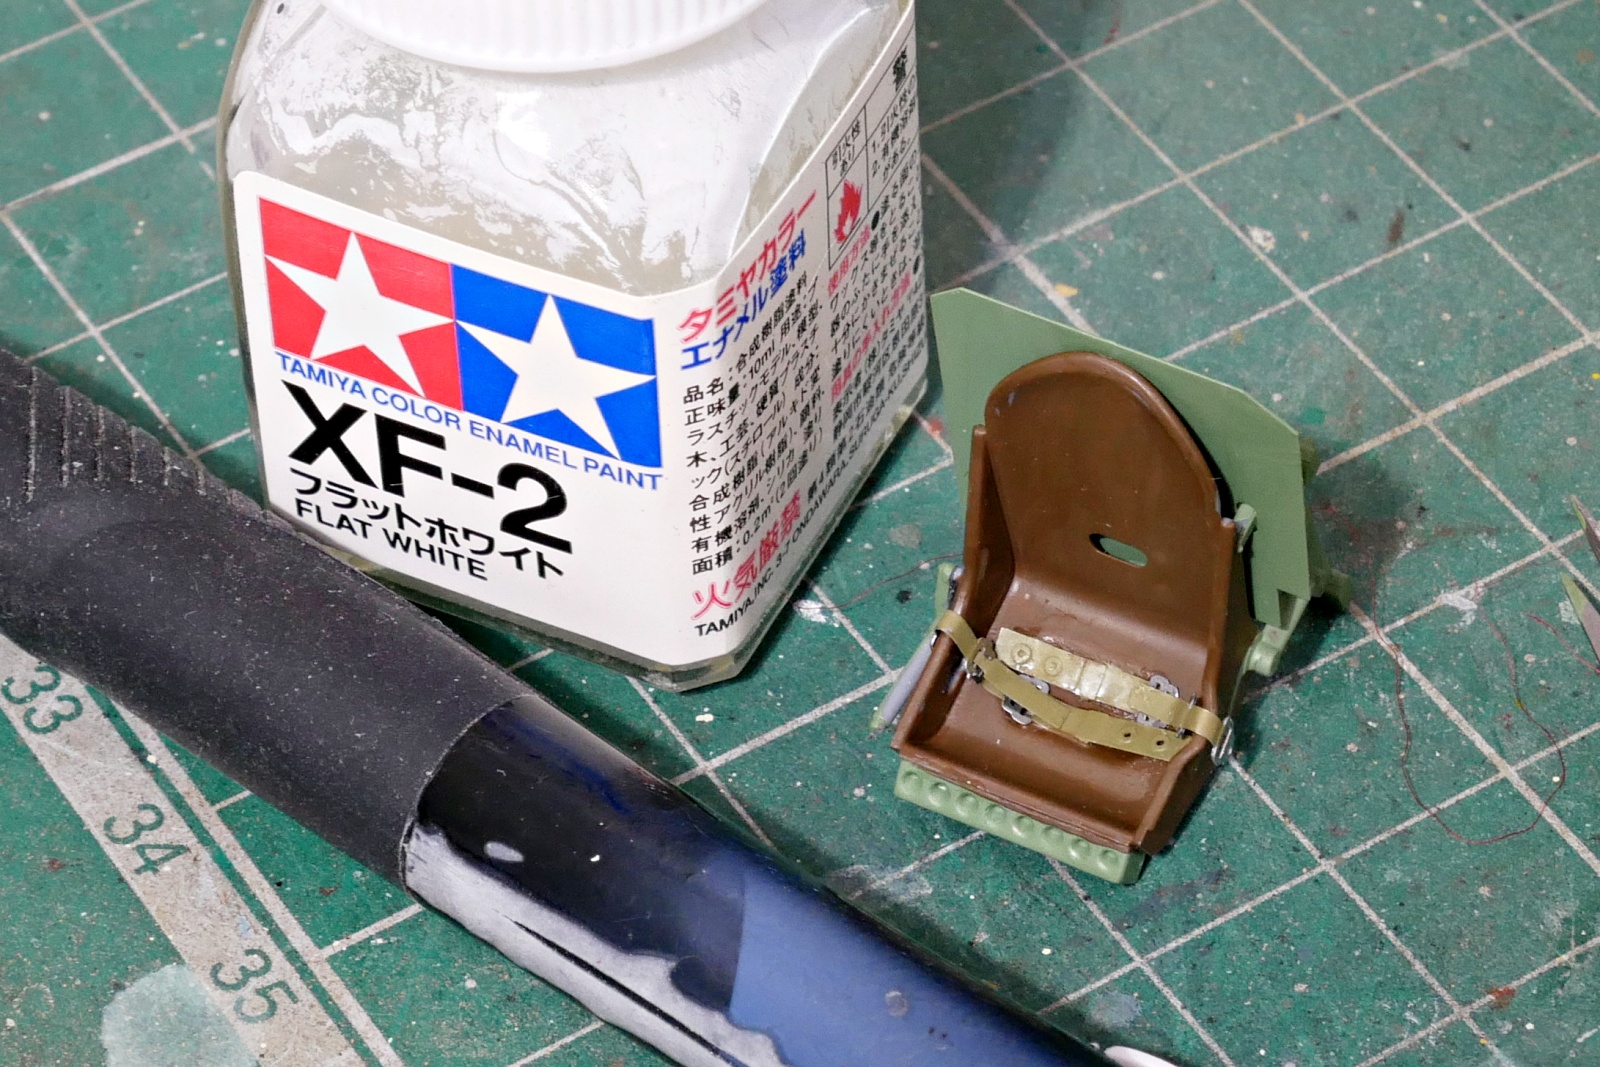
The seat also came with seat belt parts. I thought it would be terrible if the etched parts were made of hard stainless steel. It’s actually quite soft and easy to fold and bend.
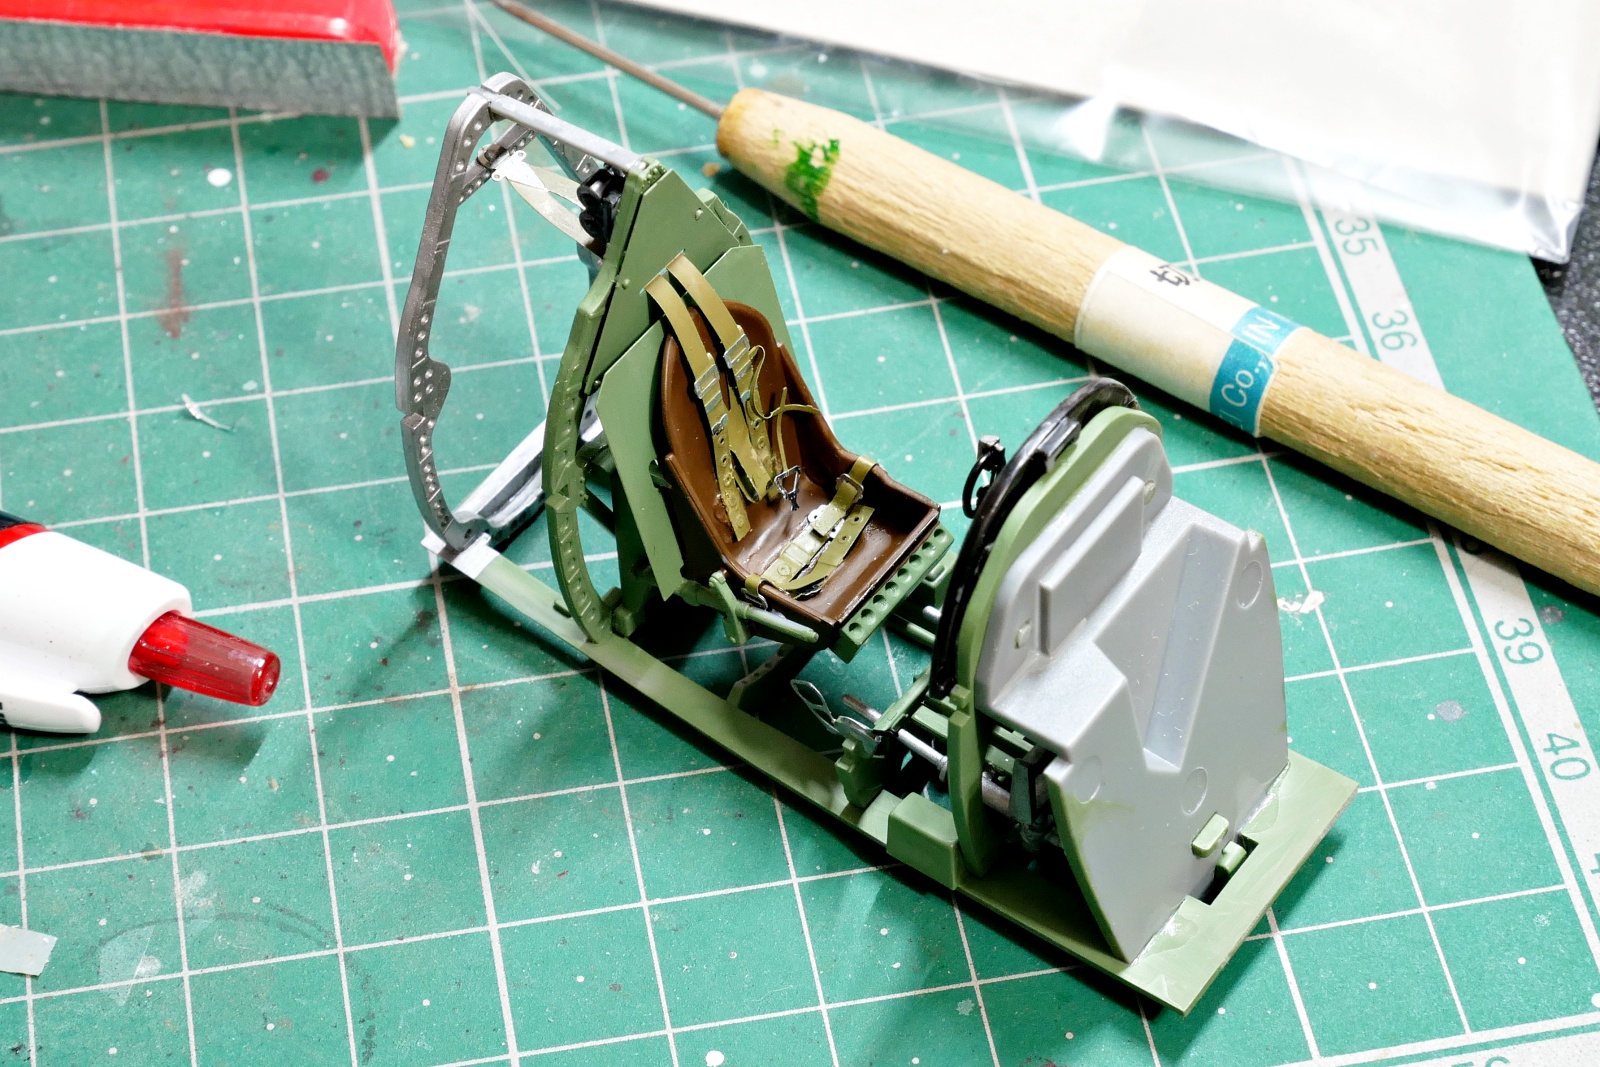
I glued and painted all the seat belts on the Spitfire. There are many detailed work such as painting the metal buckle.
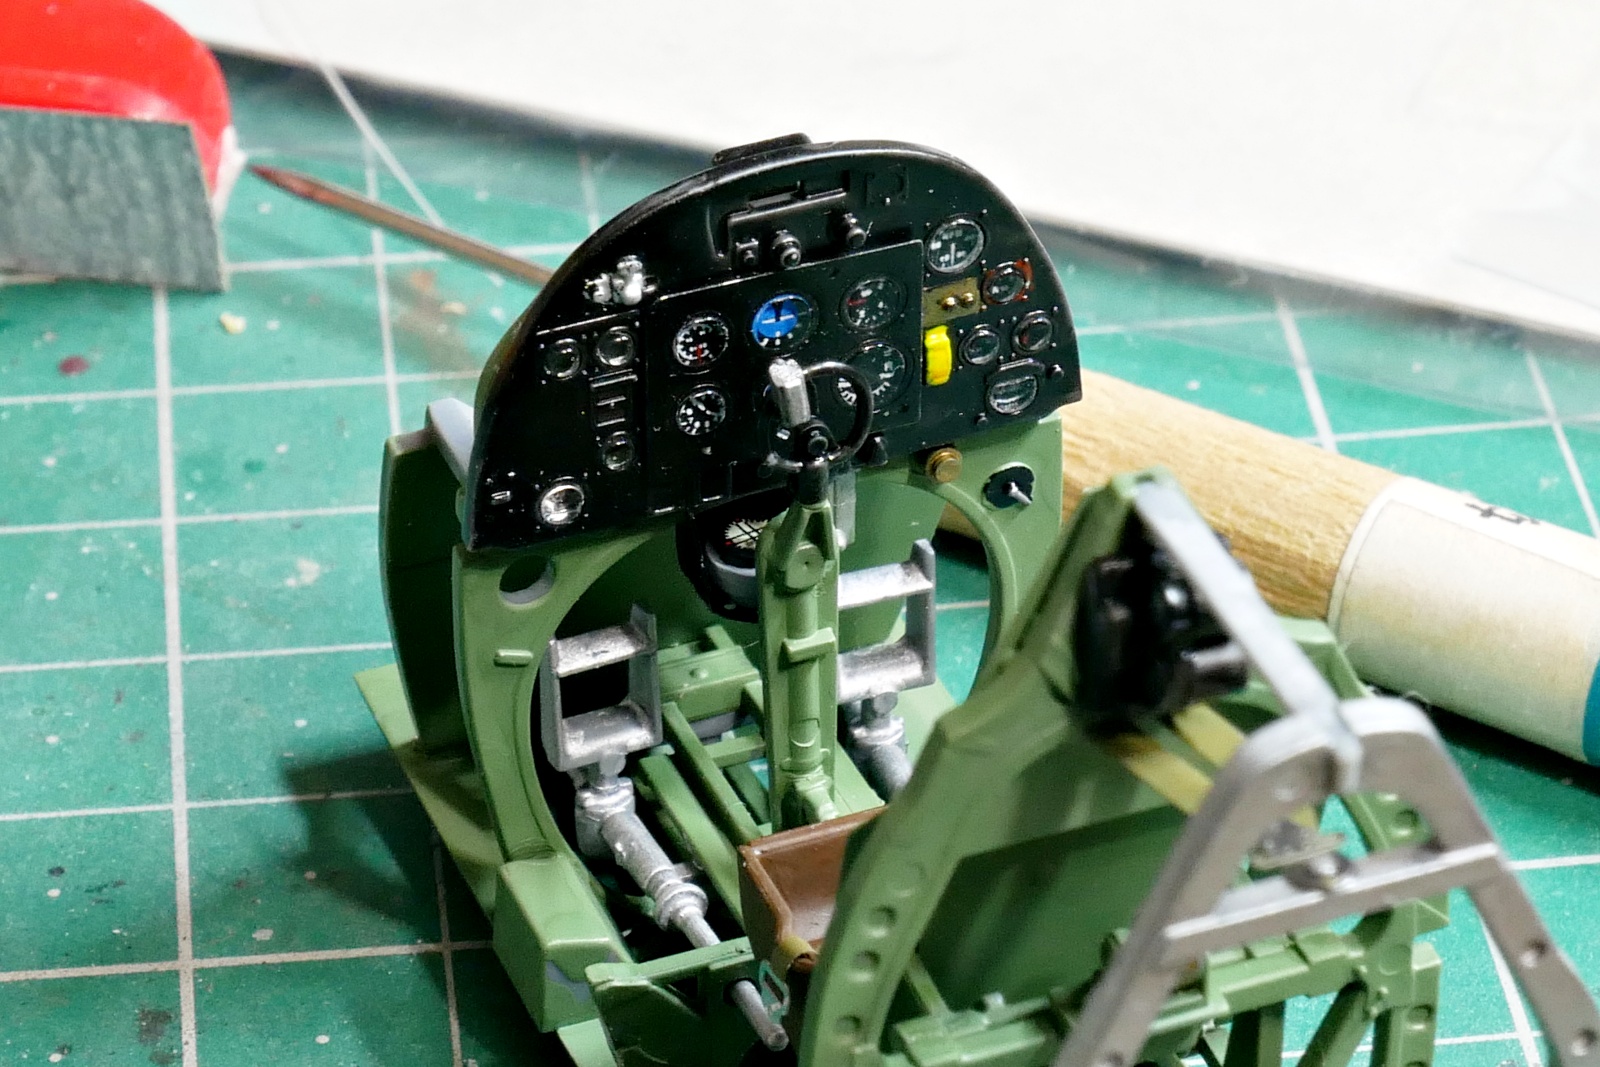
I took a closer look at the instrument panel before I built the cockpit into the aircraft.
(2025/06/08)
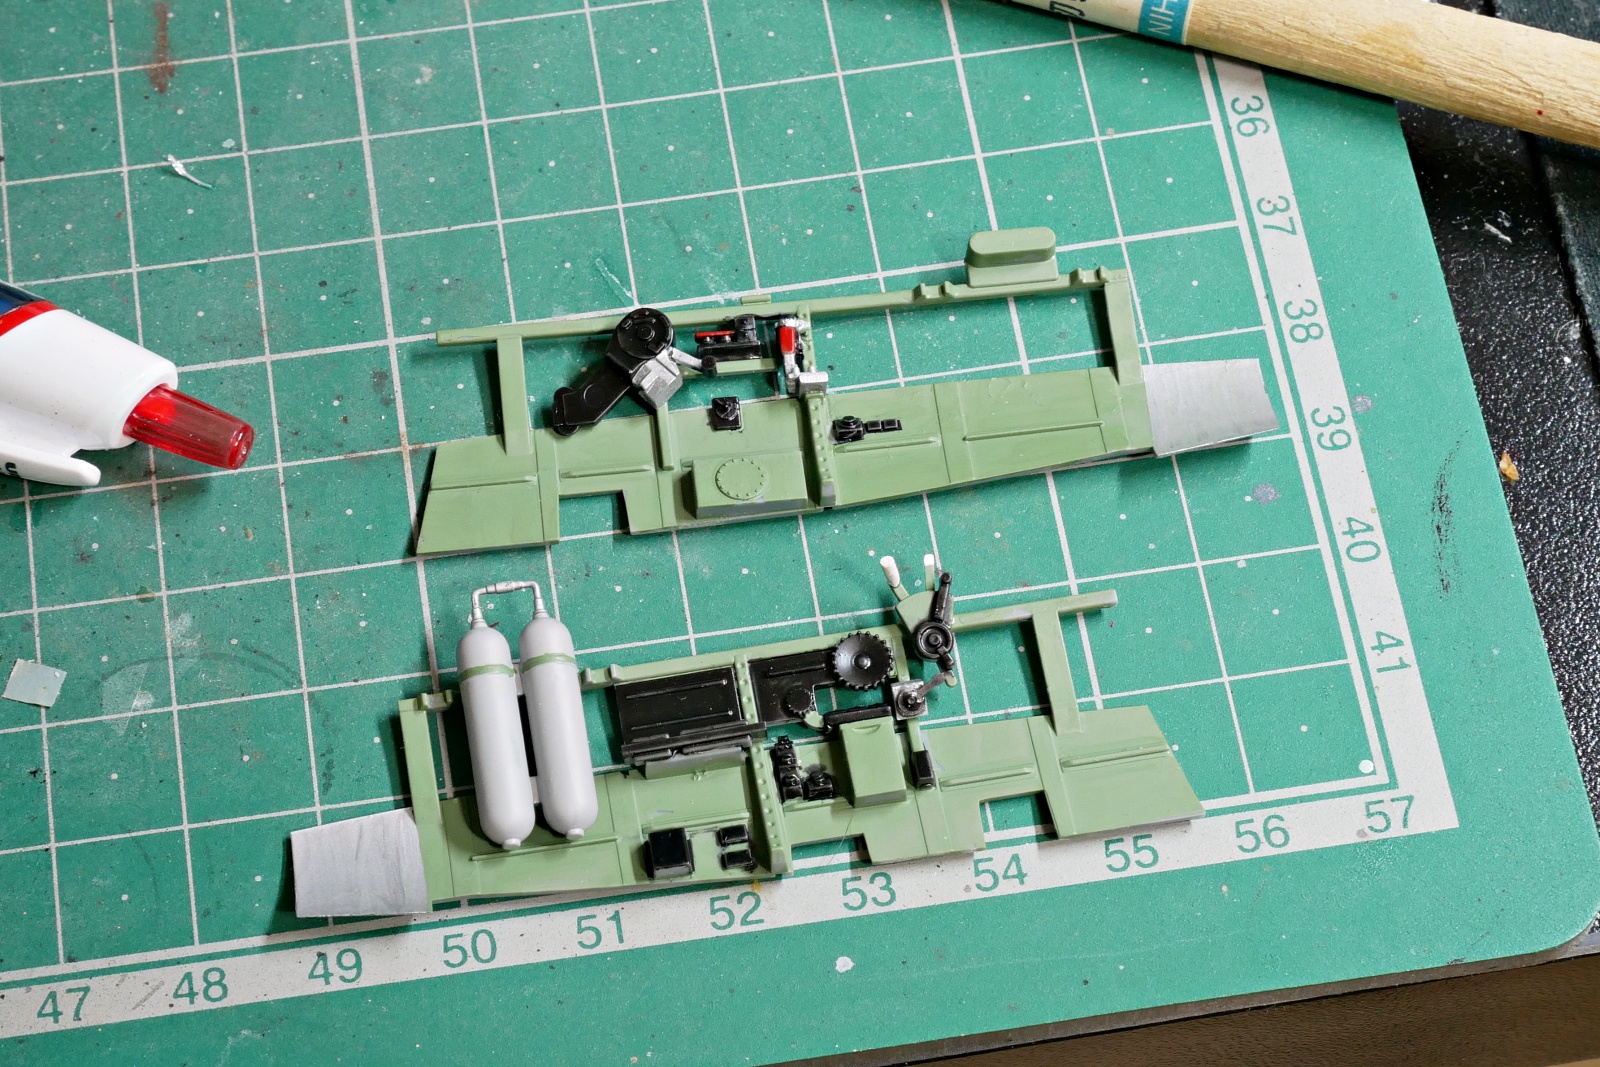
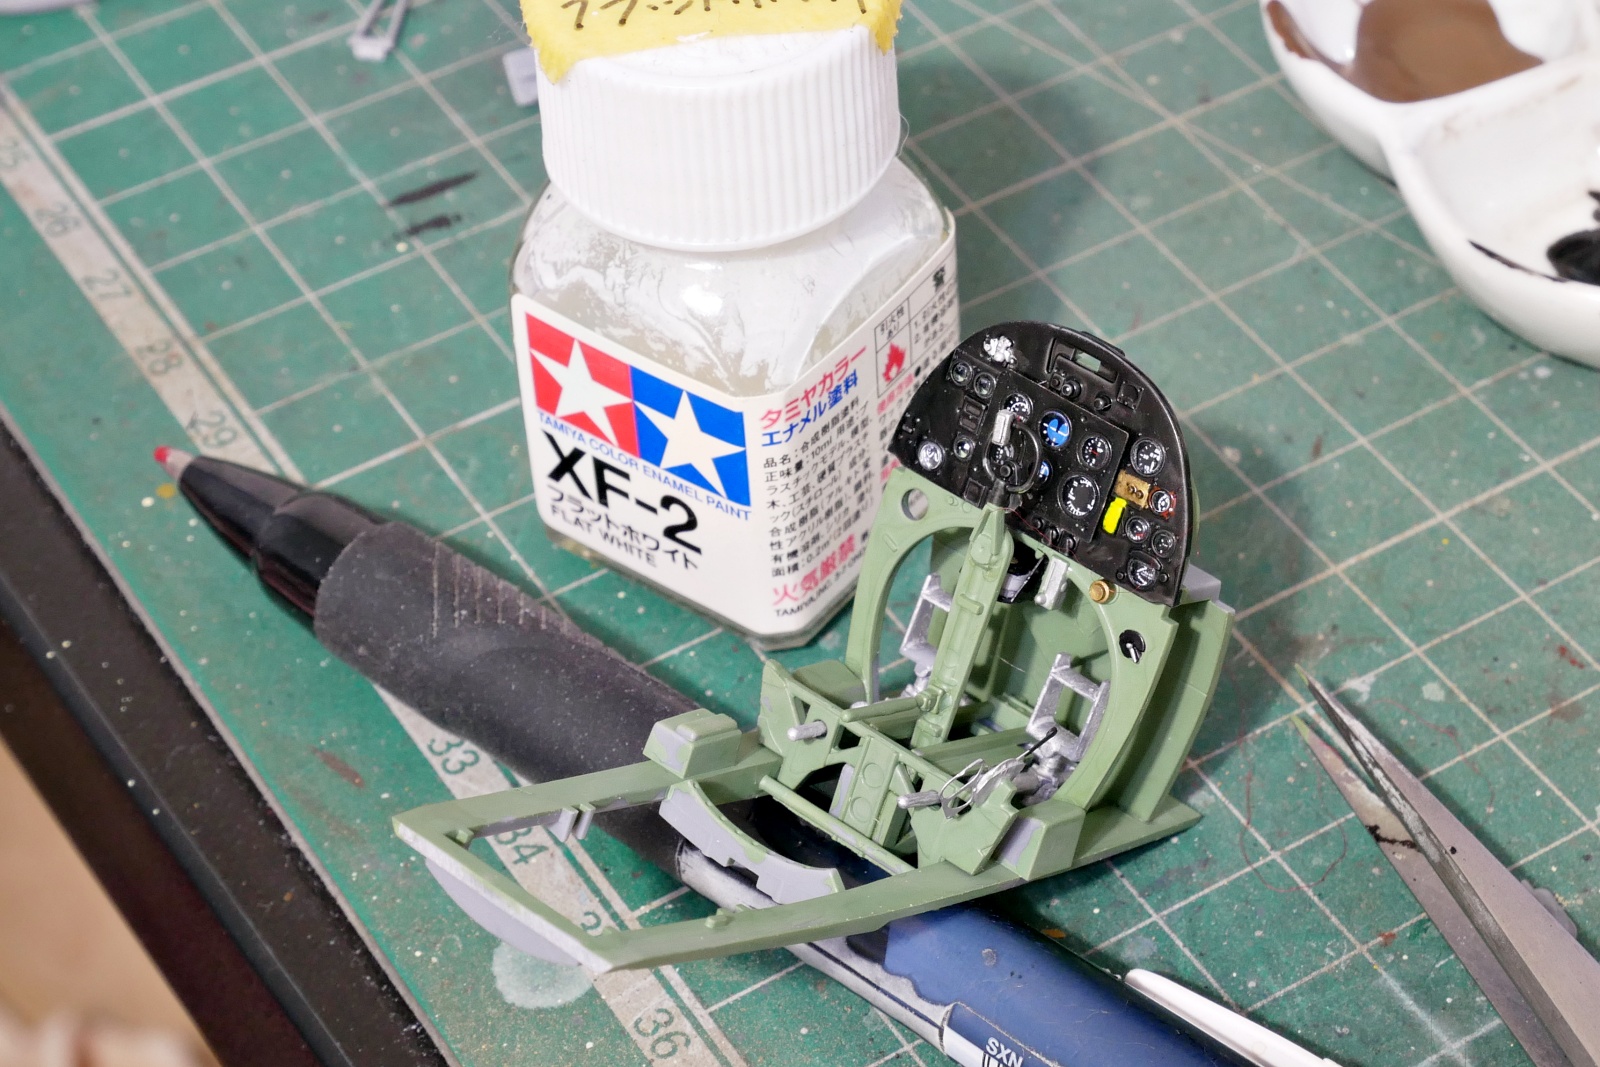
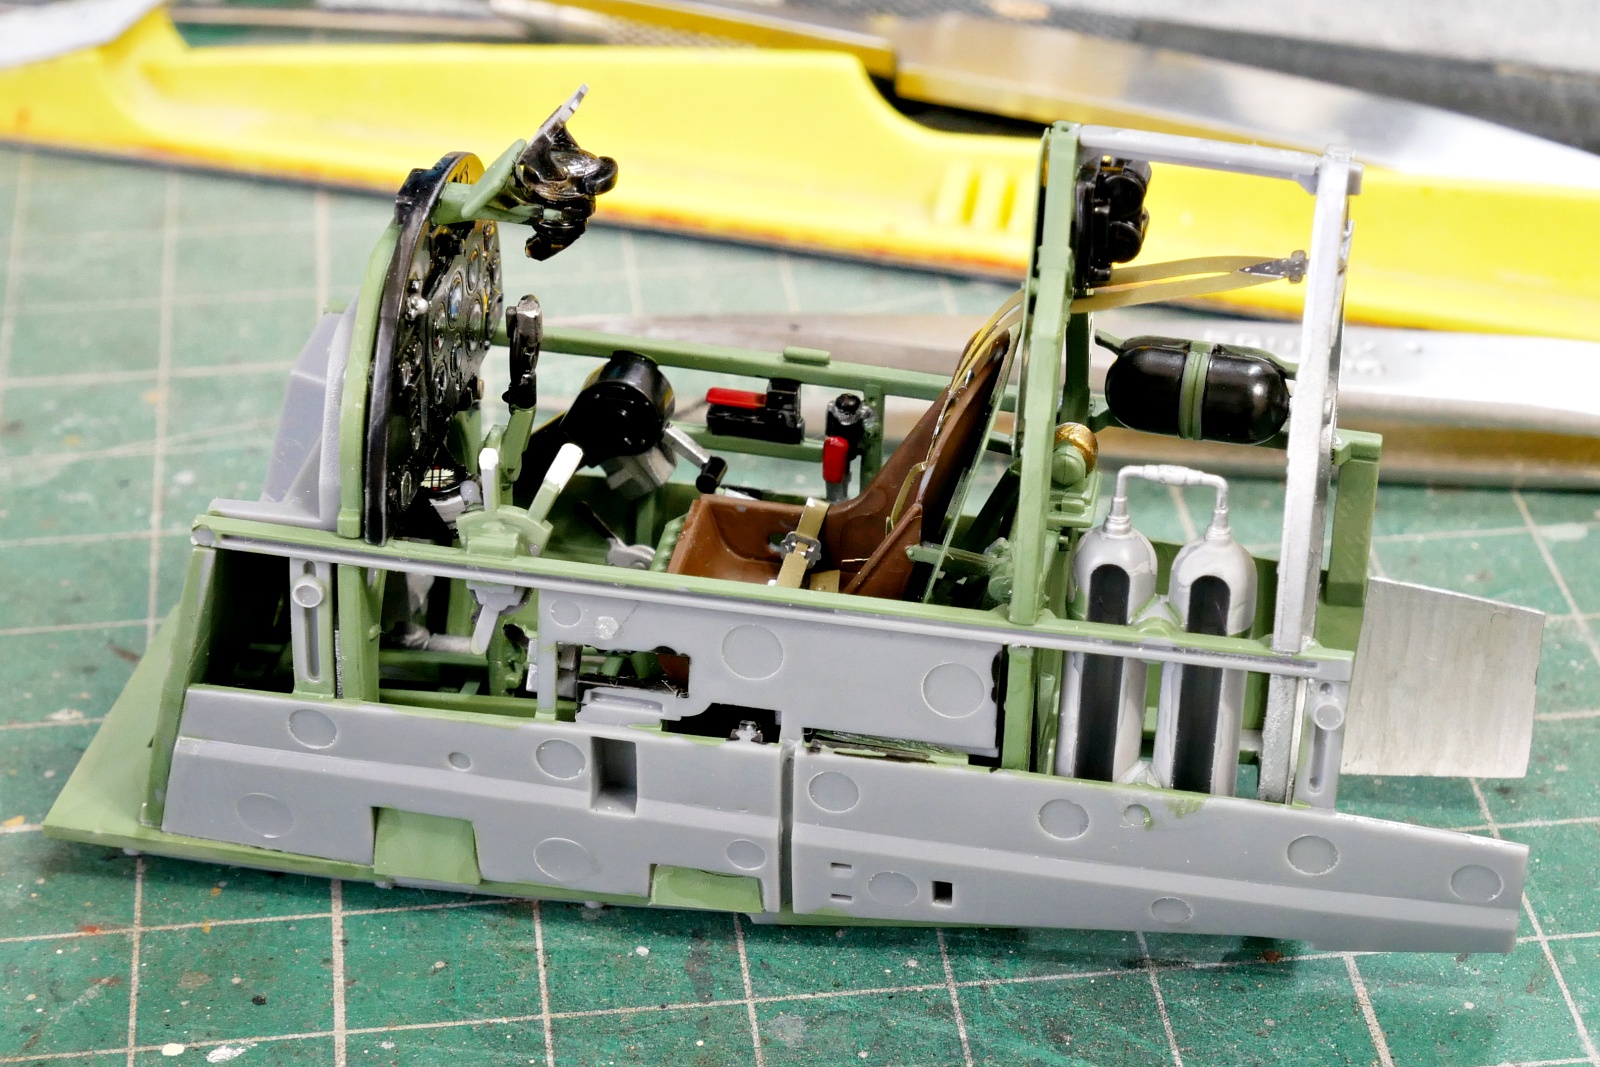
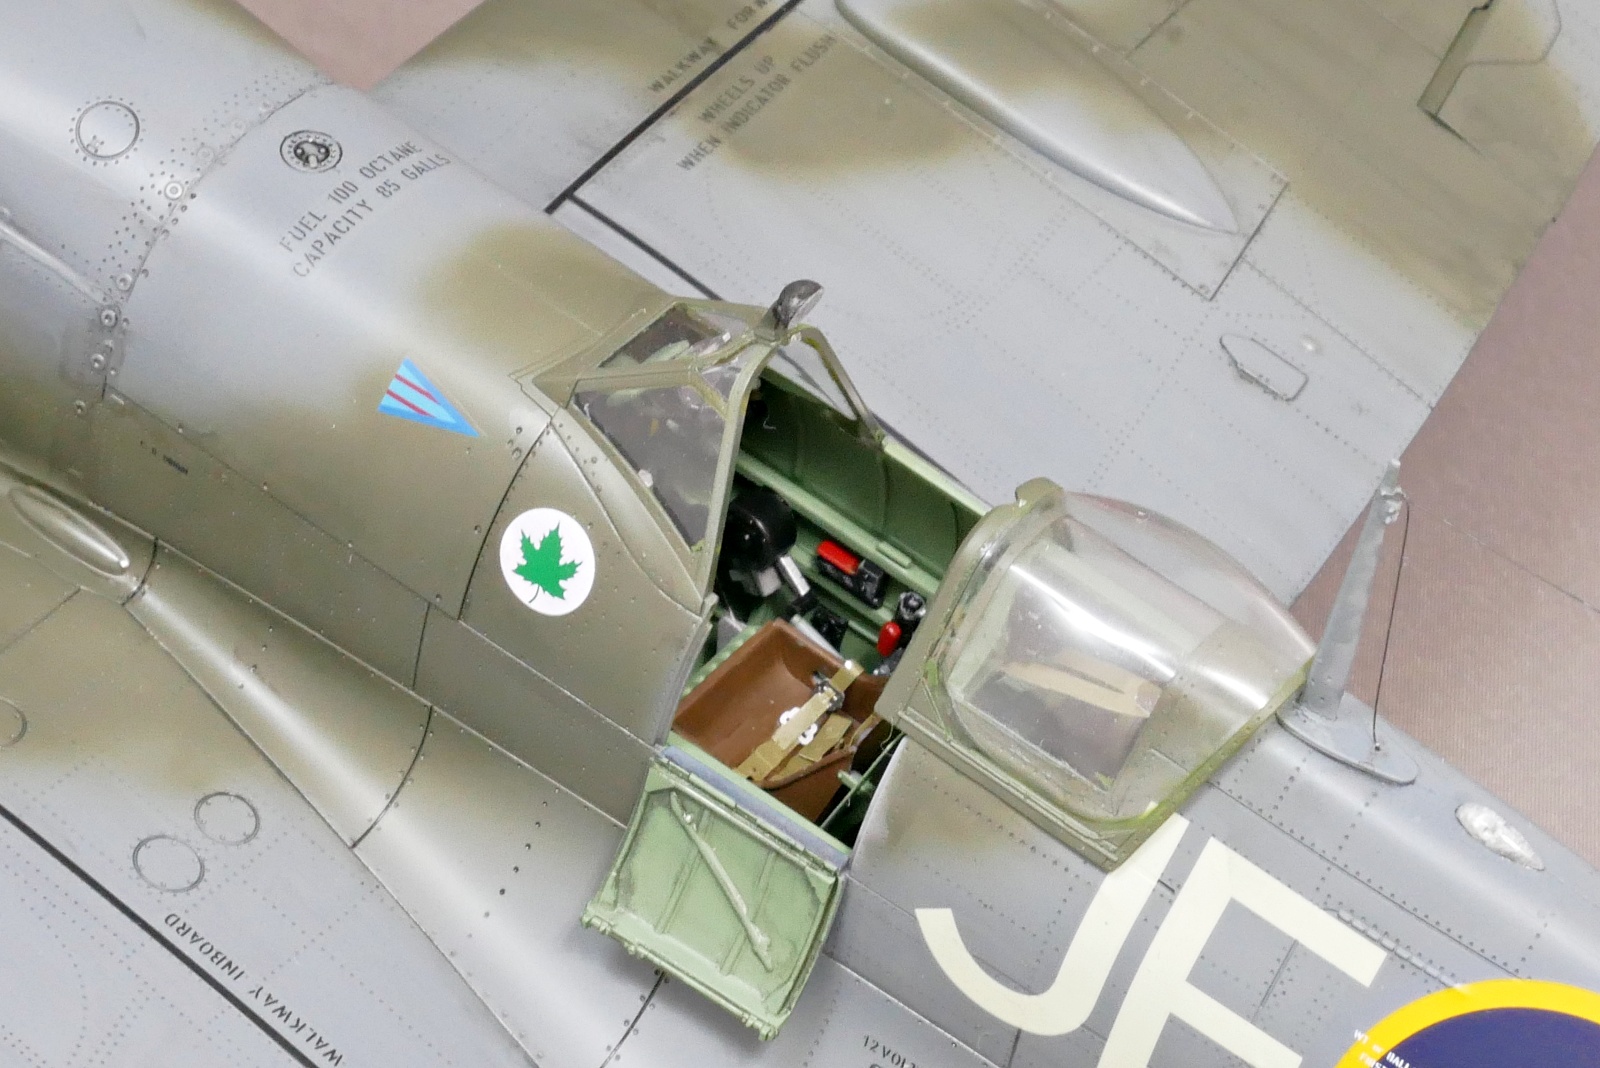
Various parts such as oxygen tanks and others are attached to the left and right panels of the cockpit. This part was also done by brush painting.
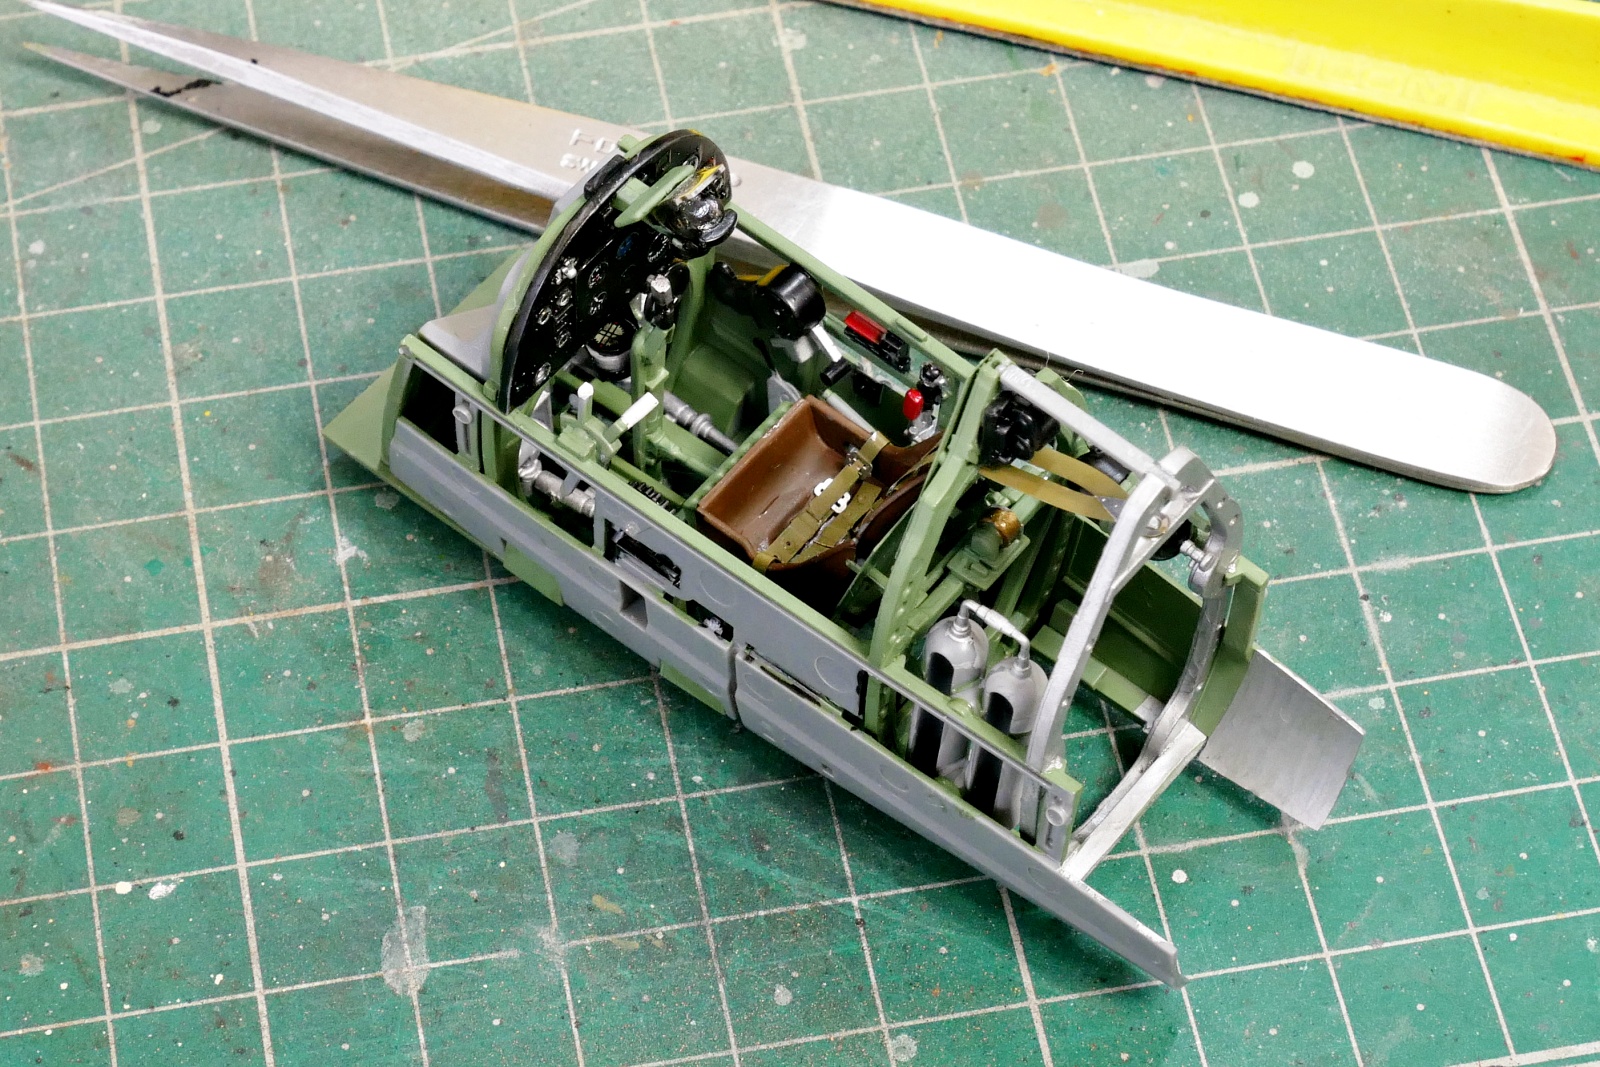
I finished gluing all the parts after painting. I think it shows the jumbled feeling in the cockpit well. It’s amazing how much information this kit has, because even at 1/48 scale, it’s easily assembled without any additional parts.
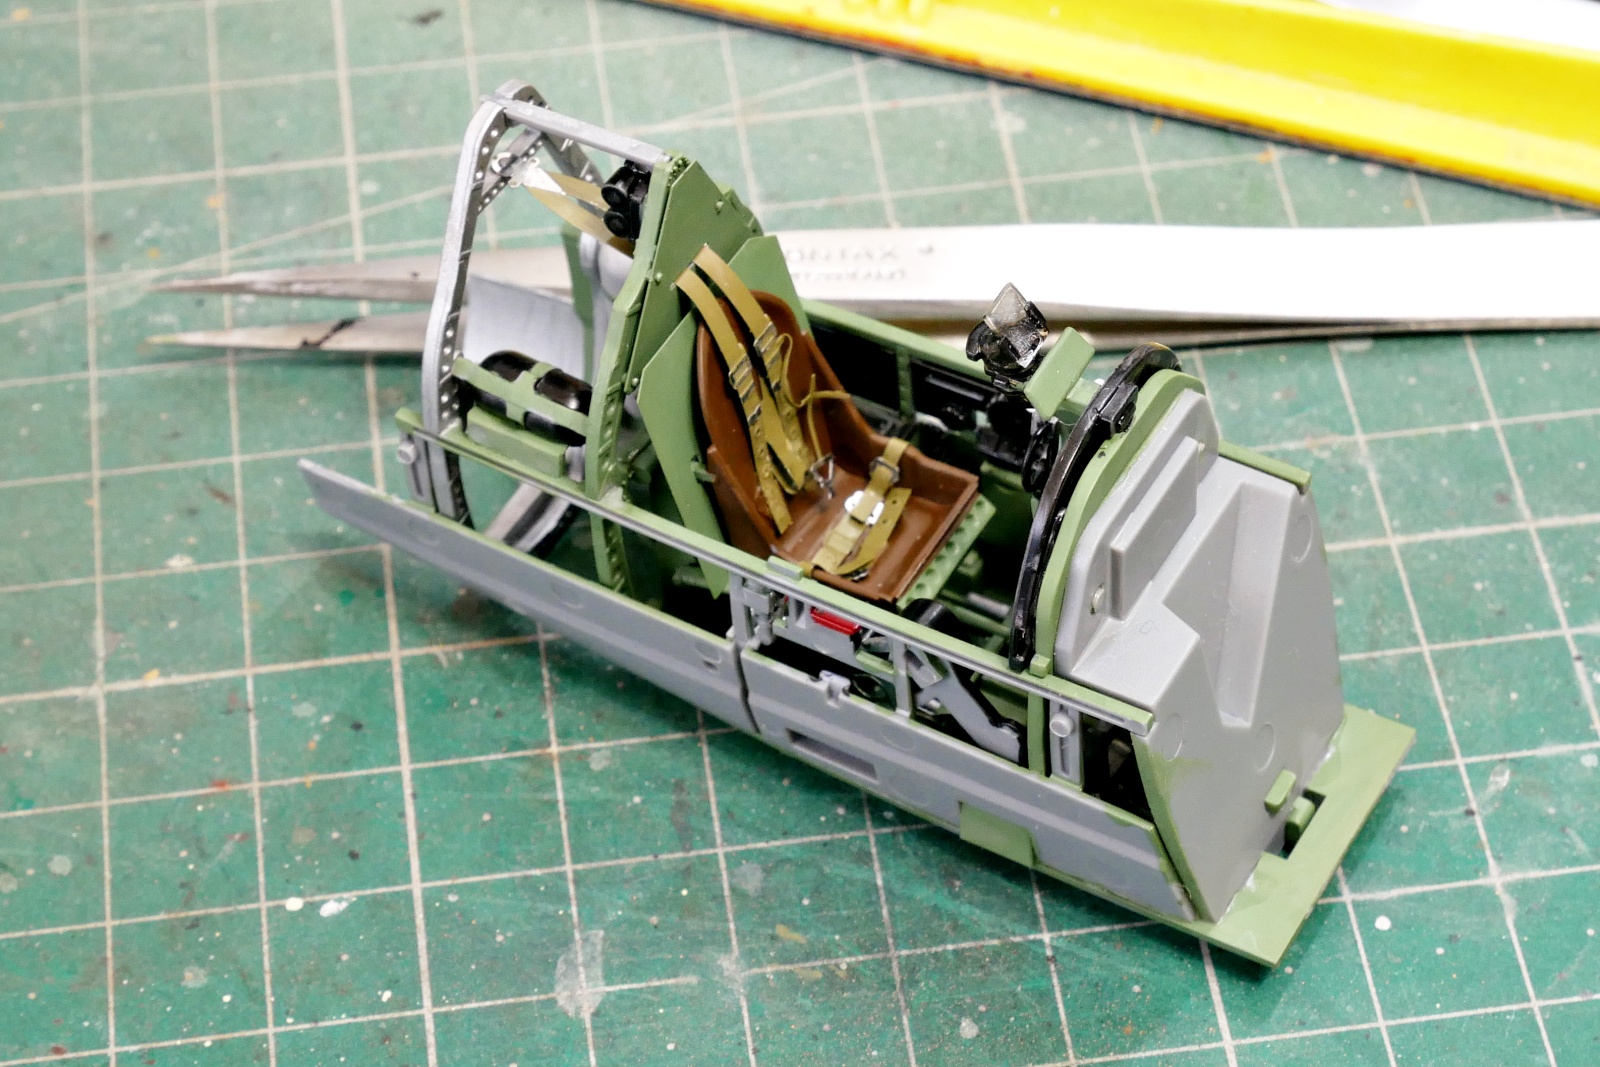
The canopy will be open this time, and the seat belt is an important detail that tightens the atmosphere of the cockpit, so I carefully assembled and painted it. The sight also uses clear parts, so I think it emphasizes the realistic element of a fighter.
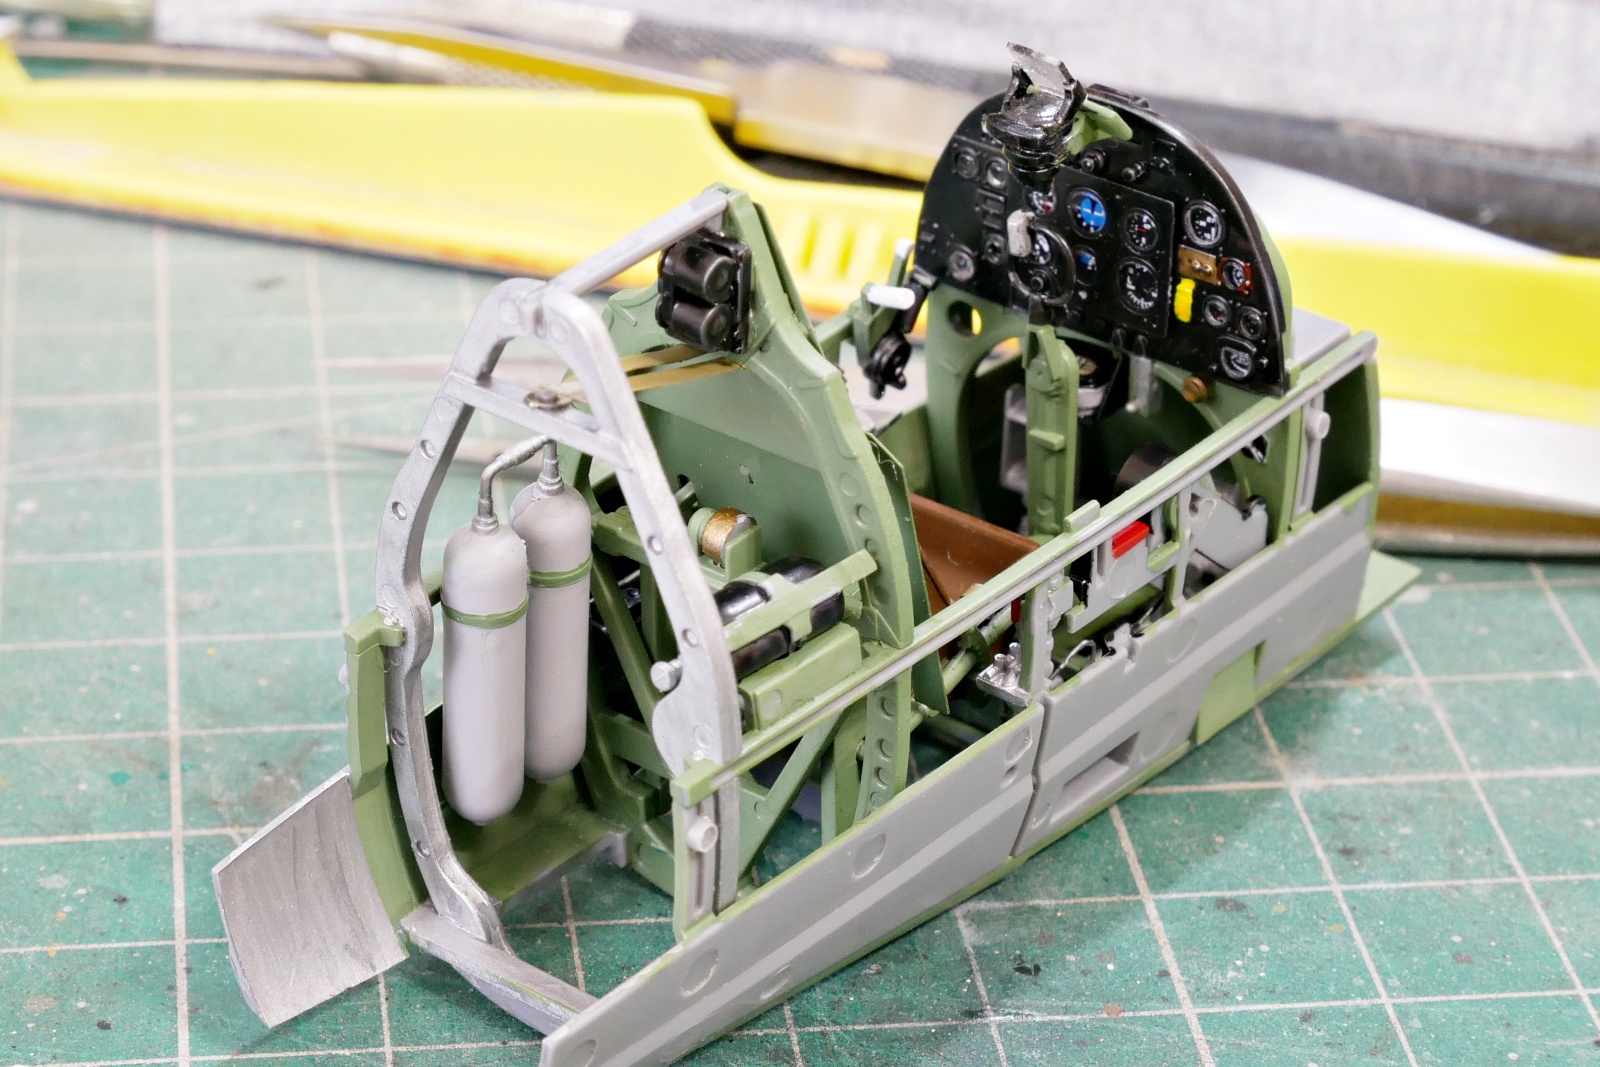
Thanks to the beautiful decals, the needles and signs are clearly drawn. I think they are horizontal gears, speedmeters and compasses.
I am hesitant to get it dirty by weathering because I finished it beautifully.
(2025/06/11)
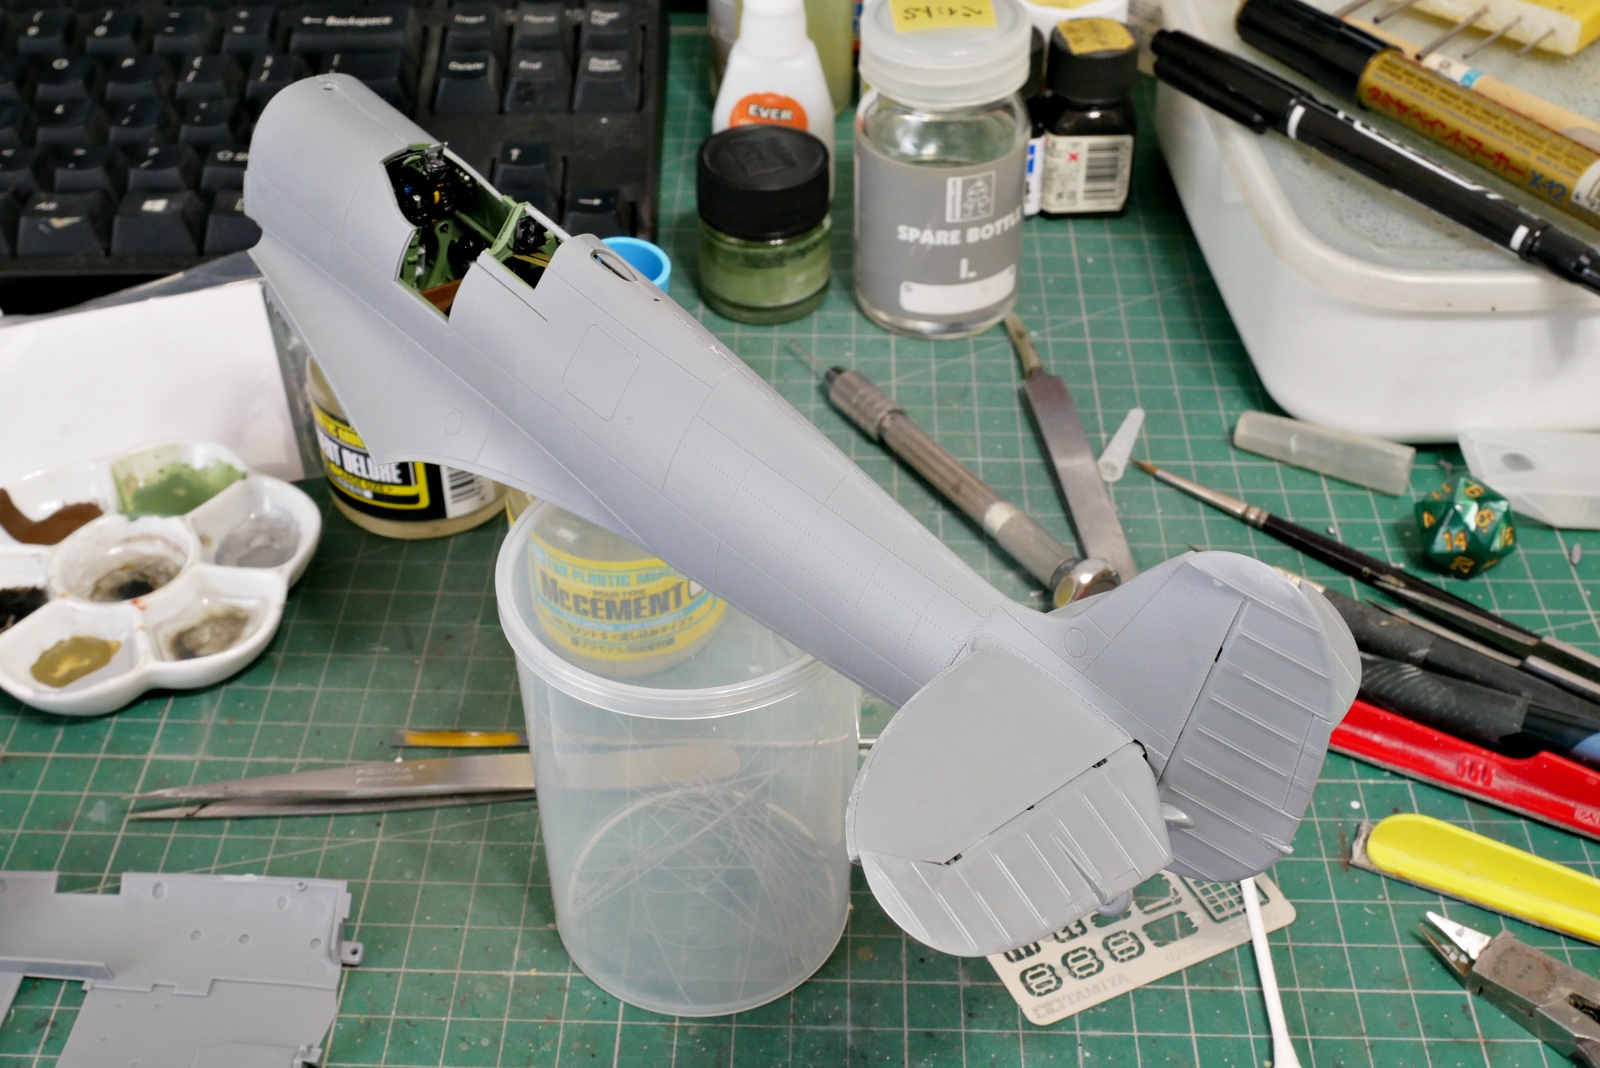
I think it’s time to start assembling the fuselage. Both vertical and horizontal stabilizers move. The assembly process was complicated, like putting metal parts inside the parts.

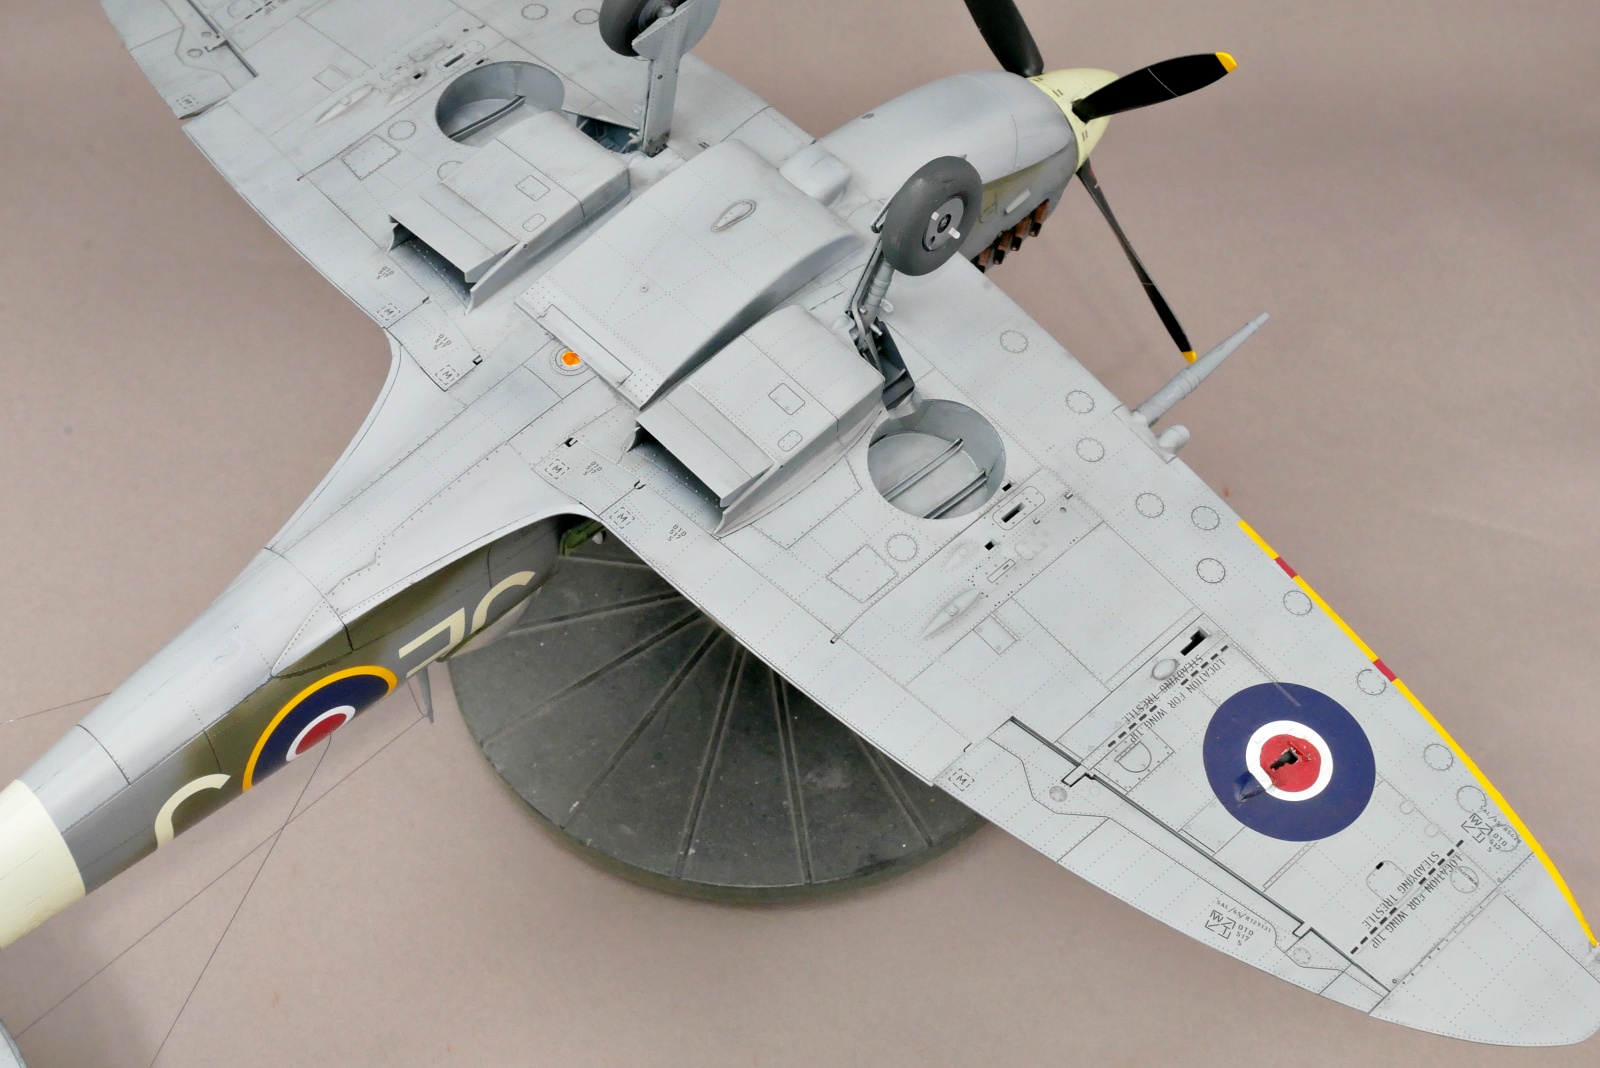
When assembling the main wing, it is not just to attach the front and back sides, but to attach the front and back parts after installing many parts of the main wing landing gear compartment. It seems that there are many delicate parts.
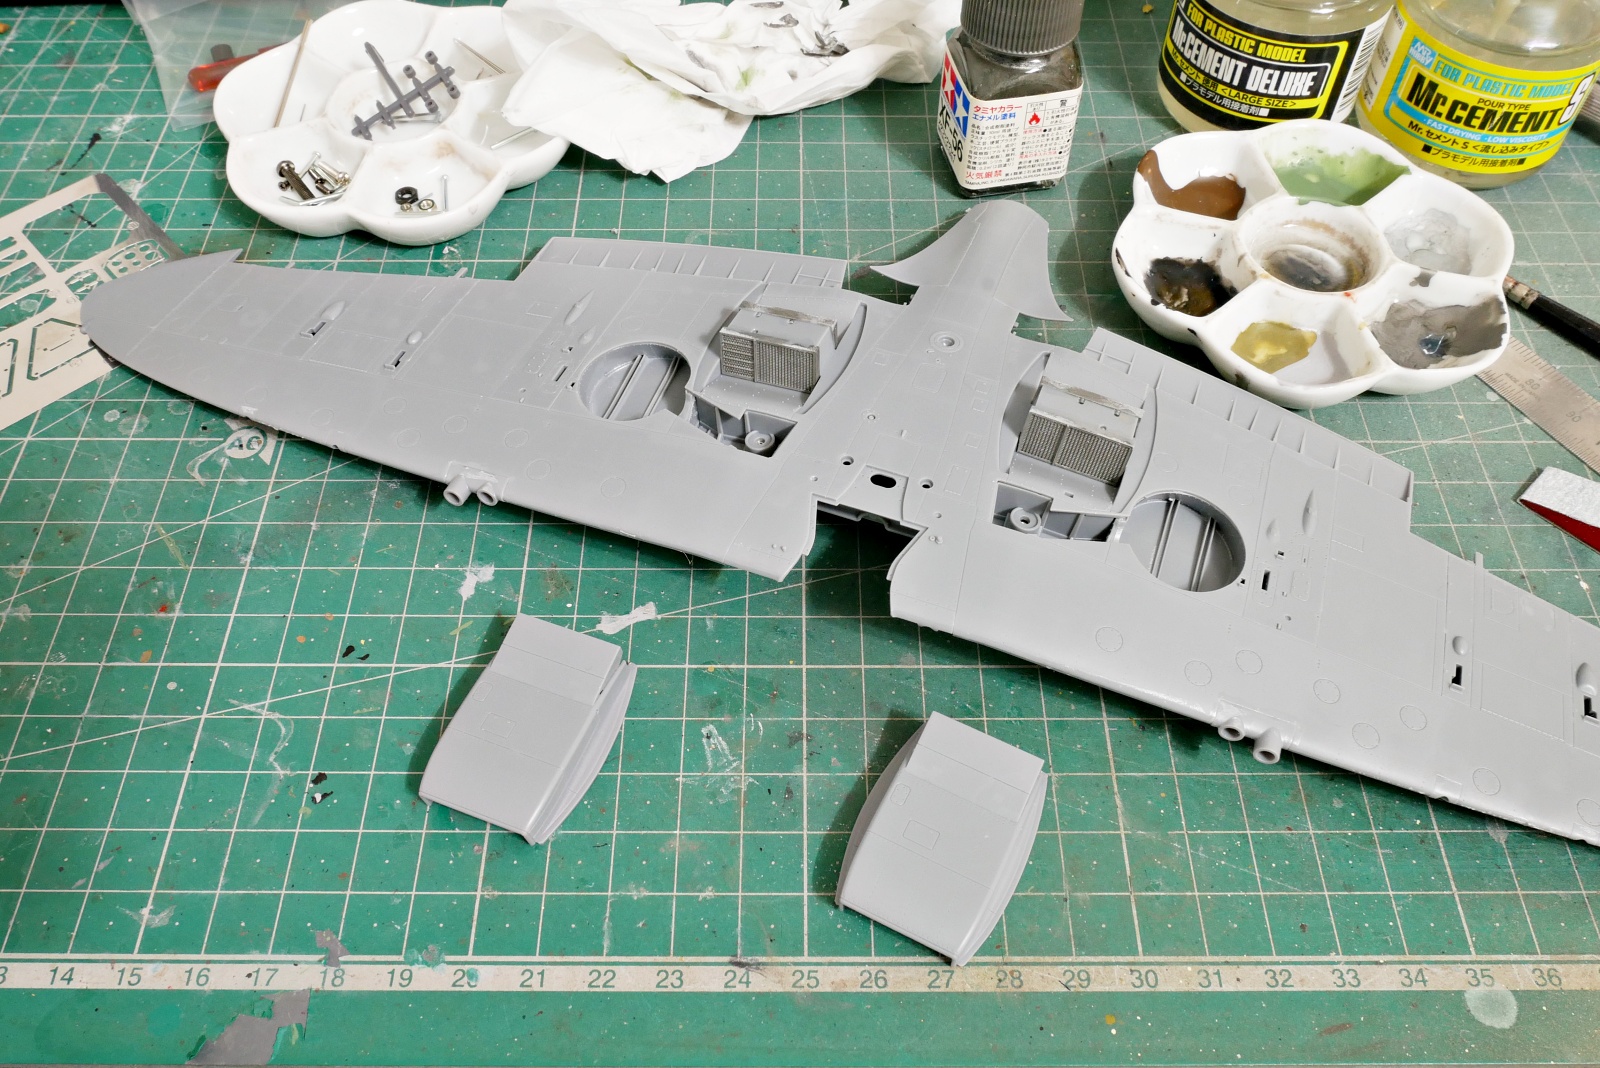
The main wing flap is also equipped with many moving metal parts. It’s pretty tough.

The assembly of the aircraft has finished. I don’t know if it’s going well, but it’s coming into shape.
In addition to the plastic parts and etched parts, there are thin metal pins, screws, nuts, shafts, and other fine items of various materials, and if I don’t take care not to lose them, I might lose them somewhere soon. There are quite a lot of moving gimmicks in spite of the fact that it is a plastic model.
(2025/06/13)

I’m assembling the engine. This is a photo that is quite finished. I built quite a lot of parts to get to this point.
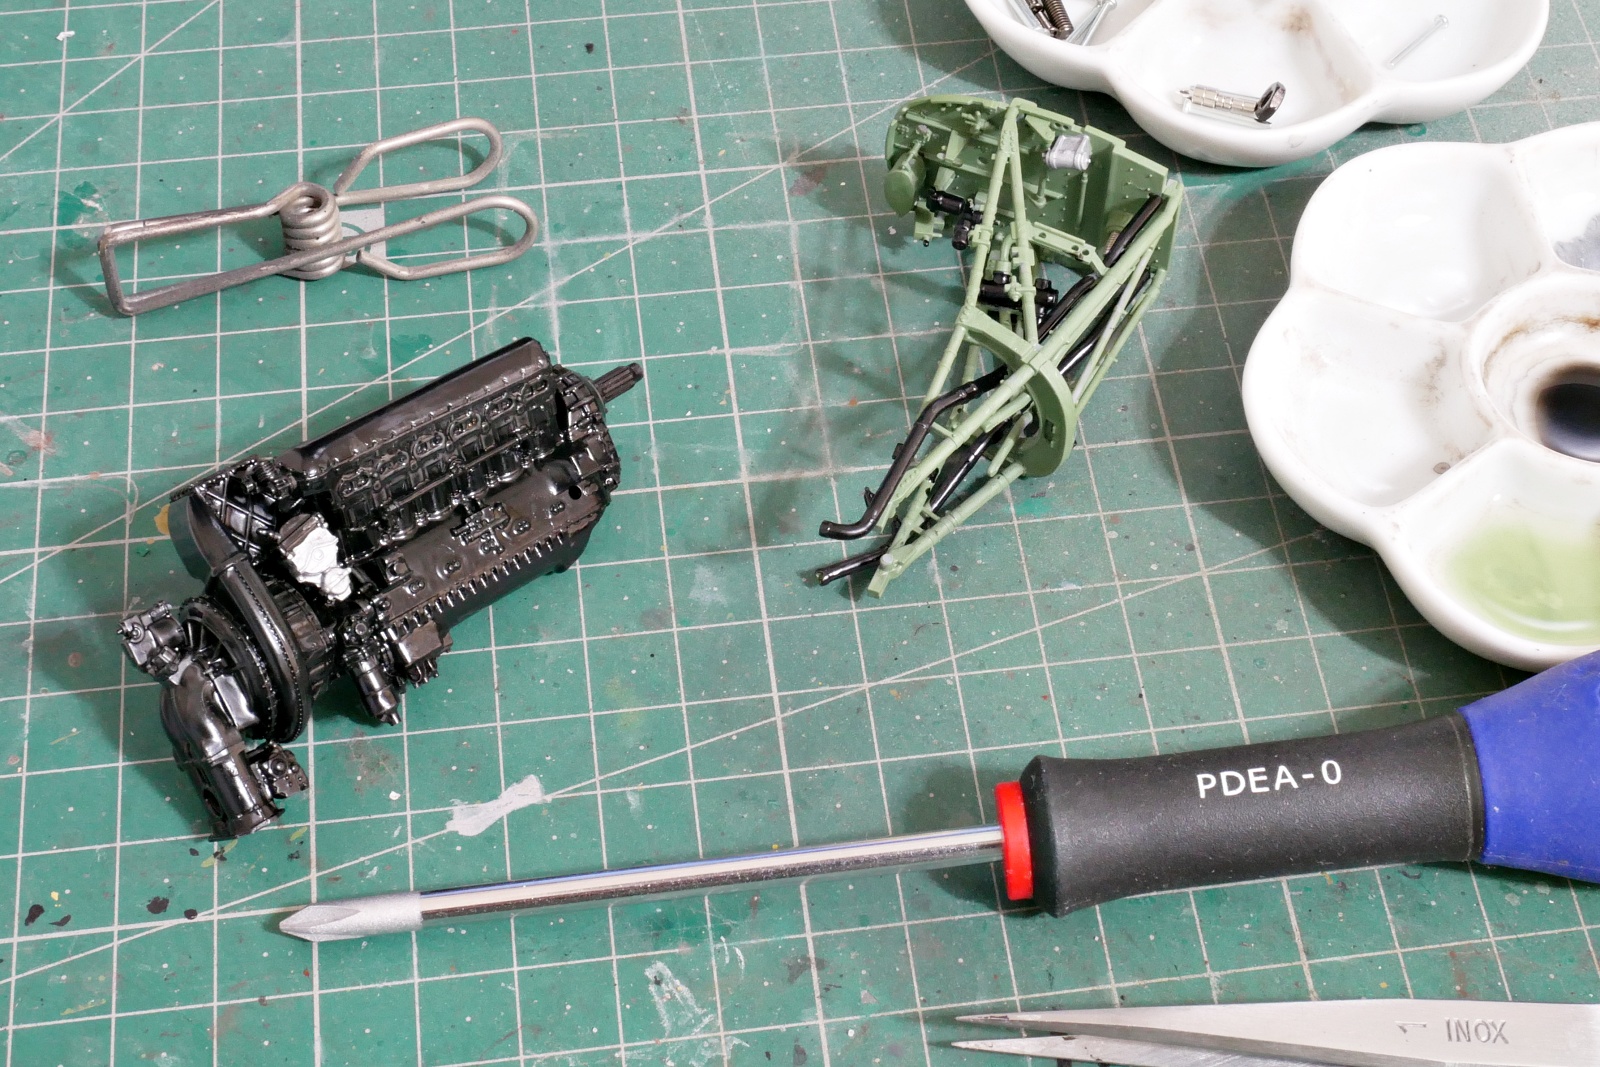
In the engine part, I painted the fine parts little by little. The engine and the frame surrounding the engine are slowly painted and assembled. Enamel paint is quite useful this time. It smells more than water-based paint, but it’s no problem compared to lacquer-based paint. It smells the same as oil painting, so it doesn’t feel strange at all. Even so, I think it’s better to ventilate frequently.
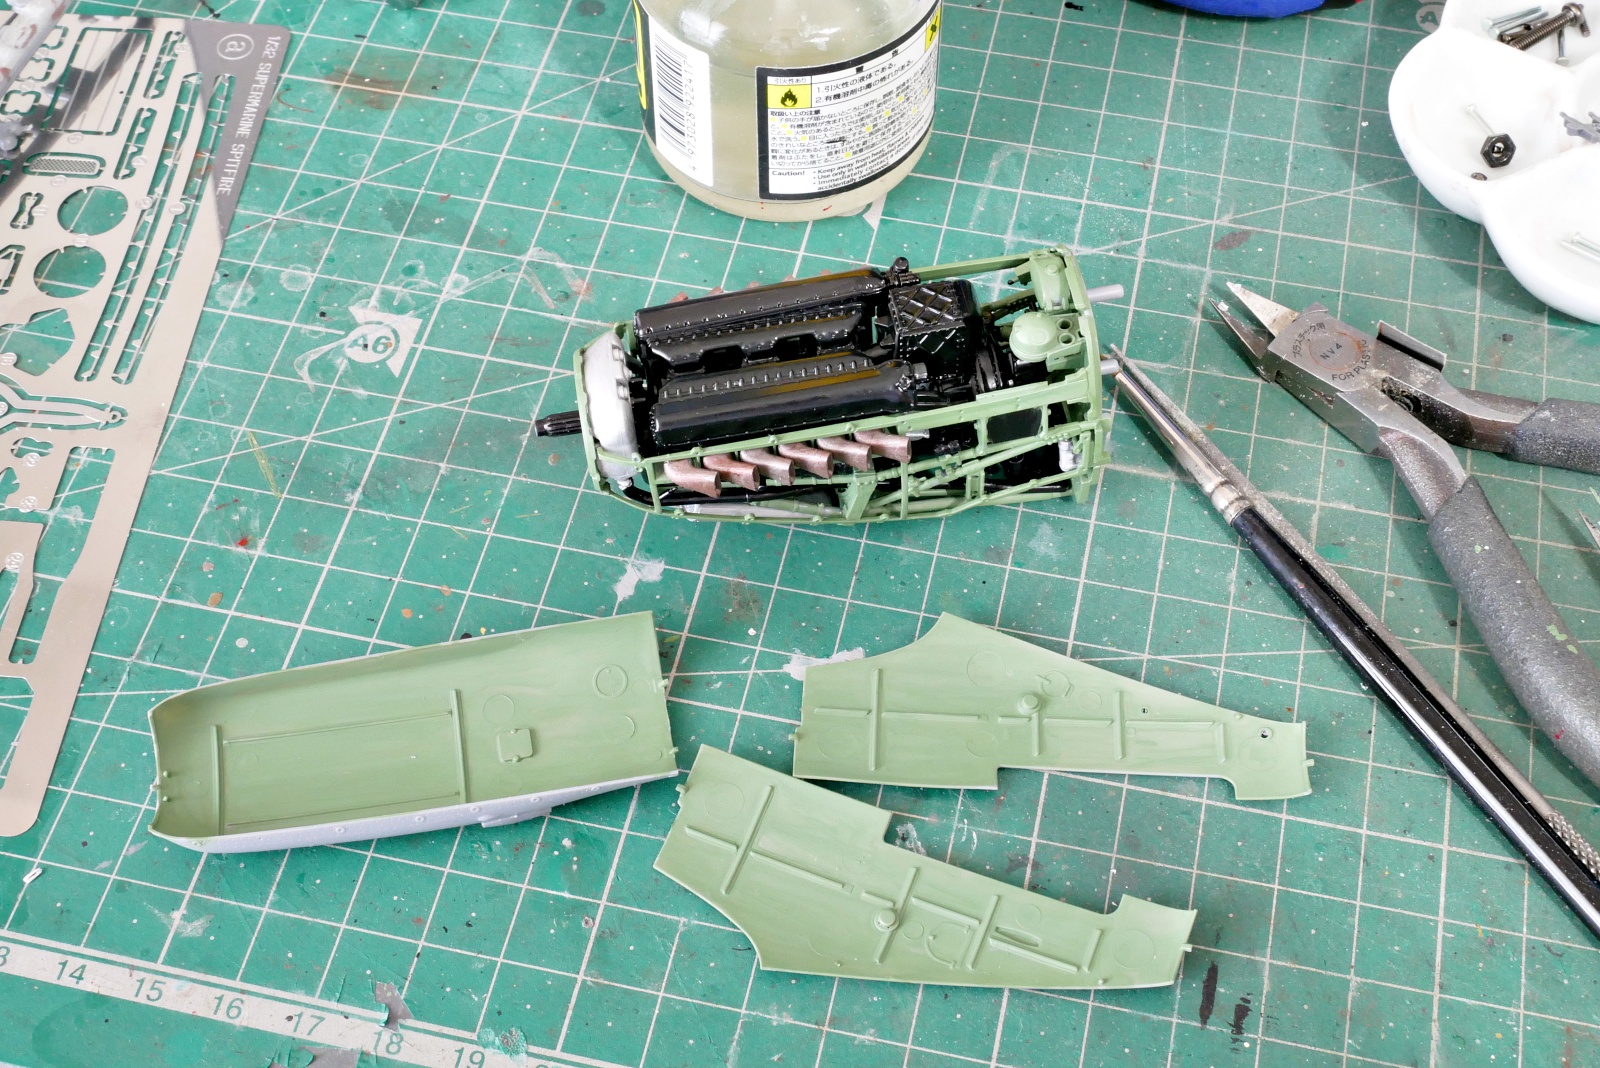
On the way, there was a work to attach a mysterious metal plate to the frame. This was the metal to attach to the engine cowl later with a magnet. It’s hard to decide how much to assemble before painting the outside of the aircraft. Does this fit right at the end? I’m worried that I’ll be able to paint the outside of the aircraft properly, or that the magnets might come off while masking.
I wonder, I think it’s time to get into the whole painting. I’m not sure what to do with the procedure. It’s different from the process I always like to use, which is to assemble it all at once and then paint it slowly. It’s like I started to take shape when I realized it while I was busy here and there.
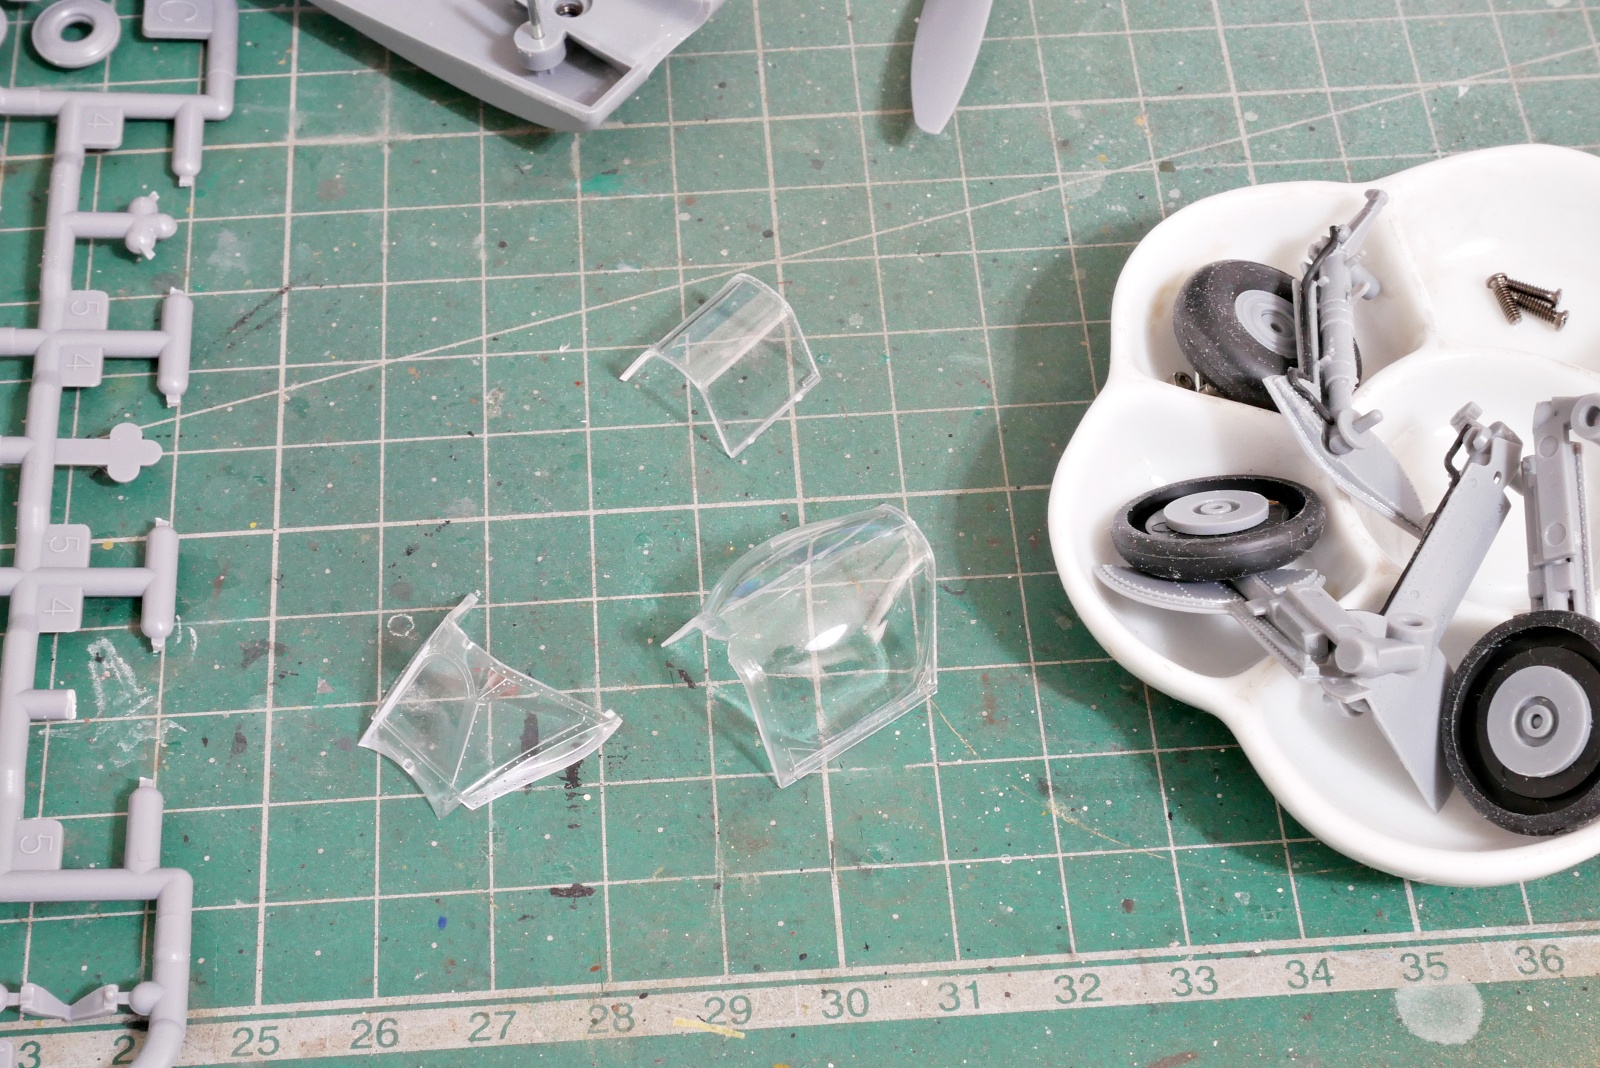
The canopy has only three clear parts and not many frames. But there is a parting line in the center of the main canopy part, so I have to remove it. The main canopy is a complex curved surface if you look closely. It’s been a long time since I made it with the canopy open, so I don’t really care, but the parts fit very well.
(2025/06/15)
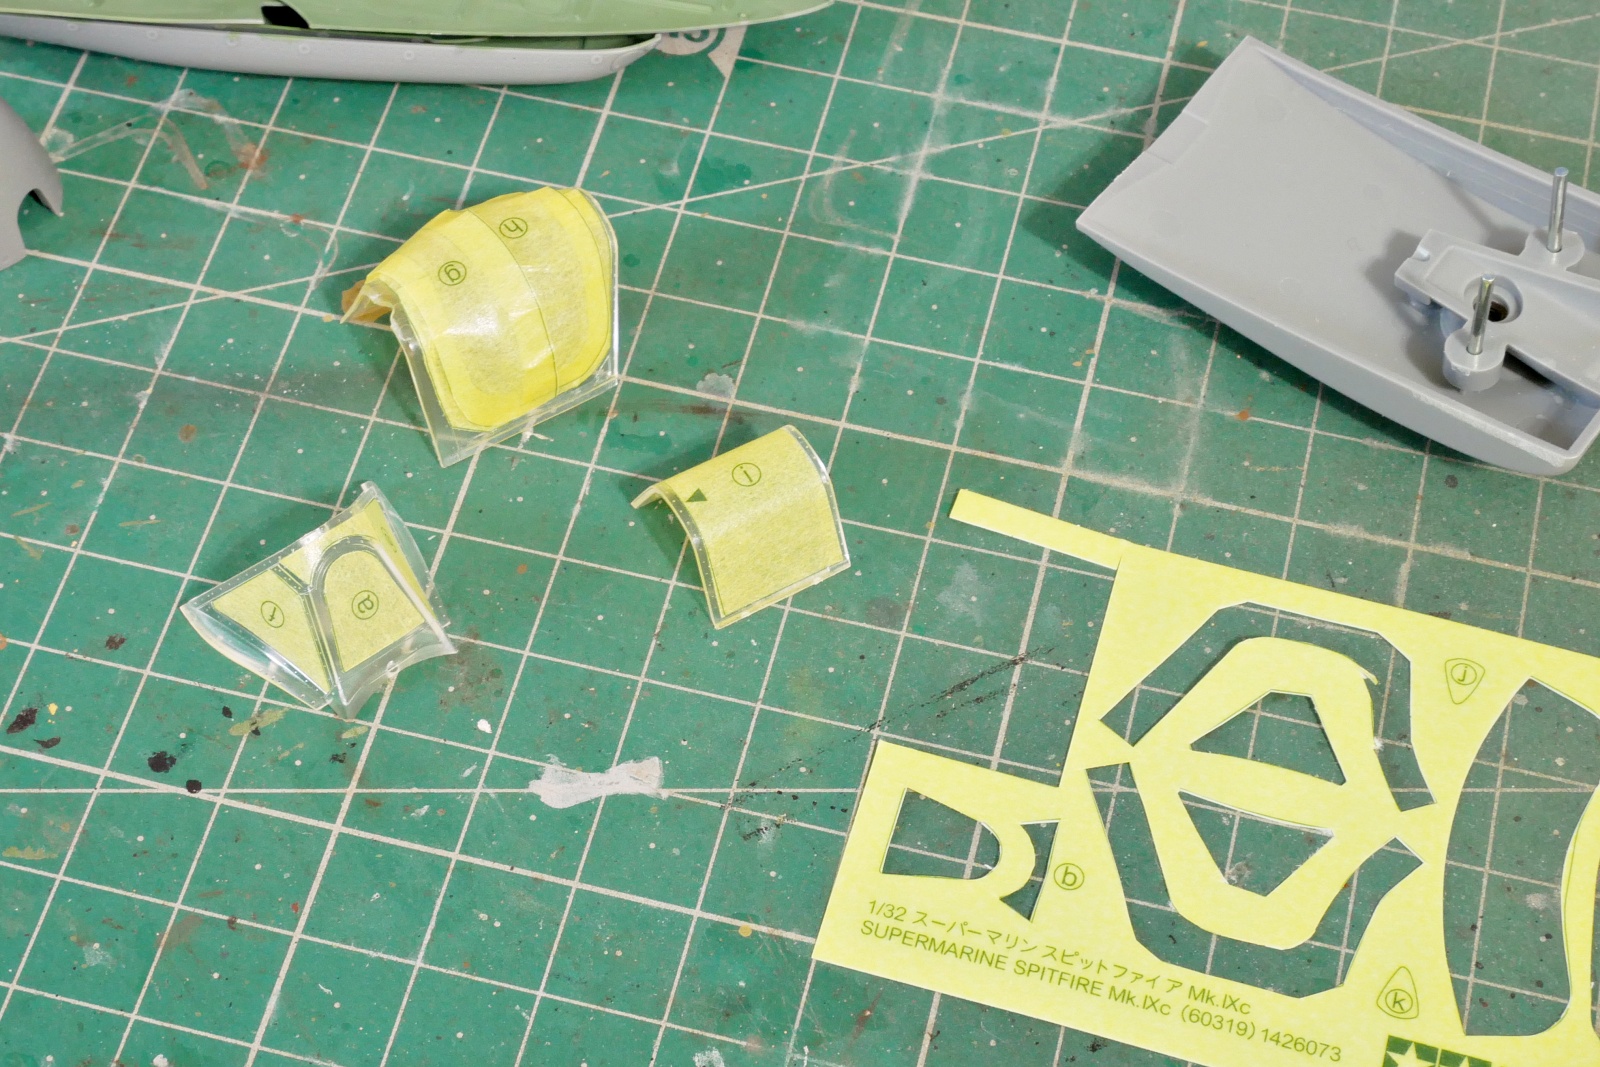
Tamiya airplane plastic models sometimes come with this kind of masking sheet, which is convenient. It’s just a cutting and pasting process, so we don’t have to pay much attention to the details.

Hmm, I think I’ve done something wrong. The engine cowl is divided into 4 parts, and after the engine is installed and the frame is bonded, the engine cowl does not fit neatly and there is a gap. It seems that it can be removed by holding it with a magnet, but what should I do? I mean, it’s gonna be difficult if I don’t glue and putty. I don’t know if it will work even with putty. It’s too bad that it was assembled so well. I painted the inside of the engine very carefully, but I want it to be as clean as possible with the engine cowl on, so I guess I have to fix the gaps. It was a little disappointing because I had done a lot of work including installing magnets. I thought I was stuck after all my efforts, but I’ll just go ahead. Normally, the engine cowl is tentatively assembled and the whole thing is adjusted. Or the frame fit is very good, but there must have been distortion, which I am not sure.
I fixed the gap with putty. Up until now, I’ve been working with fear and hesitation, but now I’m moving my hands without thinking much. Just finish it. I made it in a parked state, so I decided to glue the parts that can be removed on the way. I can choose a lot of options, but I can make whatever I want.
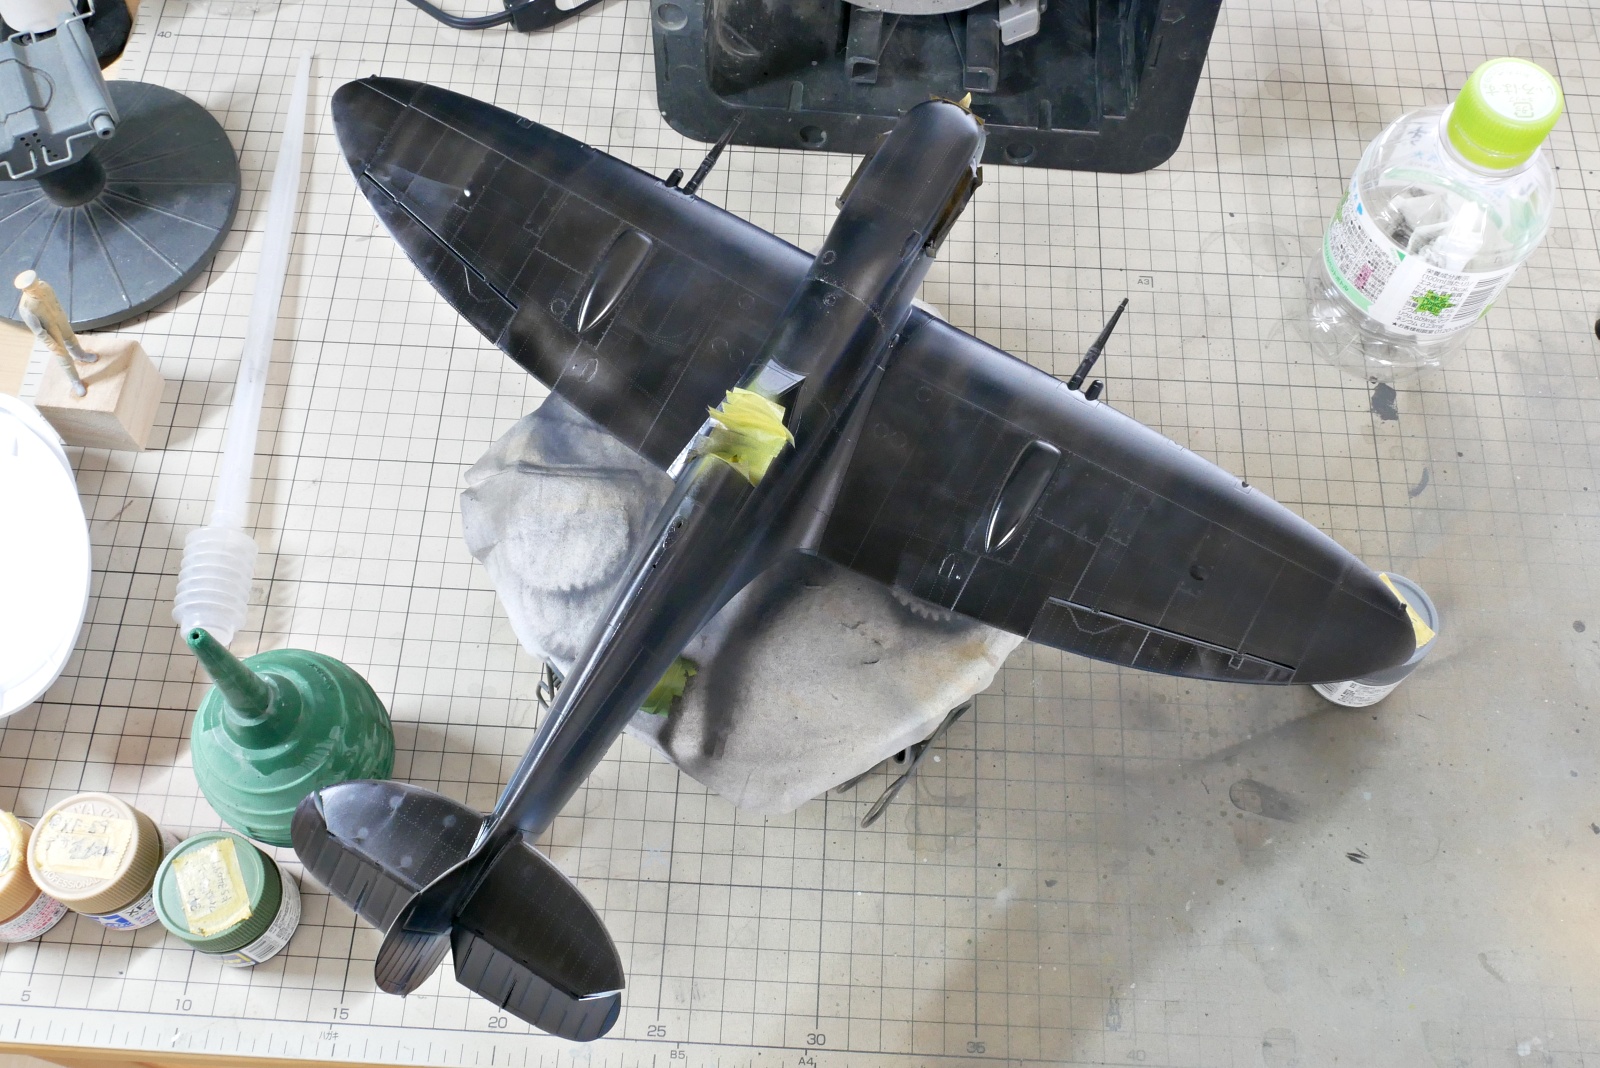
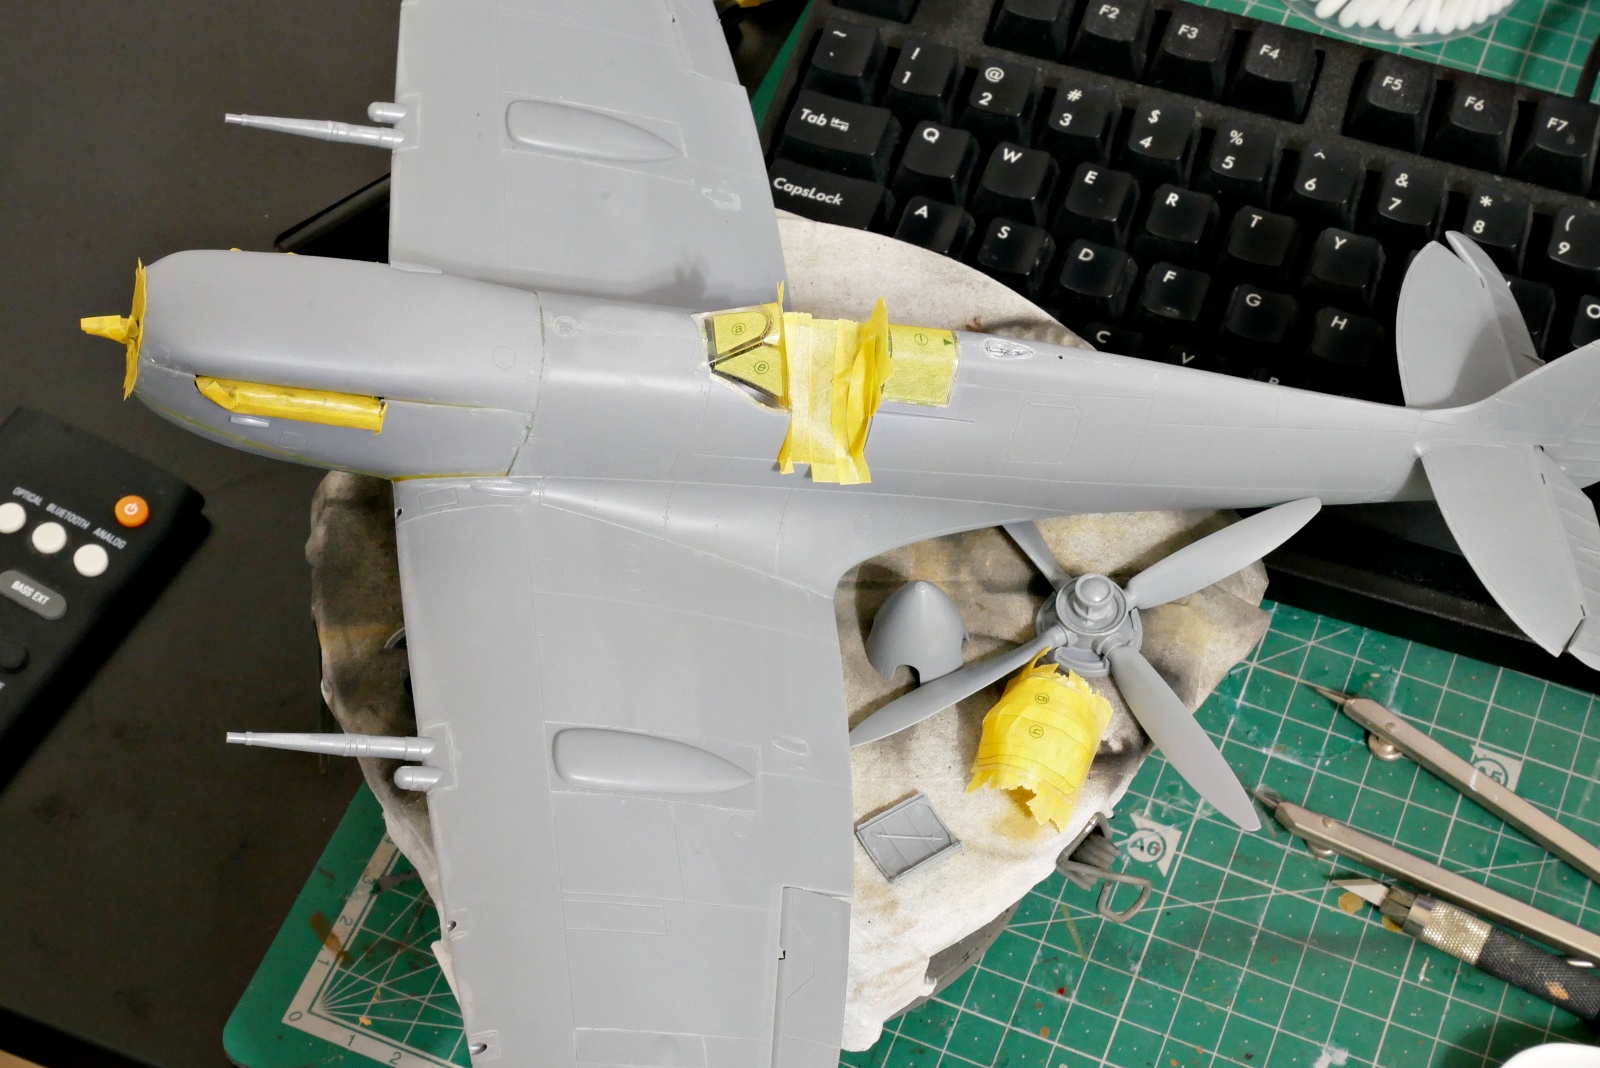
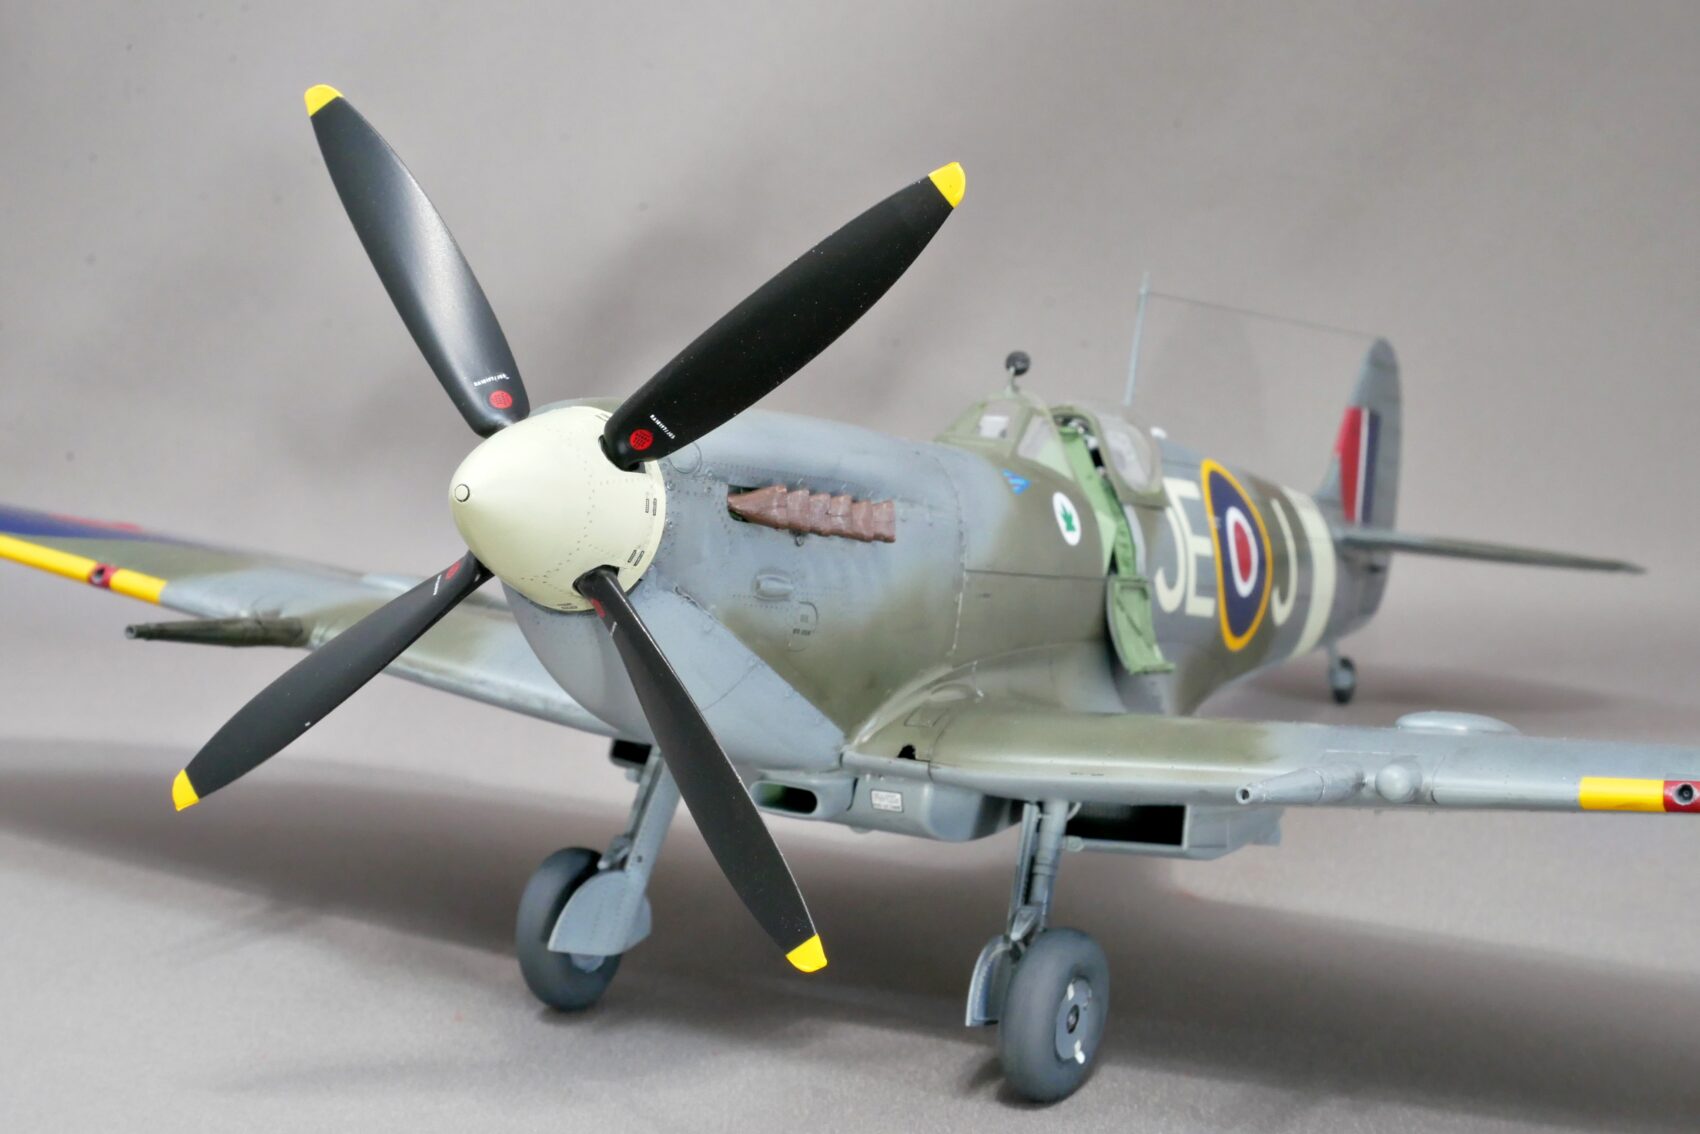
I roughly masked and airbrushed black as a primer. I did the masking, but I think it’s better to repaint the nose exhaust tubes.
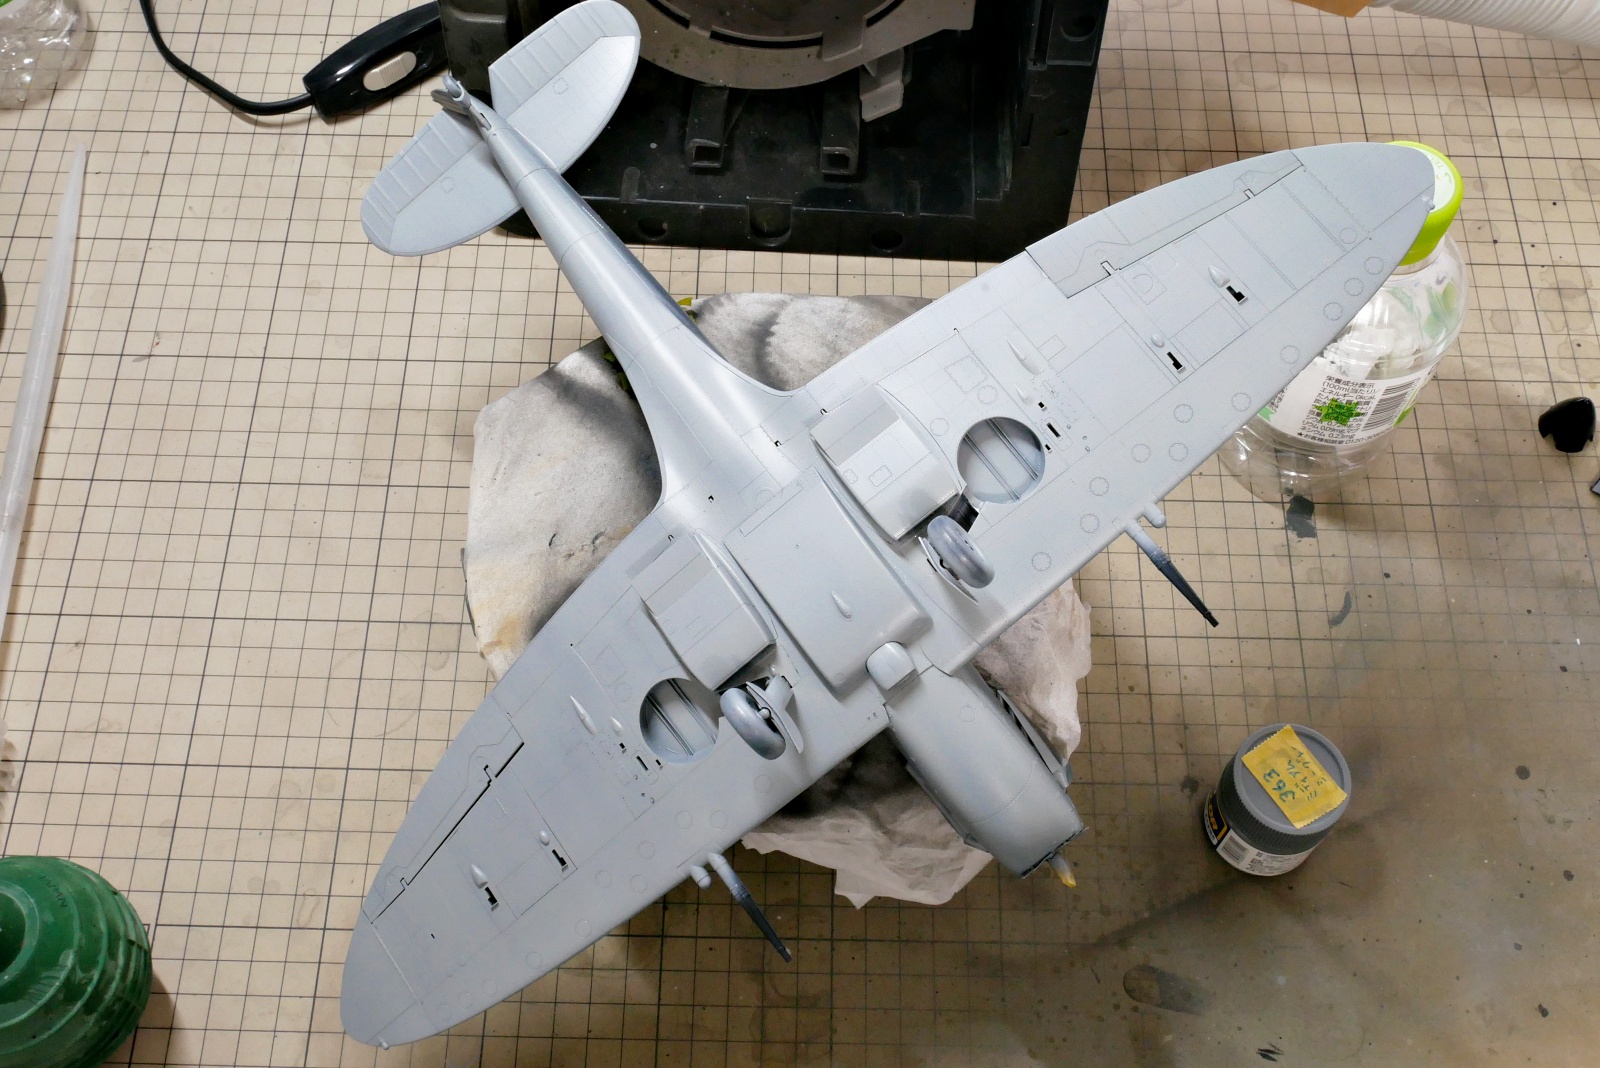
The underside of the aircraft is painted in medium sea gray. Cleos 300’s also have paint for British aircraft, which makes it convenient.
(2025/06/17)
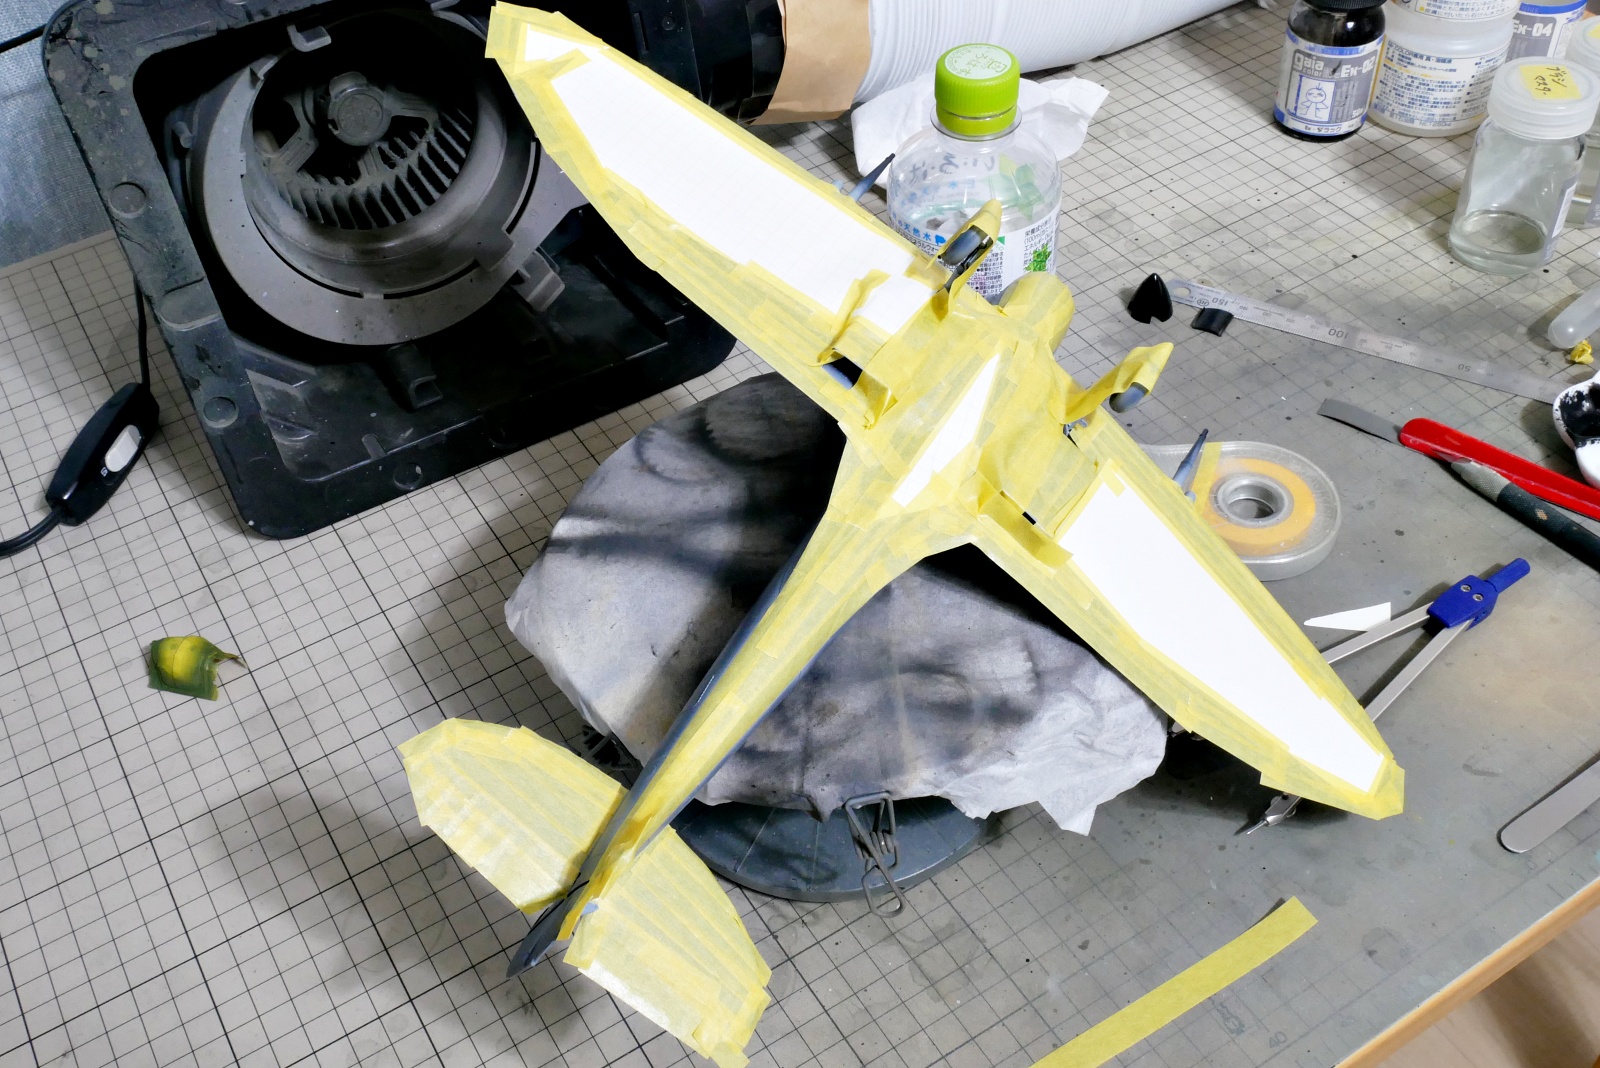
The painting work is continuing and the masking work is proceeding slowly. If it is 1/32 scale, the masking work also takes time because the area becomes wide. I had quite a lot of thin masking tape in stock, so I was willing to use it, but there was no end to it, so I tried to save labor by sticking some of it with paper. Recently, I feel that I make mostly large size planes.
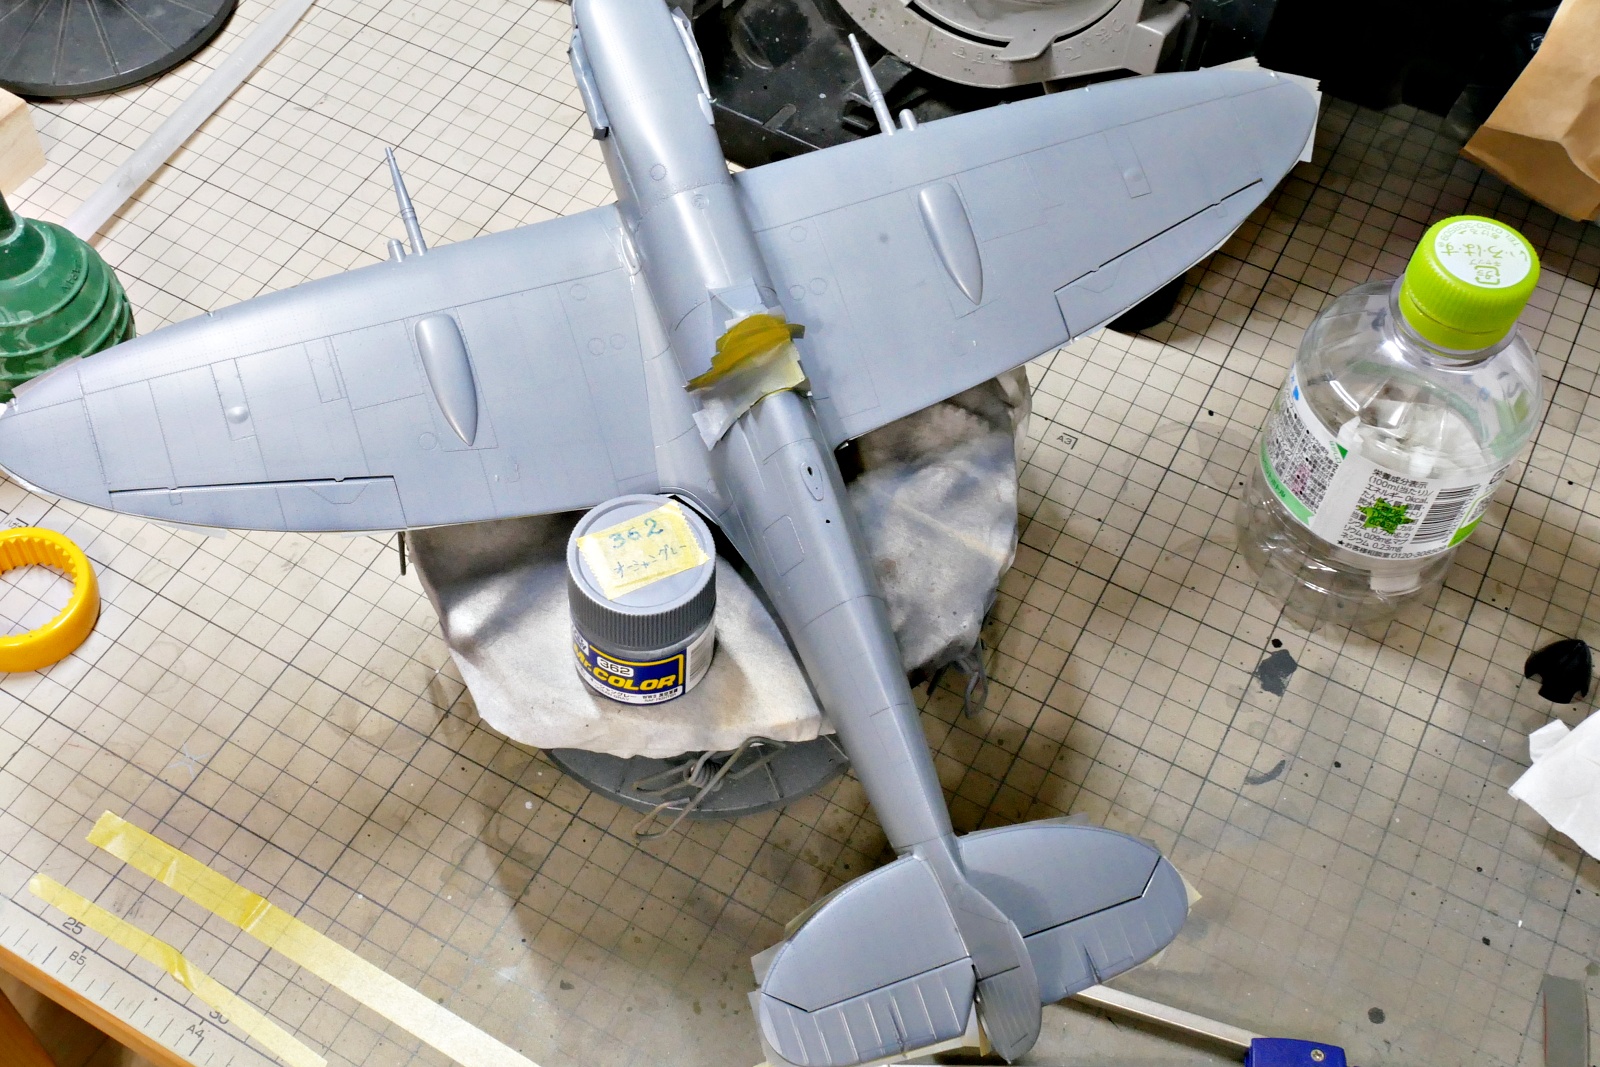
I was wondering if I should paint gray and dark green on top of the base black, but this time I painted it evenly with ocean gray first
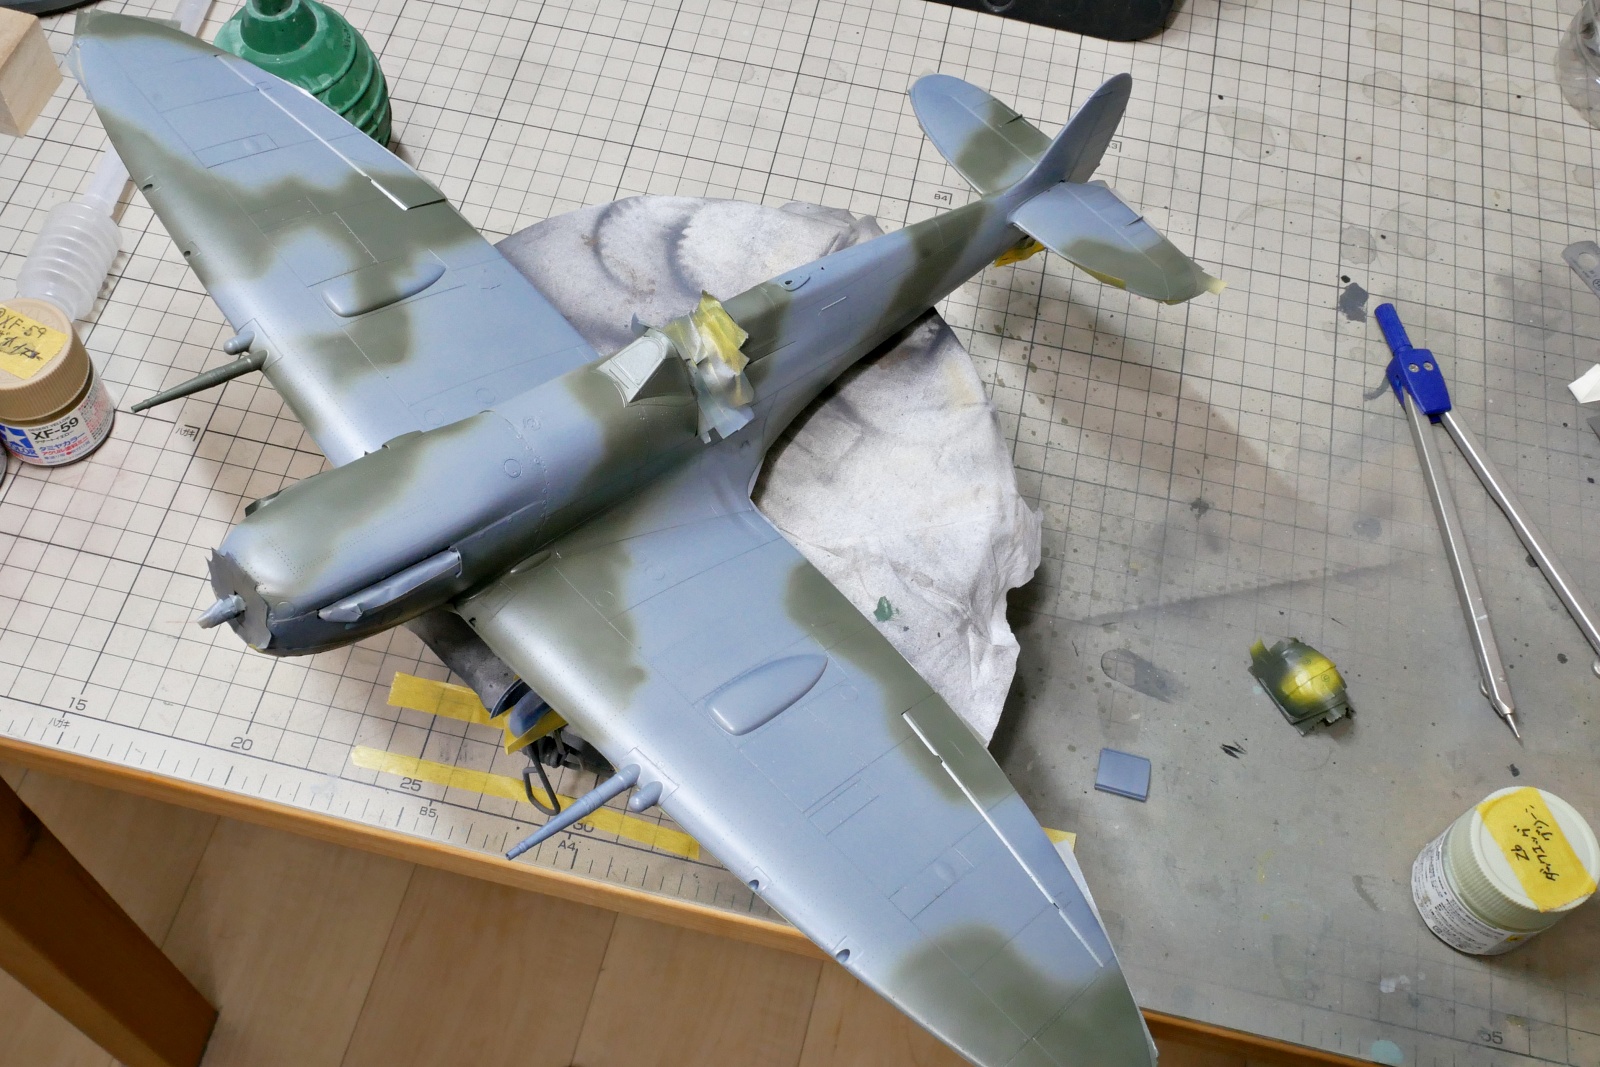
It’s getting more and more like Spitfire. The impression will change quite a bit after putting decals.
It has been quite a cumulative work up to this point, but it will be completed soon.
(2025/06/20)

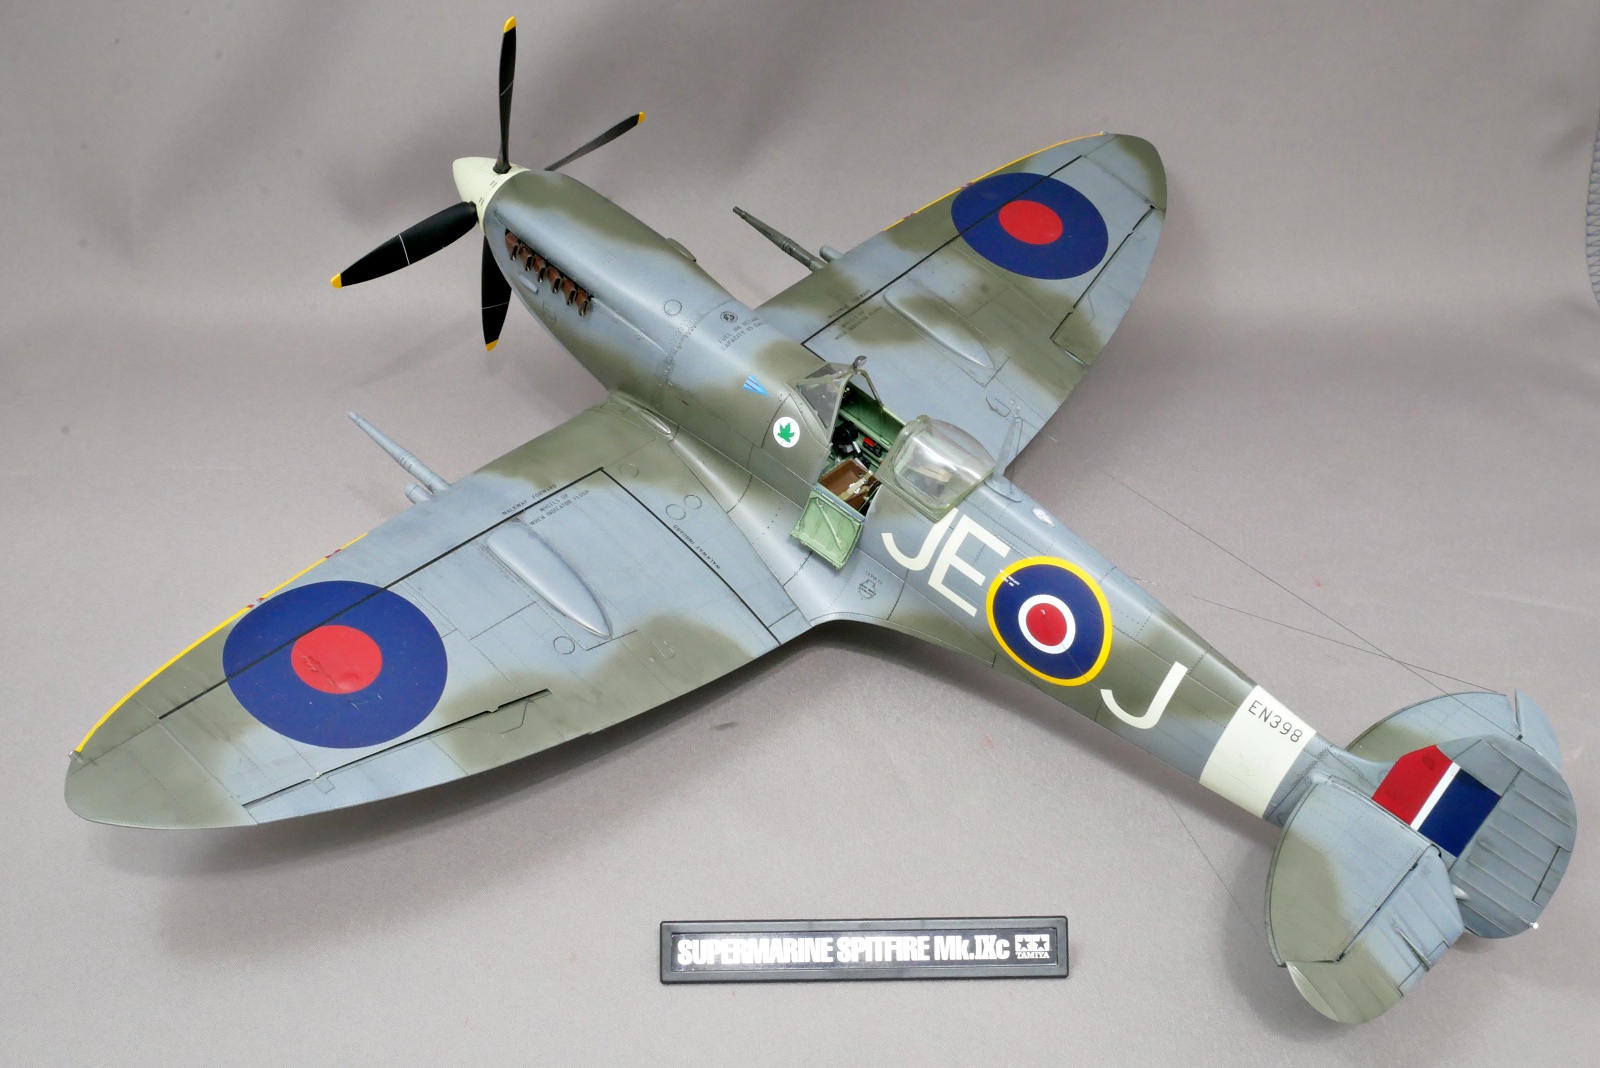
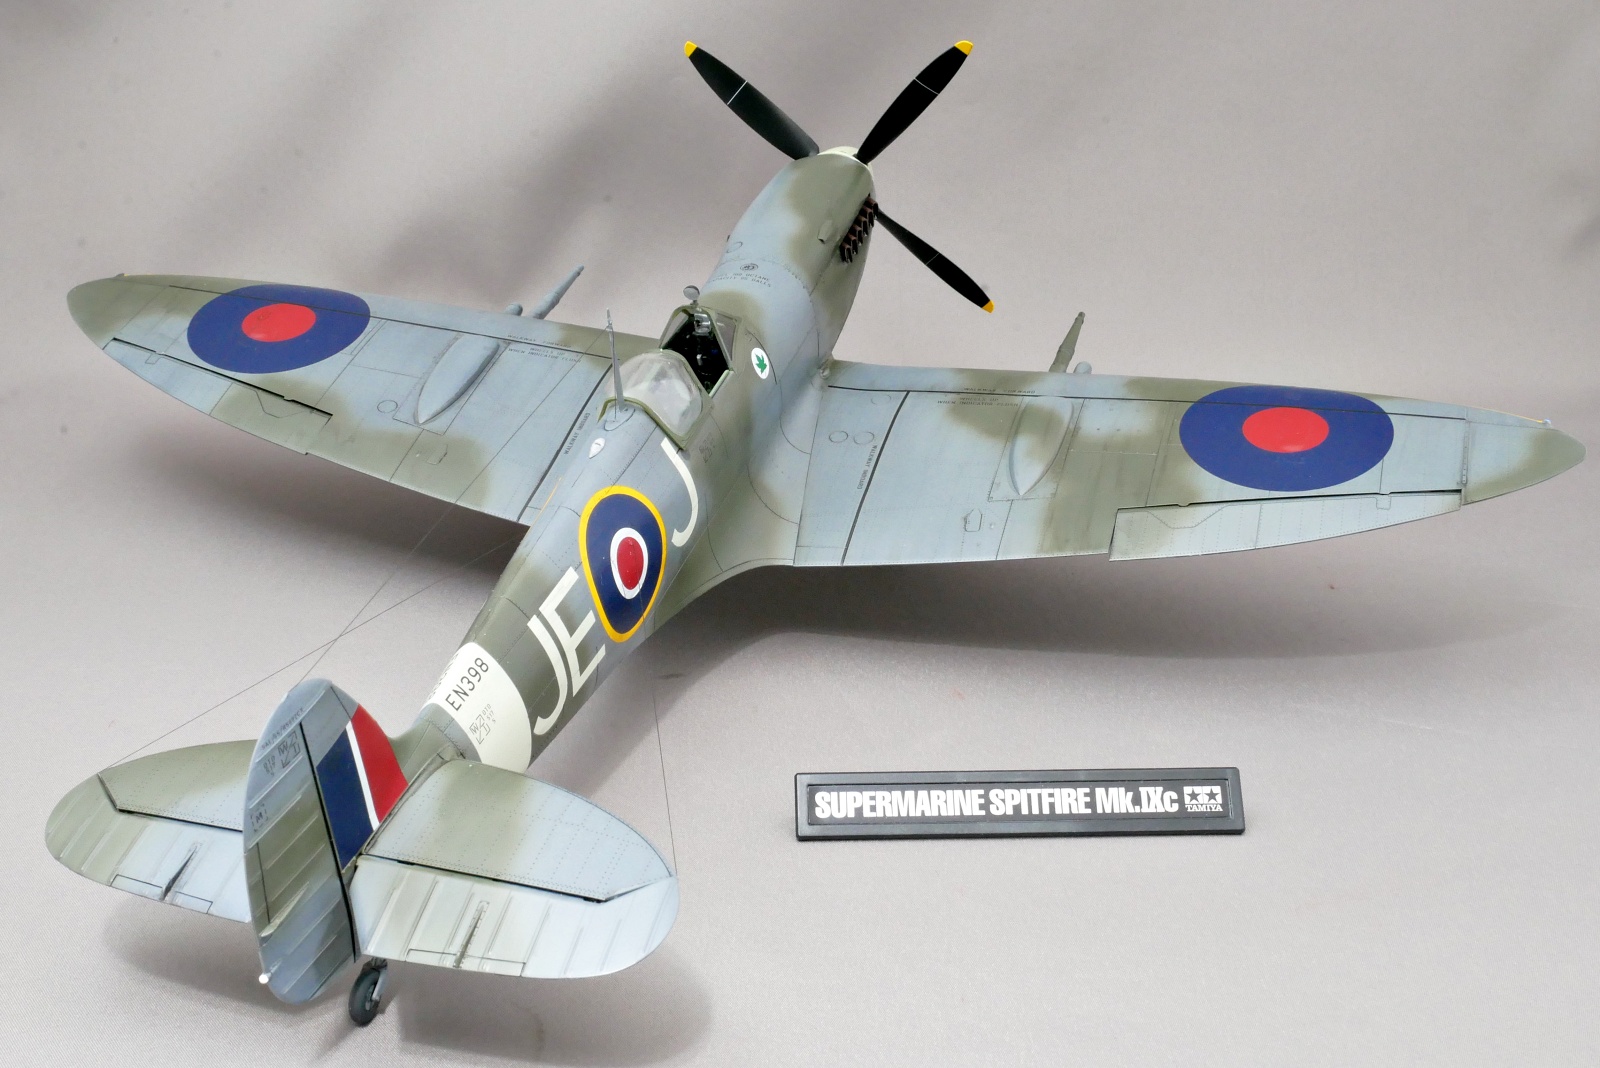
The Tamiya Spitfire is finally finished. This aircraft was used in the Battle of Britain, a major turning point in World War II. This is the aircraft that protected the UK skies with the Hawker Hurricane.
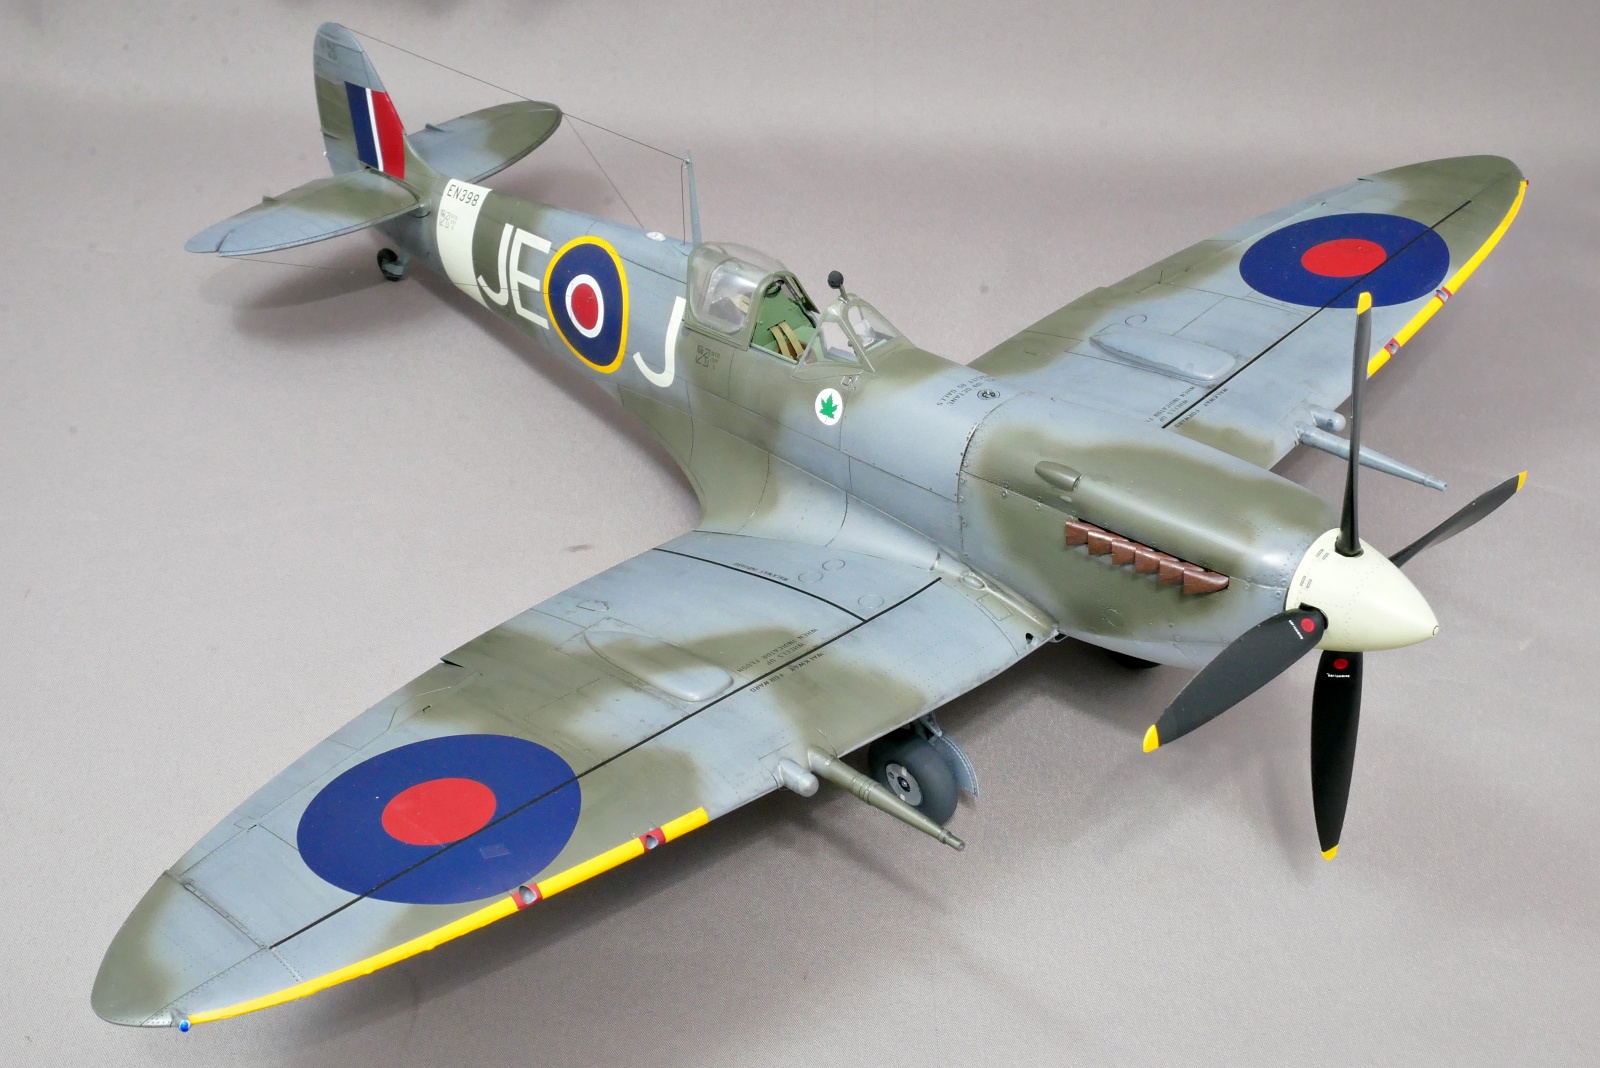
These 1/32 scale products have the highest precision of Tamiya. I think it’s a tough kit to make. I wonder if it would work better with making it again.
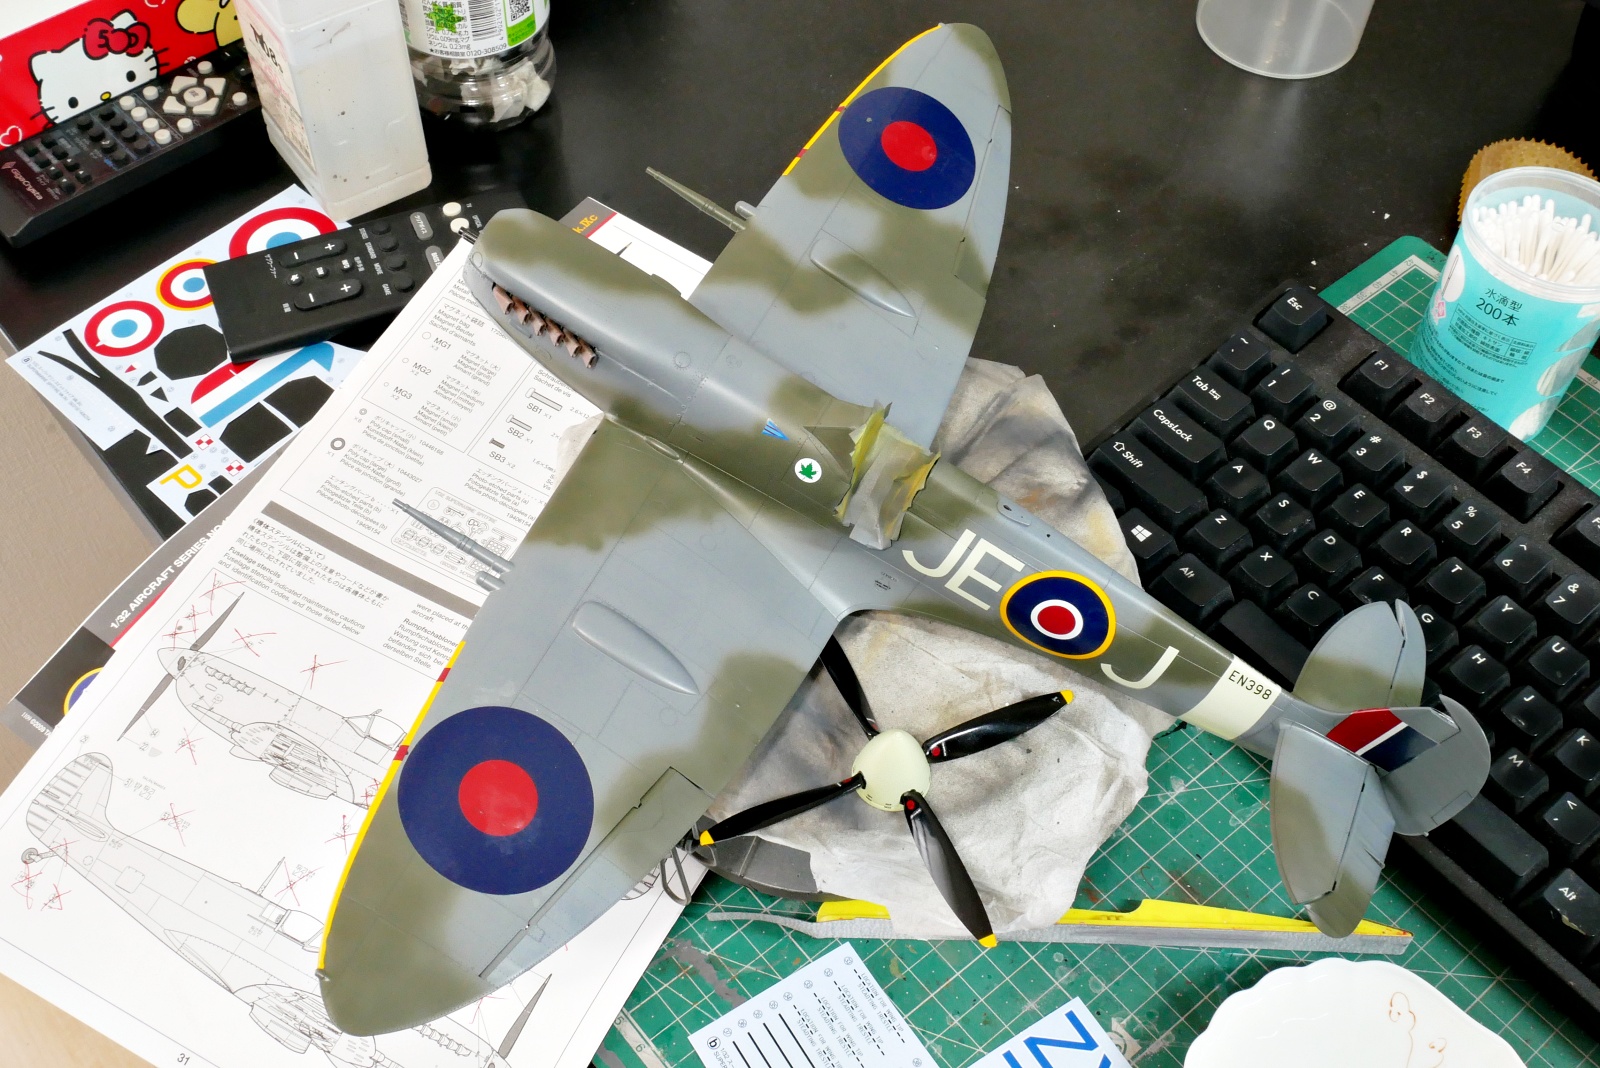
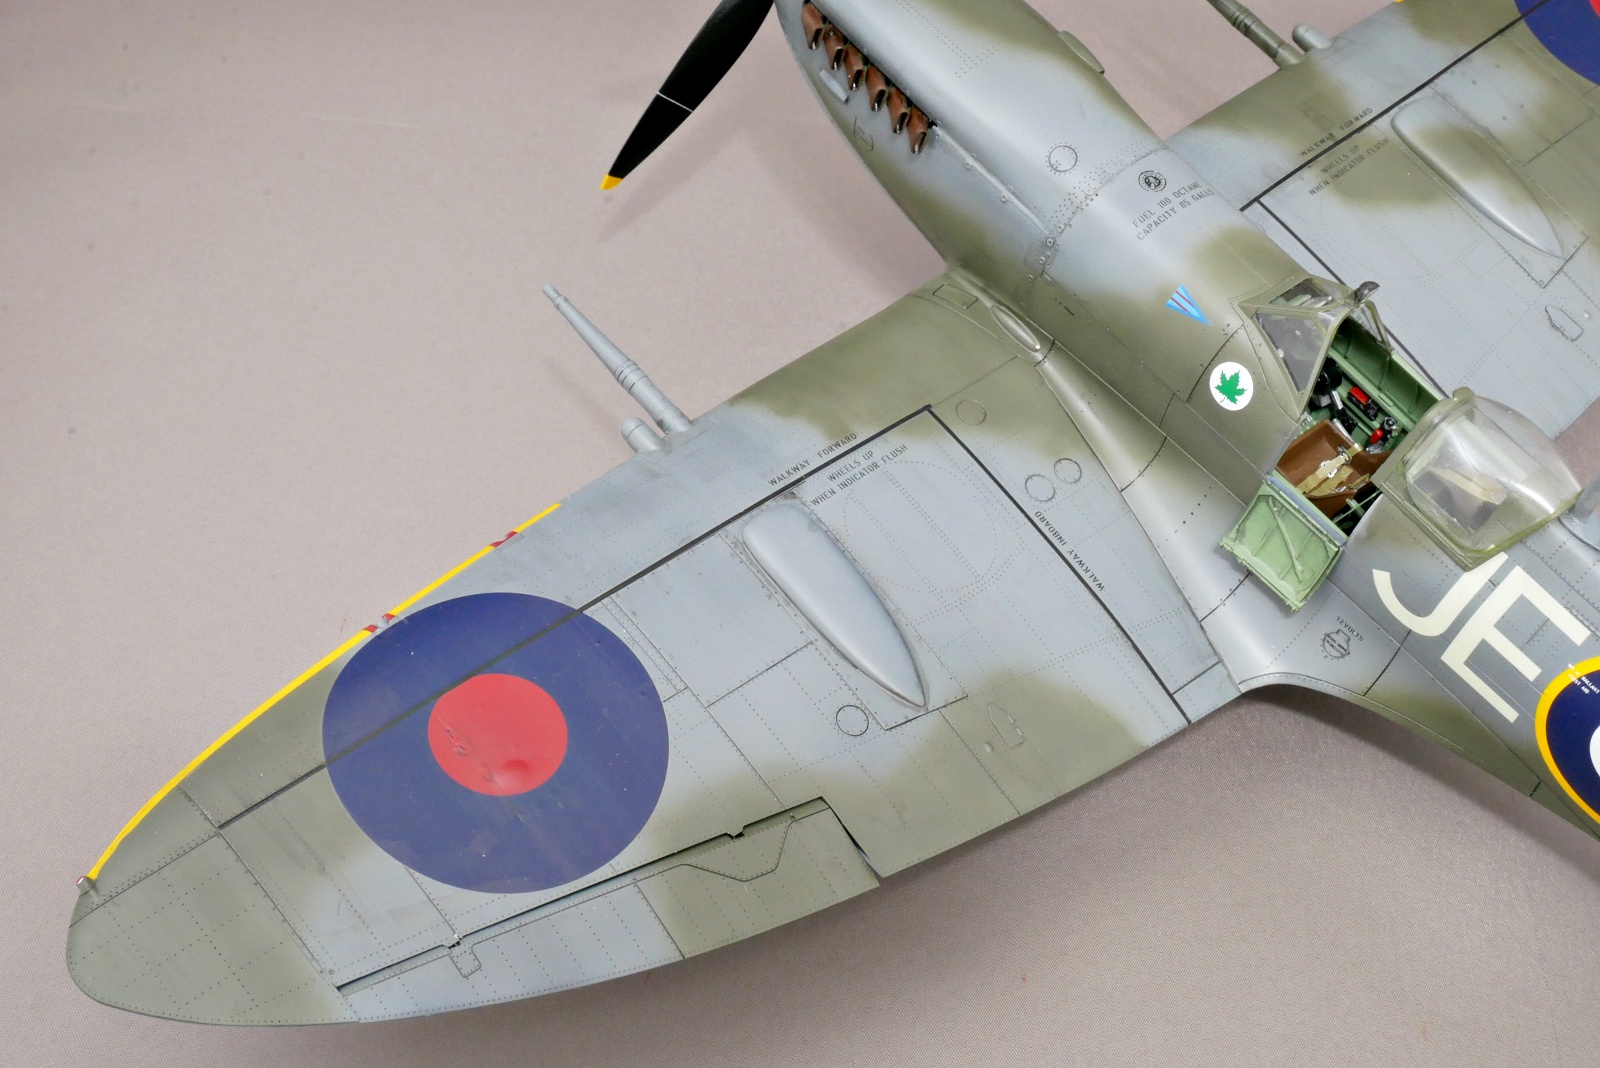
Among the 3 markings to choose from this time, the Wing Commander J.E. “Johnny ” Johnson, Kenley Wing, RAF Kenley base in July 1943.
This pilot is James Edgar “Johnny ” Johnson Lieutenant Colonel, the ace of the official shoot-down record 34. There were 7 sared shoot-down, which is half of 3.5, so the total score is 37.5, which is a record of 38 shoot-downs. He only used Spitfire in WWII. He also fought in the Korean War, and he used F-80 and F-86.
The individual shoot-down record of 34 was 14 Messerschmitt Bf109 fighters and 20 Fockewolf Fw190 fighters, so it must be great that all the shootdowns were fighter planes. The fact that the opponent was a high performance German fighter is proof that he was a highly skilled fighter.
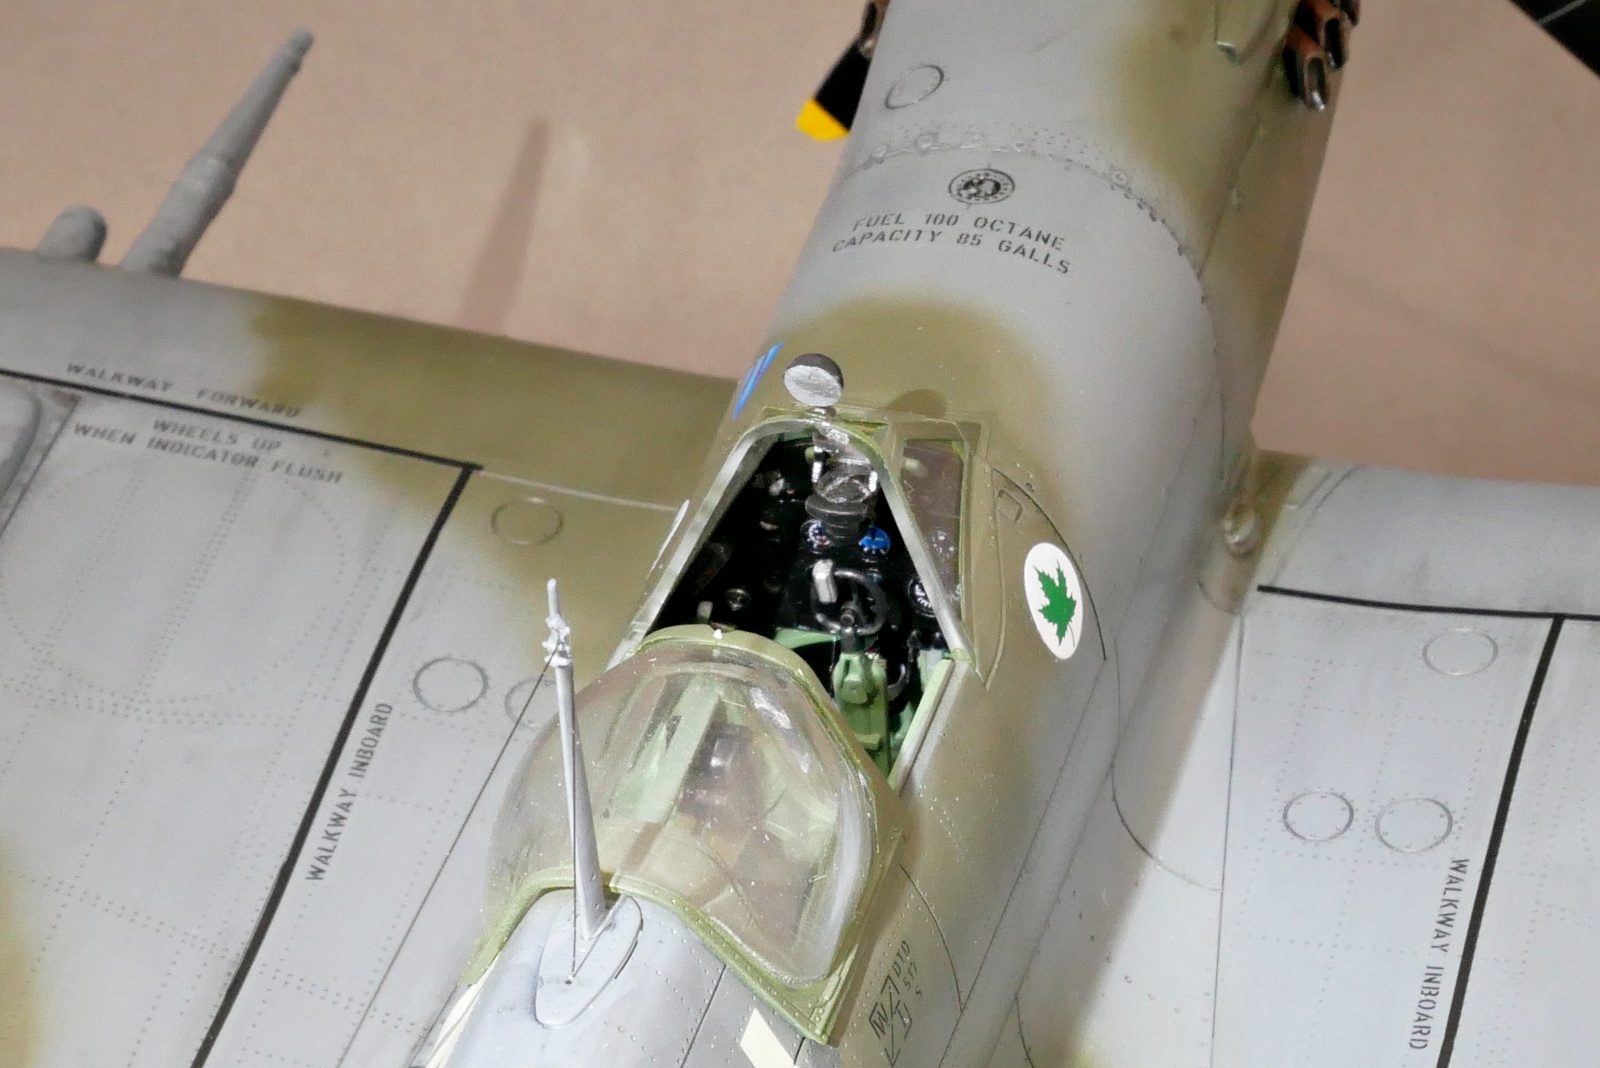
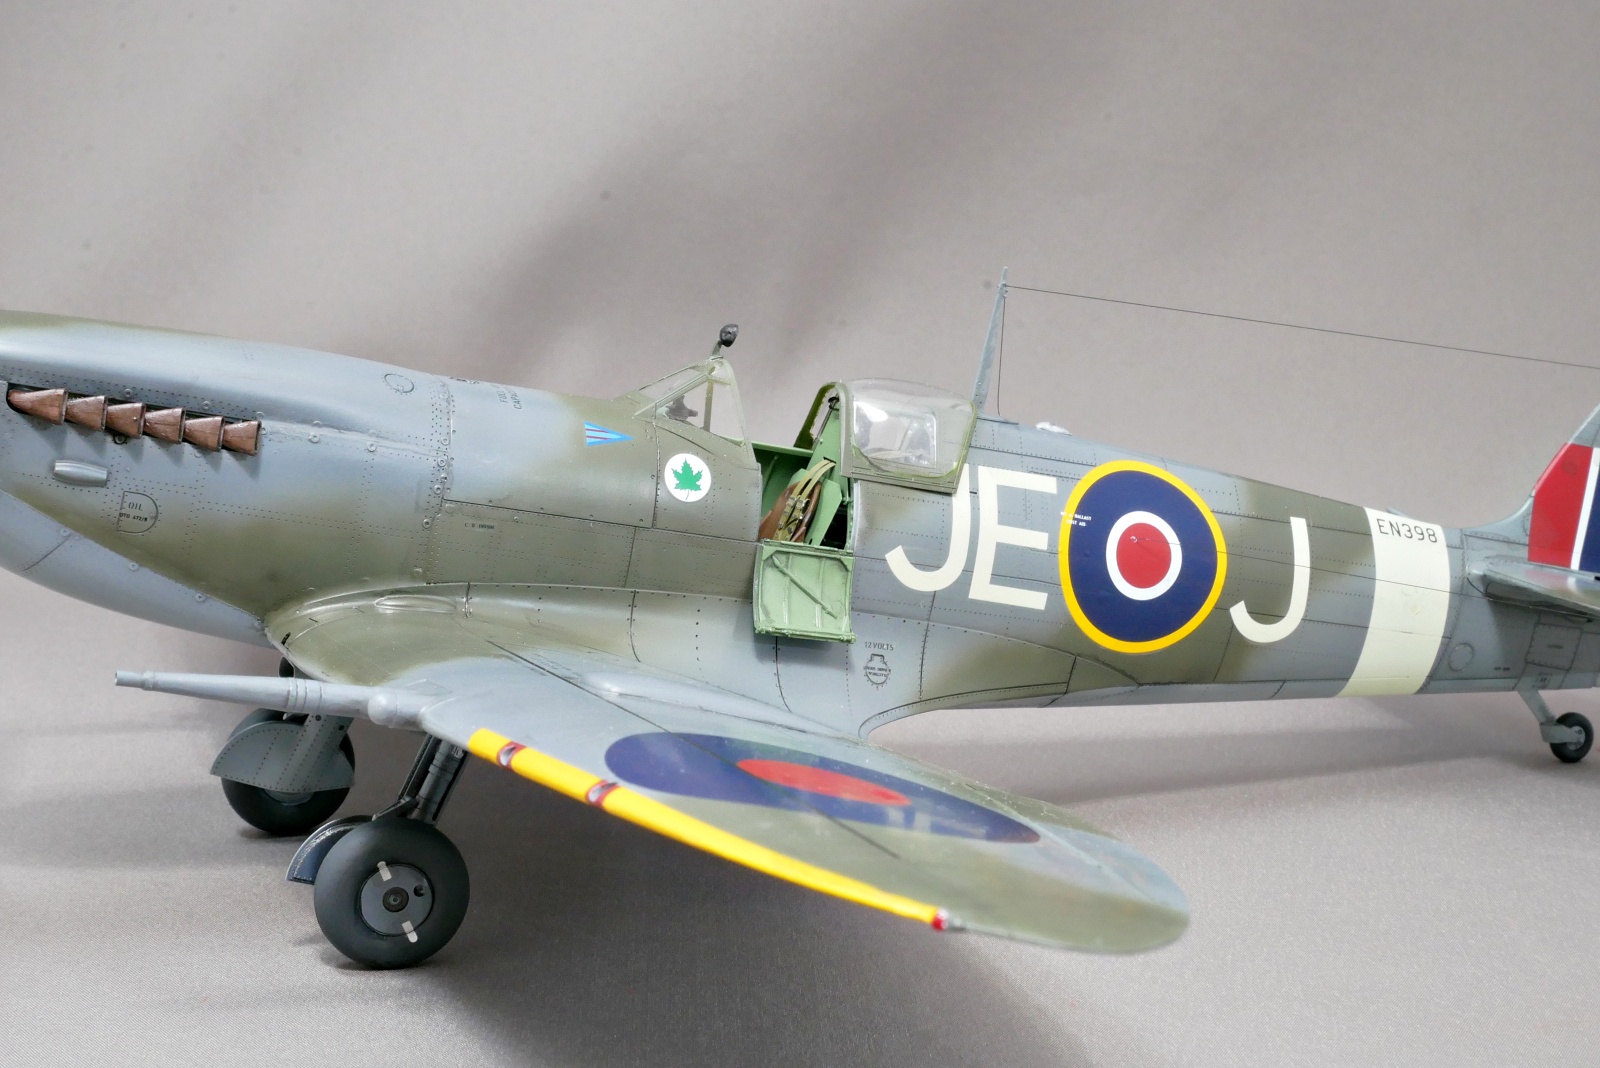
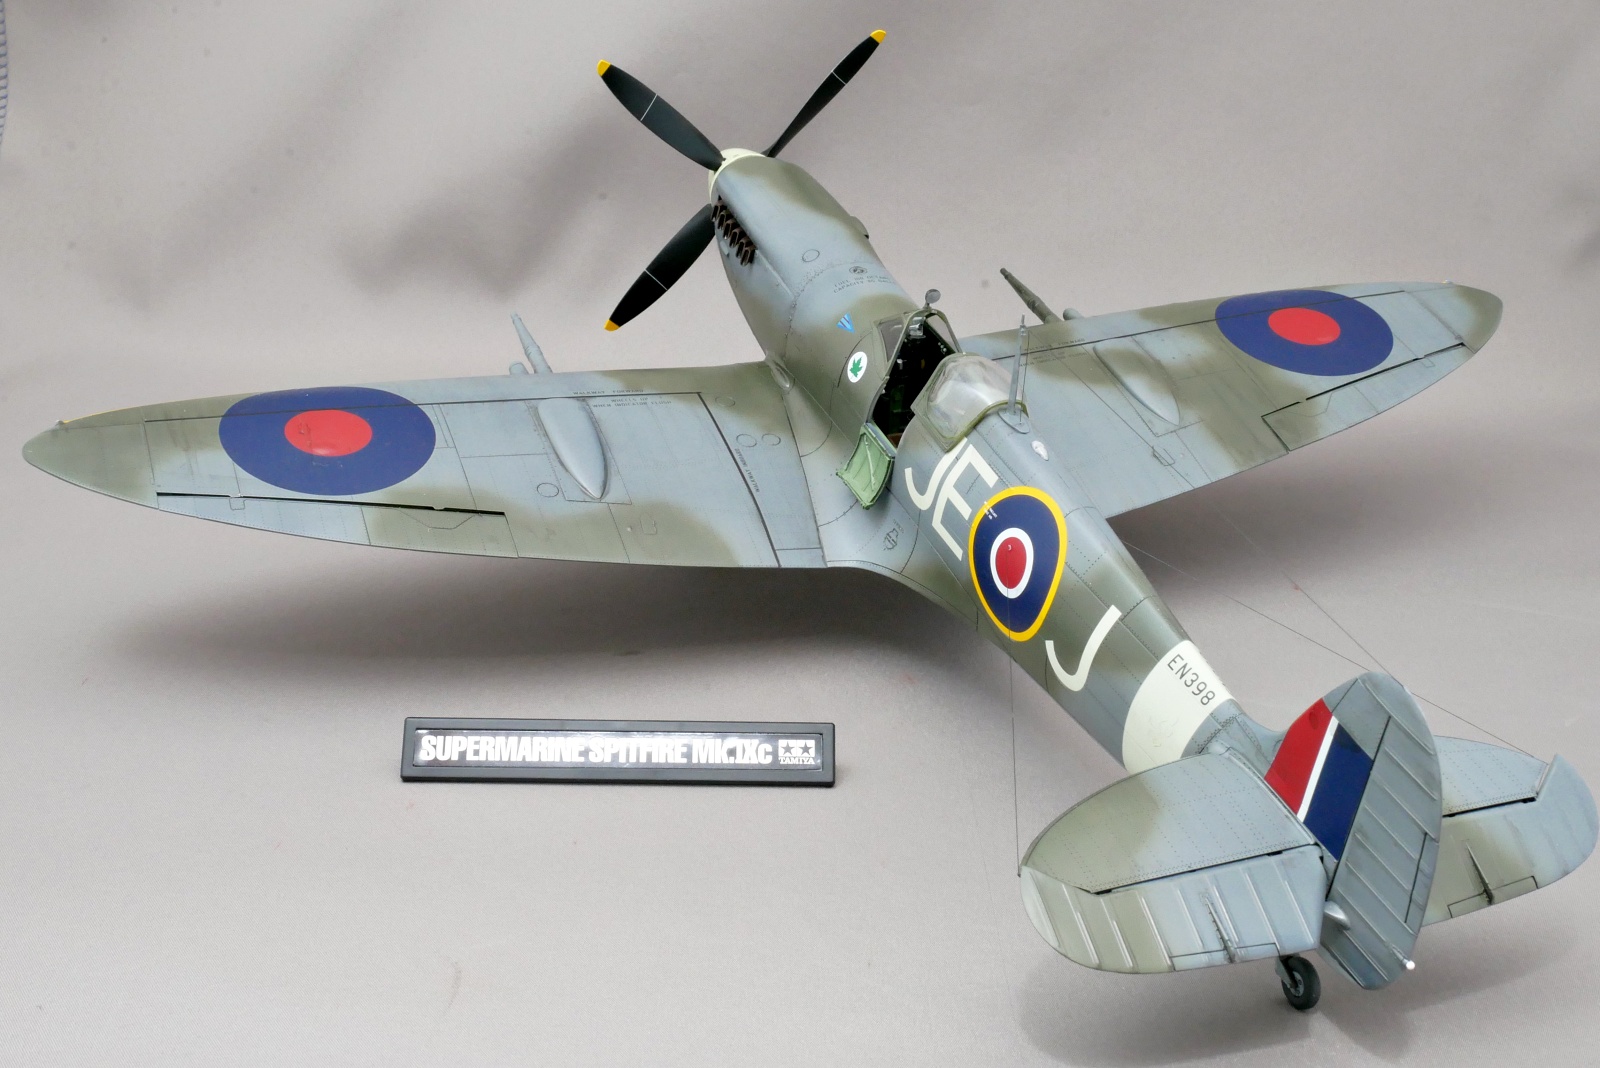
Lieutenant Colonel Johnson himself was British, but he led the RAF 144th Wing, which was made up of Canadian pilots, so there are maple markings on both sides of the canopy, imitating the Canadian flag. At that time, the RAF Wing consisted of about three squadrons, so it was probably 30 to 40 fighters.
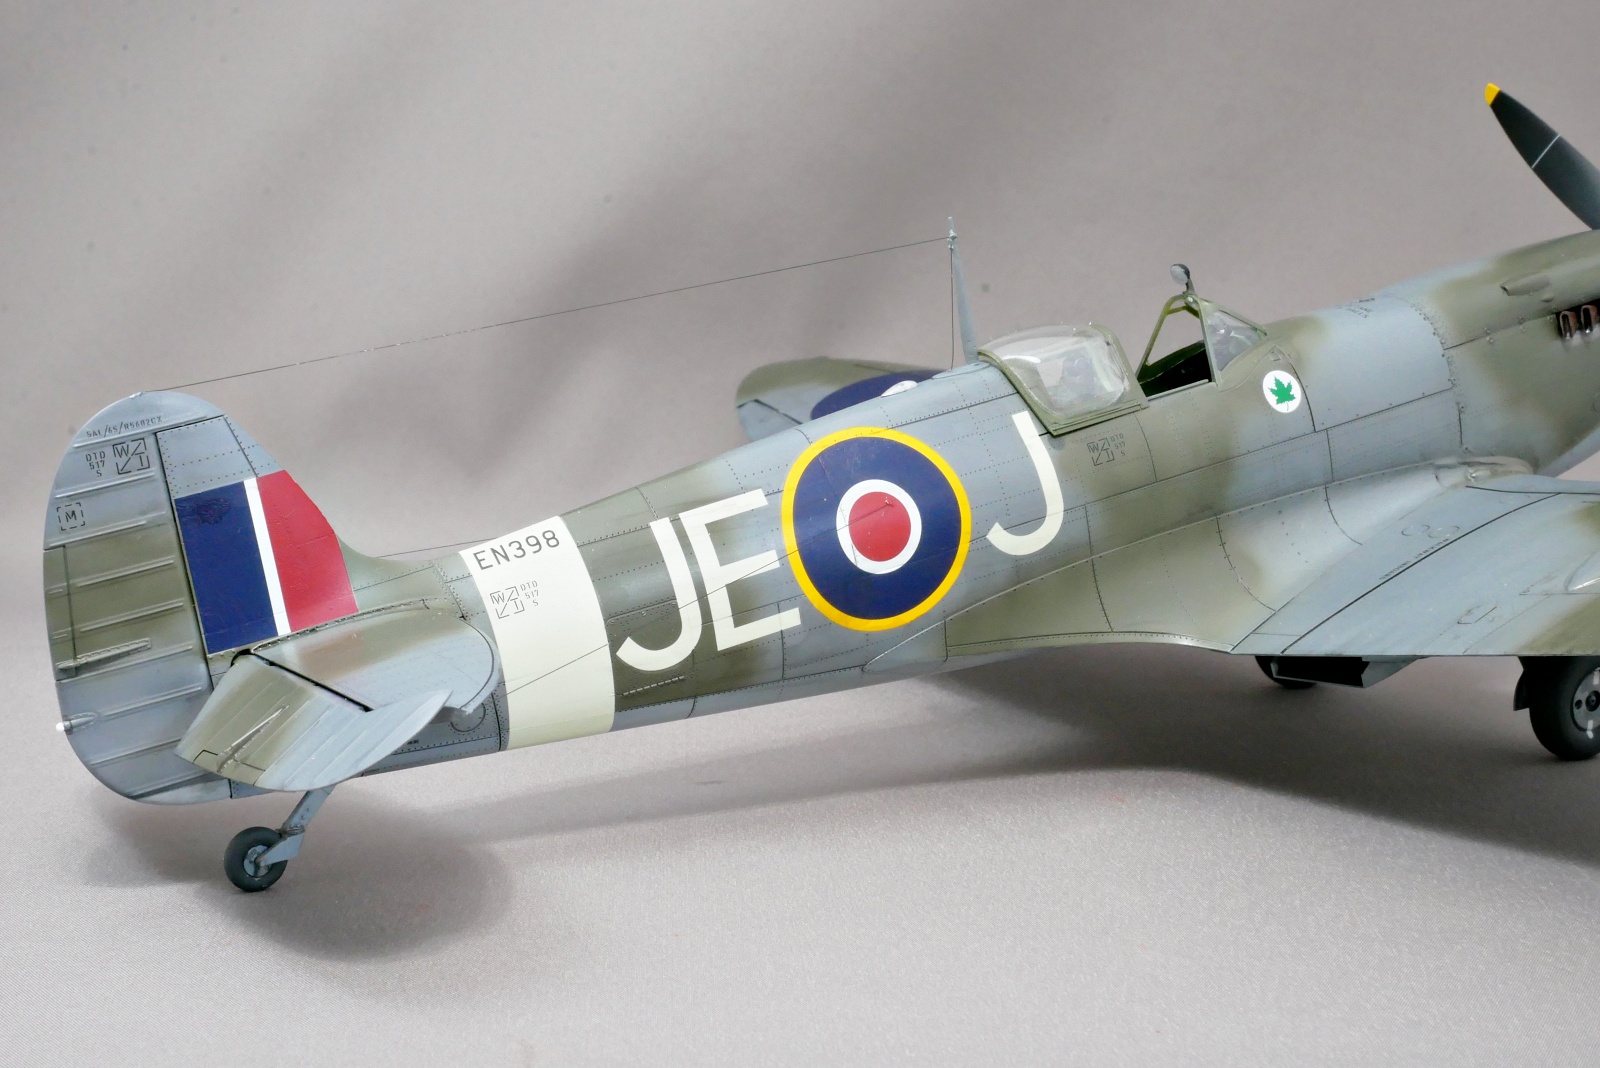
“The code name of Lieutenant Colonel Johnson’s beloved aircraft (Scordon code + individual identification letters)
Known as “”JE-J”” (“”J””ohnnie “”E”” dgar- “”J””ohnson), this is a rare example of an individual’s initials. A normal RAF aircraft uses a “”Scordon Code”” (two characters) and an “”Individual Identification Character”” (one character), but as a major ace, Johnson was given a completely custom code called “”JE-J.”” It is a sign of high performance and trust in people’s reputation, so it is famous as a mark on the plastic model.”
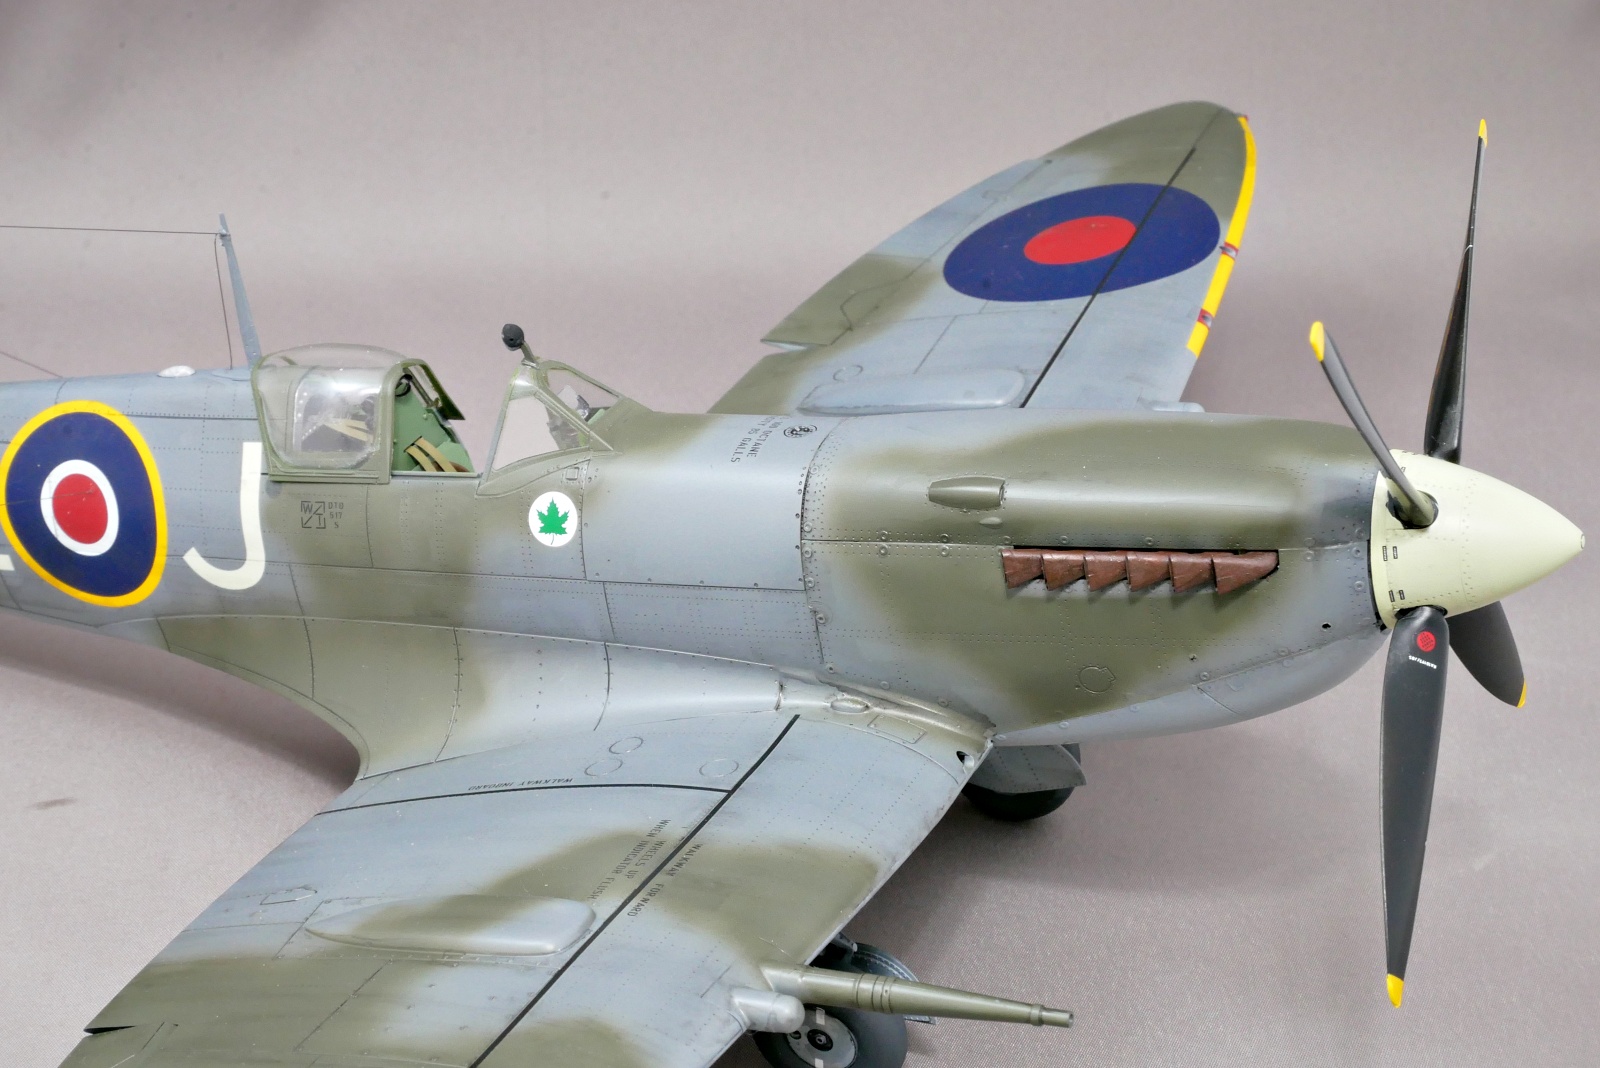

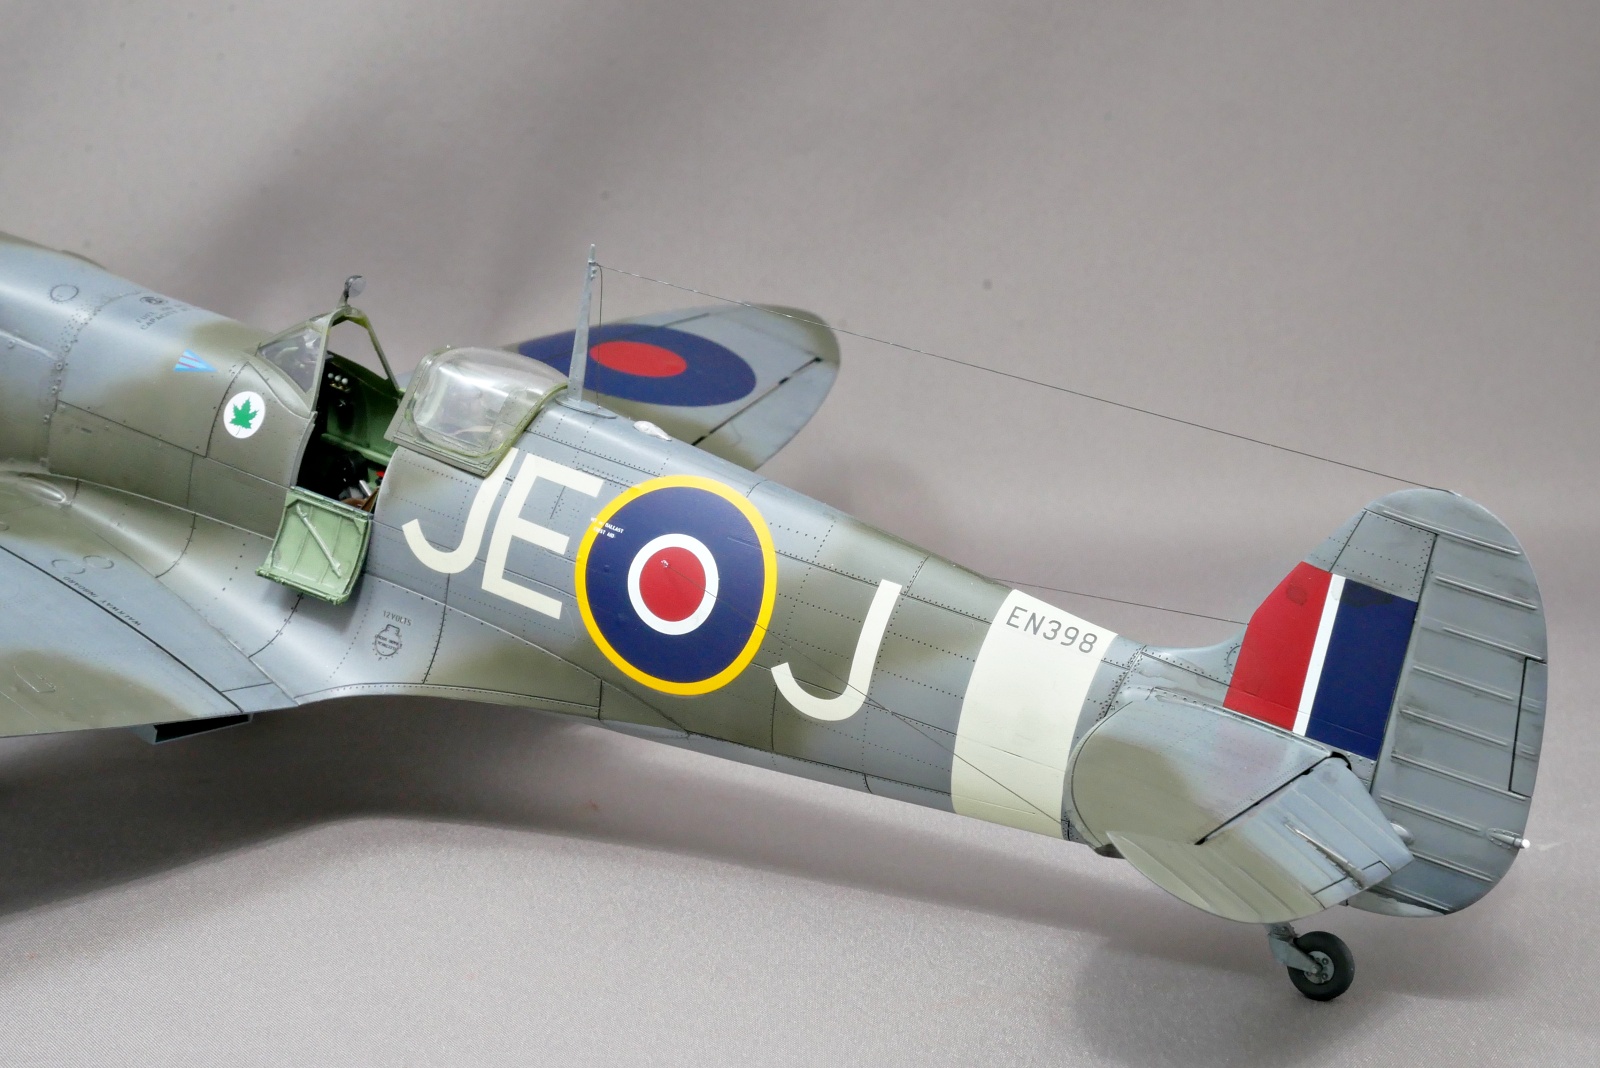
I tried to make it look natural with some fading and smearing, and I tried to paint it like an actual aircraft that flew for a long time.
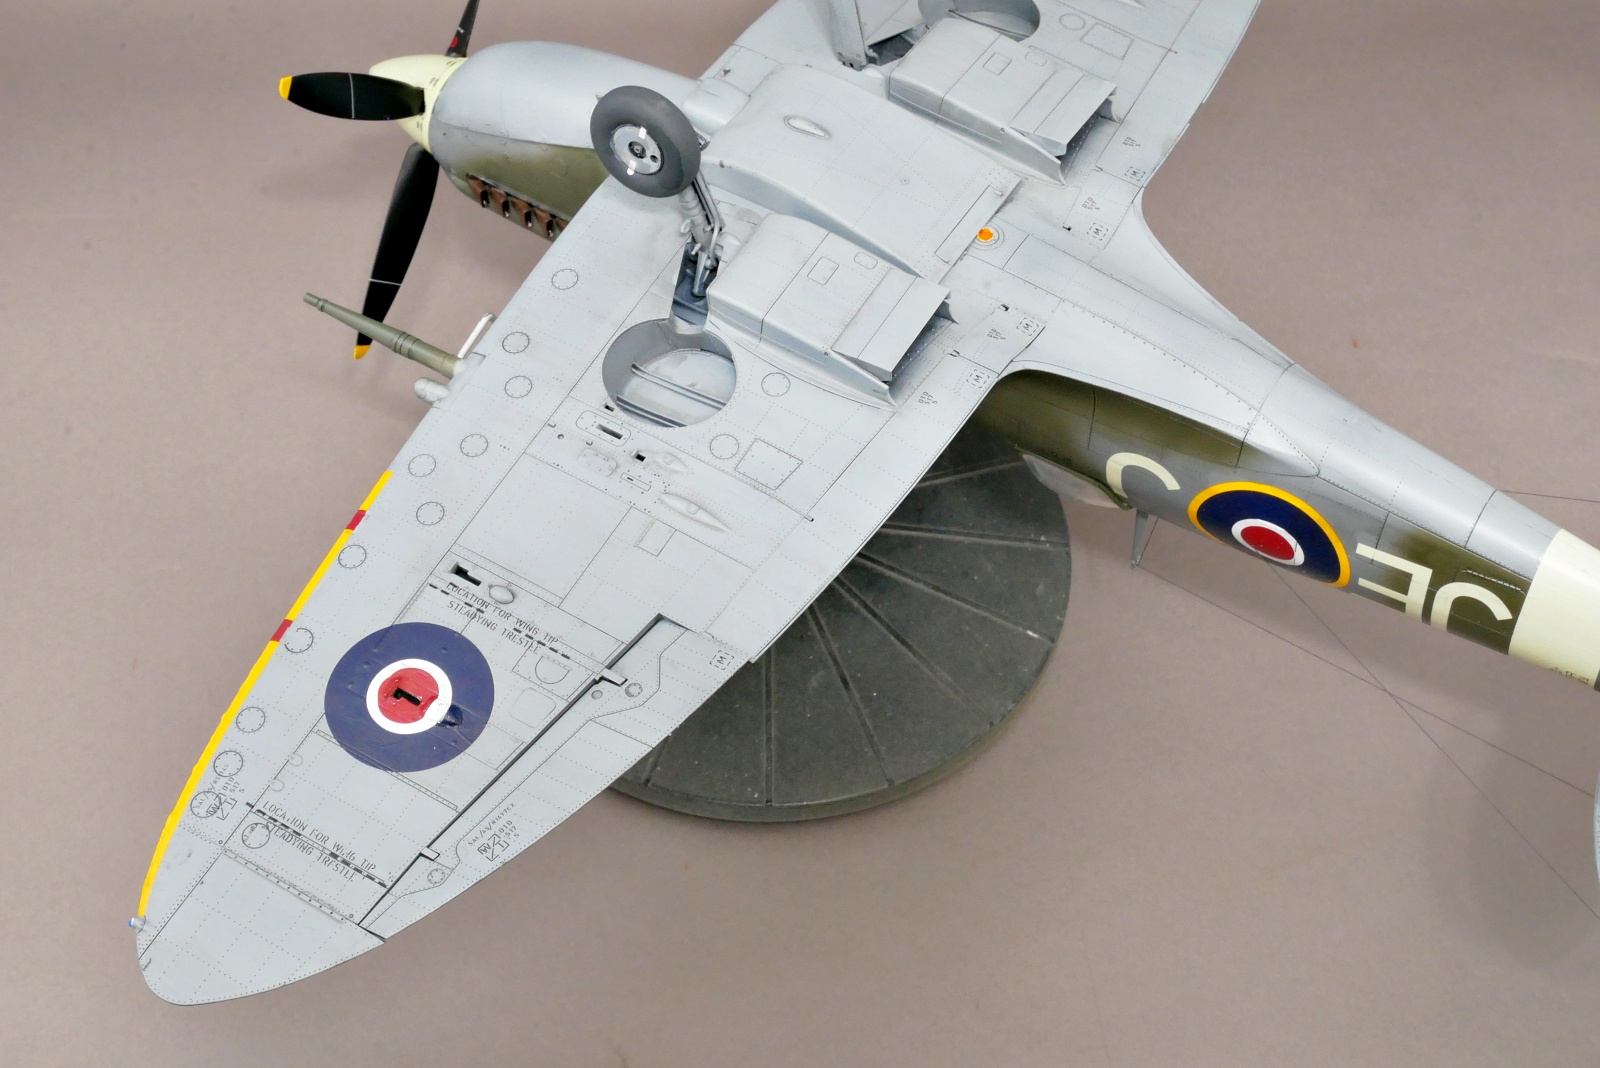
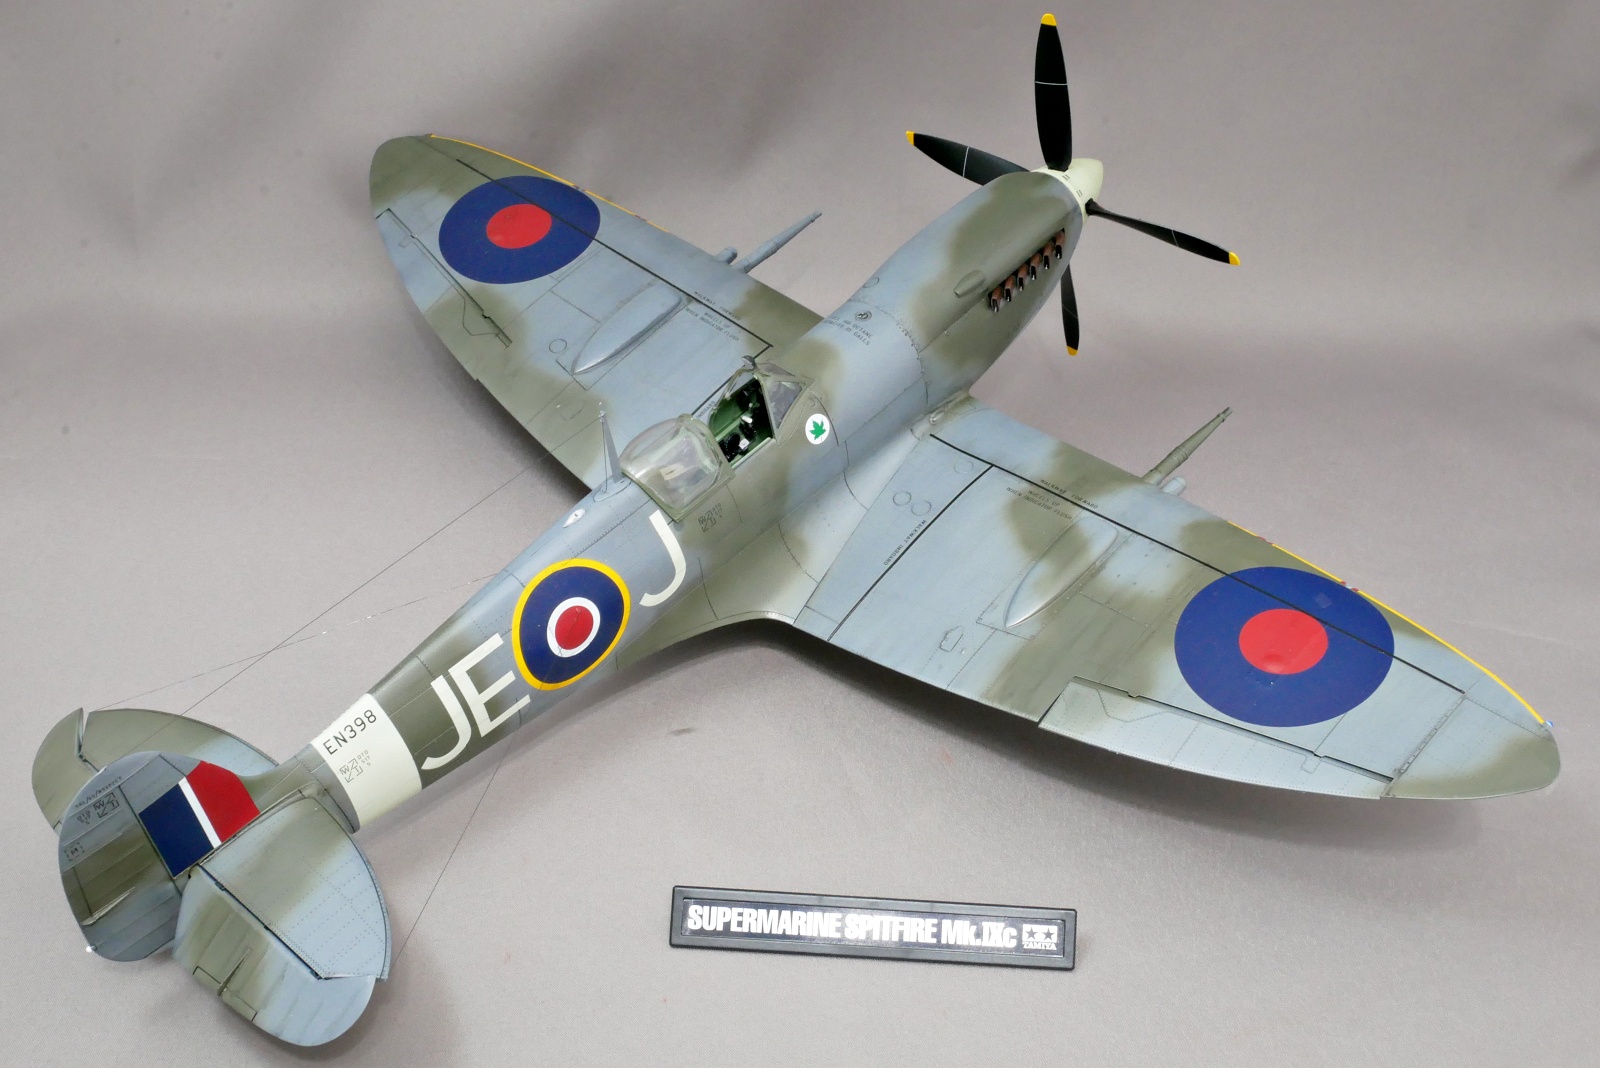
The underside of the fuselage is not camouflage painted, it’s a single color, so I smeared the details a little. Additionally, the cotion mark on the machine gun storage part is precise and it is rather an accent.
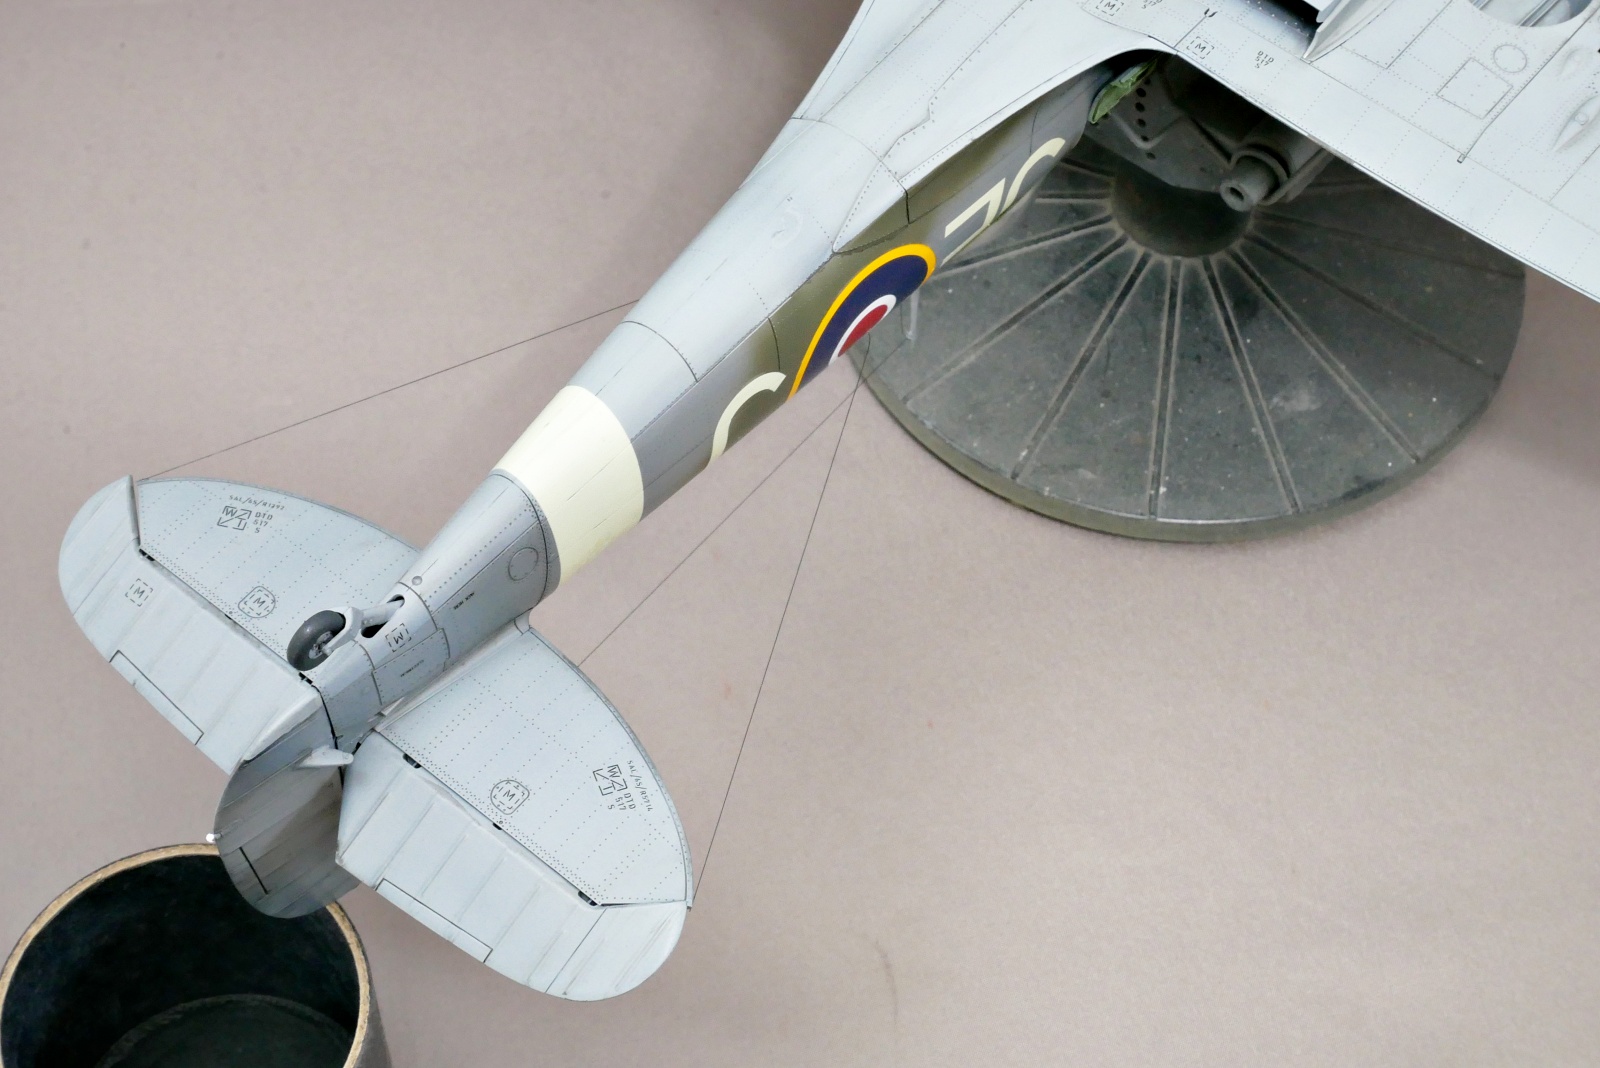
The vertical and horizontal stabilizers are movable. I was impressed with the gimmick with various parts inside.
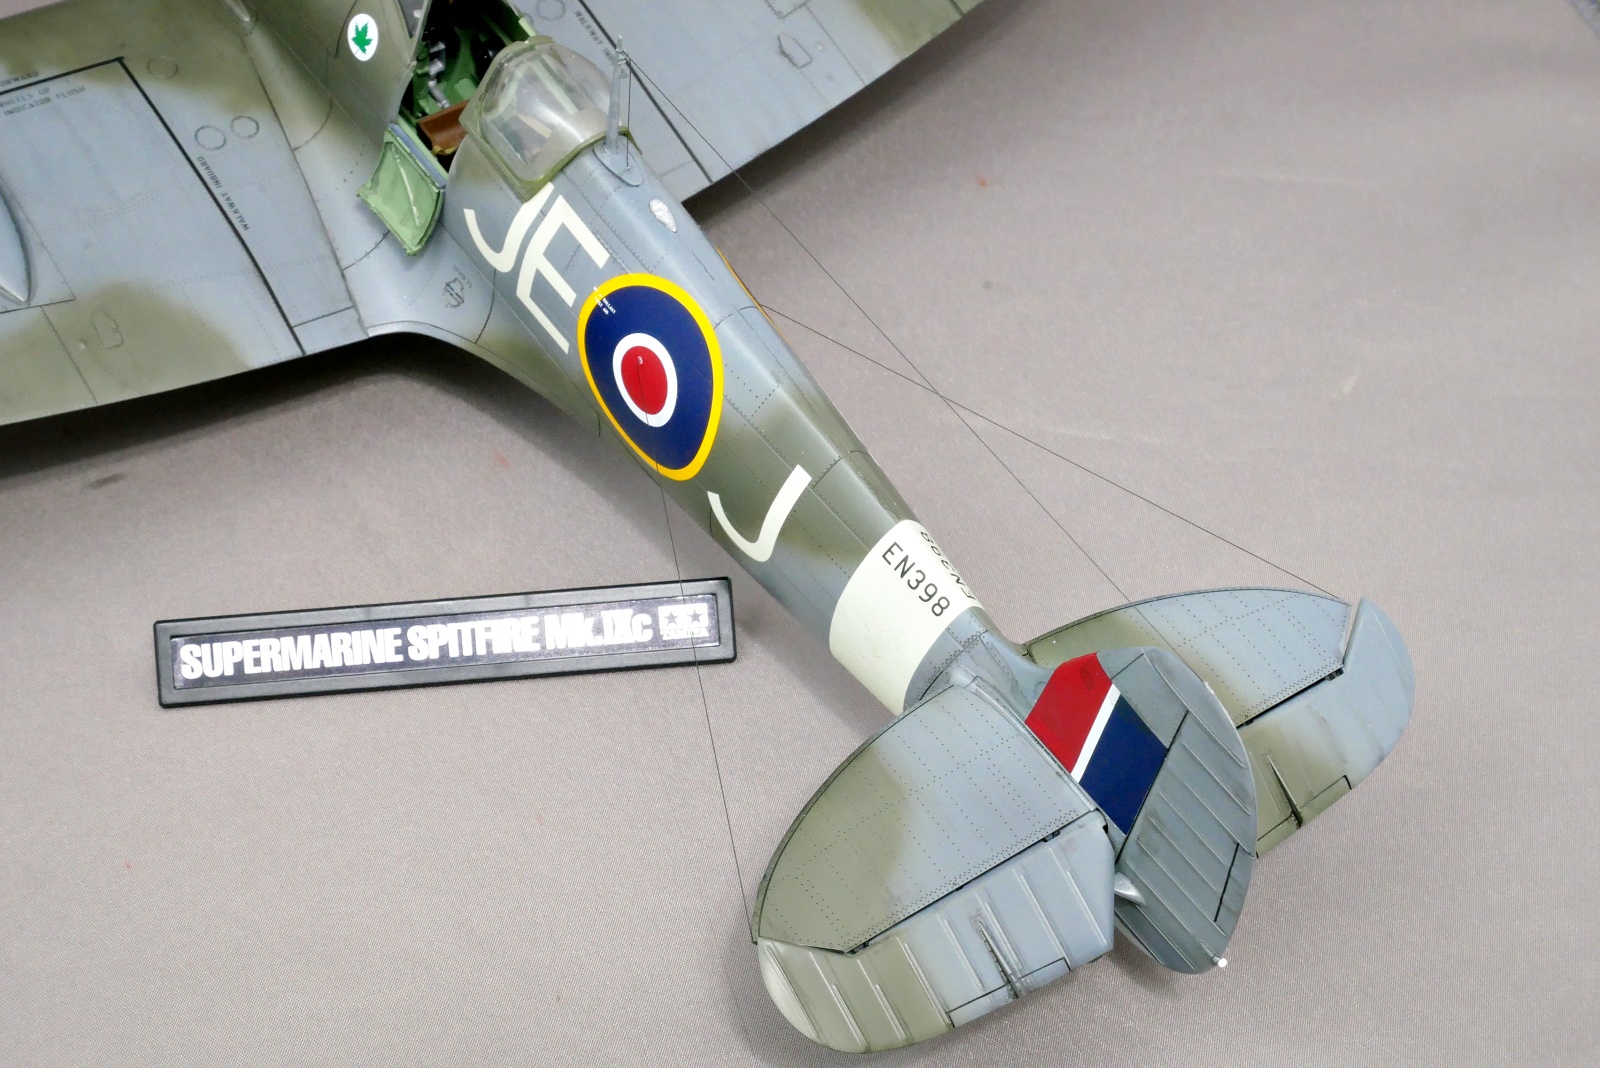
The antenna was made of 0.5 mm black fishing line. It’s too delicate to do the work of drilling holes in the airframe and fixing them with glue.

This time I glued everything together because I failed with the cowl fitting, however the precision around the engine is beyond the third party after parts. I felt that not all users are looking for this high level content. I’m usually a modeler who doesn’t care much about the internals of tanks or airplanes, so I was surprised. It’s a bit of a waste, but I think it’s a good idea to make it by omitting unnecessary parts. Since it is an expensive kit, I think it will be fun to get some experience in the making process, so I made it according to the assembly instructions. I messed up a bit.
It was difficult for me, but I managed to complete it. After all, it is impossible to know the essence of the kit without making it. I mean, there are a lot of things that I don’t know until I make it, such as the points to be careful in assembling and the building order.
(2025/06/21)


コメント