
This is my first posting. I have operated the website “MINIATURE ARCADIA” for about ten years. Working with the “HOMEPAGE BUILDER” software is a bit troublesome, and the layout collapses with smartphones and tablets, so I thought of transferring the article to WordPress. I moved the topic to the M1 Abrams tank of the Dragon Models I built the very first. This work was from February to March 2007.
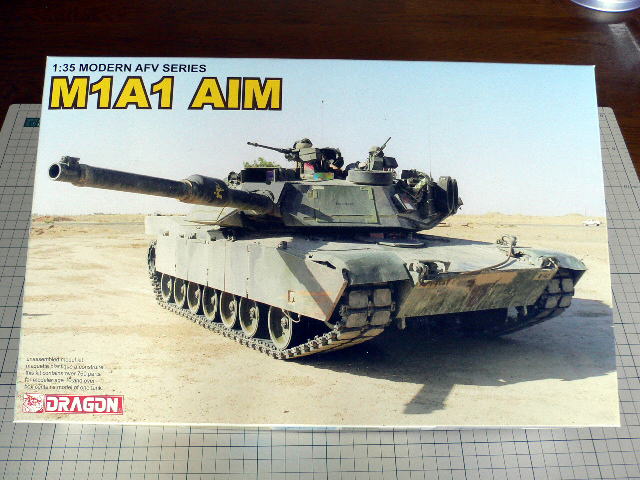 This time, I chose M1A1 Abrams in Iraq War. I hope it’s my first memorable nice kit. (2007/02/02)
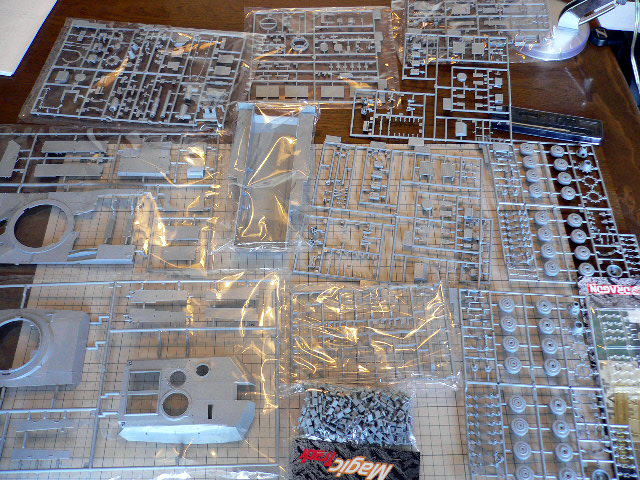 I was surprised there were a lot of parts. There are about 760 parts. So many, and I can’t array on my desk all the pieces. The photo-etched parts and decals are attached The photo-etched parts, and decals are attached. Anyway, I’ll start making it tomorrow.
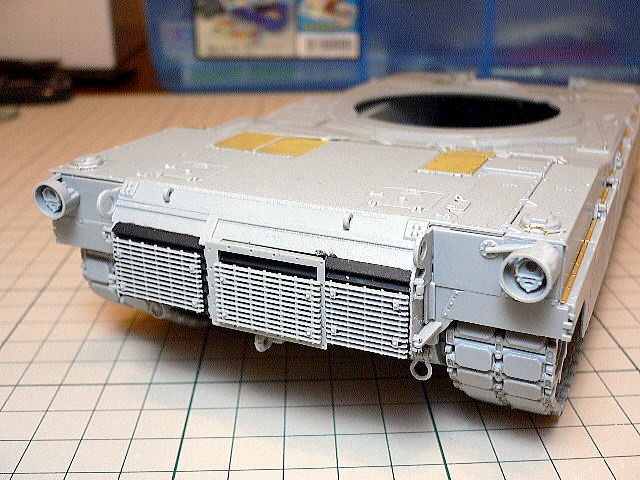
 I assembled the lower body with no difficulty. Sand papered because the edge of the track roller was a little edgy. (2007/02/03)
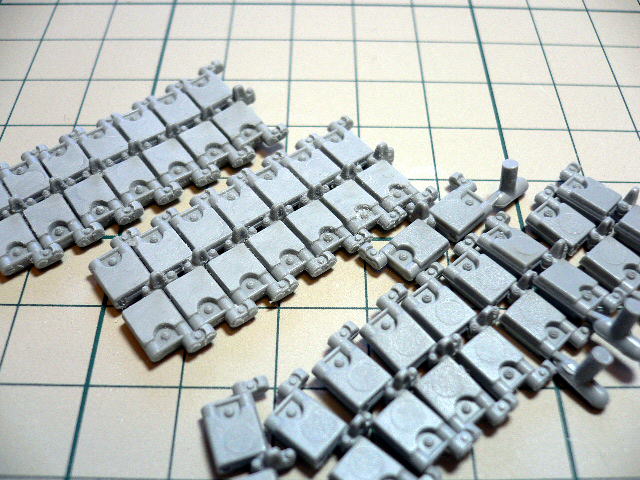 Construction of caterpillar. These typing-out pin marks and parting lines stand out though the Magic Track was quickly assembled. Behind parts of this photograph were sandpapered, and the front one was before papered parts. I omitted sand paperwork and the parts hidden by the side skirts.
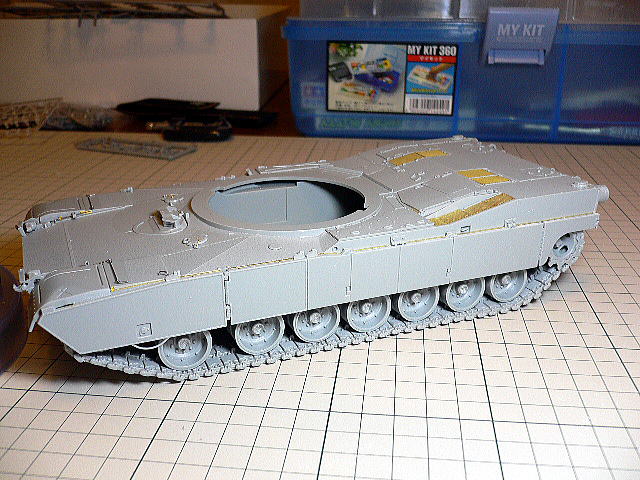 The assembly of the body is almost completed. It took time to attach the armor plates on both sides. This model has become more precise after using the etched parts. (2007/02/10)
 Back of the body. After basic painting, I install clear parts of the tail lamp.
 This kit expresses the skid processing on the body, which is excellent. It is the upper surface of the body. Because of the glue-fouled marks, partly rough finishing, but I’ll fix it before painting.
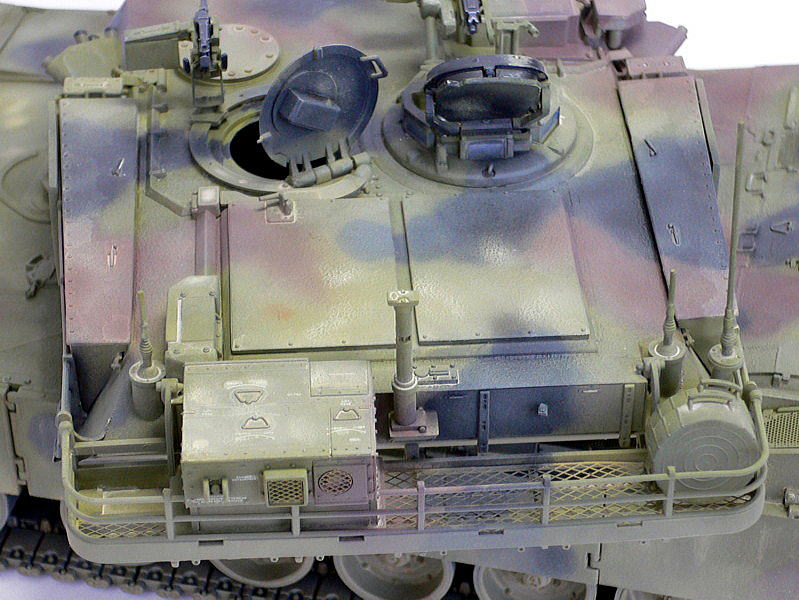
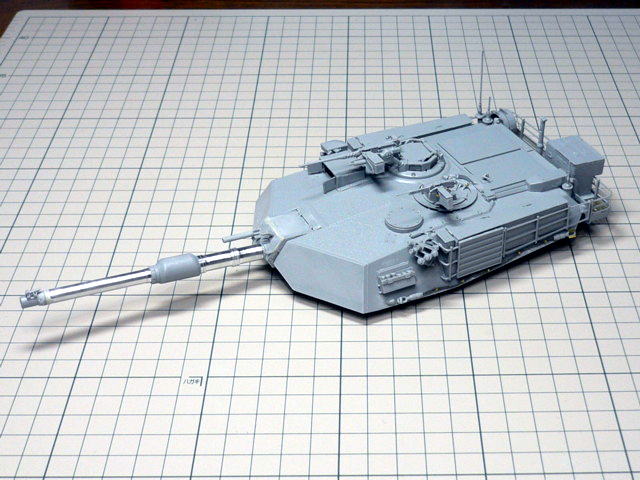 At last, assembly ended in the turret part. The assembly of the turret base was considerably more complex. Because the gap was occurring, I amended it with the patty. Only this turret is almost the same size as a small tank.
 Back shot of the turret. On the surface of the metal barrel, sandpapered with No.1000 for sticky painting. However, there are a lot of no understandable devices on modern tanks…
 I lost one part of the smoke charger and substituted it with a transparent runner. I punctured small holes in the barrel with a mini drill. The texture of the steel wire rope is also excellent. I think that molding was considerably remarkable.
 The hatch enabled opening and closing. (2007/02/11)
 The support arm of the gun barrel is also equipped. Other parts interfered, and it was not easy to attach them. (2007/02/16)
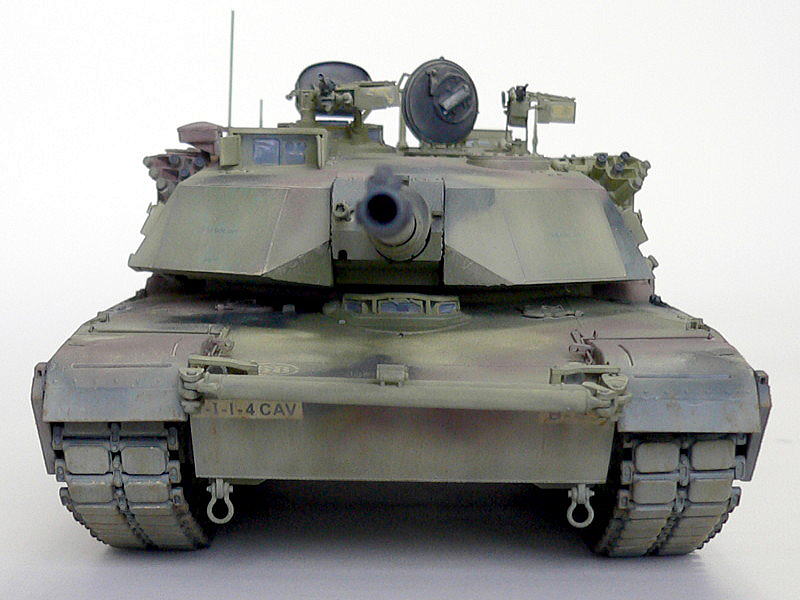
 I will make this kit for the tank of the first infantry division in the Iraq War. It is quite good-looking though even completion is still a long way to go.
 It is the same barrel as Leopard in Germany.
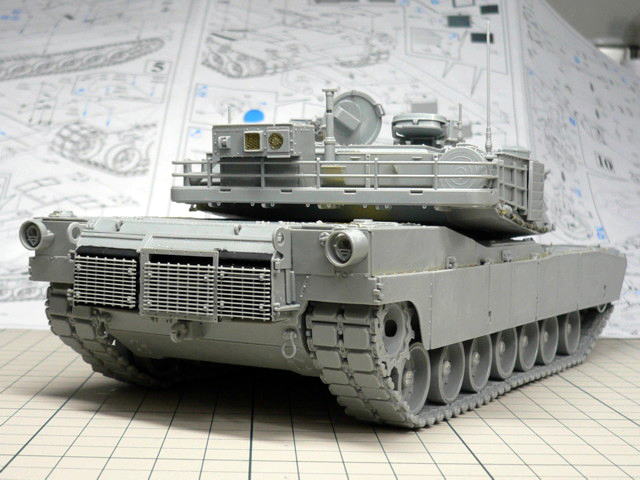 The back shot of the whole body. There were a lot of parts, and it took time to assemble very much.
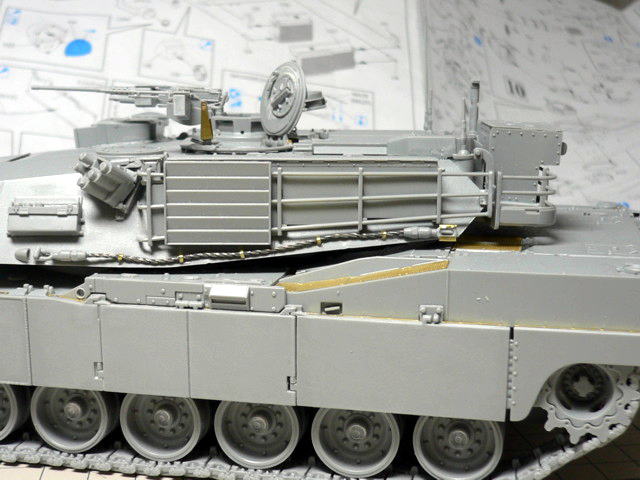 I almost deserted the runner with parts “U18”. The photo-etched parts were prepared near the case of ammunition of the machine gun, but I omitted them. It’s too small.
 Because a recent kit is prepared with the entire volume of excellent photo-etched parts, I can finish it with reality without a third party’s photo-etched parts.
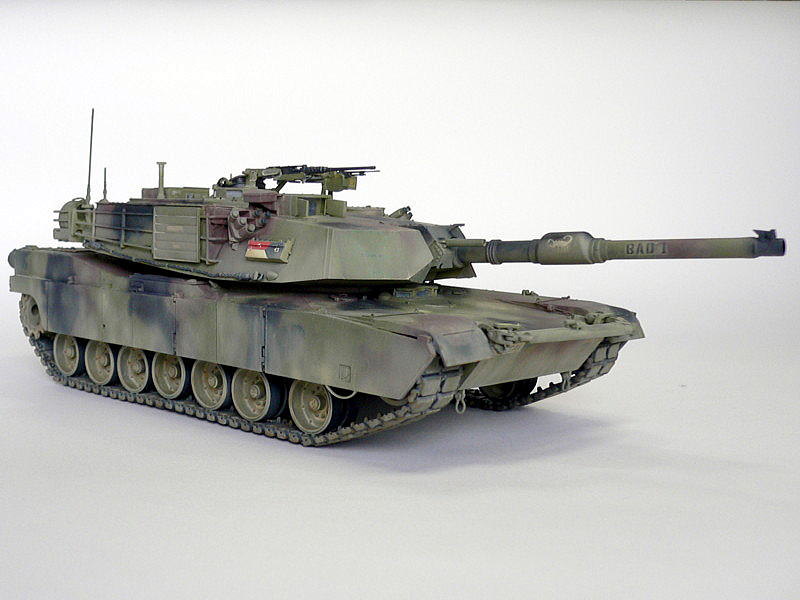
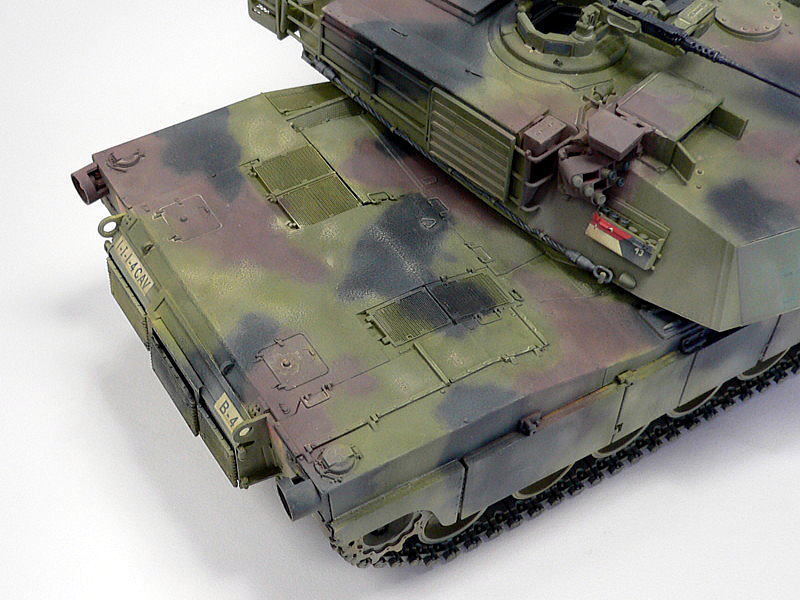
 Finally, the painting starts. I decided on the camouflage pattern roughly in Red, Brown, Khaki Green, and Black.
 The basic painting is completed. (2007/02/24)
 After washing, the color tone was darker. (2007/03/01)
 Coloring was settled down when the painting finished though it was brightly painted at the beginning… It is regrettable to have silvering with the decals…
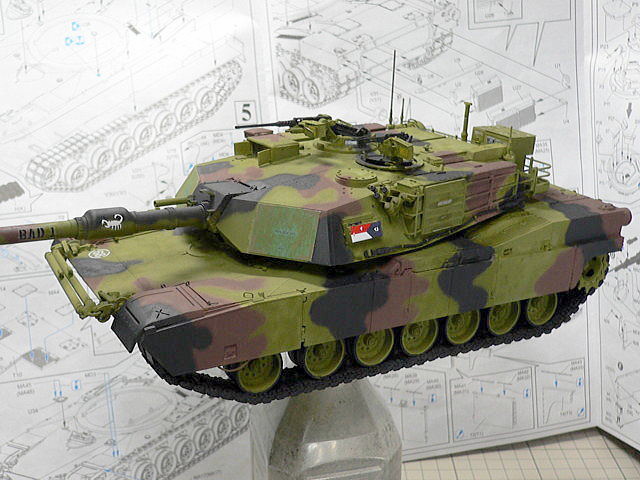
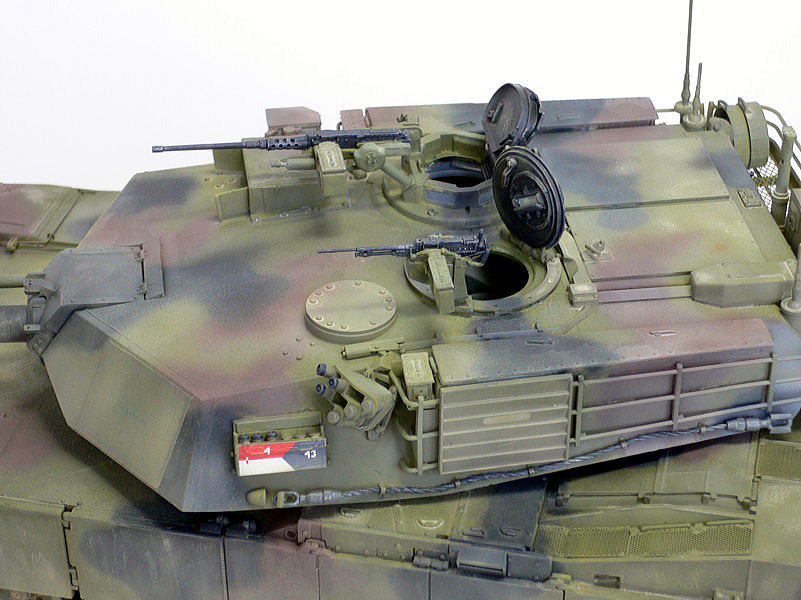
 According to the instruction, marking was the first infantry division in the Iraq War in 2004. The mark of the scorpion is excellent!
 I did not do weathering paint these taillights for the accent. I suppose to let it be shining is good-looking.
 To see natural dirt in the vertical direction on the side skirt.
 I made the hole 12.7mm machine gun on the side by the mini drill and emphasized the detail. Even the character of the back of the hatch is understood well; lovely details.
 I had a hard time with detailed tiny decals pasting.
 The periscope is thinly painted in clear blue. Whoops! The window of the infrared device was upper and lowered opposite.
 After having painted the machine gun in black, I did dry brushing lightly with the gunmetal.
 After washing, the paint was not wiped off well and remained with strangely irregular marks. It did not disappear entirely through the matte coat airbrushing and rubbed with the cotton bud. I will take care of this kind of mistake next time…
(2007/3/10)


コメント