

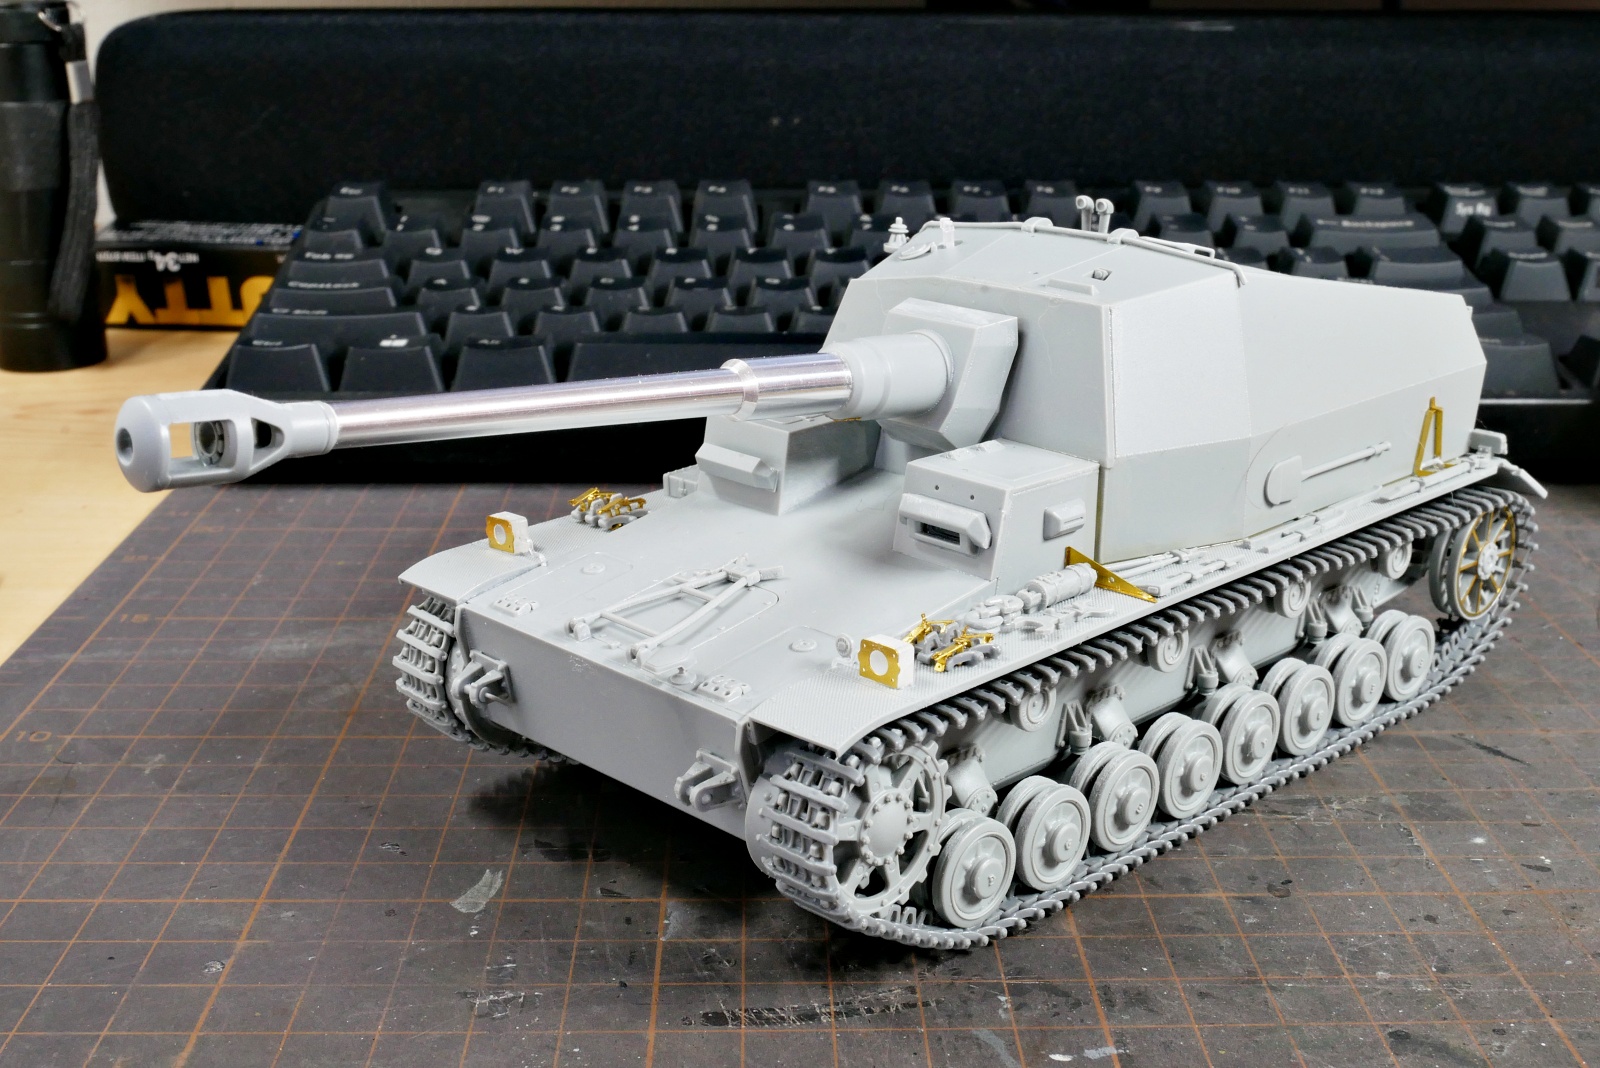
引越しをしたばかりでまだあんまり塗装環境が整っていないので他のキットに手を出してしまいました。今回はドイツ軍の試作自走砲、ディッカーマックスを作ってみようかと思います。いま電動昇降デスクを注文中でそれが届いたらちゃんと換気に配慮してエアブラシを吹こうかと思います。あと1週間くらい時間があればのんびり組み立て作業をしようかと考えてます。休みの午後に些末な事務作業やら引越し準備やら後片付けなどに煩わされないで好きな模型製作をしてるのは幸せです。とは言ってもとりあえずいろんな物を棚にぶっこんで見えなくして片づけた気になってるだけなんですけど。カーテンを買い直したりいろいろ引越し後にもやること増えそうです。
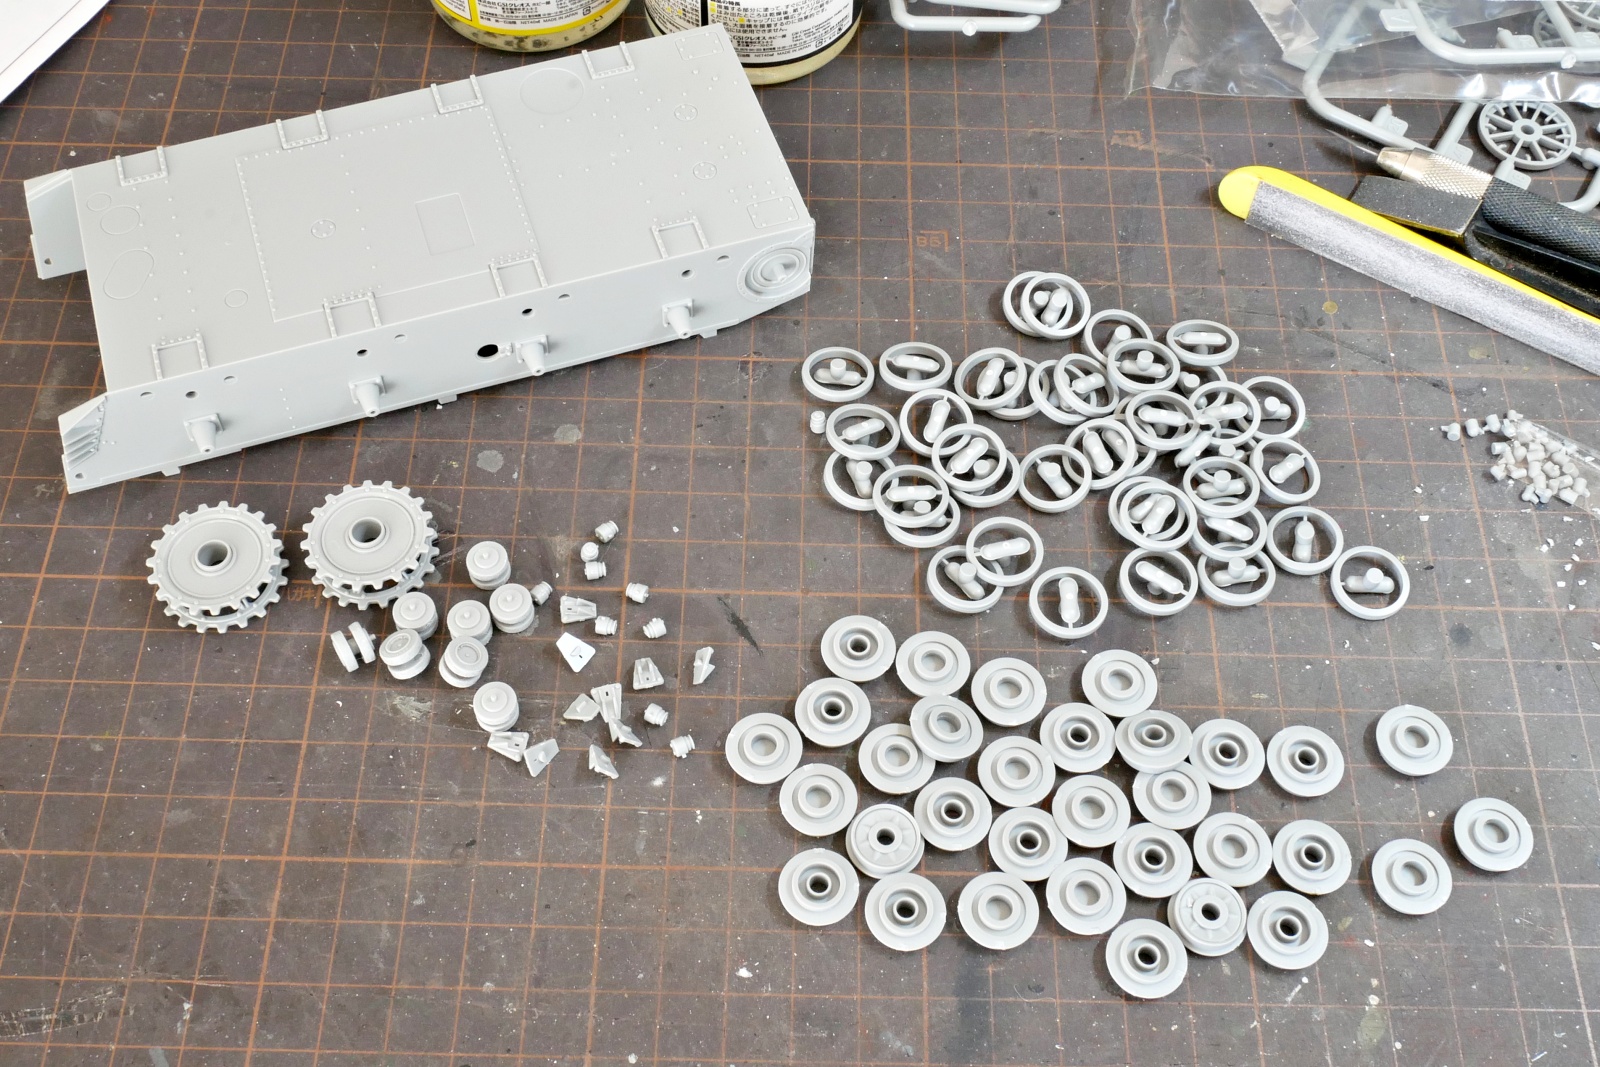
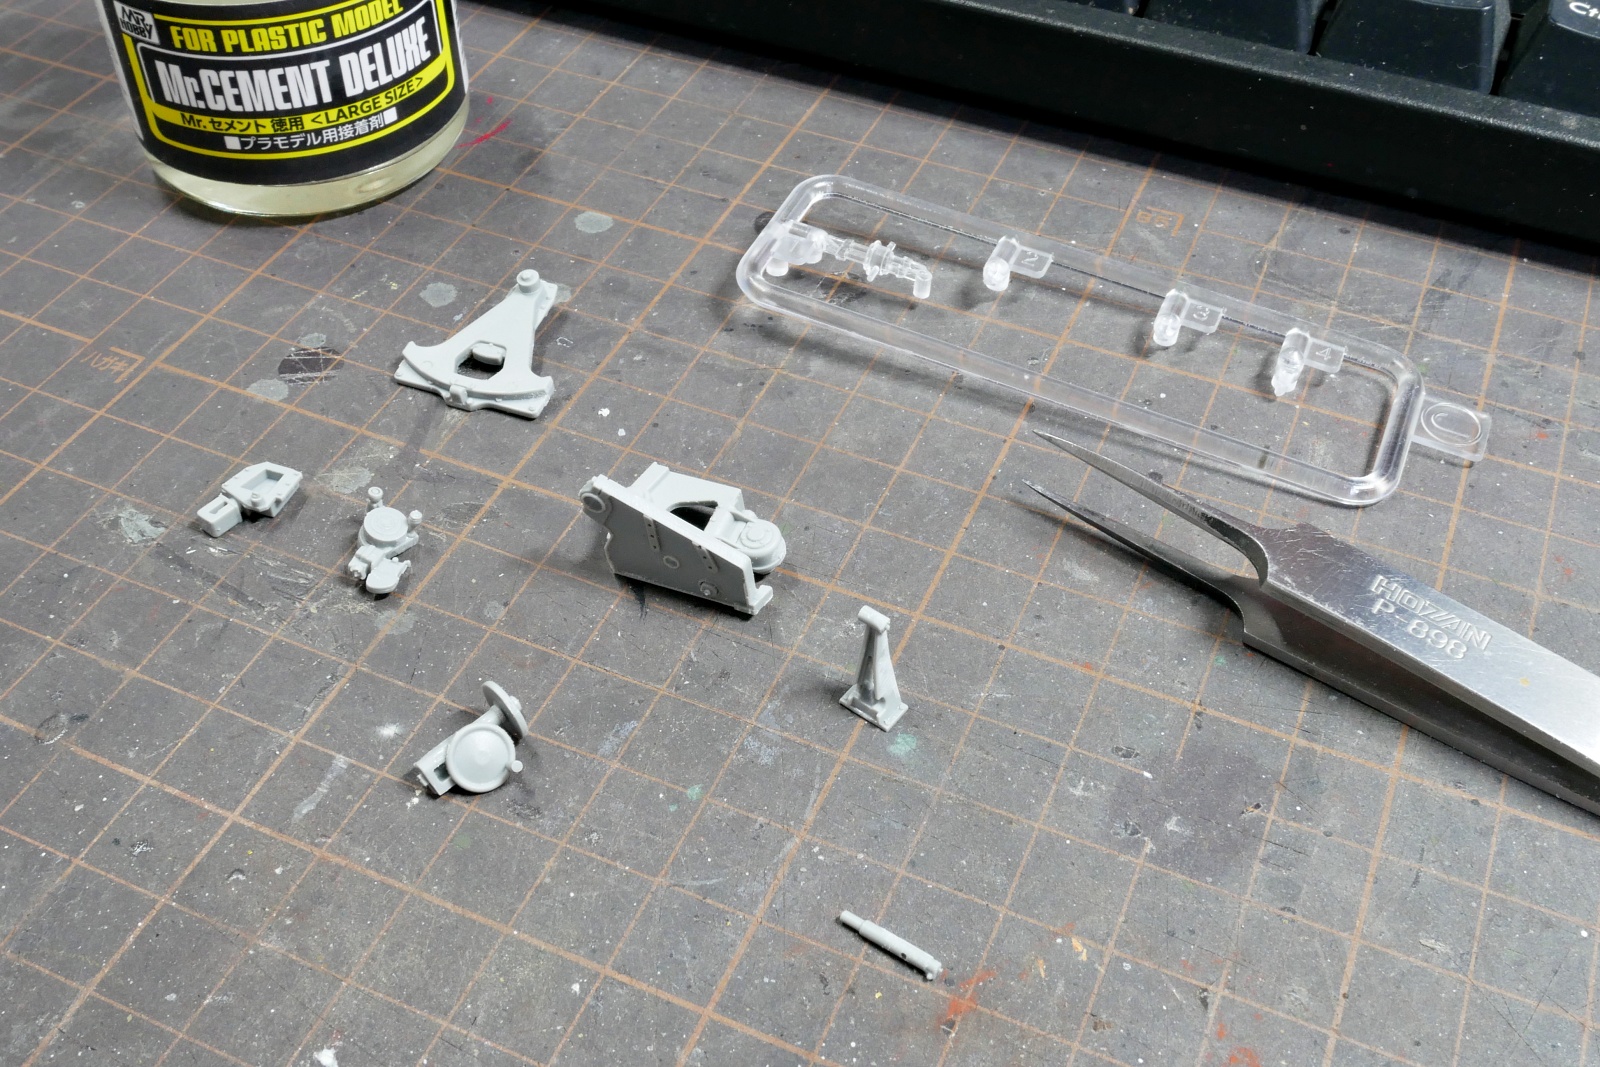
例によっていつものごとく、組立説明書の部品番号があんまりあてになりません。一応は説明書の部品形状と番号に疑問があるときは自分なりに試行錯誤しながらパーツを取捨選択しました。起動輪の裏側のパーツに迷いました。ひょっとしたら違うかも。
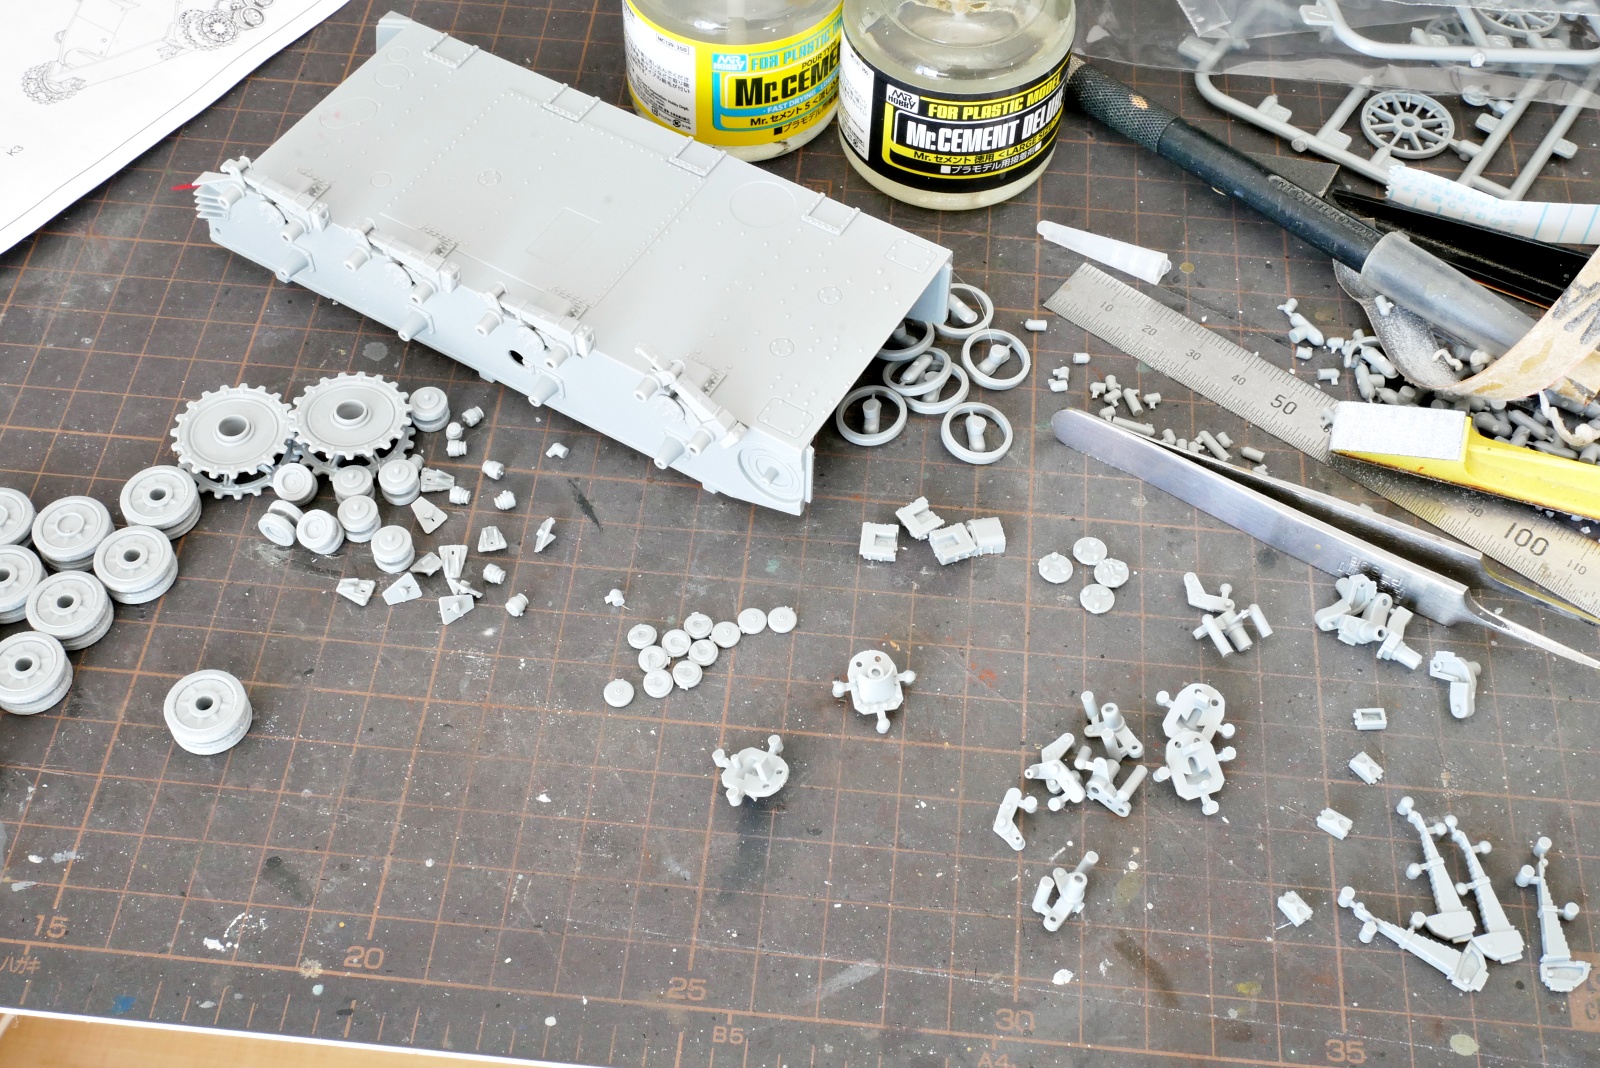
IV号戦車は初期のほうがサスペンションの組立が複雑なのかな。トライスターのキットでも散々組み立てに苦労した記憶が。ドラゴンのディッカーマックスもIV号戦車初期の車両の足回りだと思うのでなんだか部品がややこしいです。
中居氏のコメント、まだ芸能活動を続けるのか。これこそ「ザ!世界仰天ニュース」。例の女子アナ、病気だと言いつつ度々ネットで記事を見かけてどんだけお騒がせなんだよと思っていたら、かなり気の毒な内容でそちらも驚きました。うざいと思っていたがさすがに同情します。
(2025/01/11)
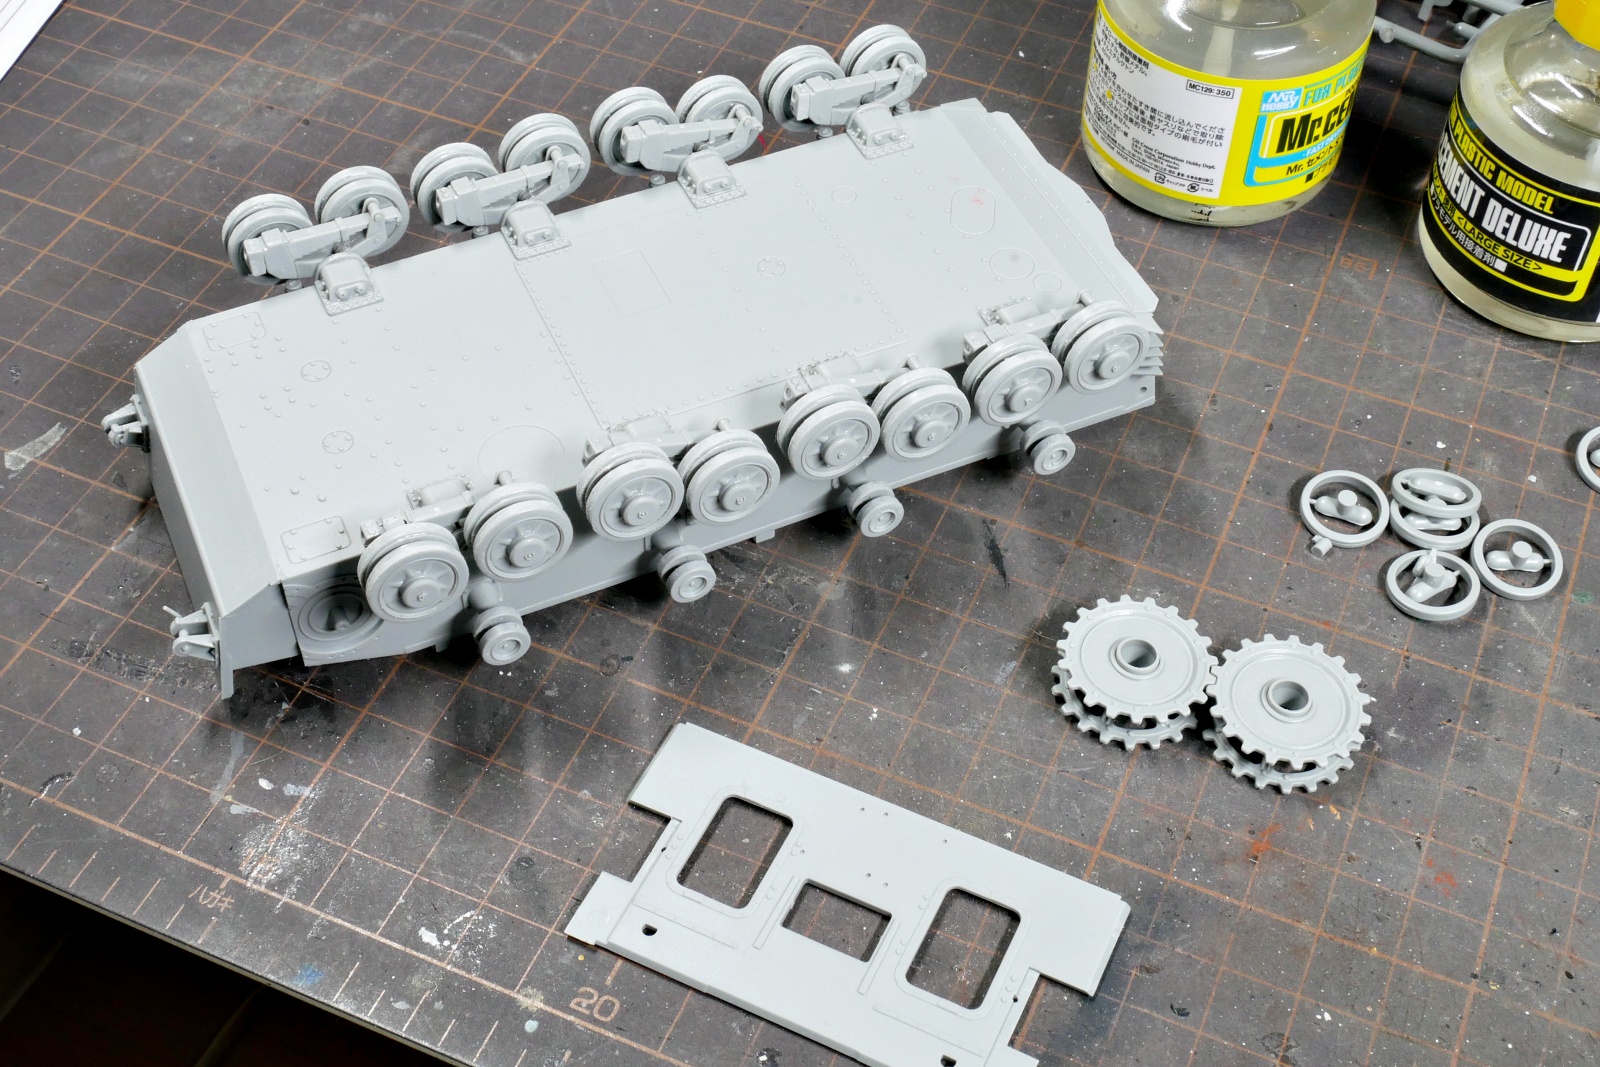
転輪のシャーシへの組付けが完了しました。ゴムタイヤの横にメーカーの刻印が再現されていたりとメーカーのこだわりが感じられます。
このキットにはそれほど多くのエッチングパーツは使用されていません。でもこの辺からちょっとずつ金属製のパーツが混じってきます。
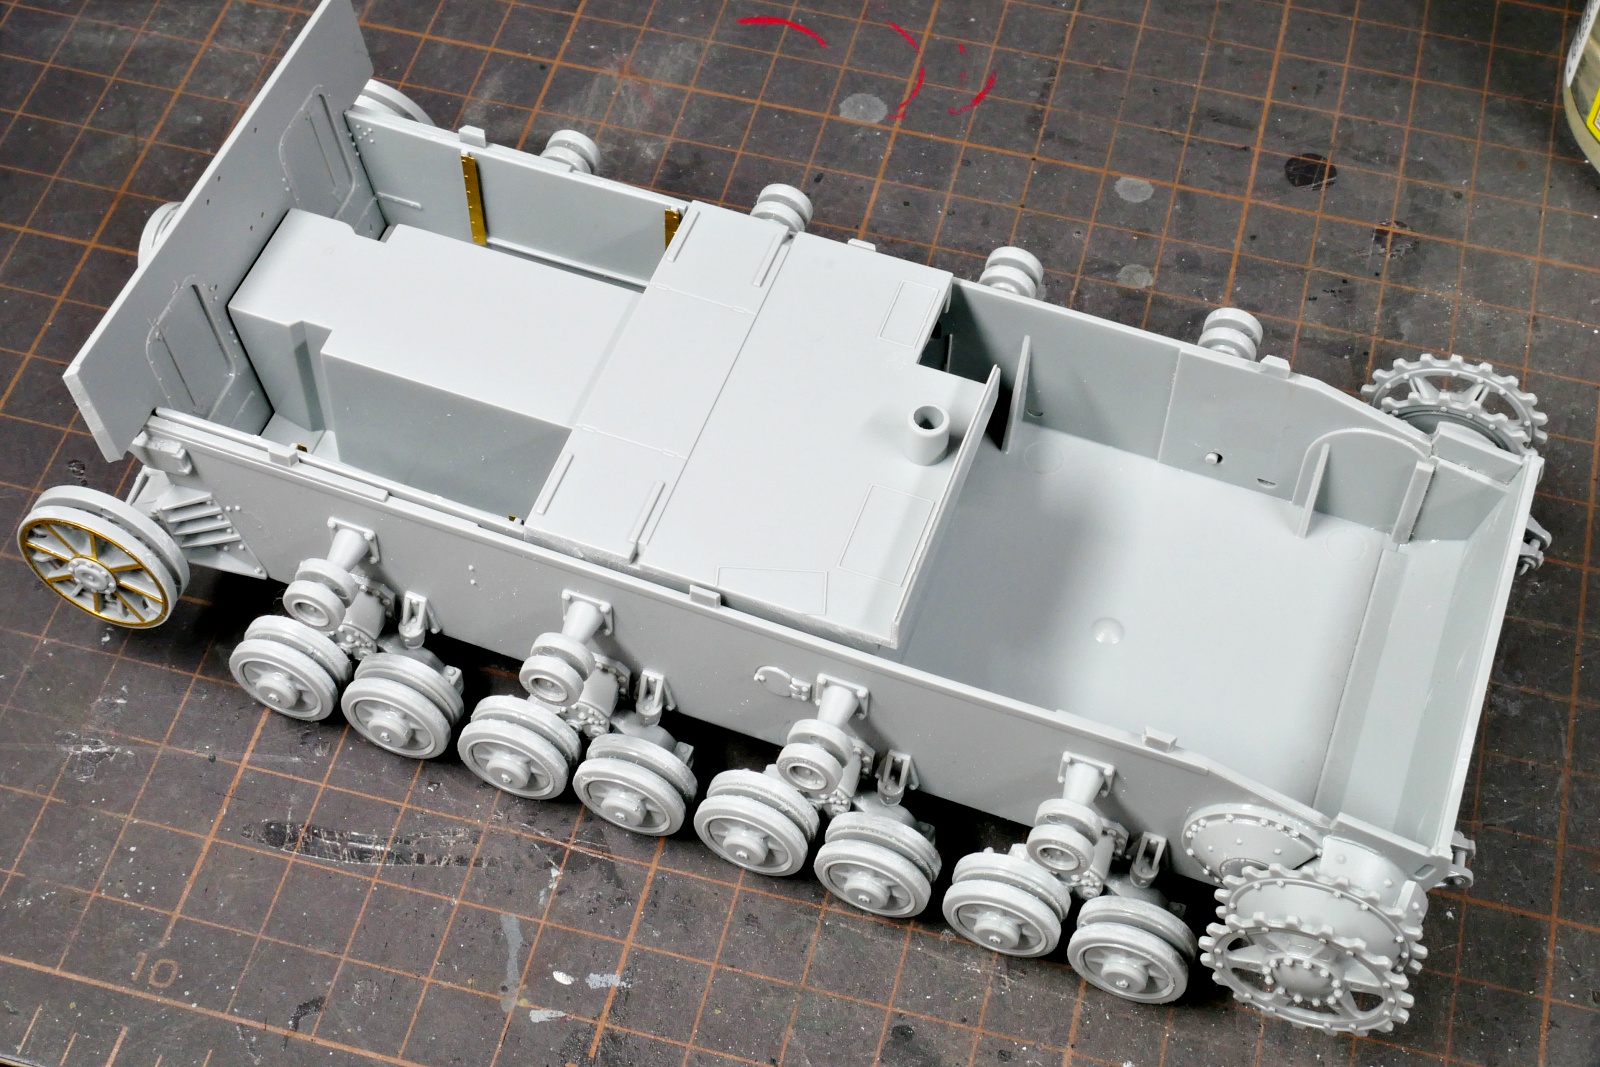
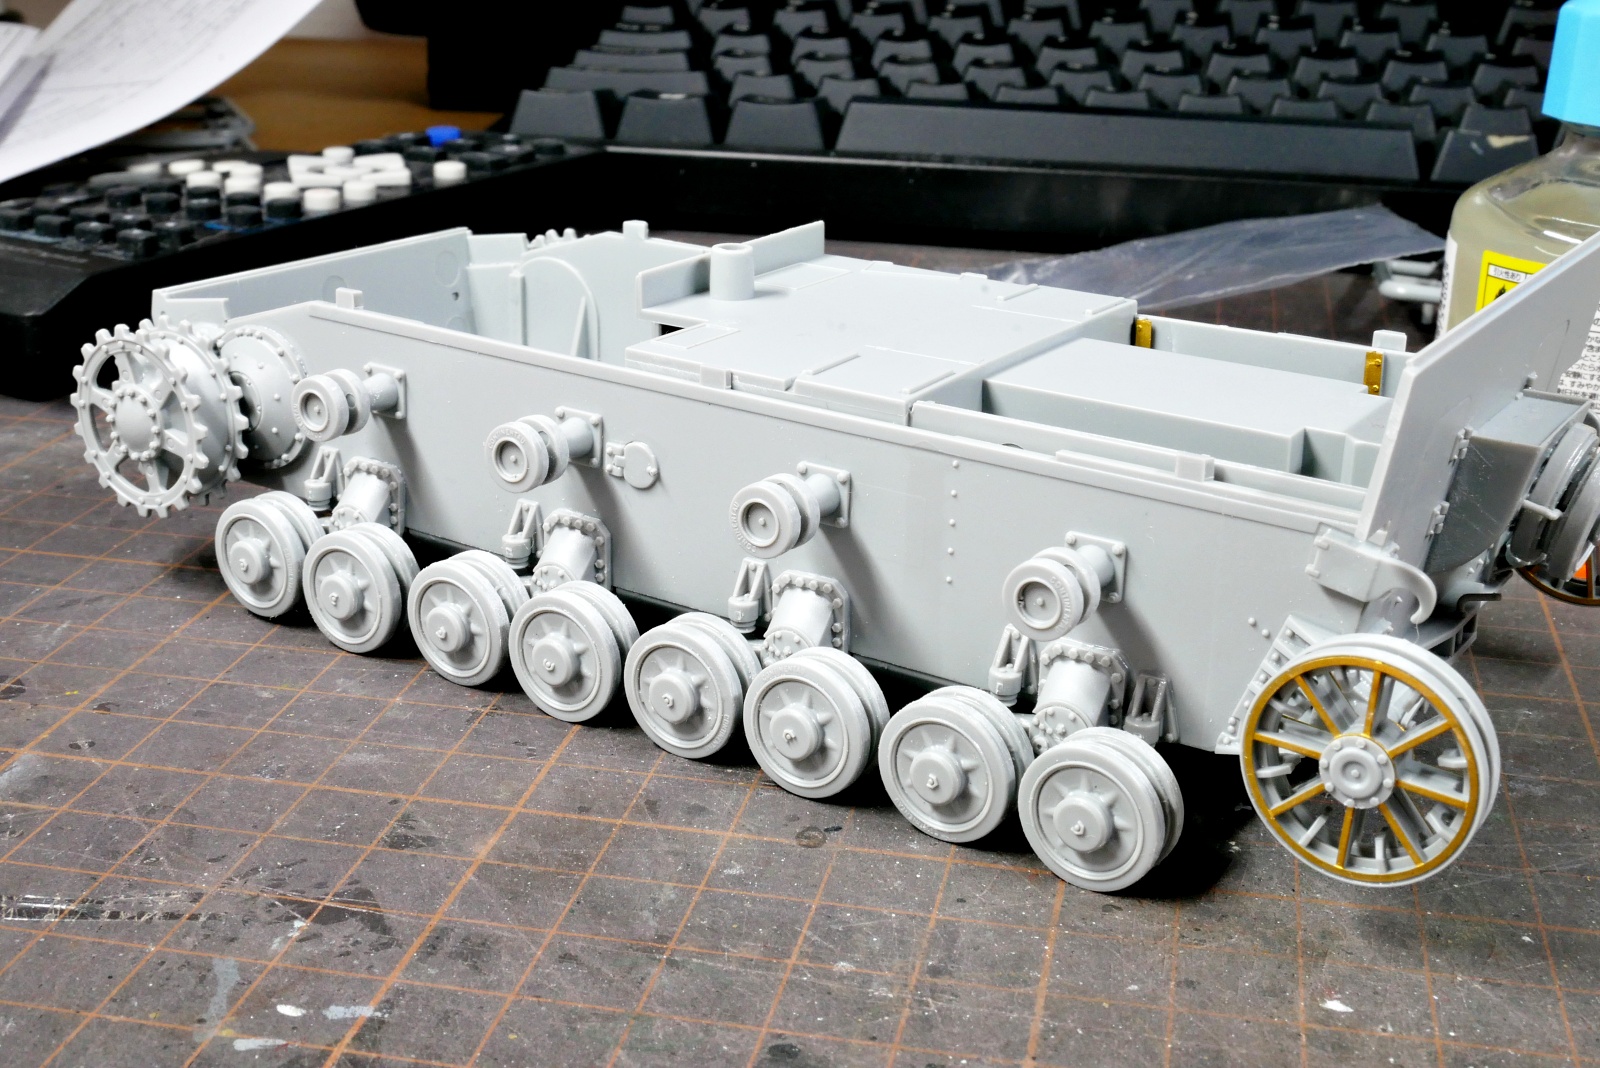
砲架になる部分や後部の戦闘室のパーツなのかな。けっこう大きなパーツをはじめのうちにシャーシに組み込むようです。最後部の誘導輪は微妙に位置を変えられるんですが、結局のところ一番後ろにずらしても履帯は綺麗に巻けました。
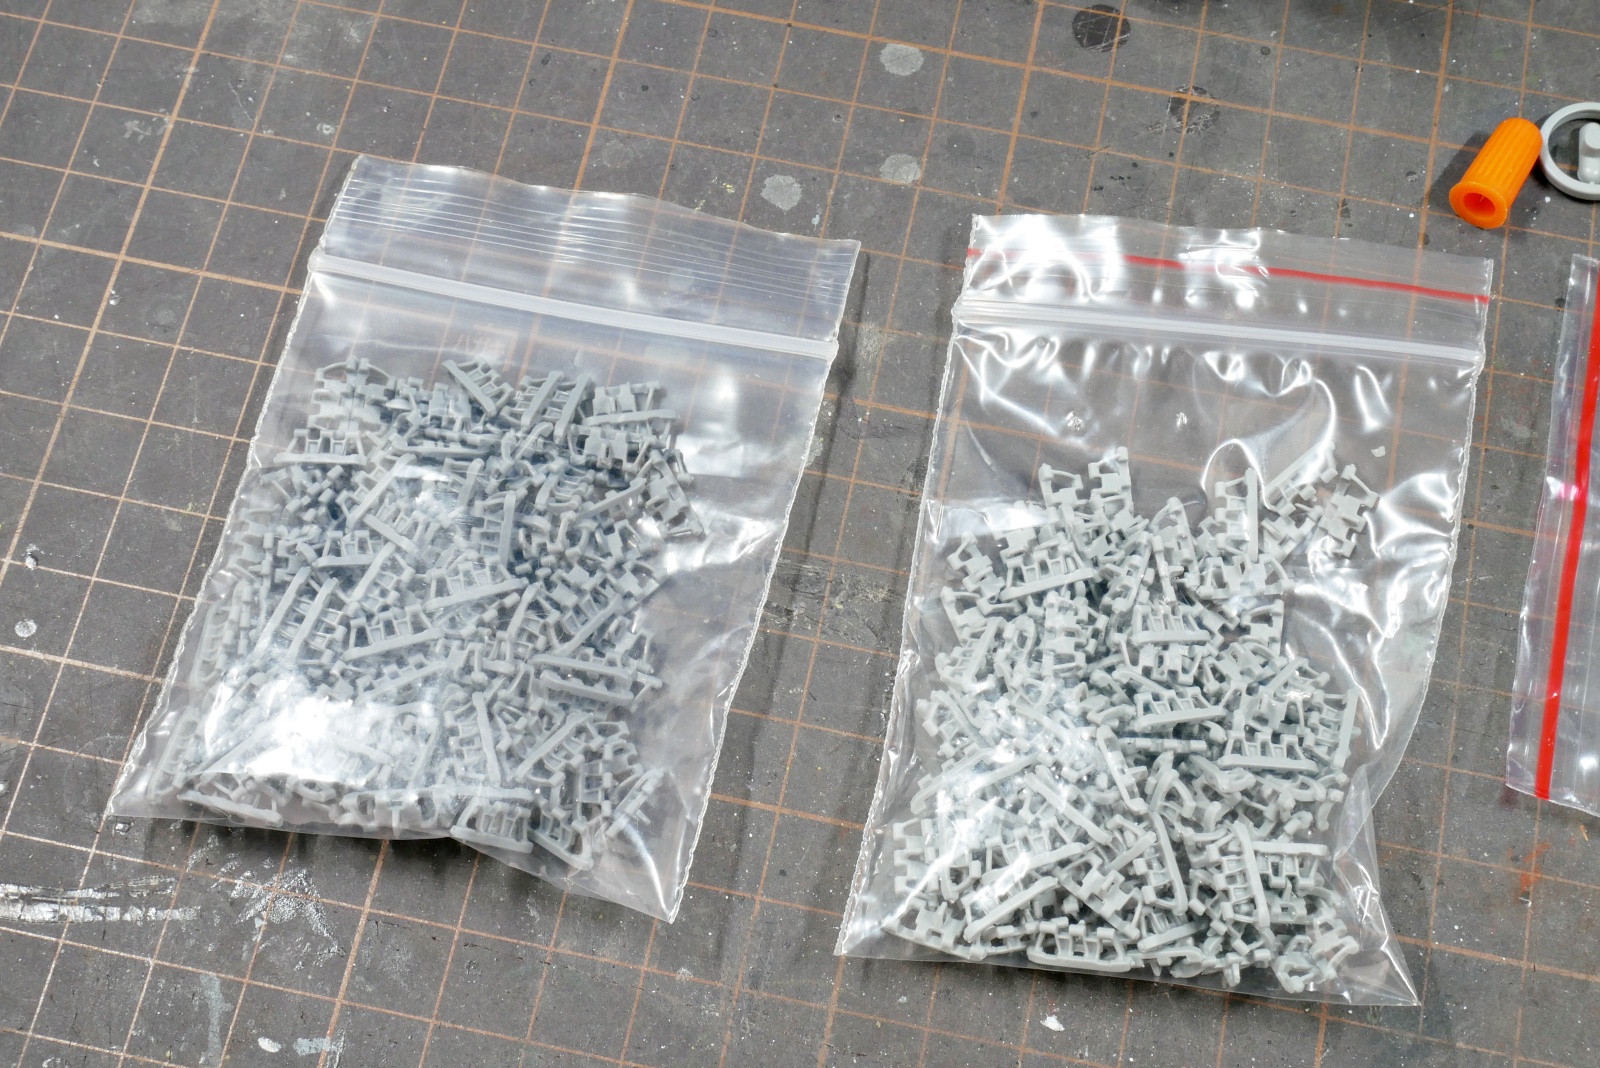
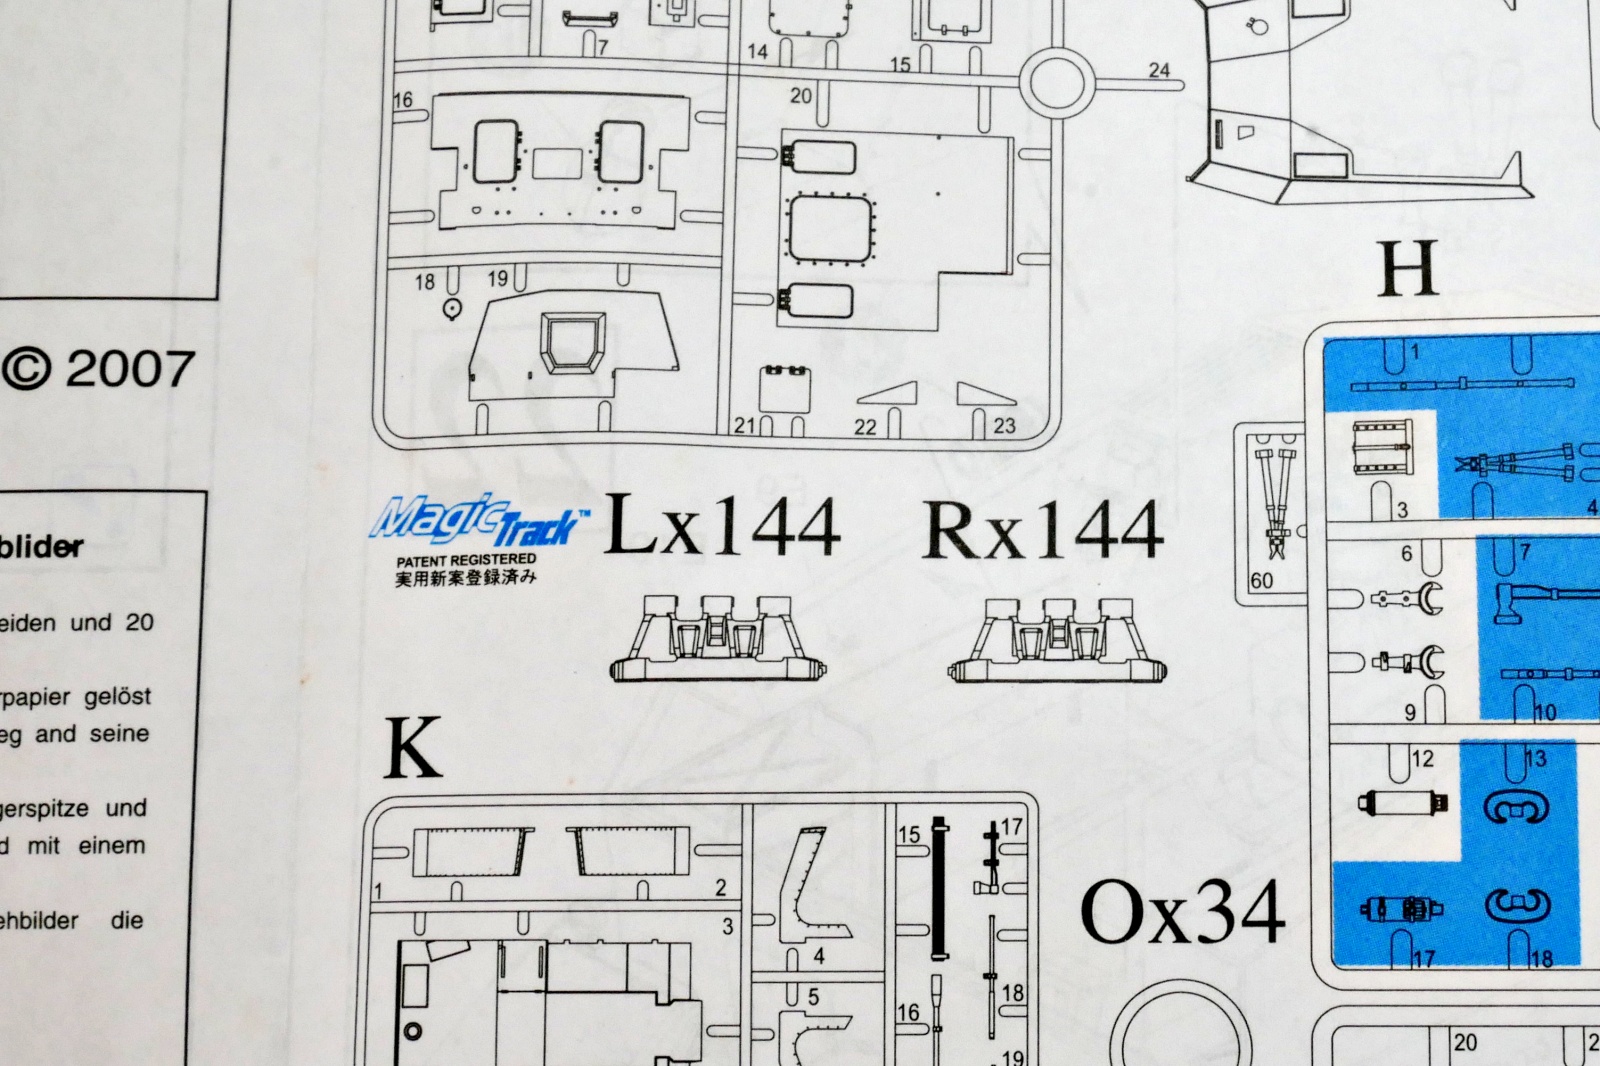
マジックトラックの履帯、右と左が区別されているようです。連結ピンの微妙にでっぱりが長いほうが内側にくるみたい。ということで薄いグレーのパーツが前方から見て左側で、濃いグレーのパーツは右側となるようです。でも正直なところどっち側に取り付けてもほとんど見分けがつかないように思います。
引越し直後でカーテンが無くて部屋が非常に寒いです。エアコンを付けても保温が悪いのですぐに寒くなります。それで昨日は都内をけっこう嫁とカーテンを探しに歩いたのですが気に入ったものに出会うことなく、それと大きなカーテン屋さんがビル丸ごと休業日で休みだったりとで無駄足でした。焼肉を食べて帰ってきただけという・・・。家に帰ると寒いし。今日はもっと下調べして違うカーテン専門店に行こうと思います。焼肉もずいぶん値上がりしてませんかね。けっこう廃業している店も多いと聞きますが利用者が値上げに追いついてこないのか、あるいは単にコロナ禍で増えすぎた店が淘汰されているのかどうなんでしょうね。
(2025/01/13)
こんな感じで左右の履帯パーツが微妙に違います。もう少し解りやすく指示してくれれば迷わないんですけどね。
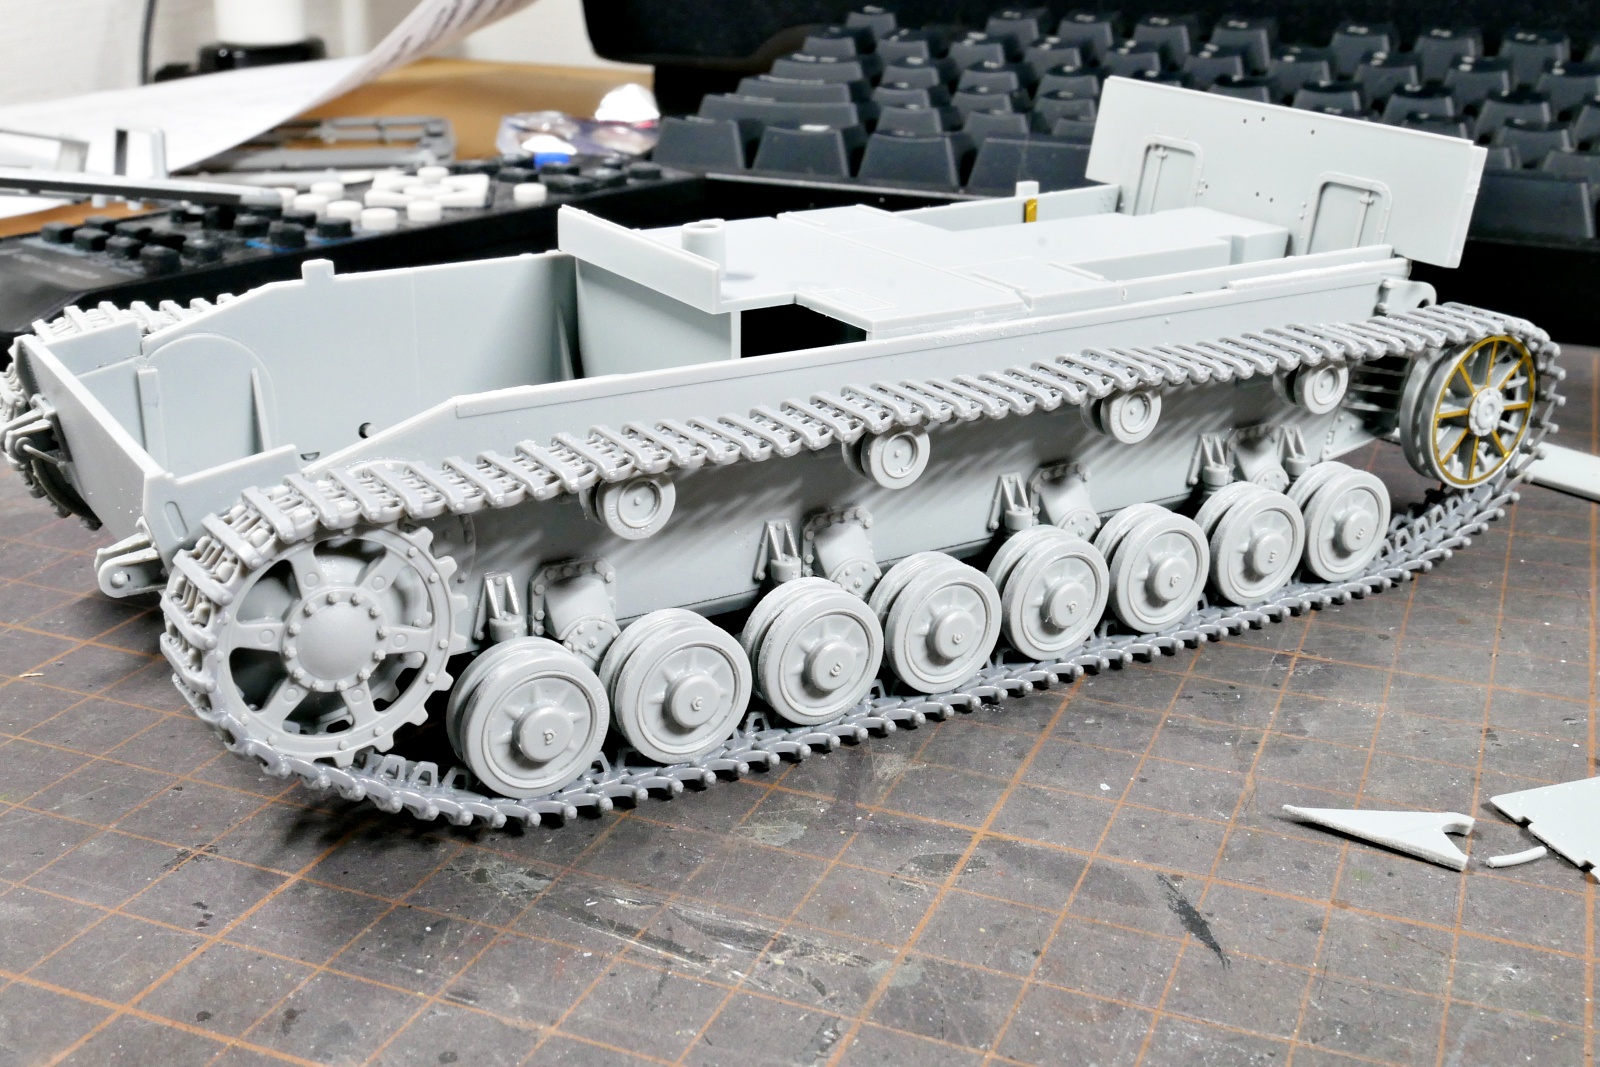
履帯は少し上側は弛みを持たせつつ何とかちゃんと巻けました。マジックトラックなので経年劣化で切れることもないし、何よりランナーから切り離す作業が無い分かなりスムースに作業ができました。でも自分の場合はベルト式の履帯でも自分の場合は劣化して切れたことは今まで無いです。すべての接点をカチッと接着しているのとそれほどテンションを掛けていないからかも。
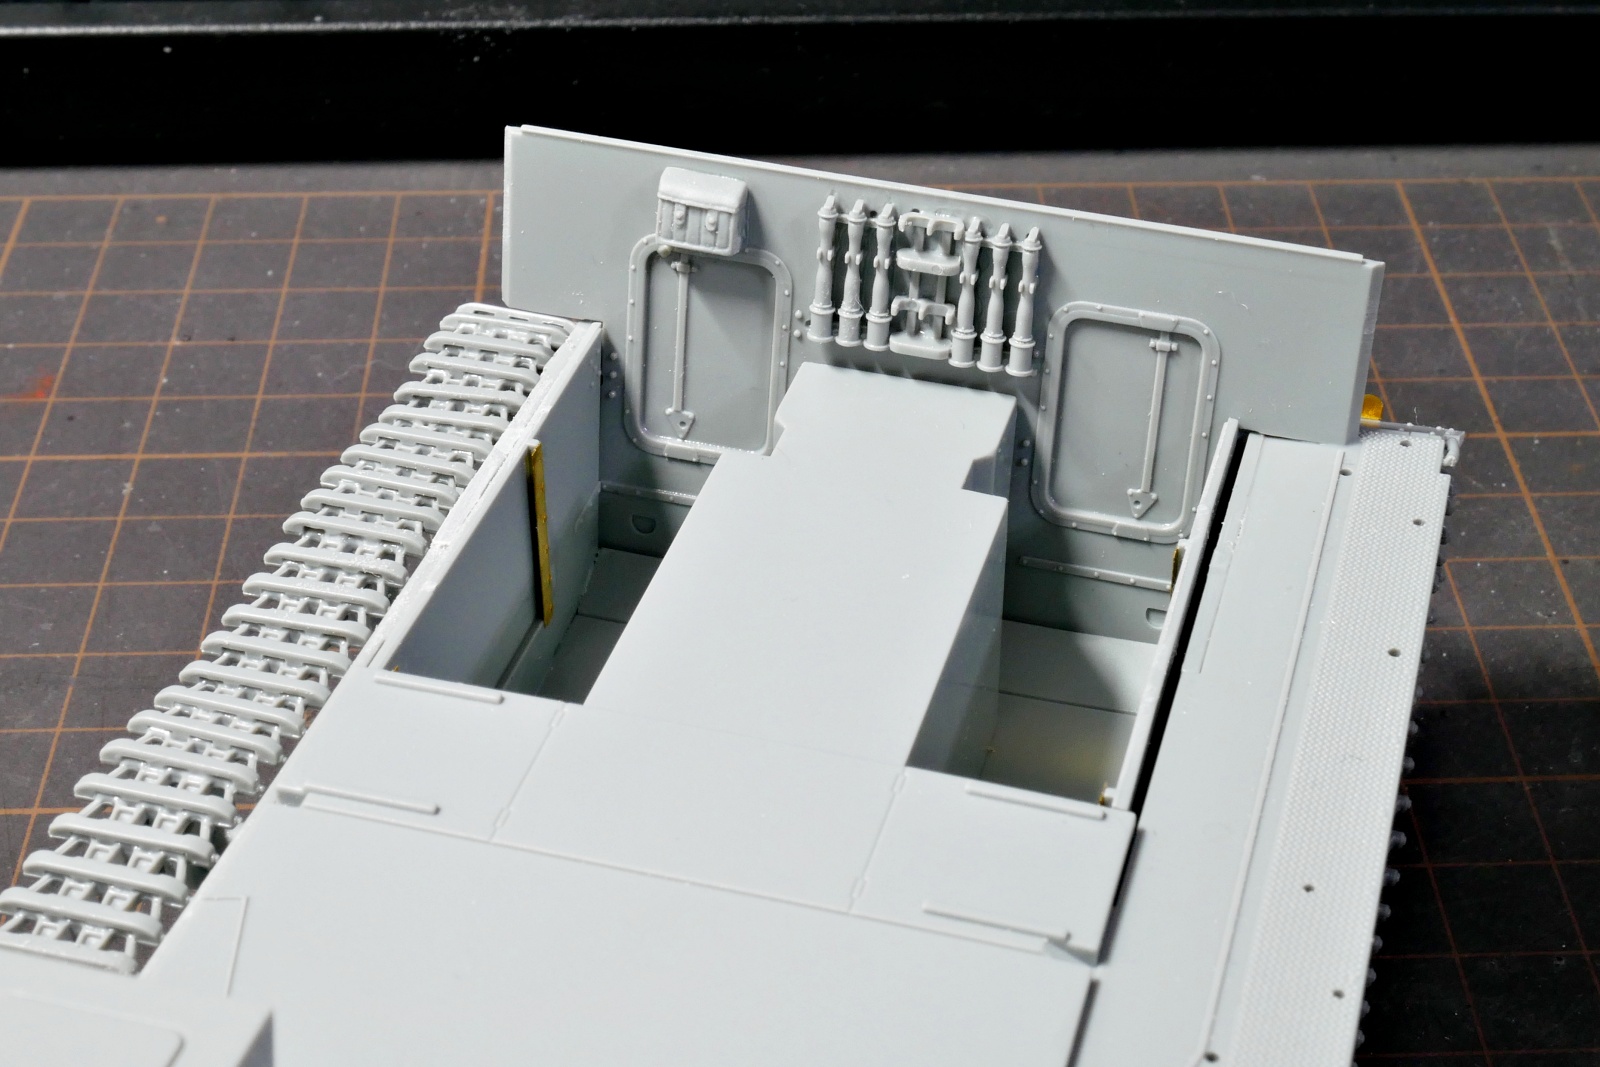
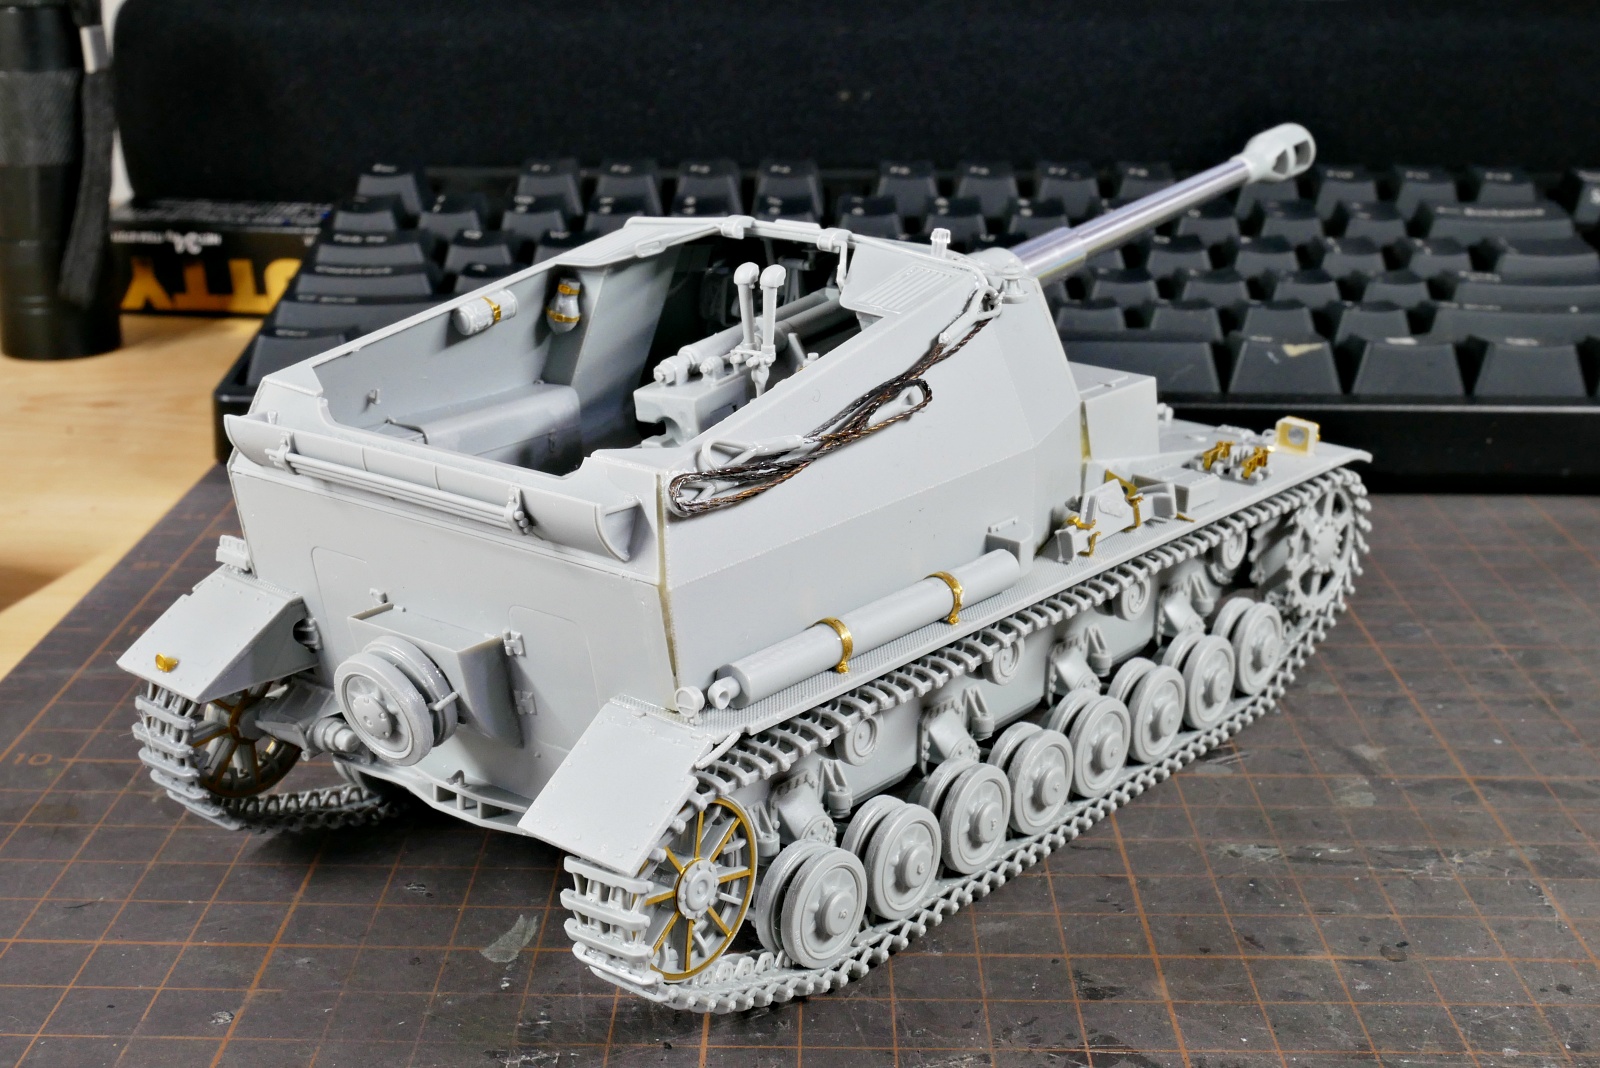
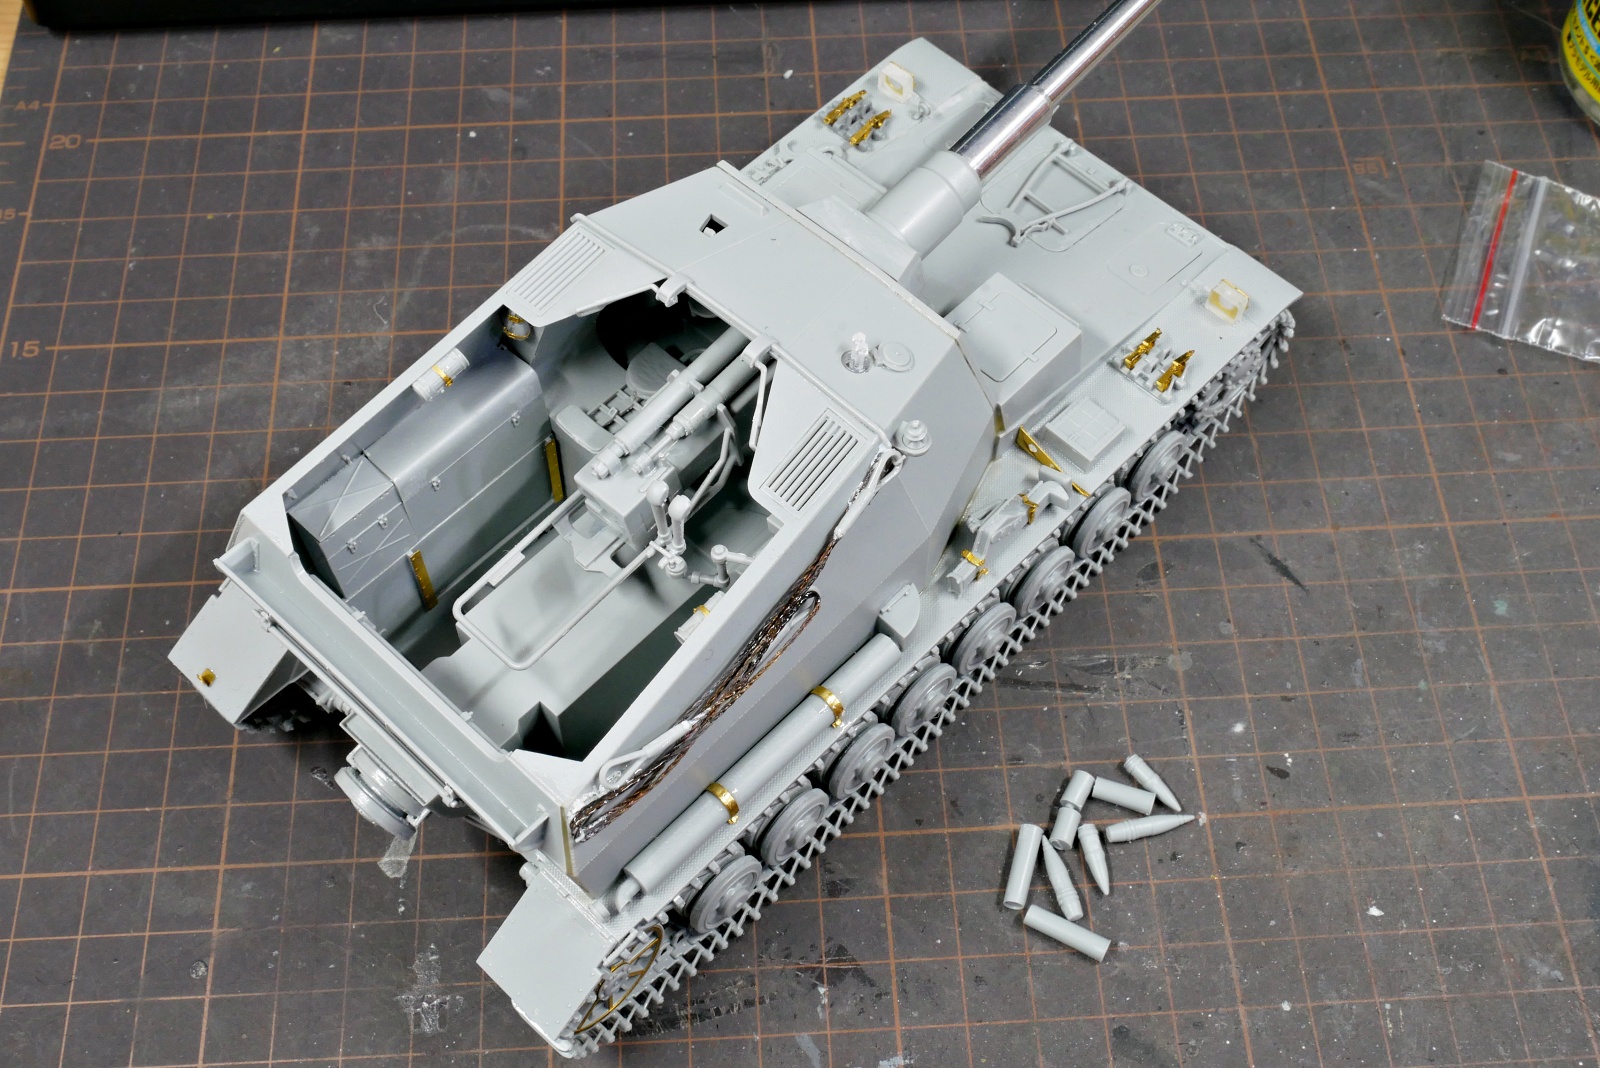
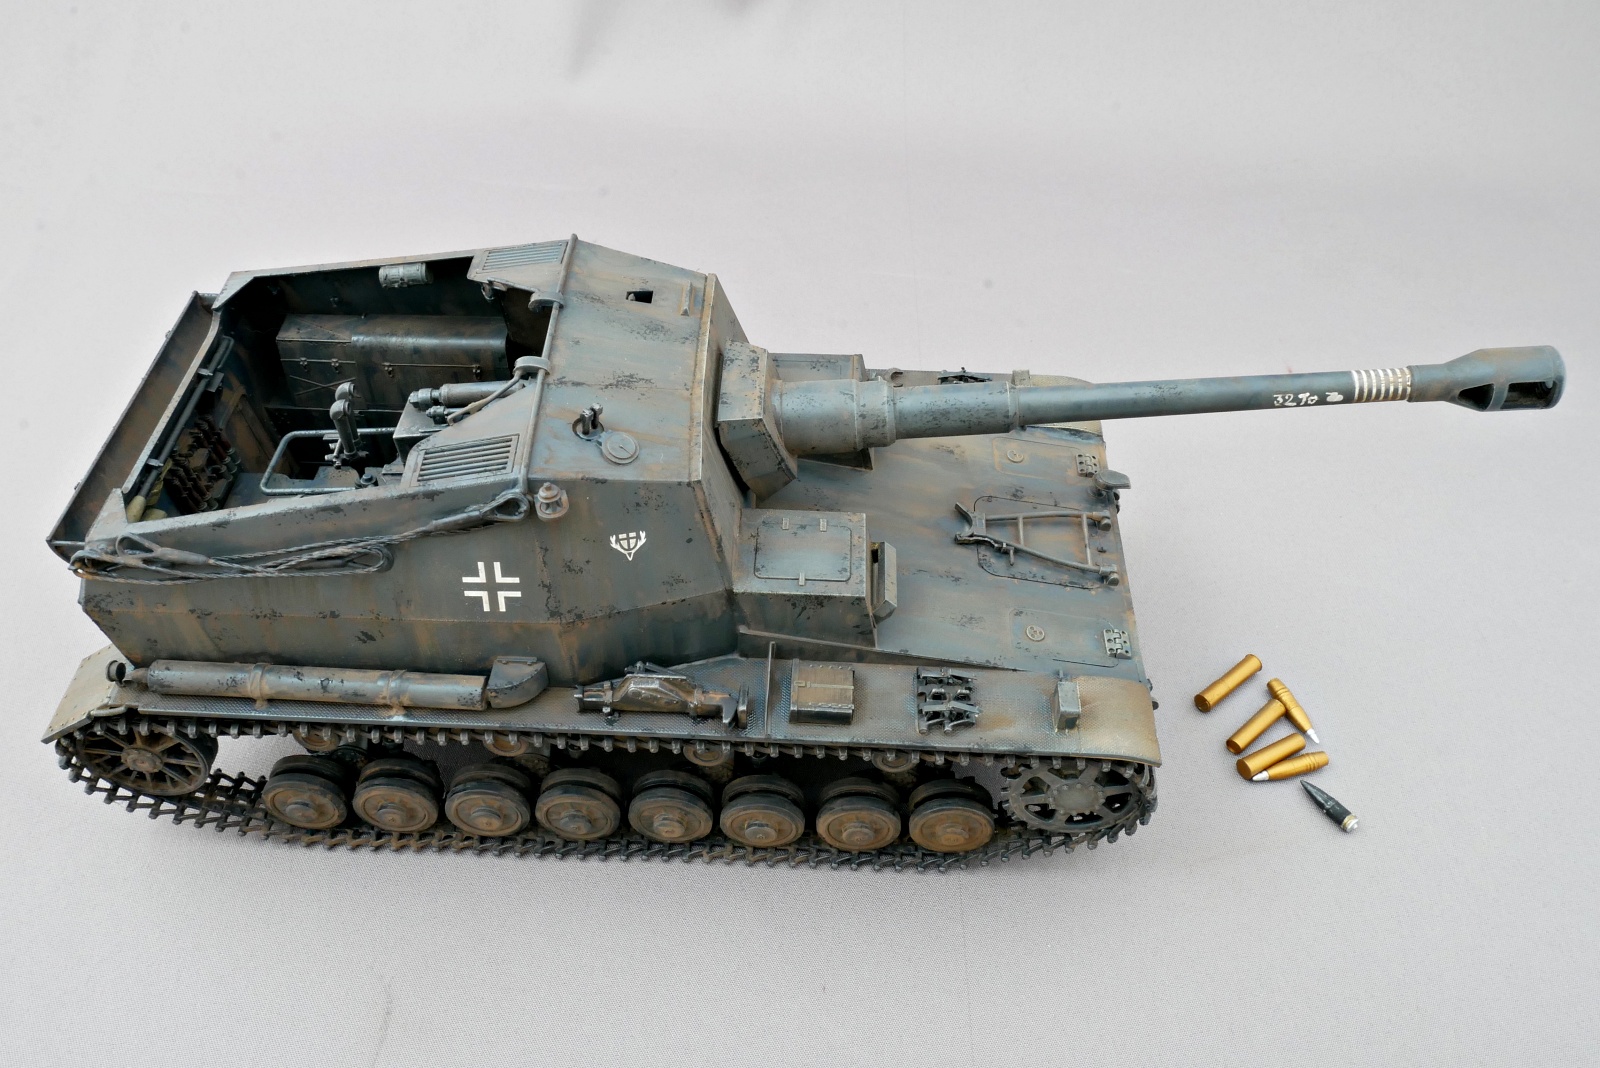
戦闘室後部には手りゅう弾が並べてあります。敵歩兵に肉薄されたときに反撃するためでしょう。でも砲兵の周りには護衛の味方歩兵とかあんまりいないんでしょうかね。手りゅう弾で応戦するようになったらけっこうヤバい状況かと思います。
ディッカーマックスはオープントップ車両なので内部の砲架や細かい機構が見えます。取り付けてみると後ろのほうが少し見えるだけでそこまで細かい部分が分かるというのでもないです。
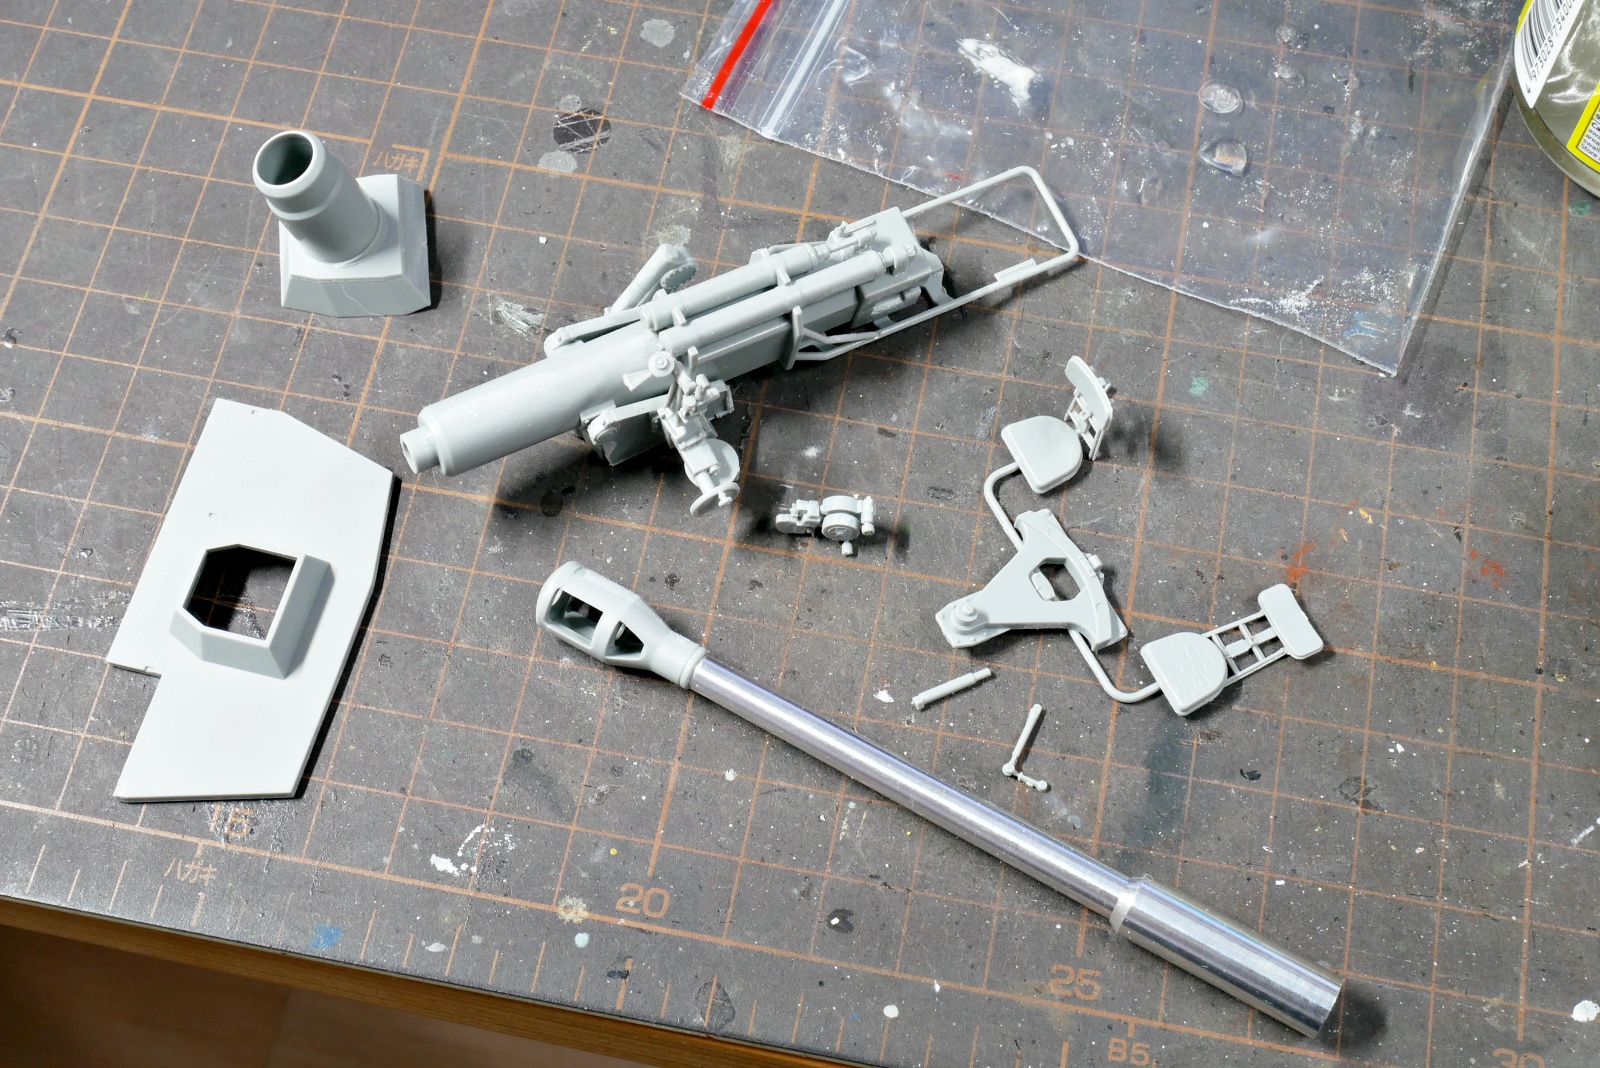
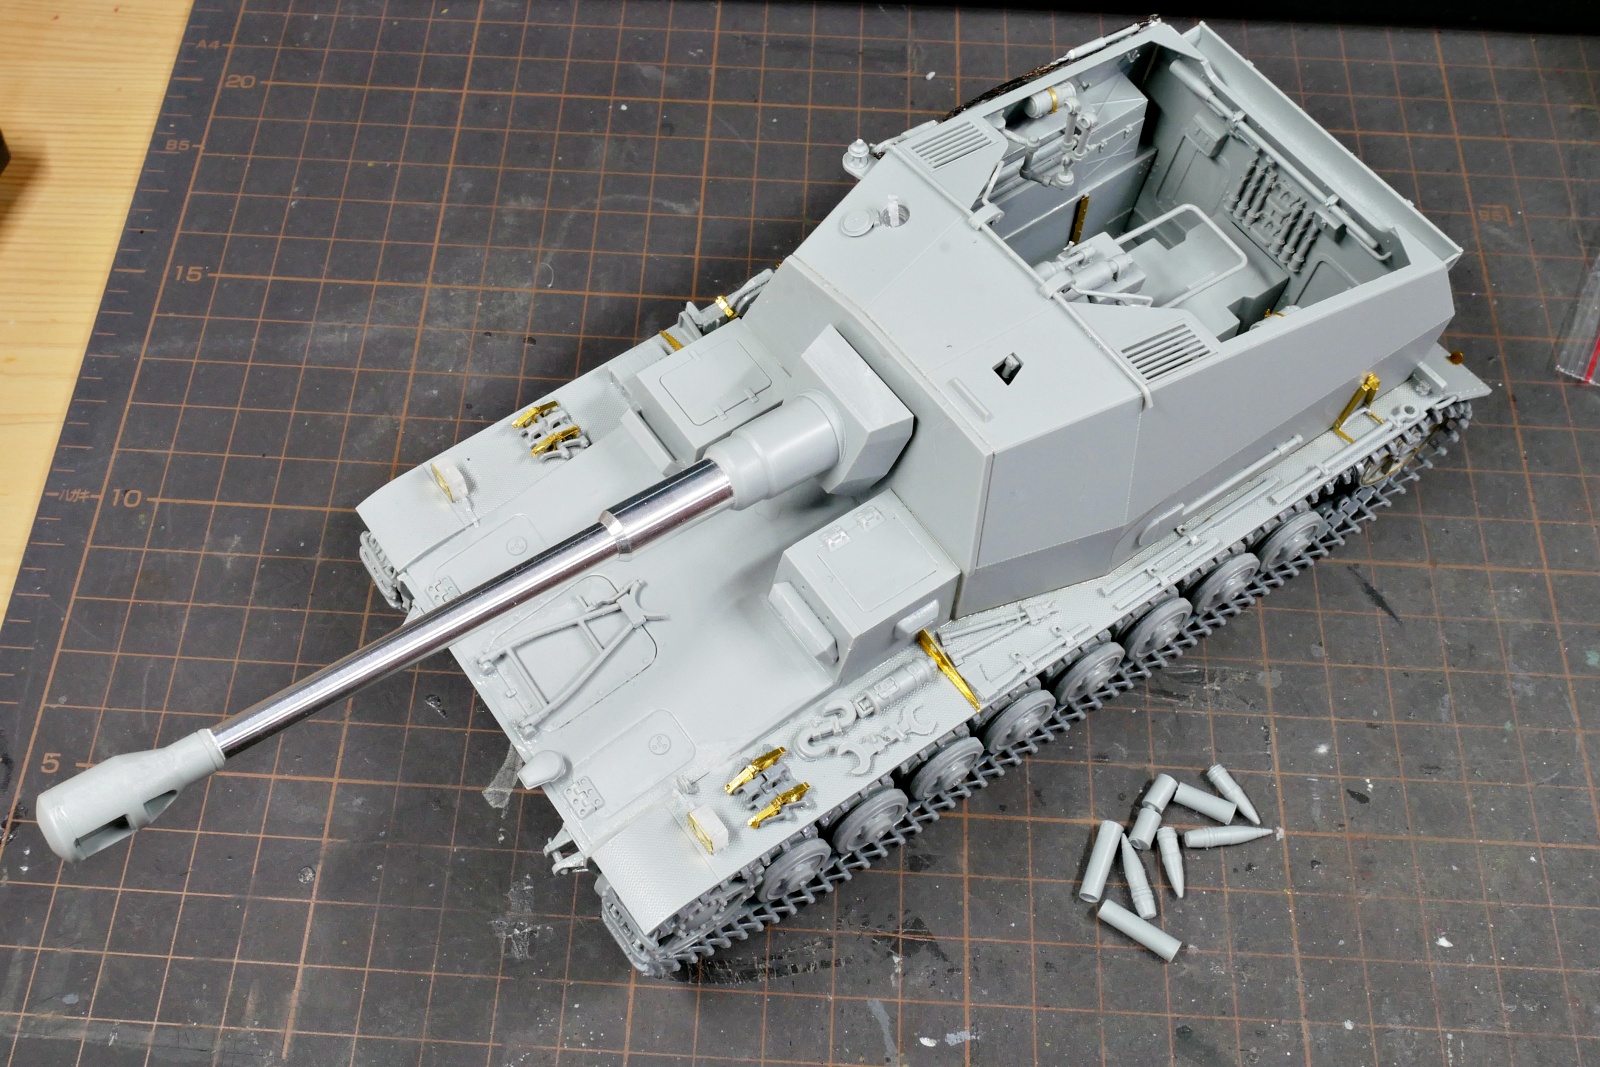
メタルバレルが入っていました。説明書には記載が無くてプラパーツを使うようになっていますがこれはせっかくだから使わないともったいない。少しプラの部品に加工が必要ですけど。
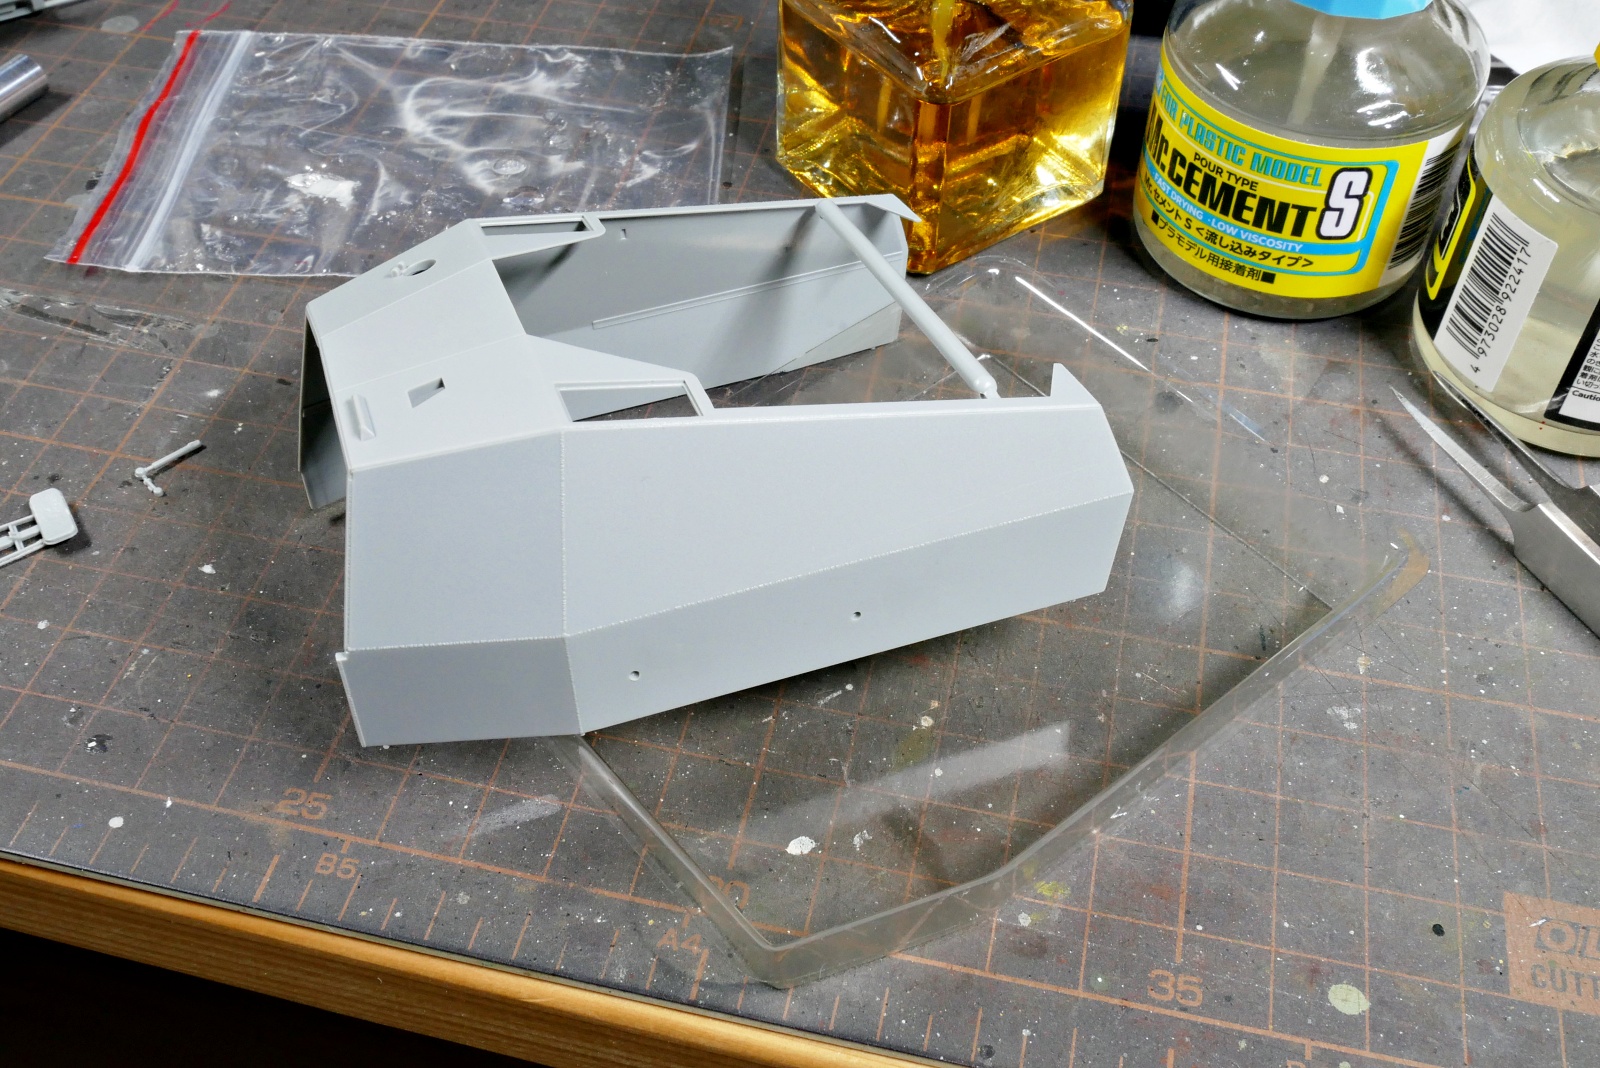
戦闘室は一体パーツになっていて壊れやすいからなのか、プラスチックのガードに入っていました。このキット、デラックスエディションとかプレミアムエディションとか銘打ってないけどけっこう豪華な内容だと思いました。このパーツも溶接跡とか上手く再現されています。
先日引越し後にようやくカーテンをオーダーできました。既製品の無印やニトリだと微妙にサイズが合わなくて。サンゲツ、スミノエ、川島織物やリリカラみたいな有名メーカーでなくても思っていたよりもお金が掛かってしまいました。標準的サイズの価格よりもプリーツを入れると必要生地が増えるのもあるし、窓が一つ、幅5mの大きなのがあるので高くなってしまったのでしょう。いま思えば既製品で大きめのを買って安全ピンでとめても良いんだけど、気軽に考えていたけれどもオーダーカーテンは贅沢品ですね。奥が深い世界です。快適に過ごしたいのもあるし、嫁の意見も尊重したいしと、まぁ引越し前後はいろいろお金が掛かります。
(2025/01/15)
戦闘室の車体への組付けがけっこう難しかったです。というか変わった組み方ですね。多少隙間ができてもあとでパテで埋めるくらいで、あまり神経質に考えないで一気に組み立てちゃいました。
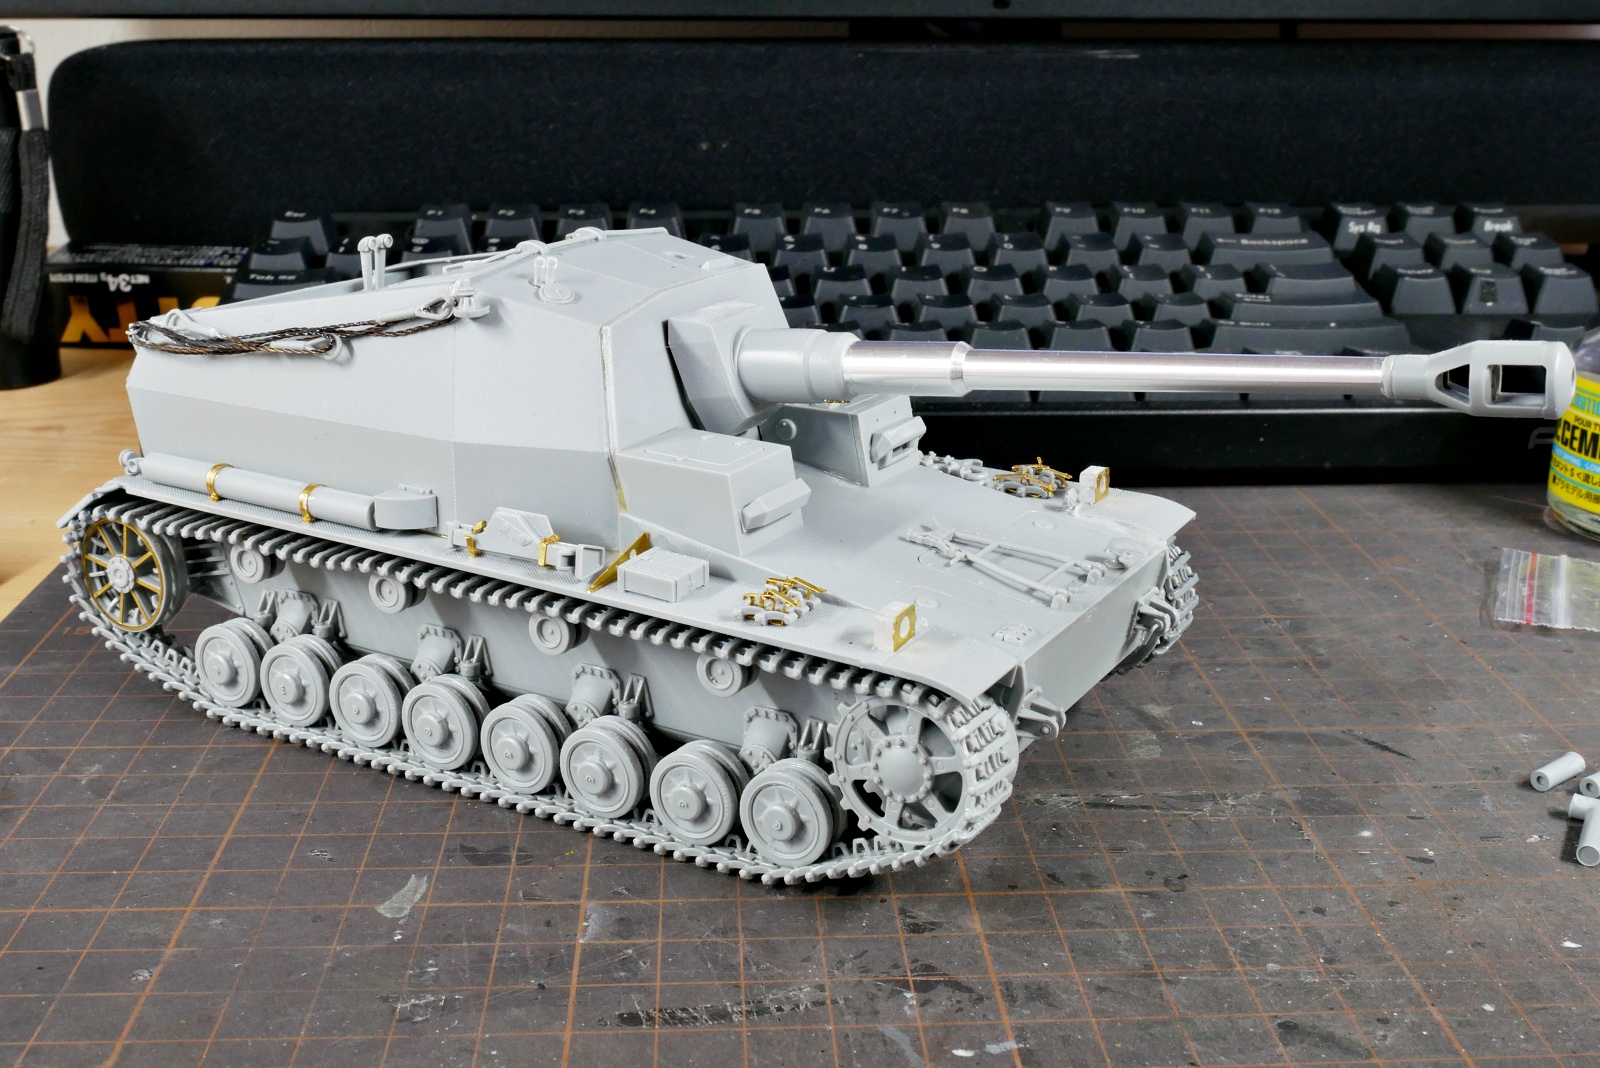
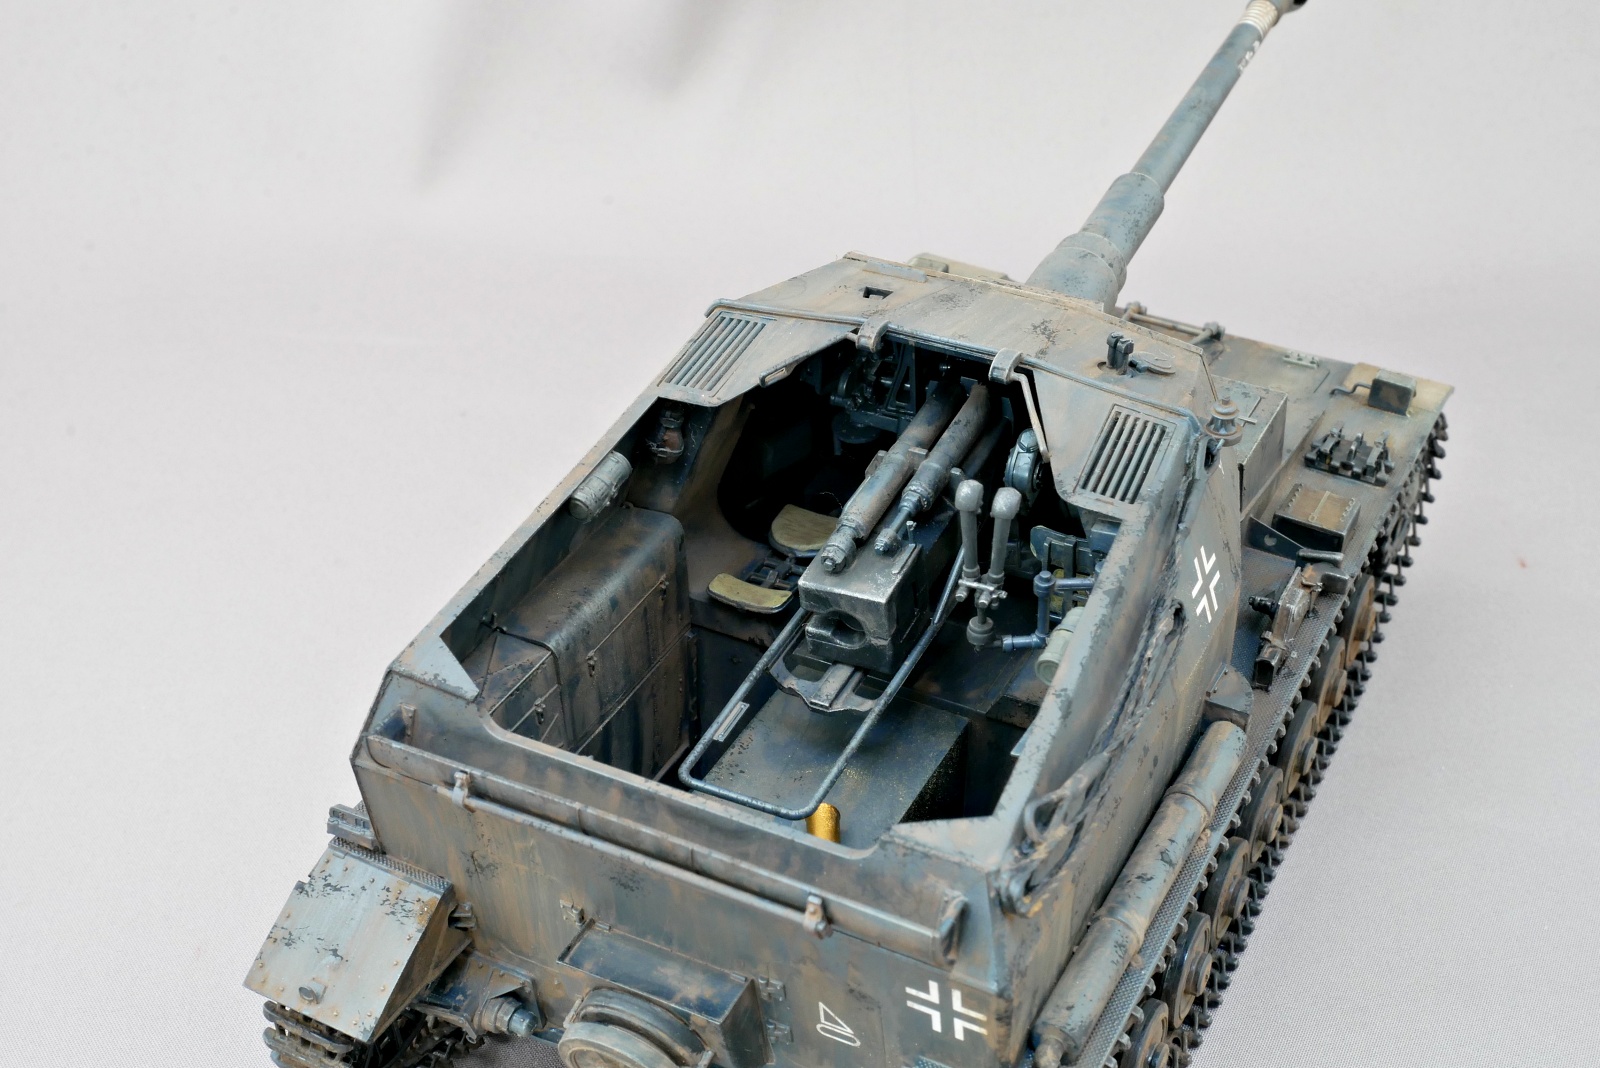
メタルバレルはとても格好良いんだけども、重すぎて砲身が垂れてしまいます。下向きだとあまり格好良くないので適当な角度で固定しました。
やっぱりところどころ戦闘室を接着するときに隙間ができてしまいました。お恥ずかしい。でもとりあえずは光硬化パテで隙間を埋めたので塗装してそんなに目立たなくなると良いんですけど。
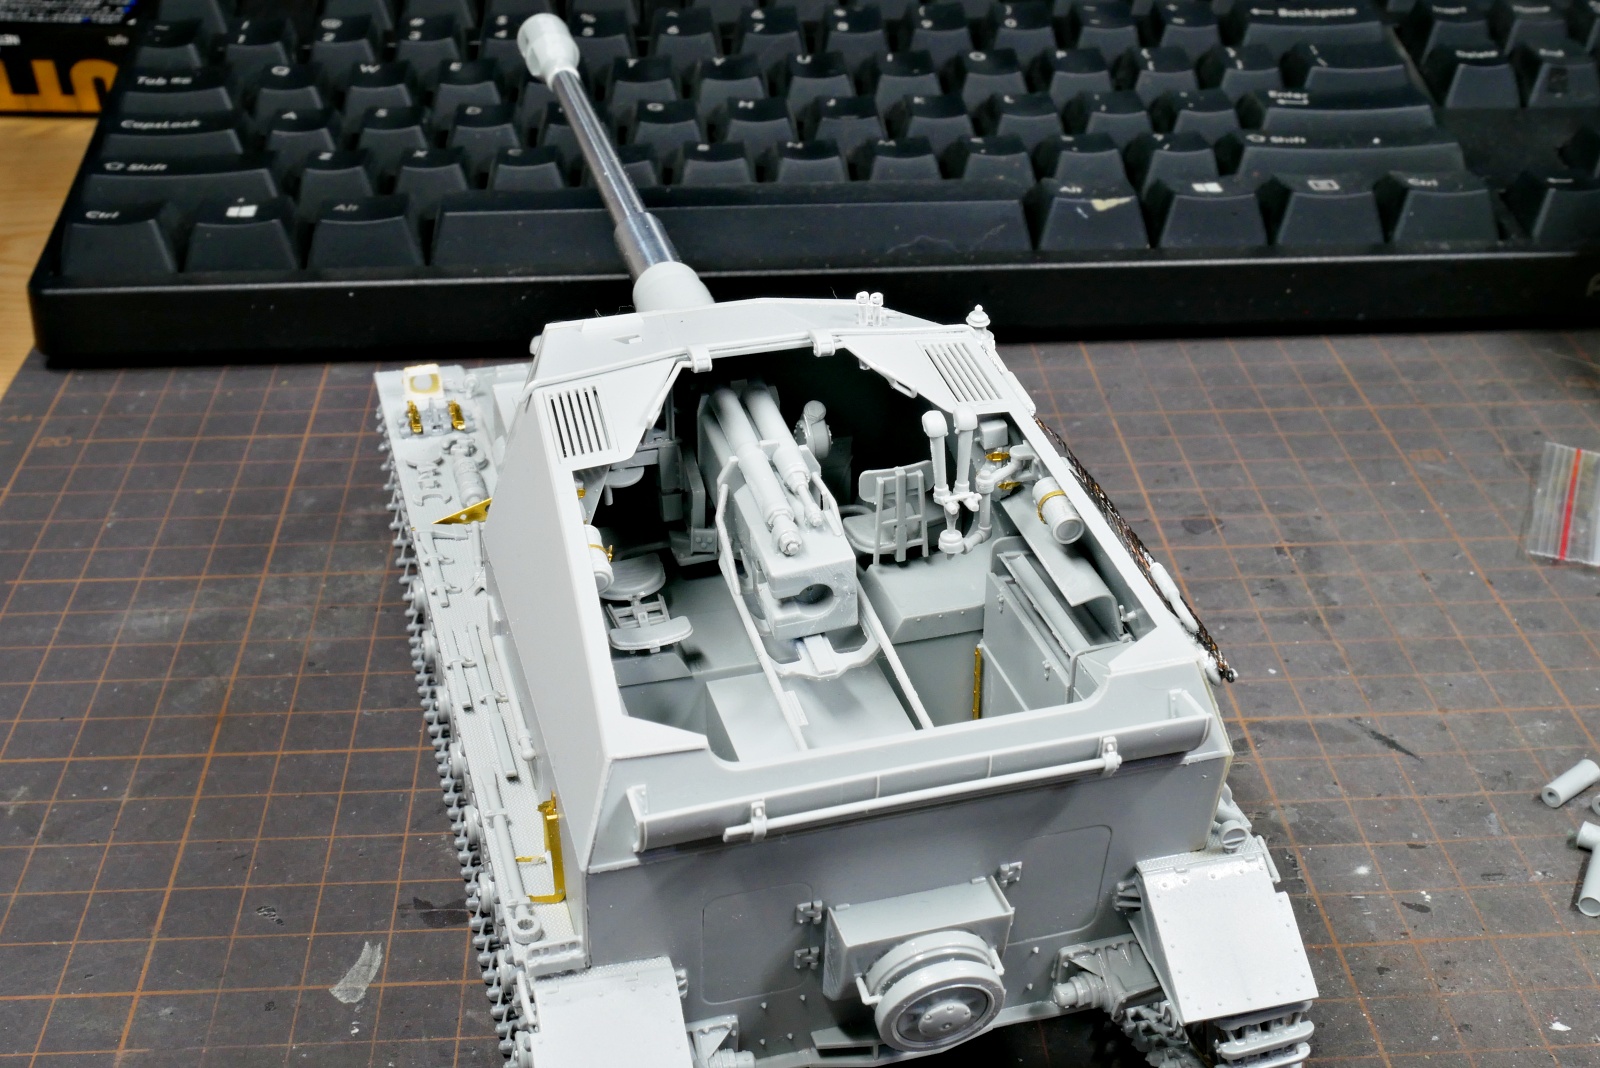
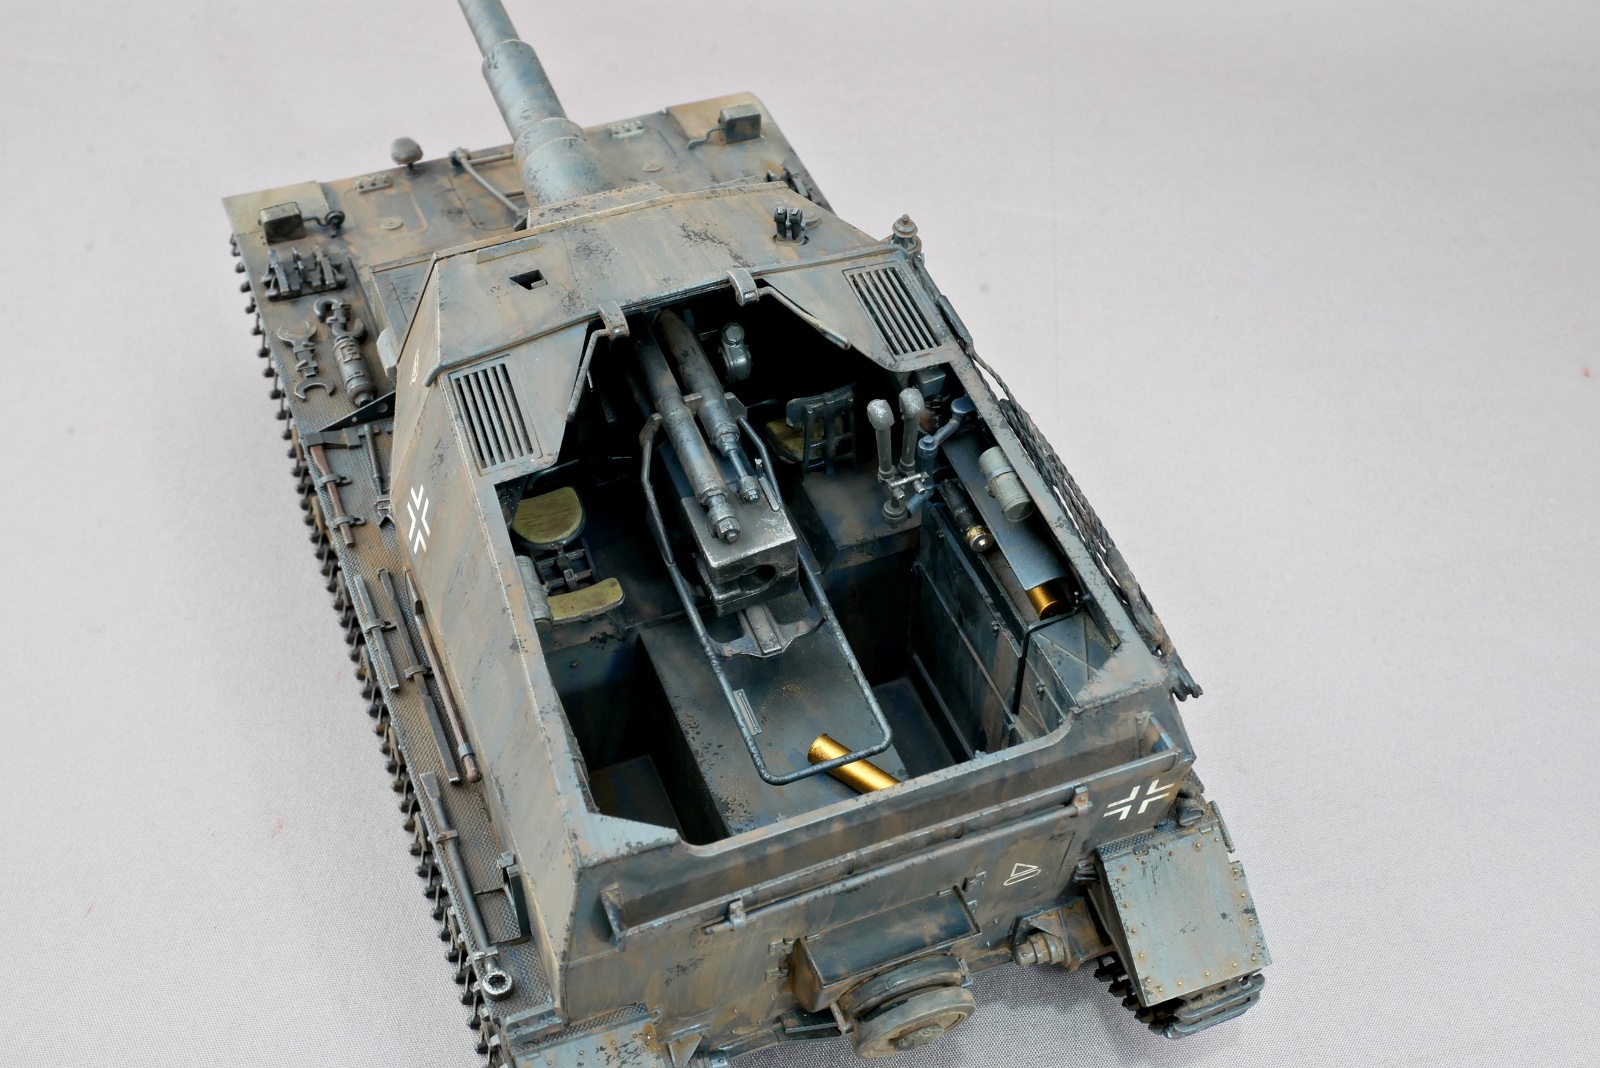
戦闘室内部はいろいろな部品があって複雑でリアルに見えます。ただ、前のほうは奥まっていてほとんど見えないですかね。
砲弾と装薬なのかな。組立説明書の一番初めに説明があって、どこに接着するつもりもないので放置してました。それぞれ何種類かあるようで用途で使い分けてるのでしょう。
組み立てが済んだキットが2つになってしまったのでそろそろ塗装しようと思います。塗装環境と言えば、昨日ようやく電動昇降デスクが届きました。いろいろ悩んだんですけどFlexispotのE7にしました。あまり廉価のものだと高さ調節で苦労すると何かに書いてありましたので普通の価格帯のグレードを選びました。山善も良いデスク出してると思うんだけど黒い天板がたまたま在庫切れだったのも決め手でFlexispotとなりました。天板から支柱から何から何までけっこう重かったんですけど組み立て設置と無事終わりまして、完了してみればけっこう快適で買ってよかったです。ついでにERGOTRONのモニターアームも設置して長年理想だった環境を引越しを機に思い切って構築してみたという感じです。でもこれで一ヶ月くらいで立ち作業しなくてずっと座ってたら笑える、というか昇降デスク所有者あるあるかもしれません。ただ、PCを使っている時と模型製作の時でも微妙に高さ調節できるのは割と便利ではあります。寒いけどなんとか今週はどこかでメルカバの塗装を行いたいものです。
なんかフジテレビの会見って全然ダメダメだったみたいですね。過去の吉兆おかみや日大やジャニーズ、ビッグモーターを超えてくるとはさすがに格が違いますね。日本生命やトヨタがCMをACに差し替えたとかも聞こえてくるし思ったより状況が酷い。テレビ局の会見が中継を行なわない、言い訳が会場が狭いから。それってもう電波停止でいいのでは。余った分は電波オークションよろしく。
(2025/01/19)
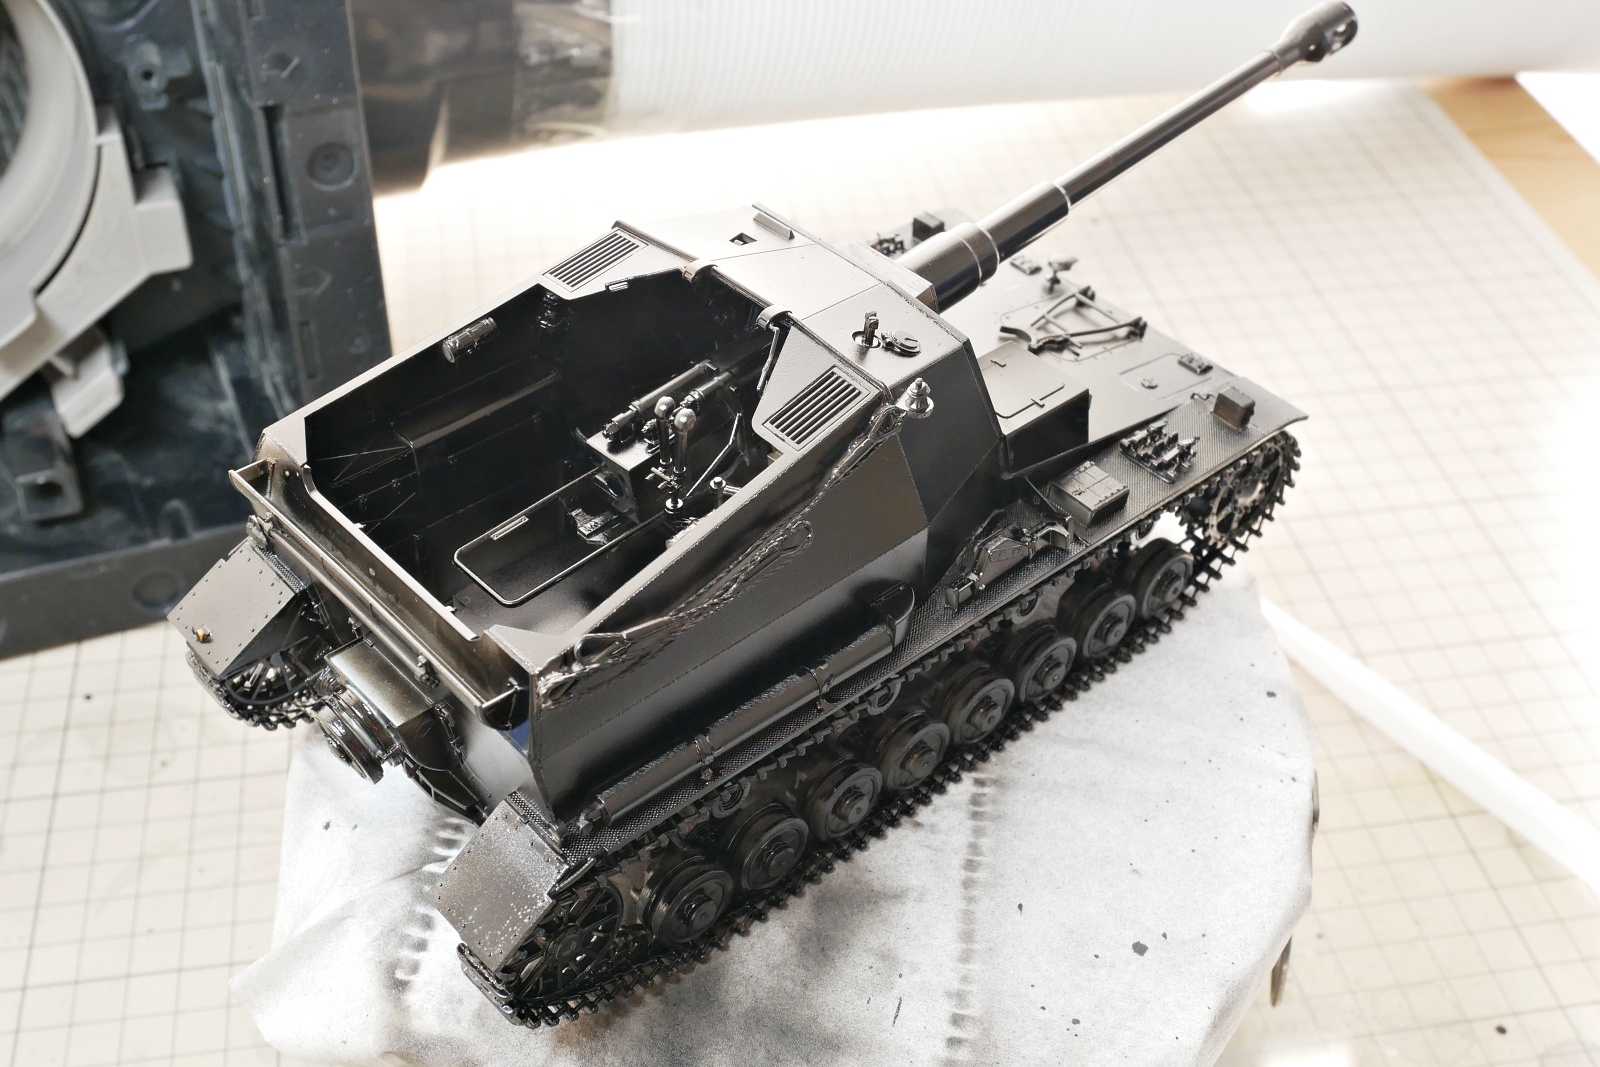
ディッカーマックスを黒で下塗りしました。引越し後に部屋の日当たりが良くなったんですけど塗料の乗り具合が明るすぎて良く解りません。カーテン閉めると寒いしで、少しずつ確認しながら作業しています。
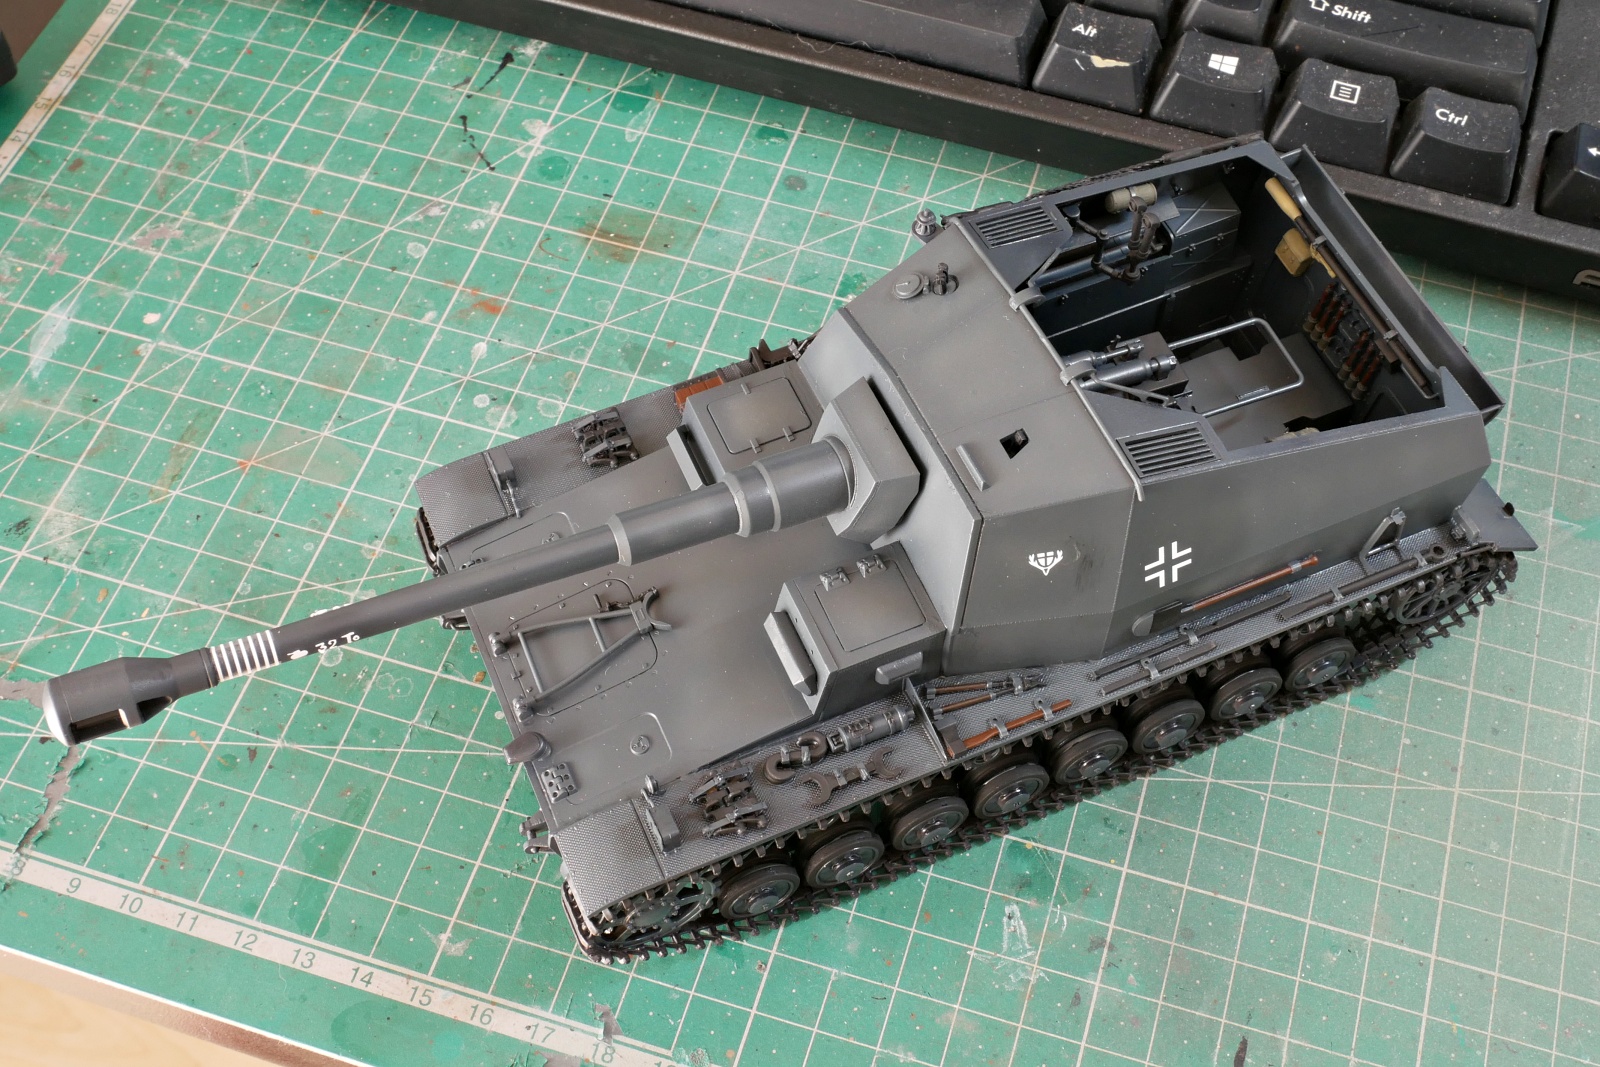
細かい部分を塗装してデカールも貼り付けました。あとはウェザリングを行う予定です。東部戦線だと思うのでけっこう泥だらけにしてみようか。
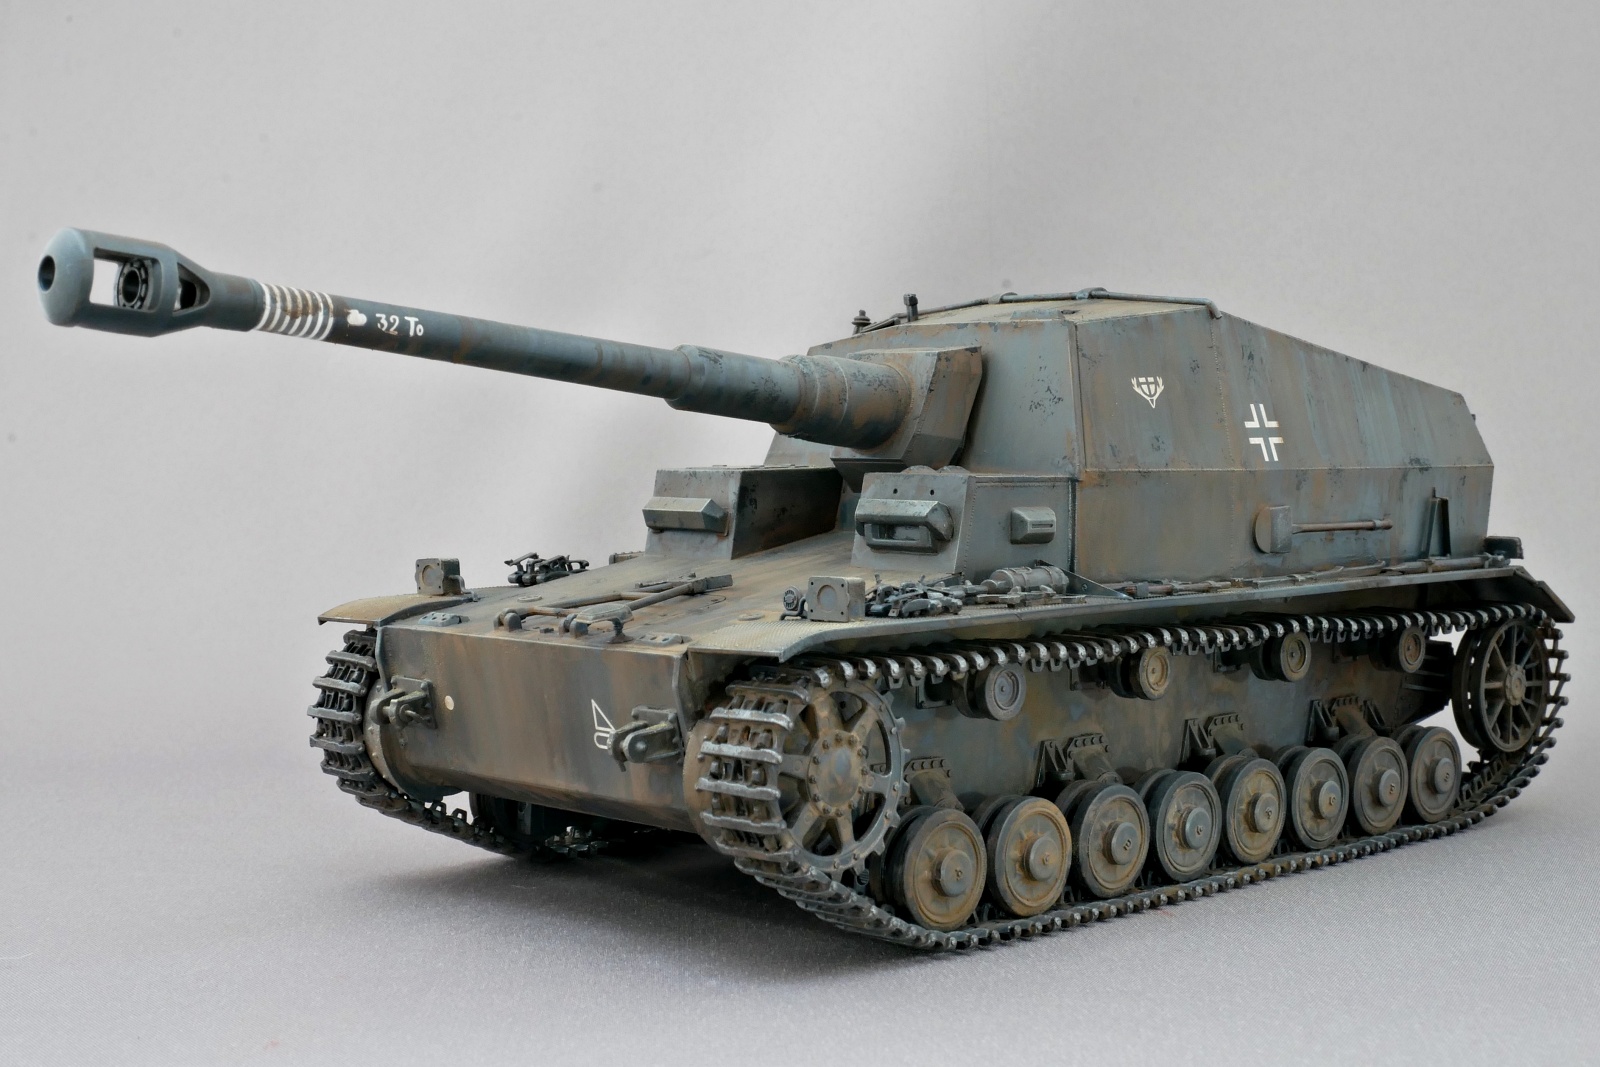

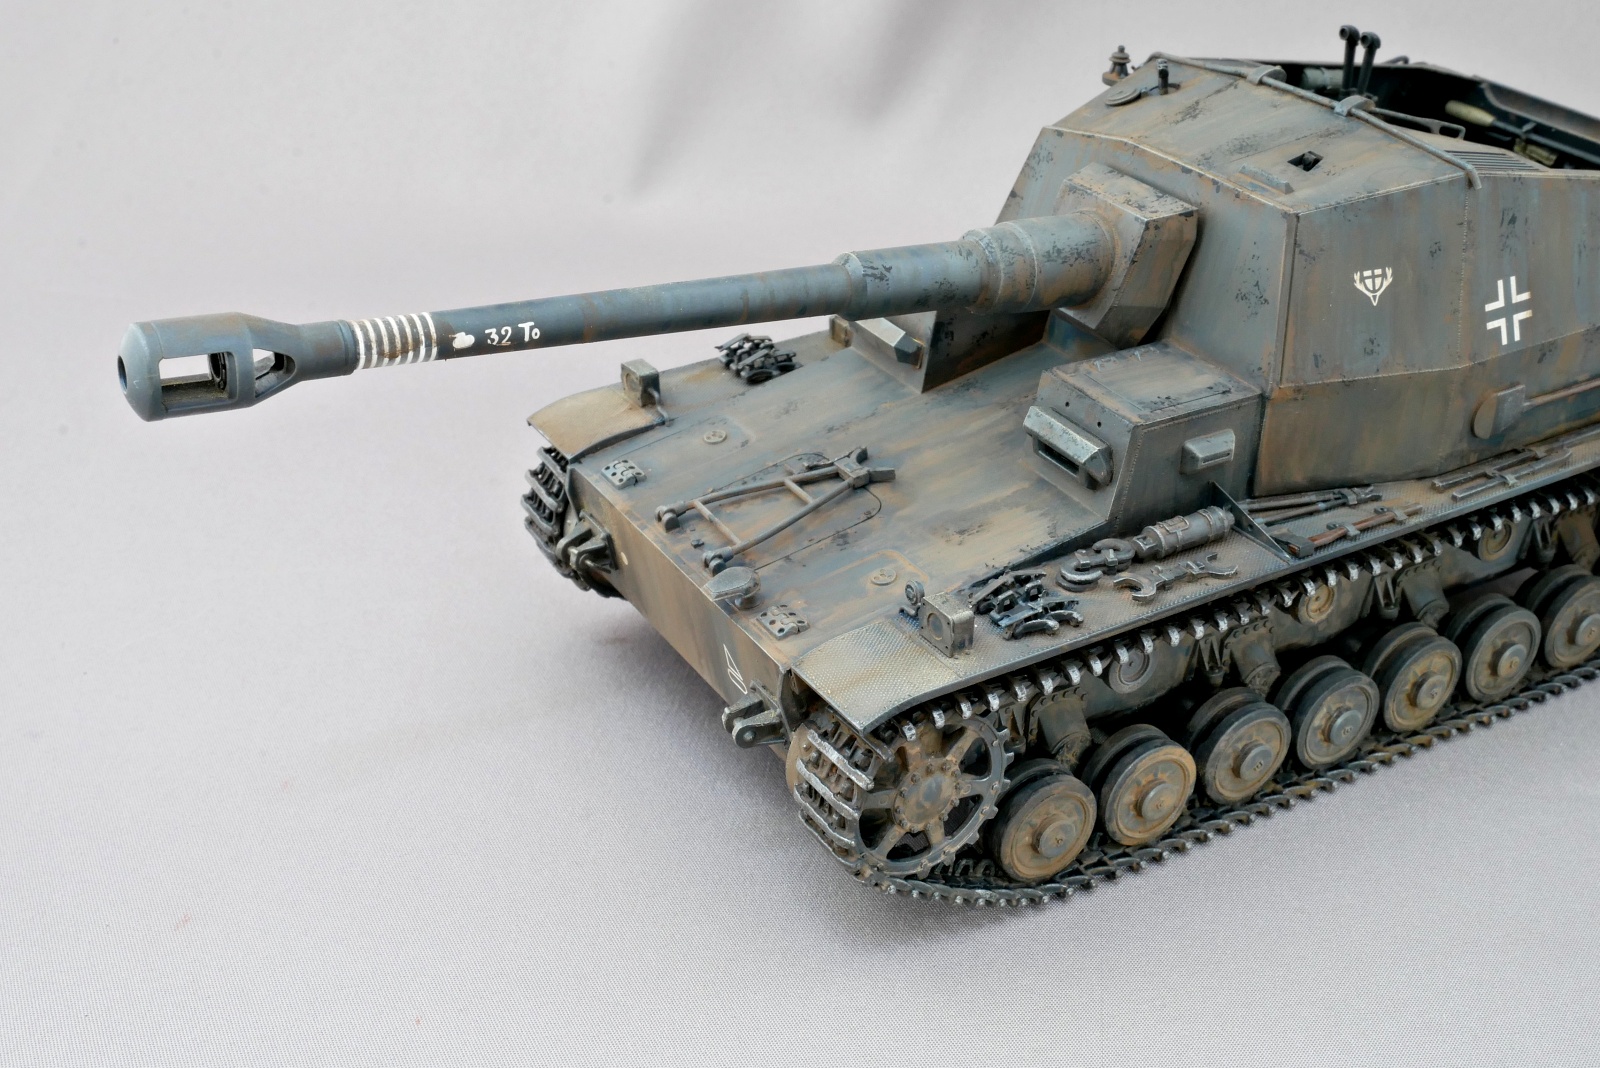
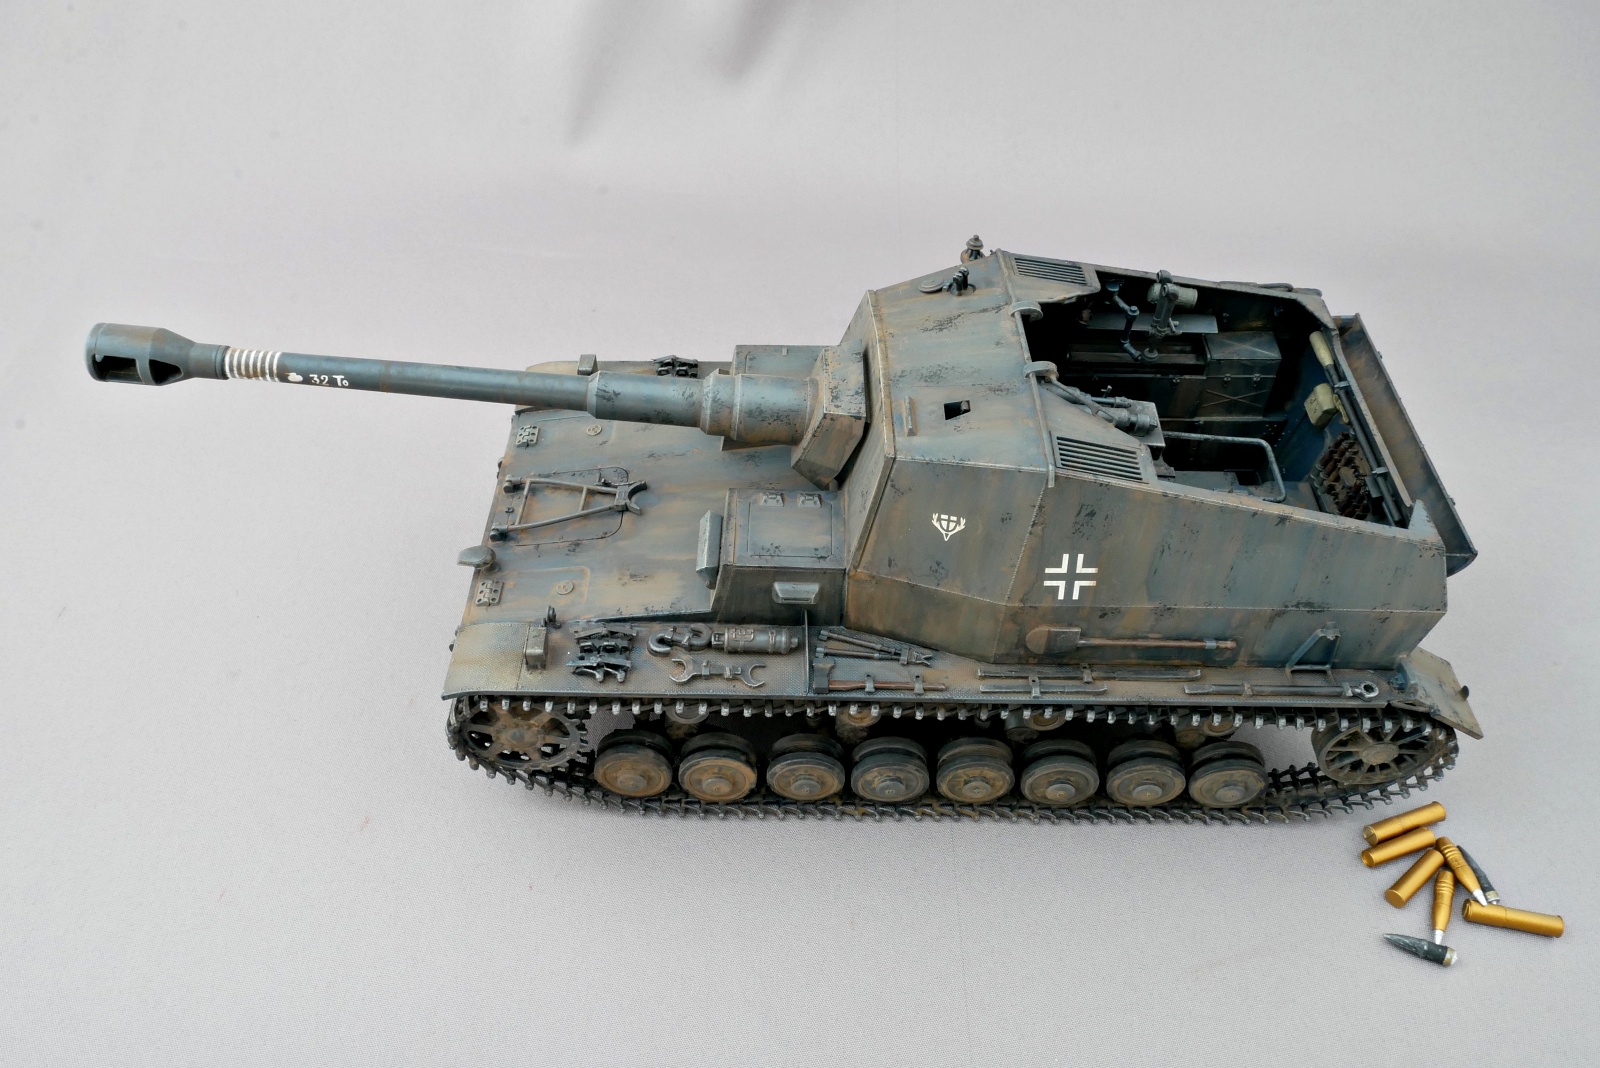
IV号a型10.5cm対戦車自走砲 ディッカー・マックスが完成しました。試作車両という位置づけで2両しか完成しなかった車両です。配備されたのは第521駆逐戦車大隊です。2両のうちの1両はロシア戦線での1942年の夏季攻勢にも参加した可能性があります。1942年冬の大隊報告書には記載が無いのでそれまでには撃破されてしまったのかもしれません。今回の車両は1942年のマーキングです。試作車両だから一部想像なのかも。たしか試作車のシュタール・エミールもこの大隊に配属されてなかったっけかな。


一応は砲身のマーキングにキルマークがついているのでけっこう活躍したという設定でしょうか。
この主砲、52口径10.5cm野戦加農砲K18は当時のIII号戦車やIV号戦車では撃破が困難だったT-34やKV-1でも長射程から撃破できたというのでなかなか性能が良かったのでしょう。ただし88mm砲のほうが使い勝手が良かったということで残念ながら正式採用とはなりませんでした。
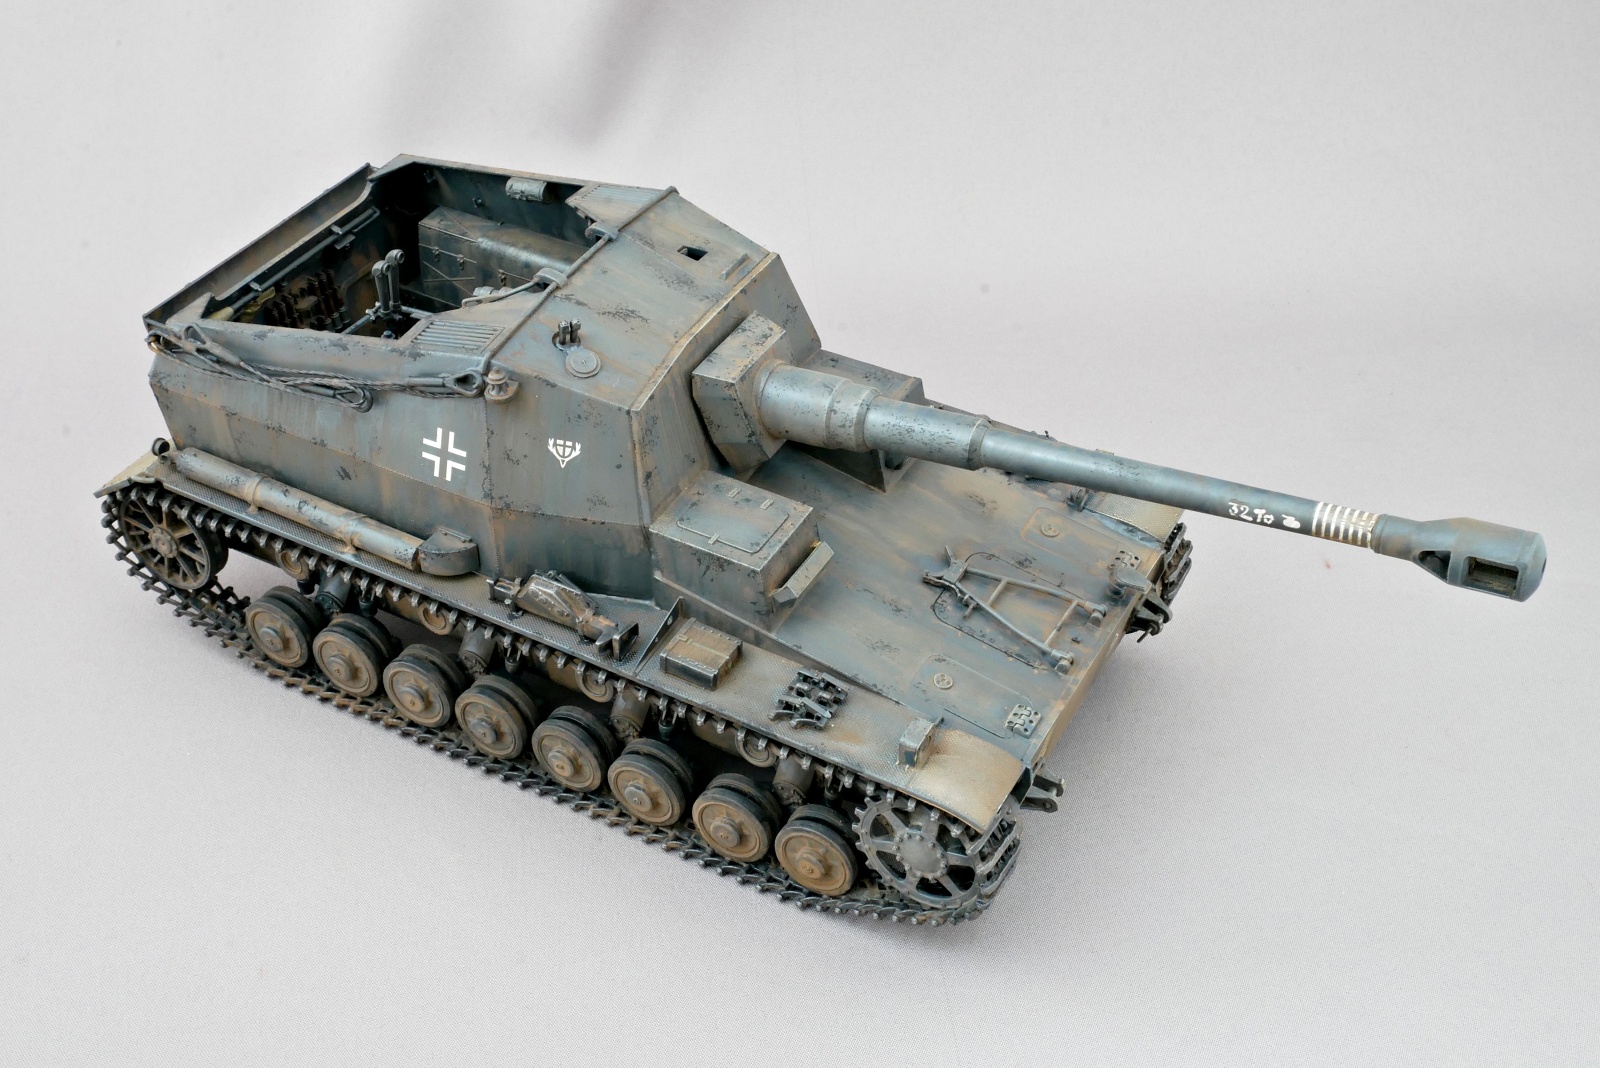
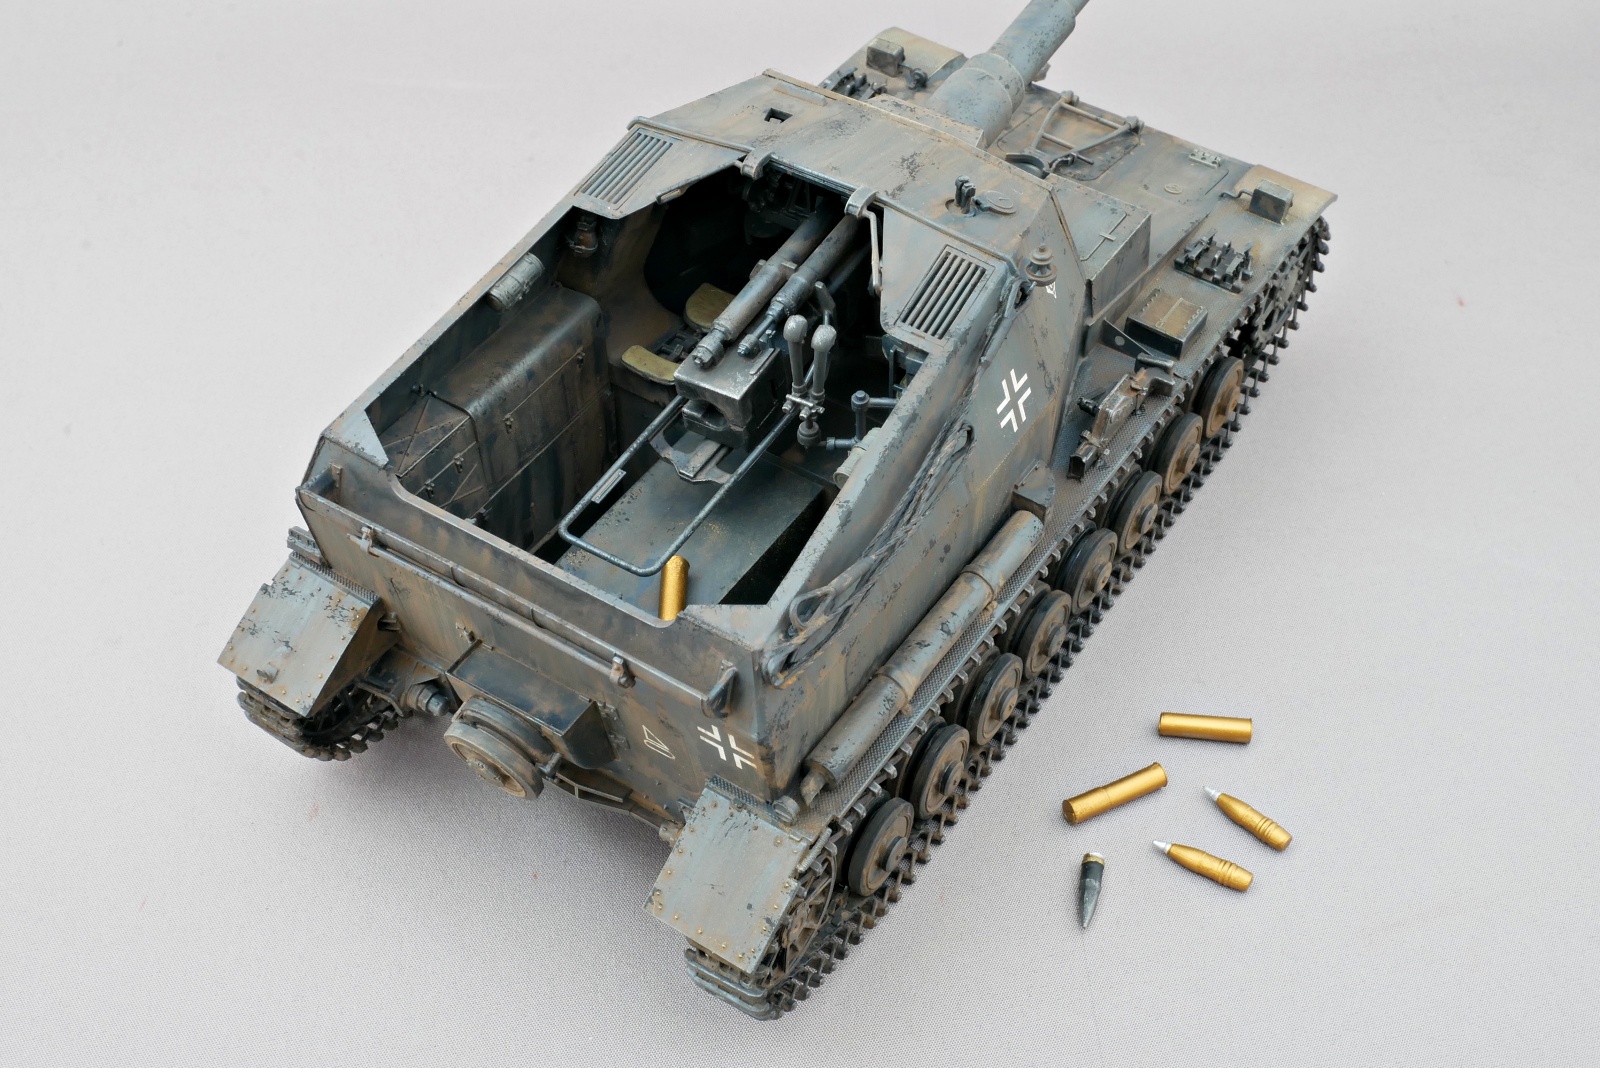
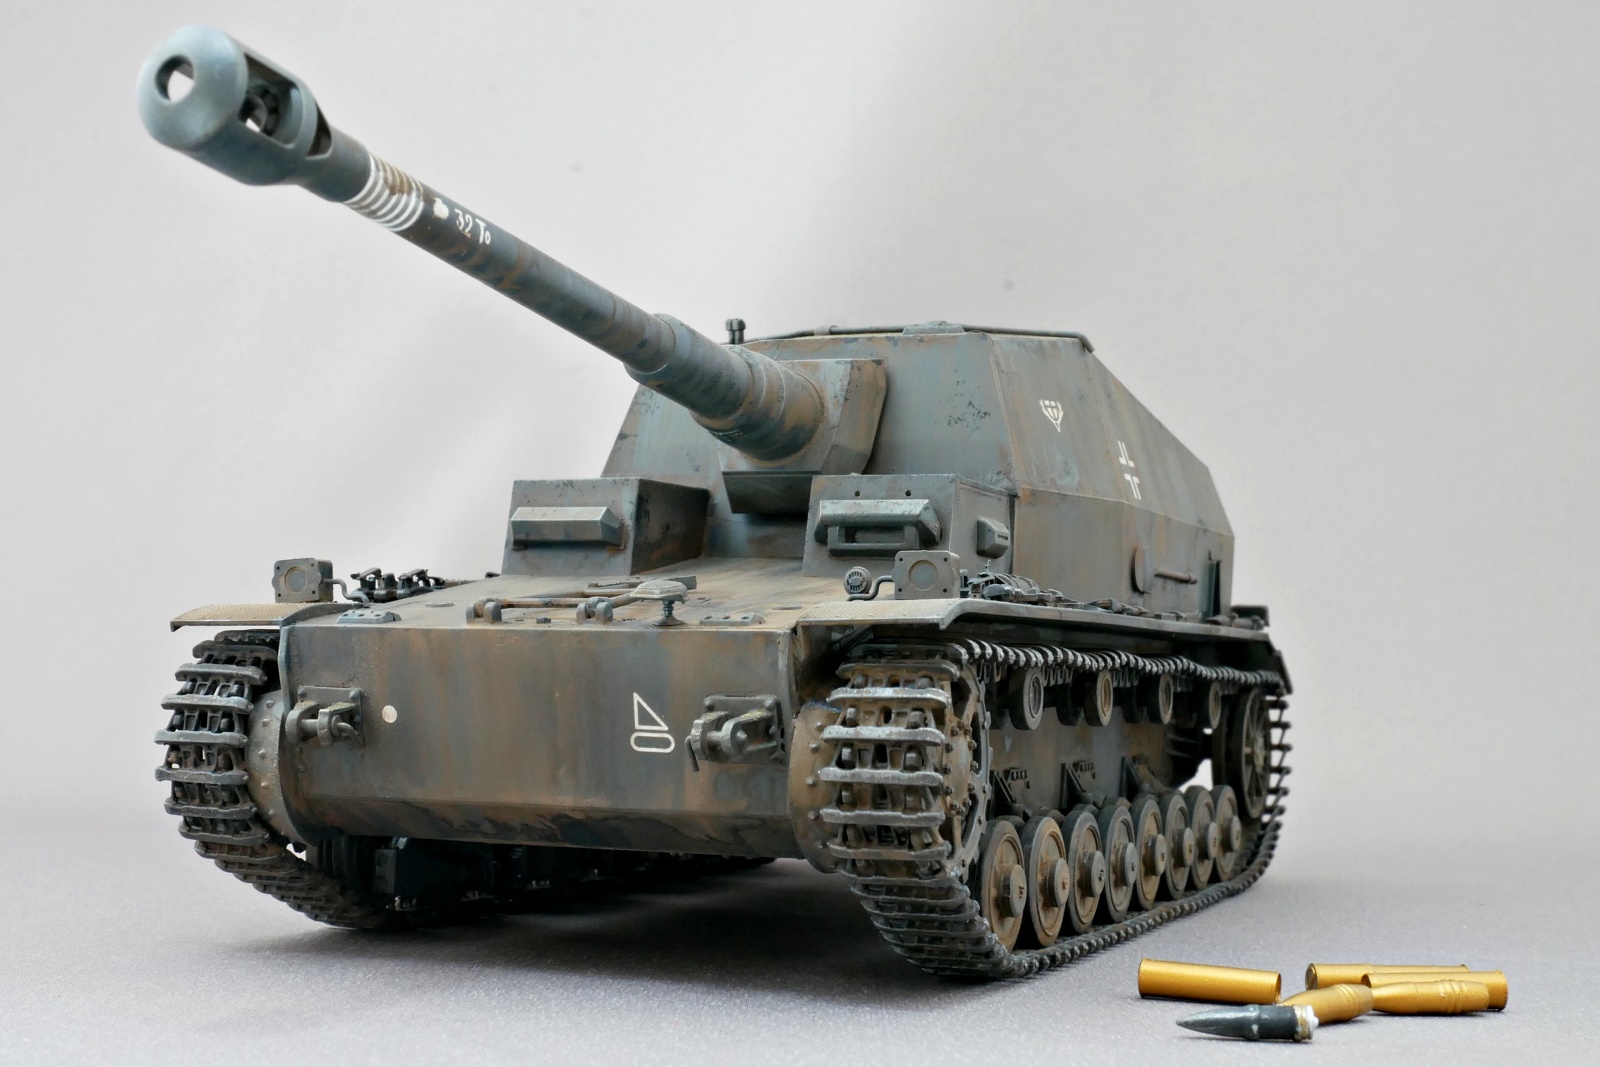
本車両には徹甲弾と榴弾を使用可能だったようでいくつかの砲弾が付属していました。加濃砲は分離薬きょう式だからなのか細かい砲弾や薬莢部品がたくさん付属していました。割りと芸が細かい。
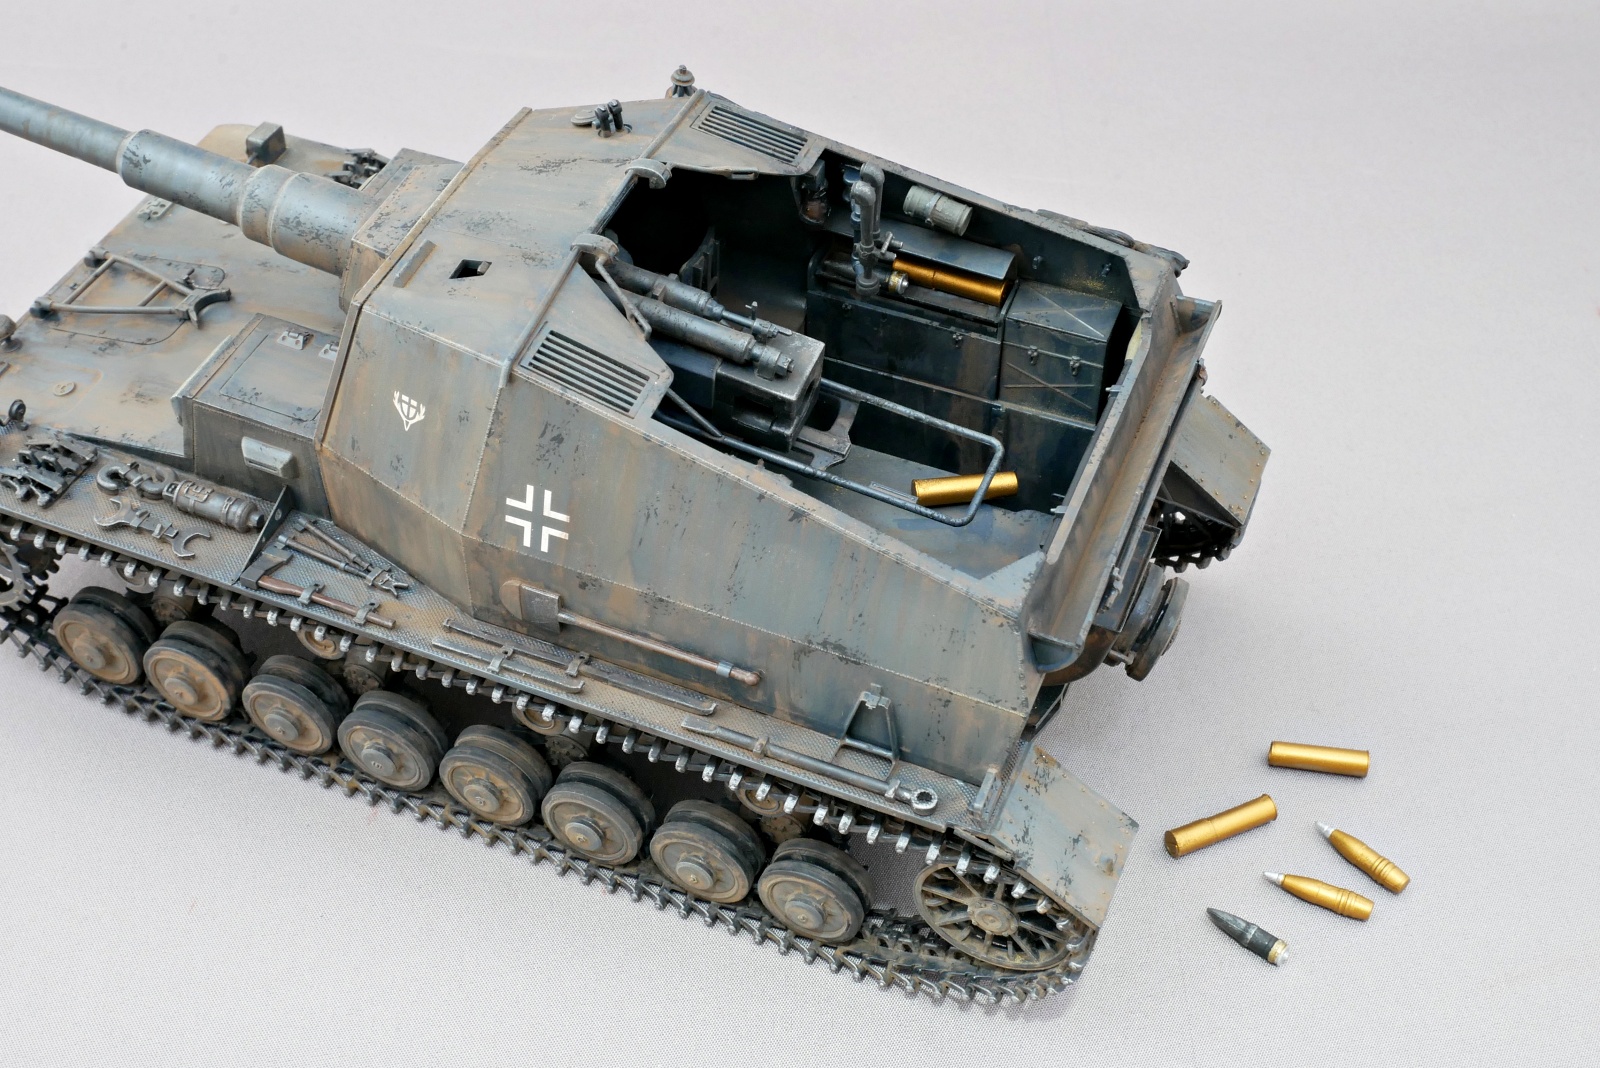
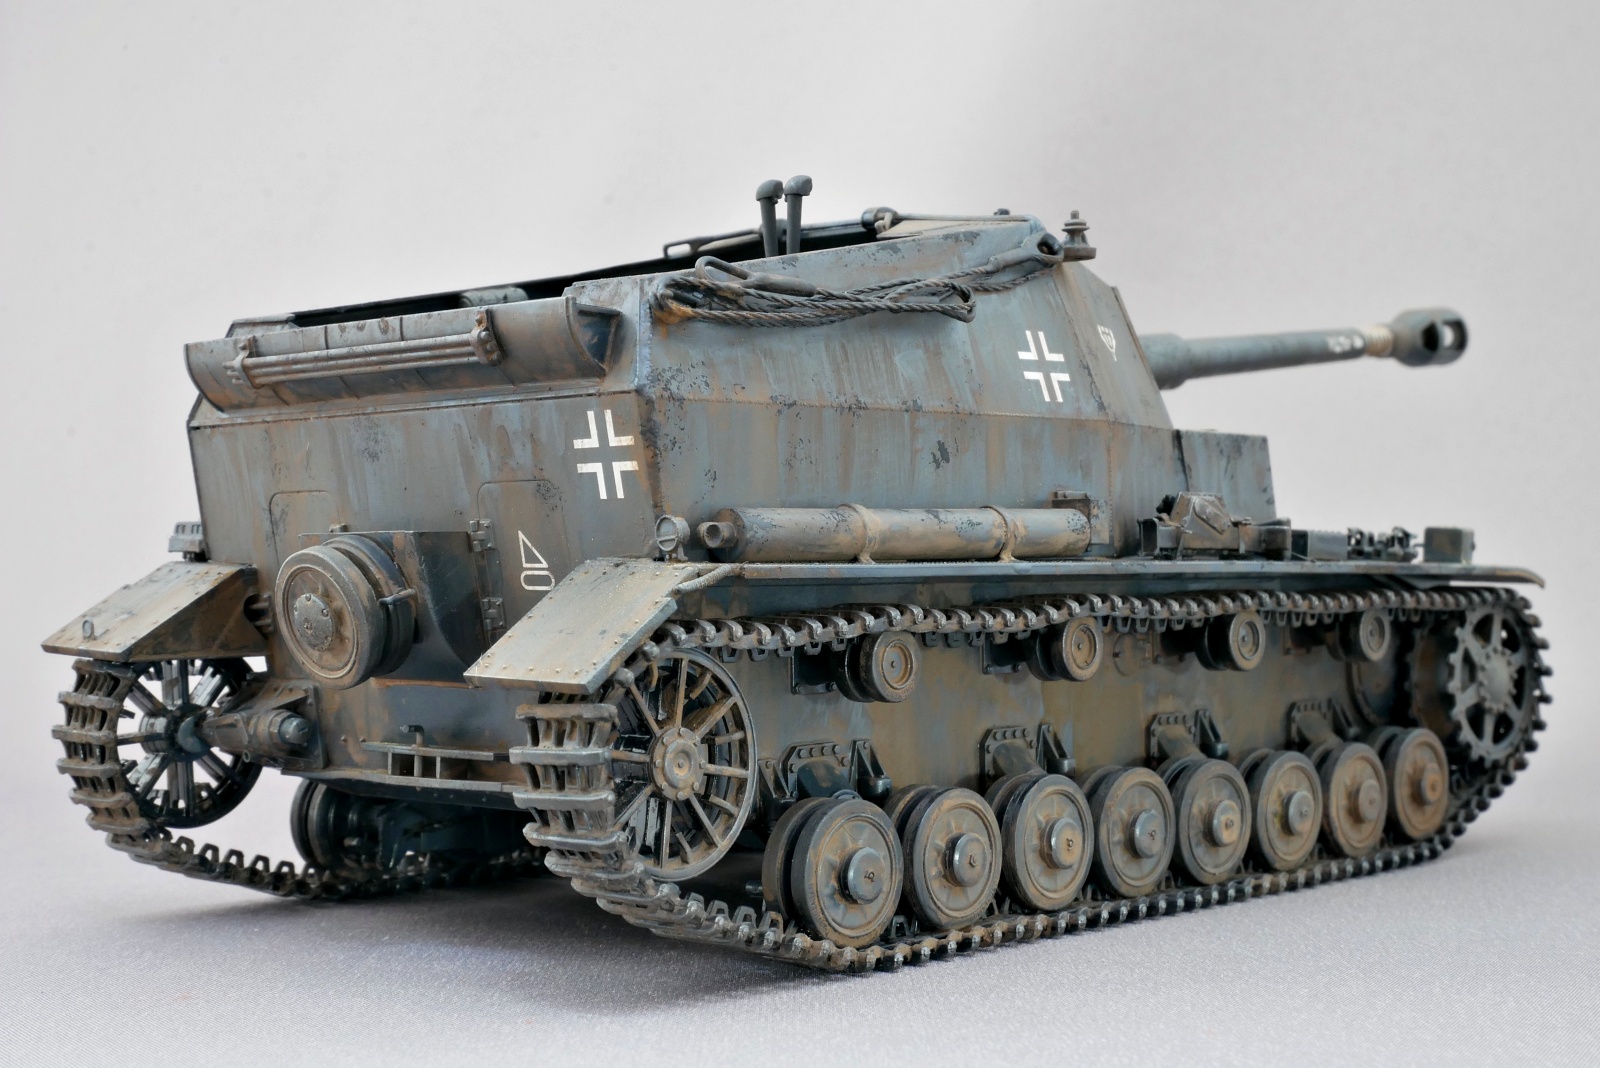
車体の前方にある右側の四角いのはダミーの操縦室だったようです。ということは本物は左側なのか。他にも車両後部は装填手を保護するために装甲は厚めだったとか。

ここまで周りを囲ったんだからついでに天井も覆って防御力アップすればよかったんじゃなかろうか。
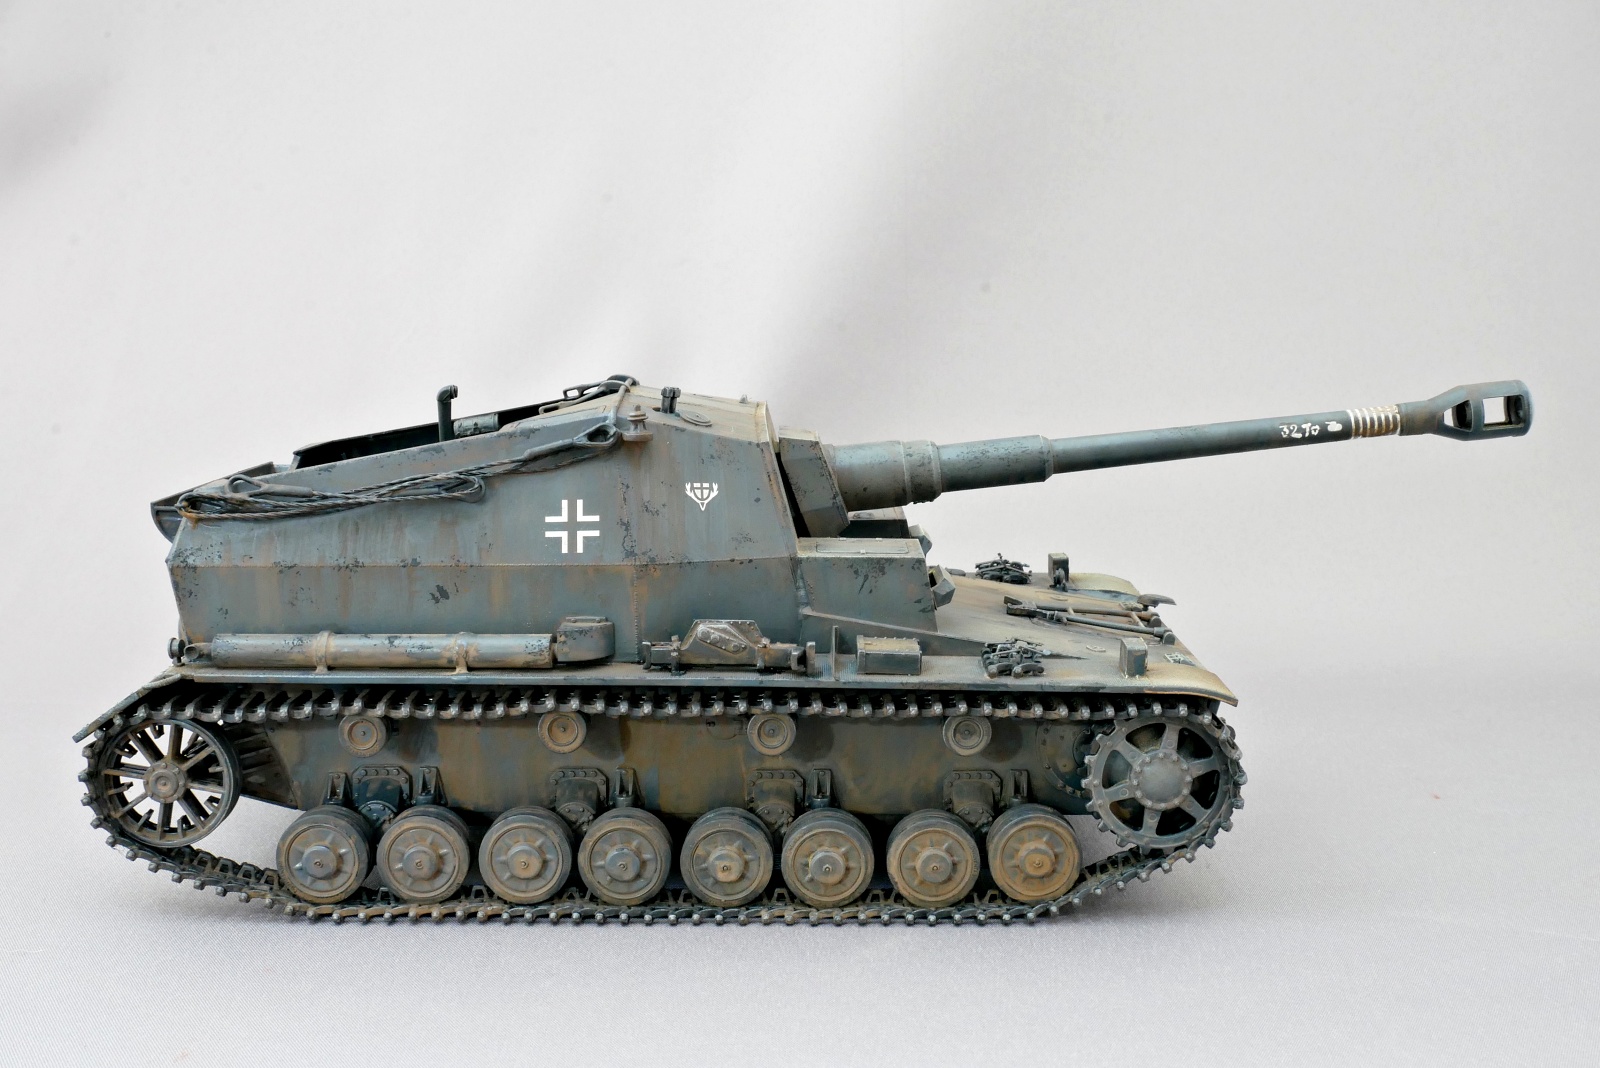
塗装に関してはジャーマングレーの車体はちょっとブルーがかったほうが好みなので、Mr.カラーの後から出た色、500番台の塗料を使用しました。ウェザリングでウォッシングをしたら随分と明るい茶色になりすぎてしまって、すこし落としたり濃い茶色で足したり雨だれ表現をし過ぎたり調節が難しかったです。でも対ロシアでの東部戦線だとけっこう汚れが激しいイメージがあります。
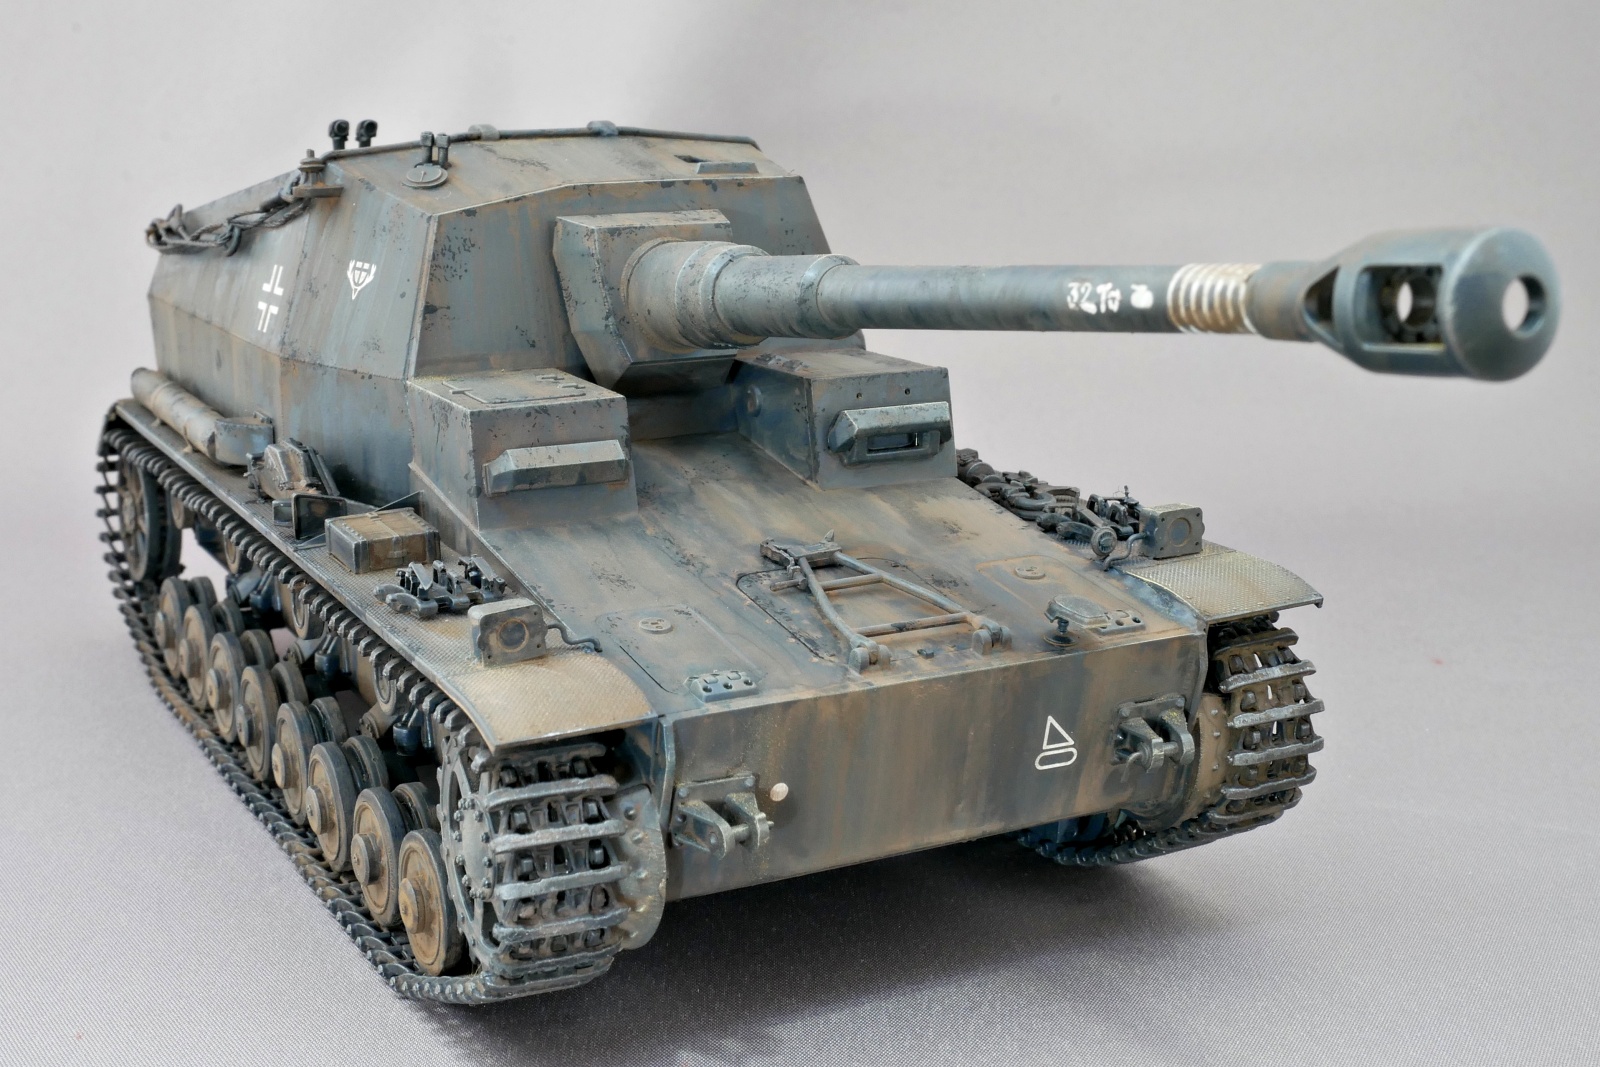
このキットは戦闘室の組み立てがけっこう難しかったです。オープントップの車両だけど前の方には上部に覆いがあるのでそこまで細かい砲尾周りは見えないです。それと前後左右の装甲板がけっこう大きいのでマーキングやウェザリングで変化を付けないと少し単調に見えてしまうかも。IV号戦車に10.5cm砲を搭載しているので車両に比べて砲身がかなり太く見えますね。今となっては古いキットになりますが無事に完成出来て良かったです。ドラゴンのキットの中にはラバーキャタピラのキットも結構ありますけど、このキットはマジックトラックでランナーから切り離す手間すら無くてディテールも細かいのでその点はとても組み立て易かった。最近のドラゴンのキットはほとんどチェックしてないけど、マジックトラックは入っているんでしょうかね。昔の傑作キットを長くリリースしてくれるだけでも良いですね。
漫画の話、「神のみぞ知るセカイ」という古いコミックを読んでましてこのあいだようやく最終巻を読みました。全26巻の大作でした。ちょっとネタバレになっちゃうけど神のみ、天理で検索するとかわいそうと出てくるのでなんぞやと思ってたらそういうことだったのねと。主人公は「ギャルゲー(恋愛シミュレーションゲーム)」の達人で、現実の女性に対してもその攻略法を駆使していく話。物語が進むと現実の女性たちが持つ「心の隙間」を見つけたり地獄界や悪い悪魔?と戦ったり物語が壮大な展開になっていきます。天理は引っ込み思案の性格なのに主人公の為にいろいろ頑張ったのでずっと応援してたんですけど主人公とは結ばれなくてちょっと残念。コミック自体は話がとてもよく出来ていてとても面白い。パイロットフィルムも読んだら作者さんが物語を作り出す苦労も良く解りました。
(2025/01/30)


コメント