I made a Russian fighter plane in April 2015.
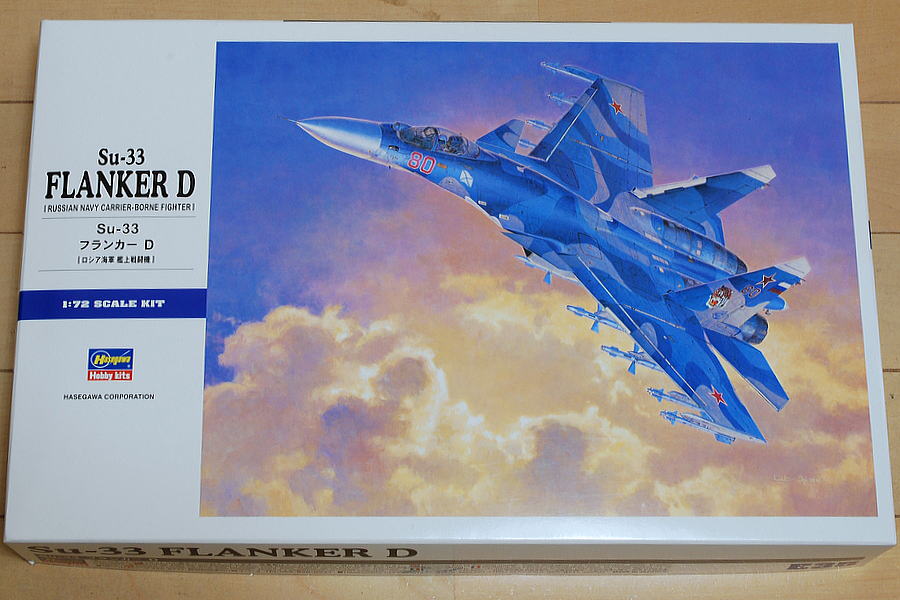 The other day, I went to the hobby shop near my house to purchase the color of Merkava IV now I’m making, but unfortunately, it’s out of stock, so I had an impulse purchase for this Flanker D. Since I made F-15E, I would like to make another Jet Fighter.
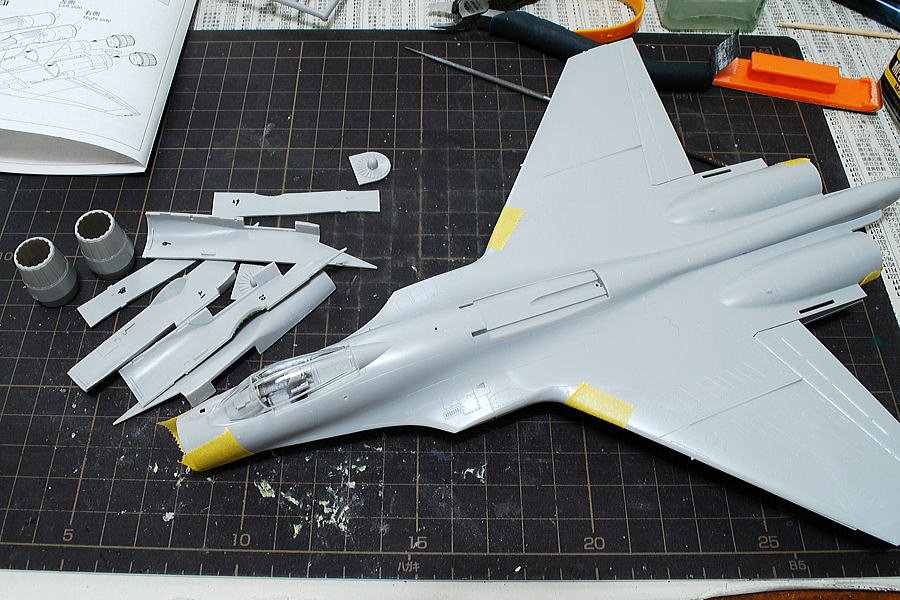 Firstly I opened the box, and I was amazed the main parts were large. The trial assembly seems to be no problem. I wonder what the best way, the best order to assemble efficiently, is.
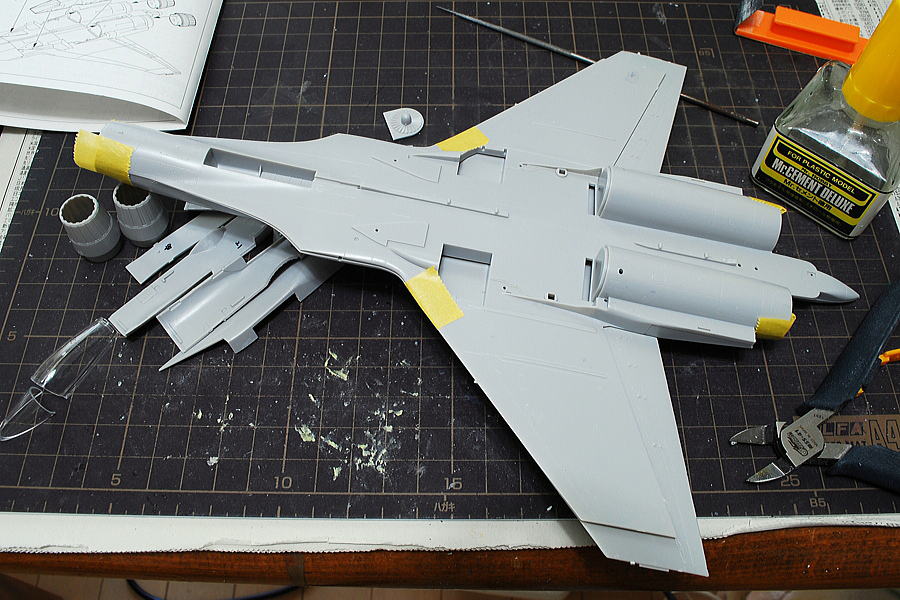 The backside main wing joint is too big, maybe about 0.6mm. I’ll file it a little before the adhesive joint.
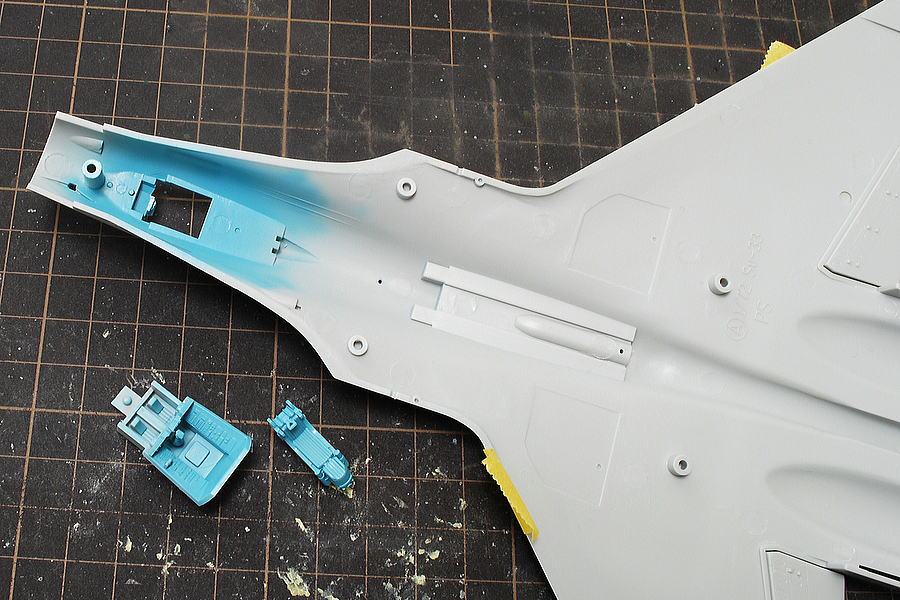 Anyway, I blew the cockpit in interior color. I really mistook the sheet for dark color, so I’ll repaint it later.
(18-March-2015)
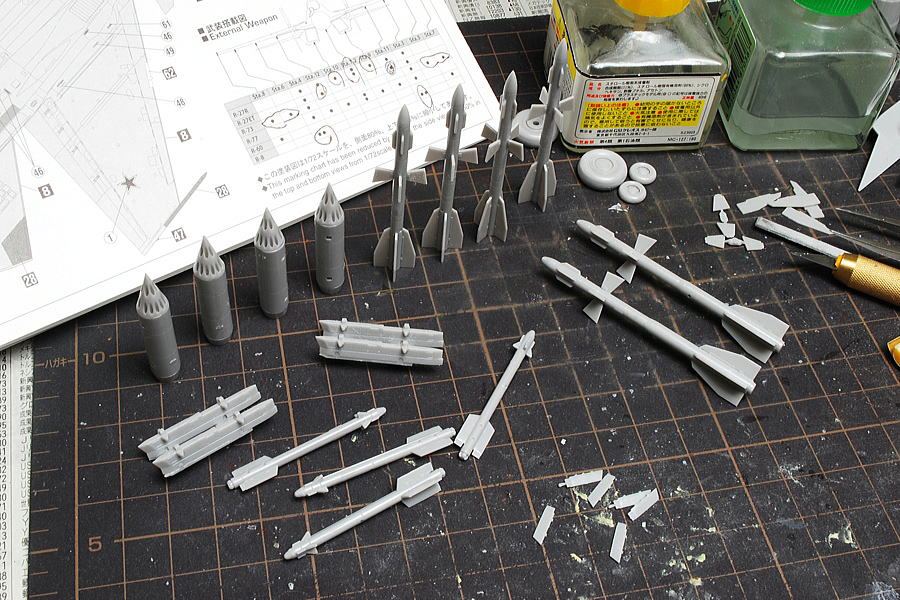 This kit is included in many kinds of weapons; I try to make it fully armed. The combination of the weapon layout is complicated; I referred to the chart in the manual. I decided to mount the R-27R, R-27ET, R73, and B-8. I should decide which weapon to amount this timing of the latest.
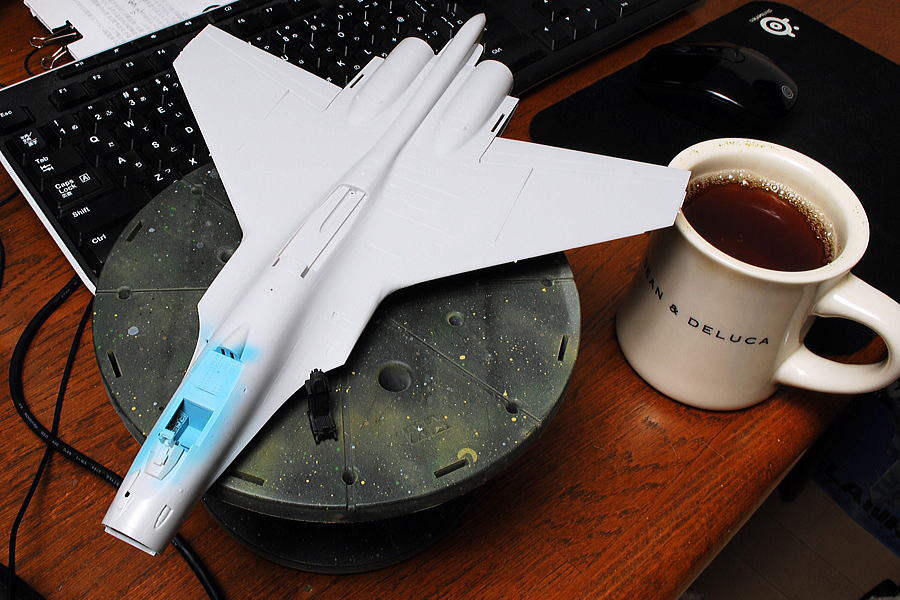 It’s not related to the modeling; I purchased the GTX960 PC video card. The drawing speed improvement seems eight times faster than my CPU onboard HD4600. It is inspiring that the 3D games I only bought and not played are so smoothly moving! For example, Tomb Raider is more interesting than playing on the rough screen…
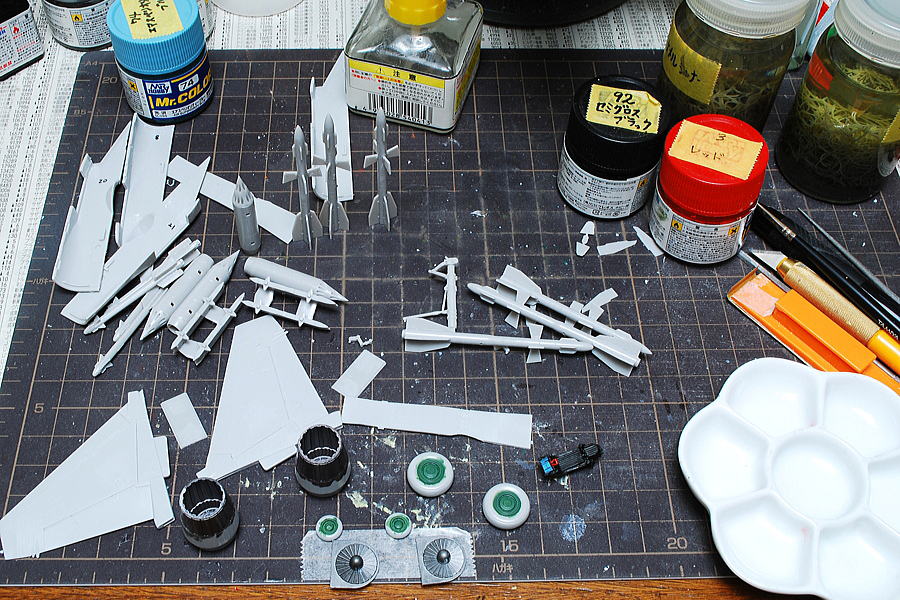 I wonder about the practical order of assembly, now painting tire wheels, engine nacelle, and lever in the cockpit. Anyway, I can not move to the next step without painting the inside of the air intake.
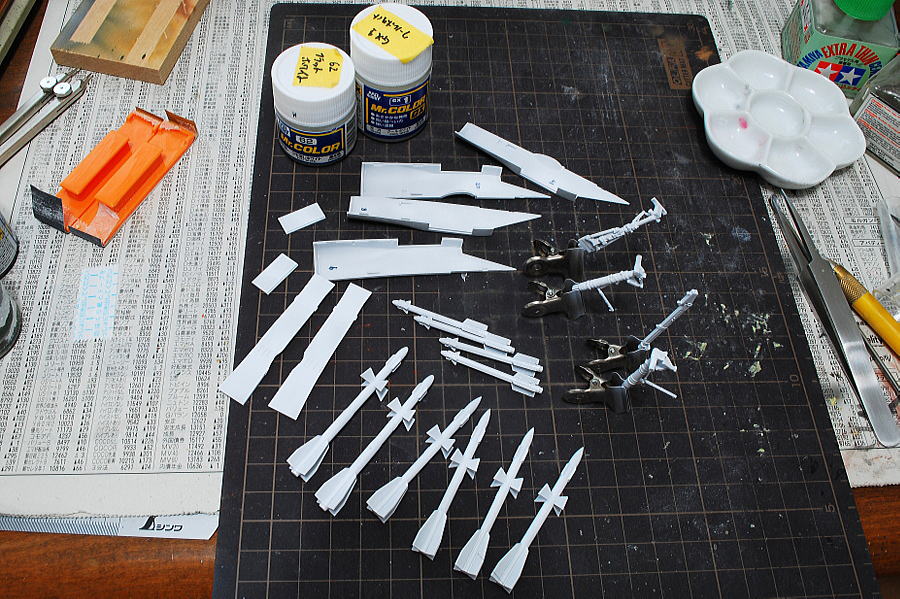 I first painted in Mr.Color mat white, but it’s not a good enough cover of gray; I used the Mr. Color GX1 Cool White because the hiding power was better.
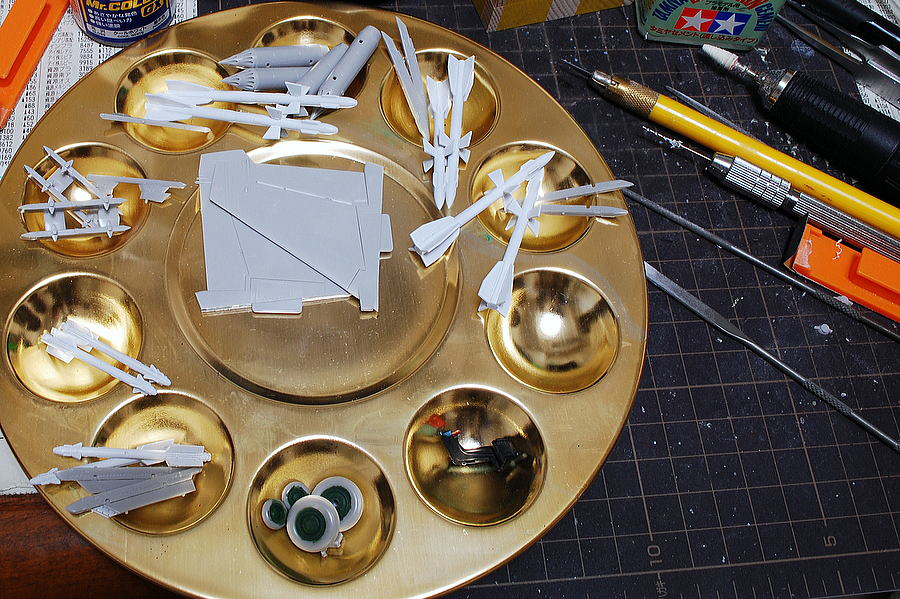 I glanced at first before starting, and my impression of 1/72 is easy, this kit has many parts, and the process is difficult for airplane model beginners. After cutting off from the runner, I need to recognize the type of pylon and weapon combination. Pylon and the body’s lower surface are the same color; it’s probably easy to paint after attaching them.
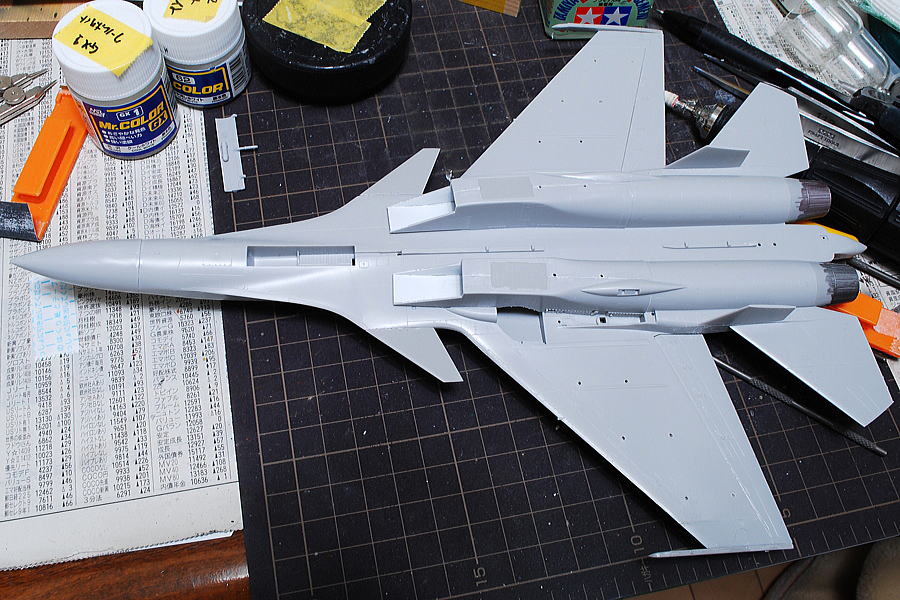 I attached air intake to the body without a big problem. Many curved parts became one beautiful form. Finally, it’s beautiful. I opened the pylon holes underside of the main wing at this time. The marks on the wing indicate the location of the holes.
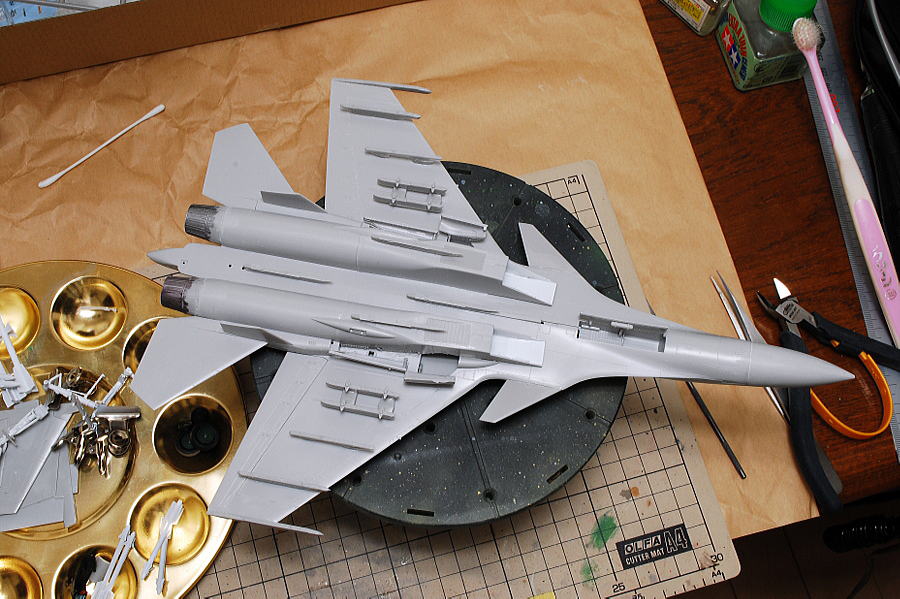 Well, before painting, I assembled as much as I could. I wonder to retry painting the inner of the air intake; it’s not smooth white.
(09-April-2015)
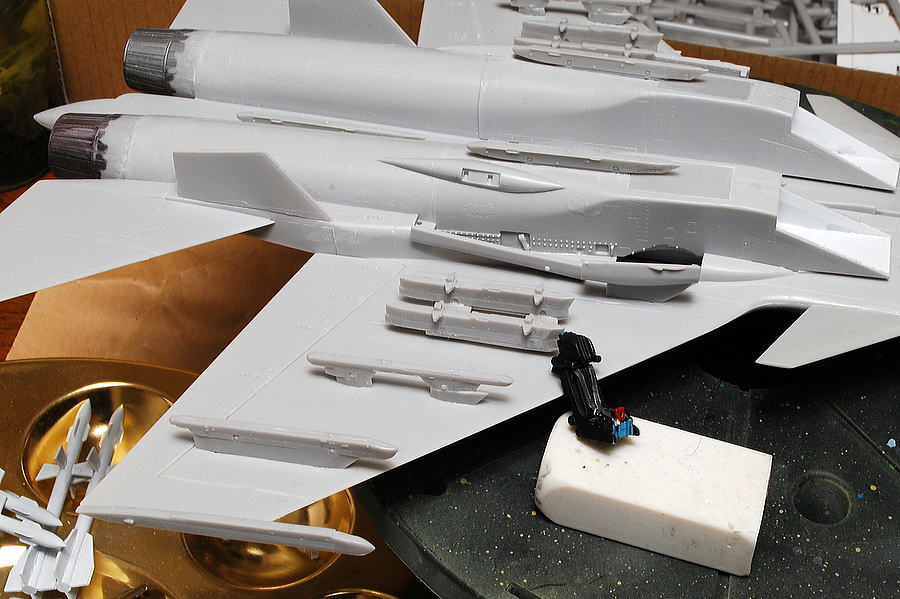 Now it’s late timing, but I put the seat in the cockpit now. Almost all of the cockpit area is invisible, and leave it, now I worked a seat belt made from the lead plate.
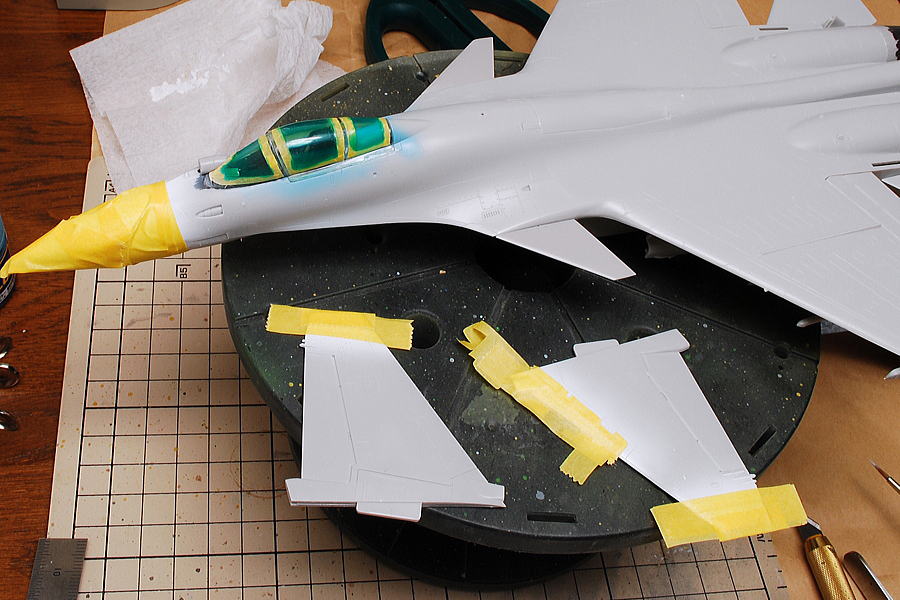 Introduction paint is white parts; I masked the canopy with masking tape and sol.
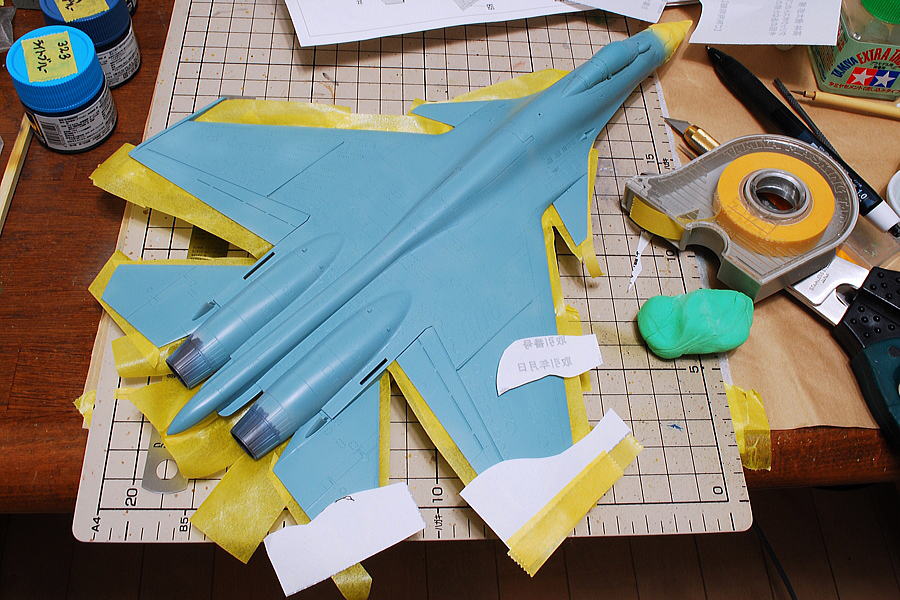 Cut out the paper and masking. I got used to masking and became interested in a paper cutouts. I thought this green kneaded eraser was useful for this masking, but it’s too elastic and unsuitable for detailed work.
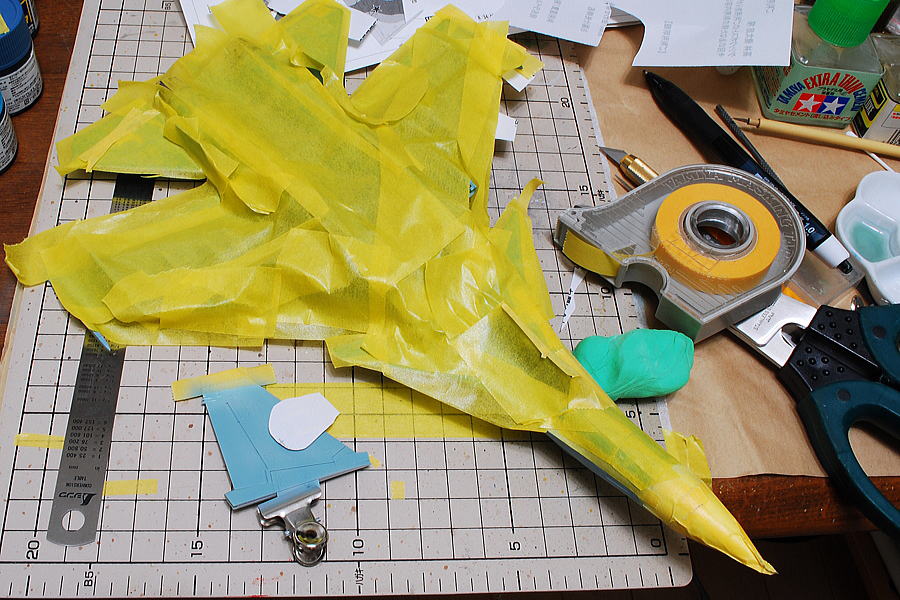 The back side is this; I felt it was spending much tape.
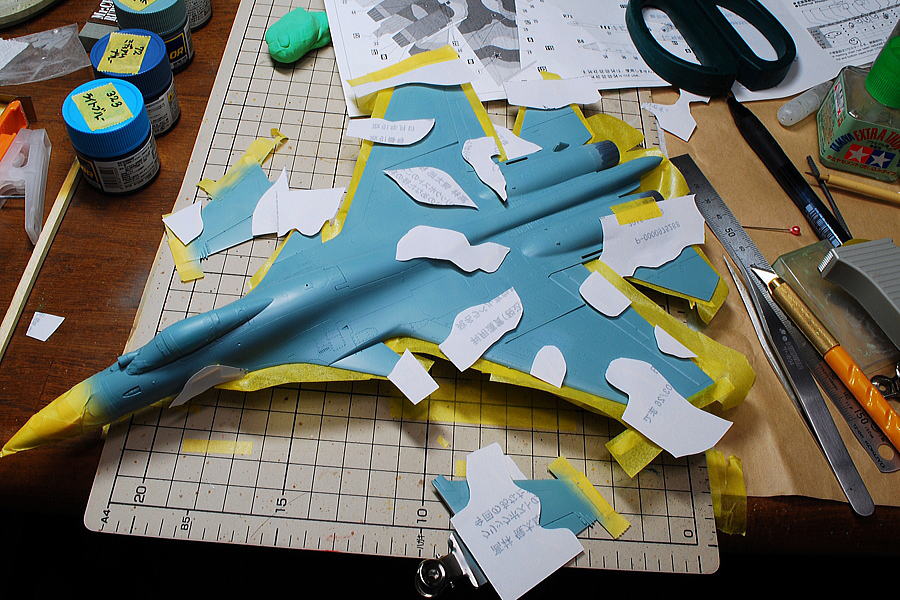 At first, I felt the cutout was interesting, and now complicated. I suppose it’s easier to copy the painting guide blowing up for the masking sheet.
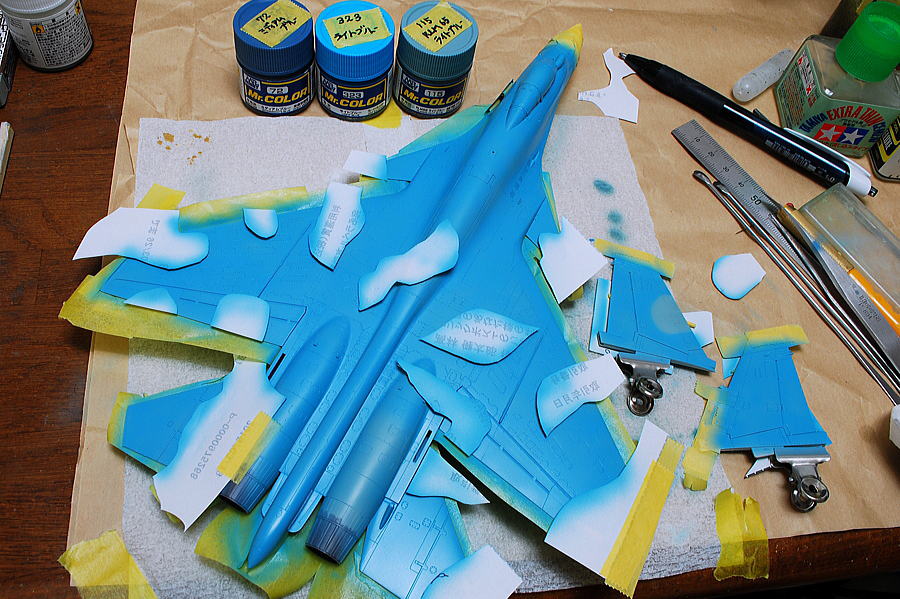 Regarding the efficiency of masking, the first paint color, light blue, is better in basic color due to the masking pattern. My procedure has become very difficult.
Light Blue has dropped the saturation to mix the other two colors moderately. Now light blue is good at matching with other colors in harmony.
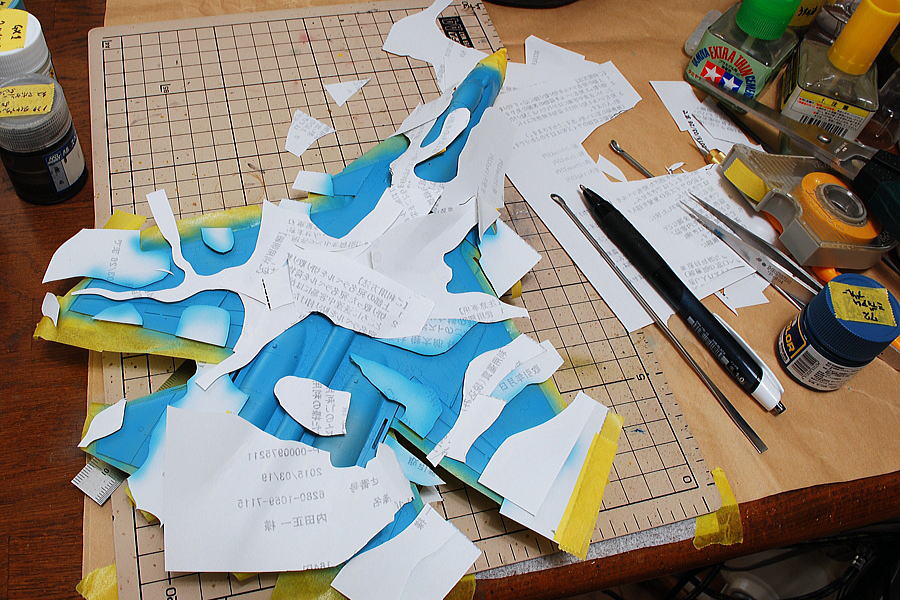 It’s past complicated and now chaos. It’s not as easy as the spitfire camouflage pattern I worked on.
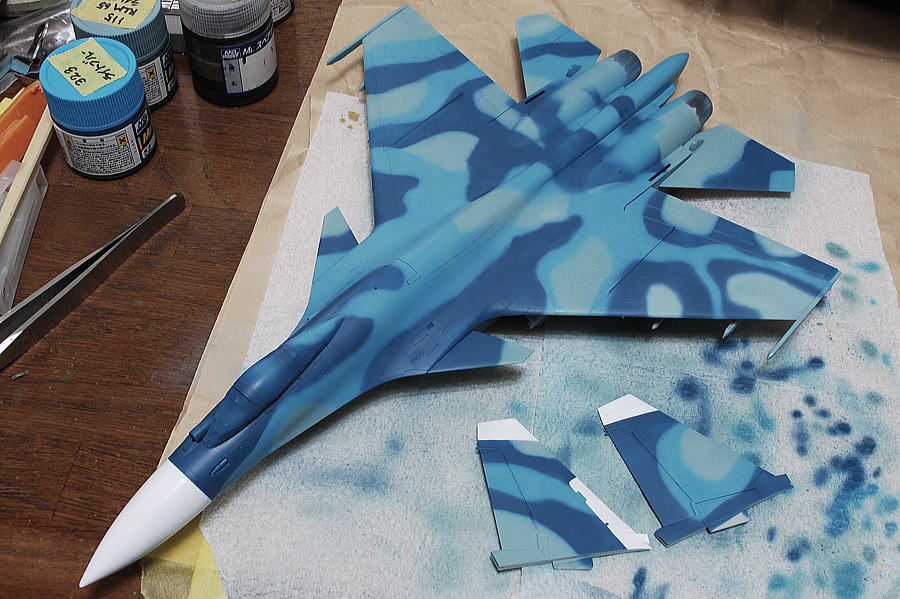 I wonder if I could blow the pattern feeling nice. There are still painting of the exhaust nozzle and other details. Anyway, finally, I got beyond the mountain pass…
(11-April-2015)
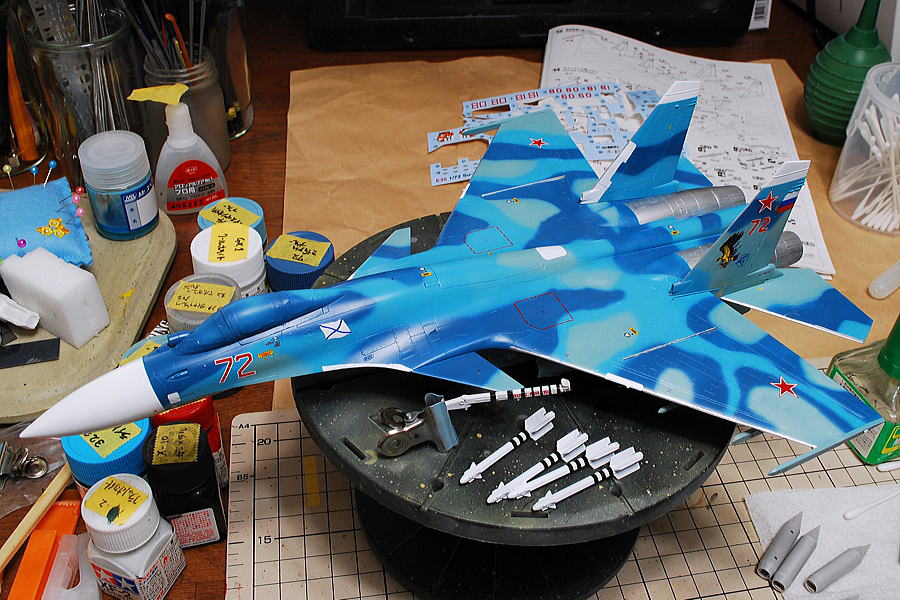 Now I’m sticking decals and painting detailed points. After painting more of the engine nozzles then, it’s completed. Oh, I forgot the rocket pods on the under-right corner photo. This time it’s fully armed, and there are kinds of weapons.
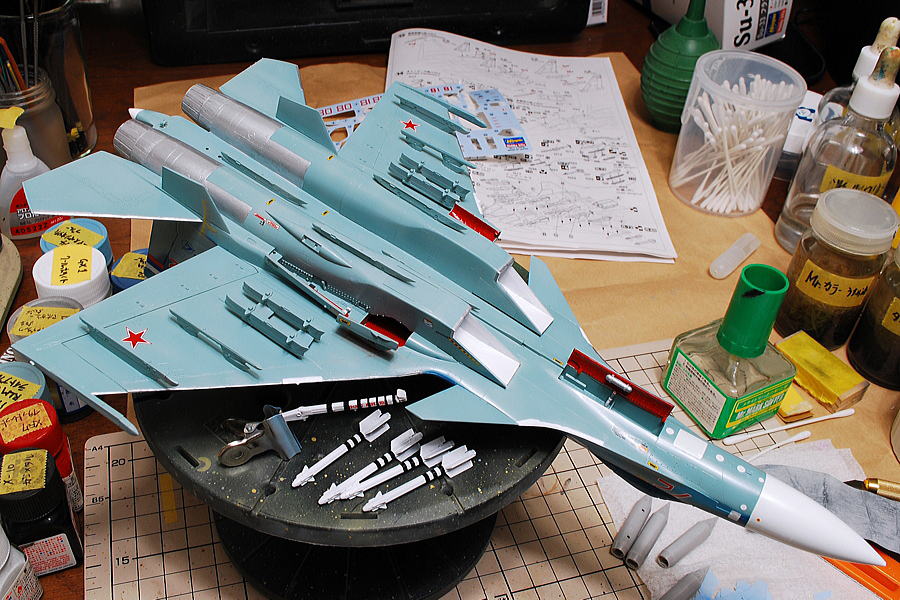 Engine metallic and landing gear red paint, side of the wing silver is by brush. The underside is working. I wonder if the engine nozzle painted in silver is suitable, but it’s better to add darker colors.
(14-April-2015)
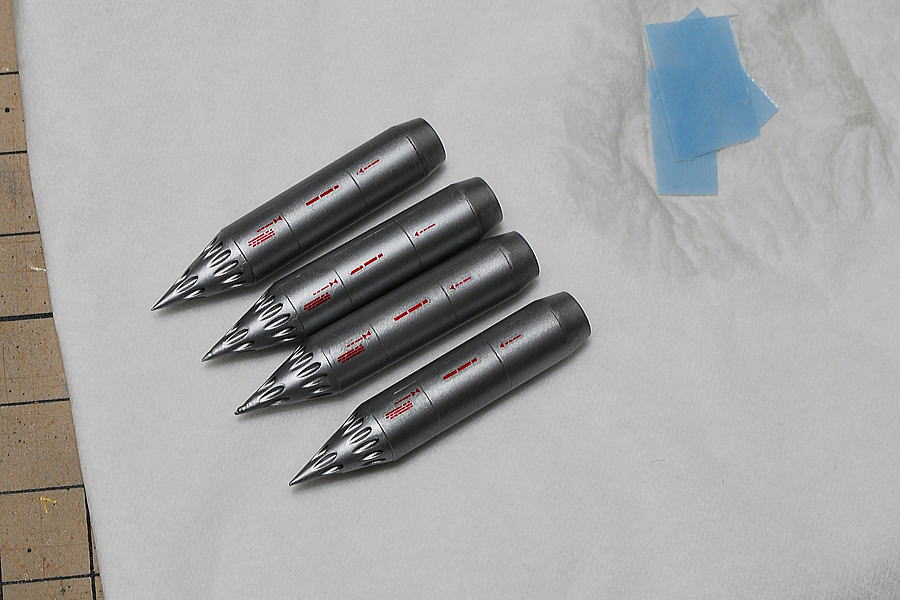 I painted rocket pods in silver. It’s looking good after pasting three small decals. One pod tip forgot to prepare the form sharpness.
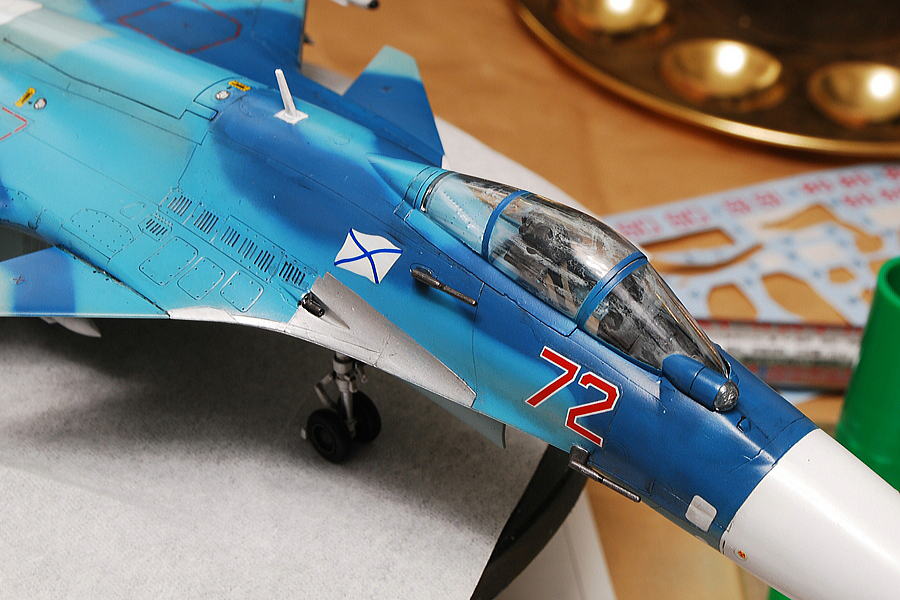 Mmmmm…, It’s a big failure. The last process peeled off the masking of the canopy, and the inside looked misted over! It shocked me. Considering the causes, too much adhesive used and vaporized one did the tricky things, or I splayed many times, and paint mist was into through the narrow gap. Oh, What should I do? The sticky bonded canopy is not coming off quickly. I think the solution is a moment. This time also, I was at a loss after failing.
(16-April-2015)
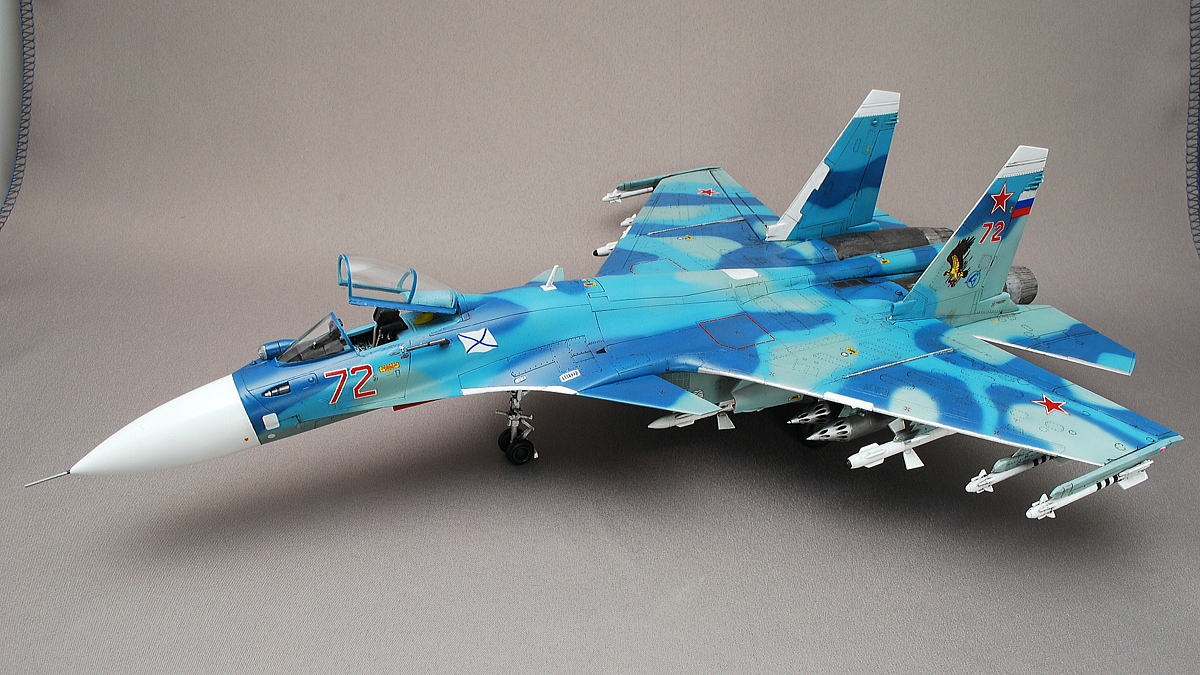 Su-33, NATO code is Flanker D, was finally completed. The aircraft has been modified to operate the Su-27 on the carrier. Although this kit scale is 1/72, it’s too big to flame on the back screen.
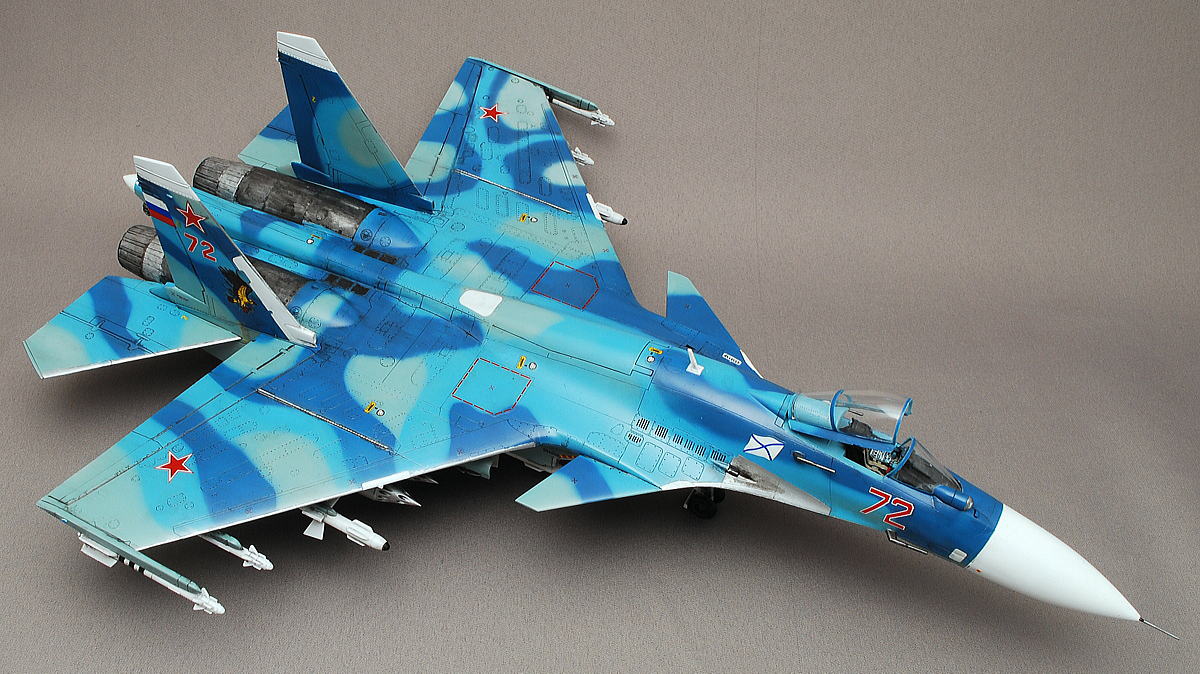 If the fight one-to-one against the F-15, the Flanker’s combat ability may be better. However, when it is a whole many-to-many system, including AWACS, I suppose an advantage is the US side.
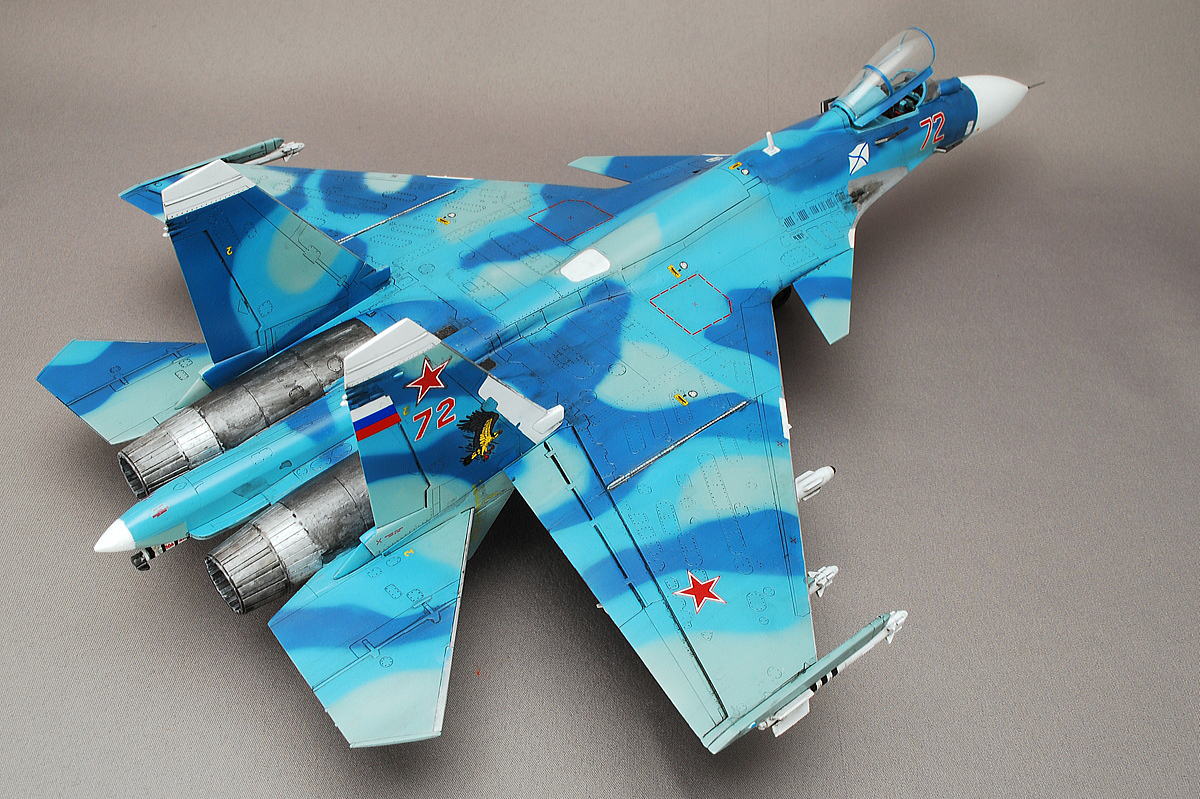 At first, I finished closing the cockpit, but the inside was covered in dust, as I commented. The airbrush dry mist was in the cockpit through the canopy gap. I poured thin adhesive into the canopy’s joint little by little, peeled it off, and changed the canopy open. Once again, I polished the canopy, and soon it was shiny.
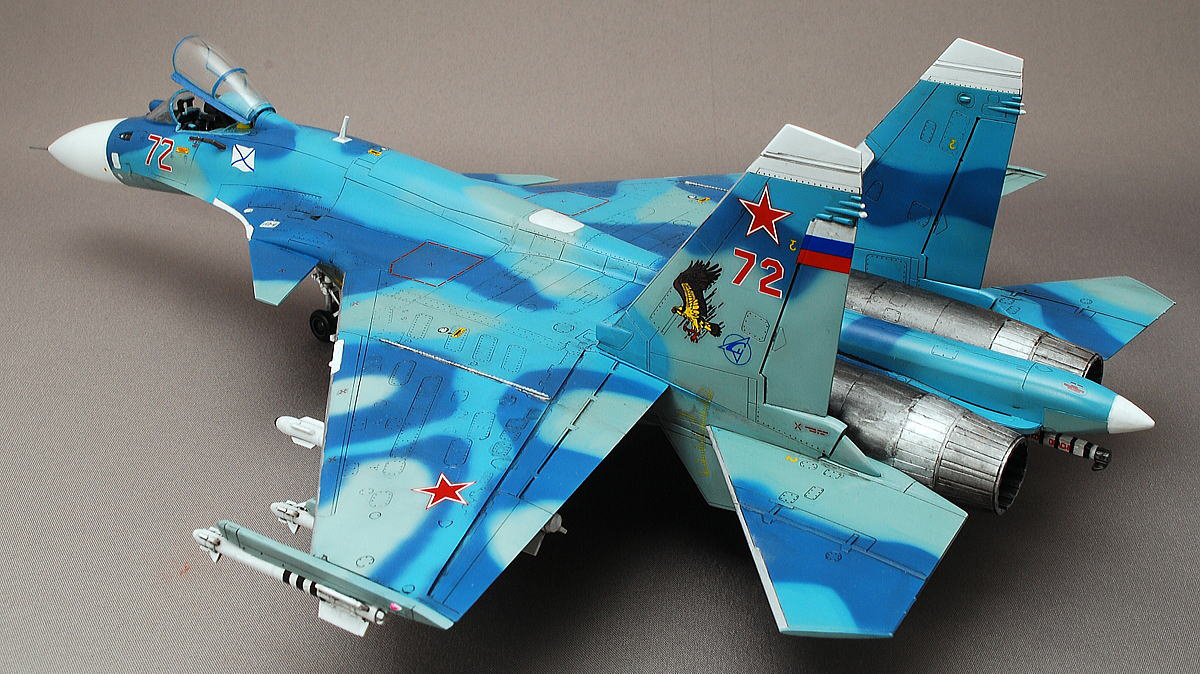 Well, the open cockpit style is also looking fantastic. I want to think it’s better to be well recovered.
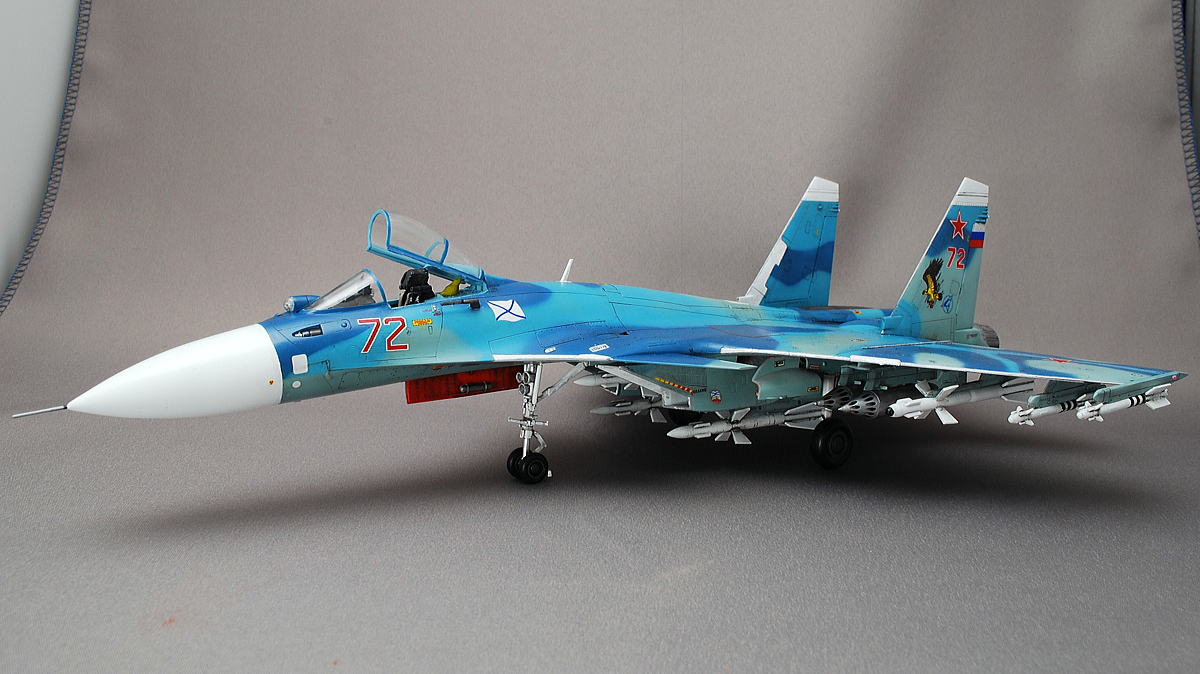 The Flanker is a beautiful curve from the nose to the center. It’s better than NATO code flanker, I feel. Their nickname is Журавлик in Russian; the meaning is the cute crane name.
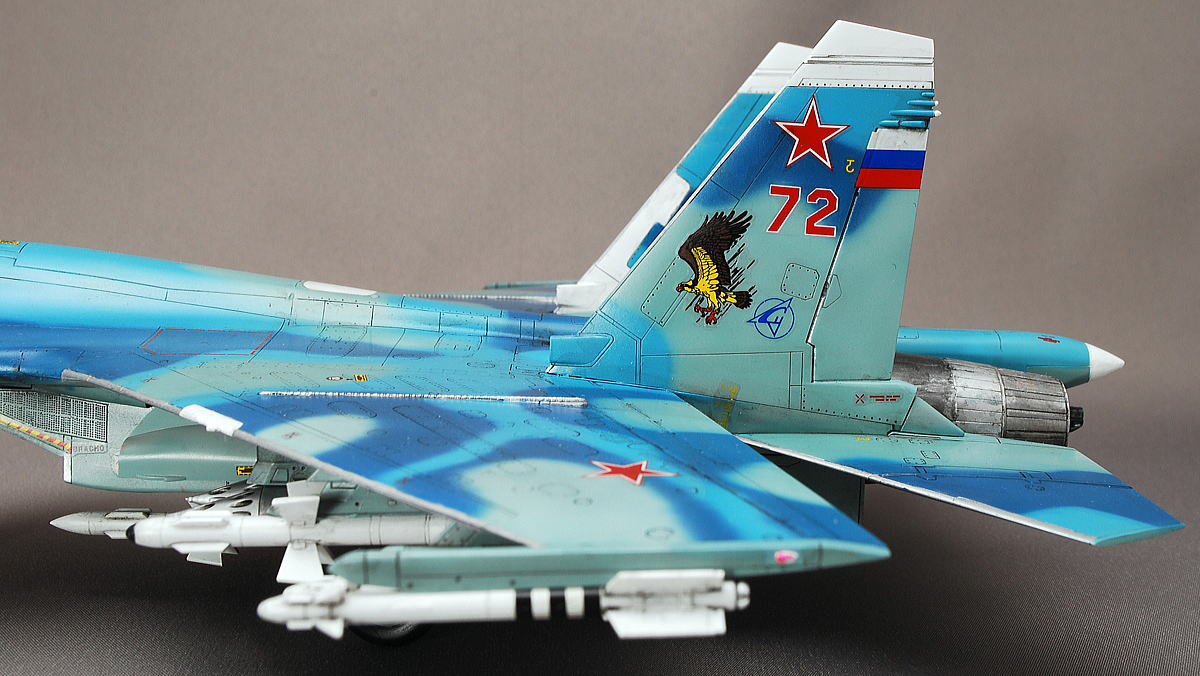 Russian Navy aircraft carrier Admiral Kuznetzov (Адмира́л Кузнецо́в) Aircraft Ser. No.72. The eagle is a trademark. The tricolor flag of Russia is also displayed in parallel with the red star of the Soviet Union.
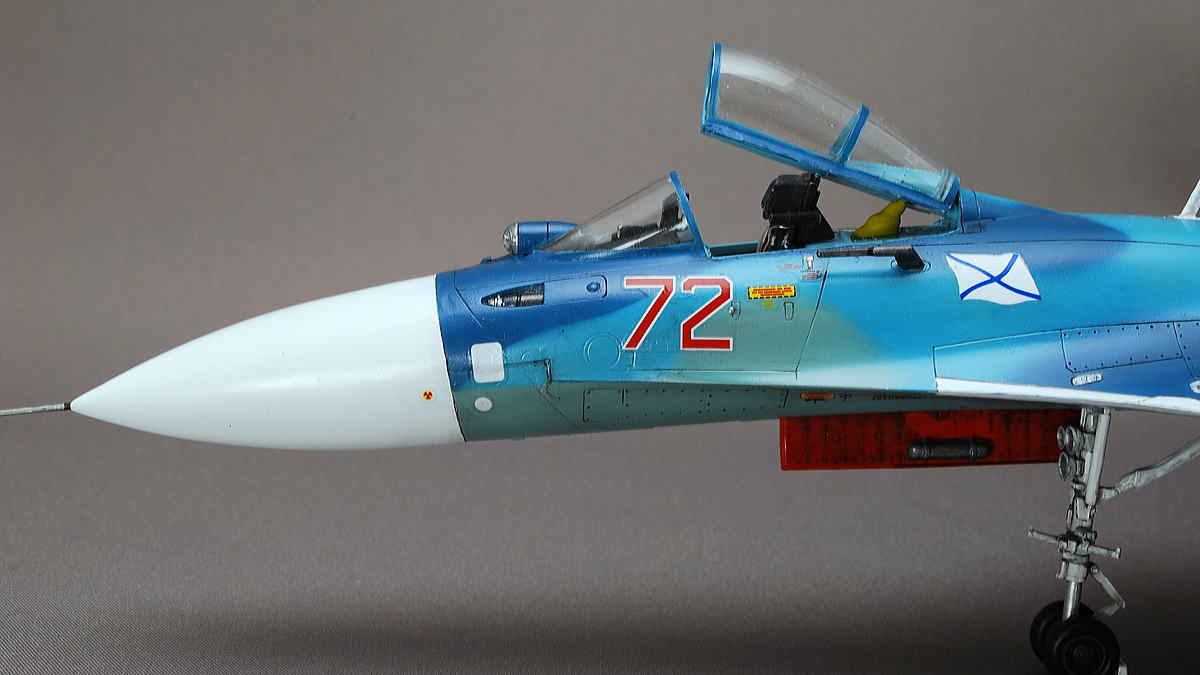 A radiation mark is pasted on the side of the Radome. Radiation? I wonder about electromagnetic waves.
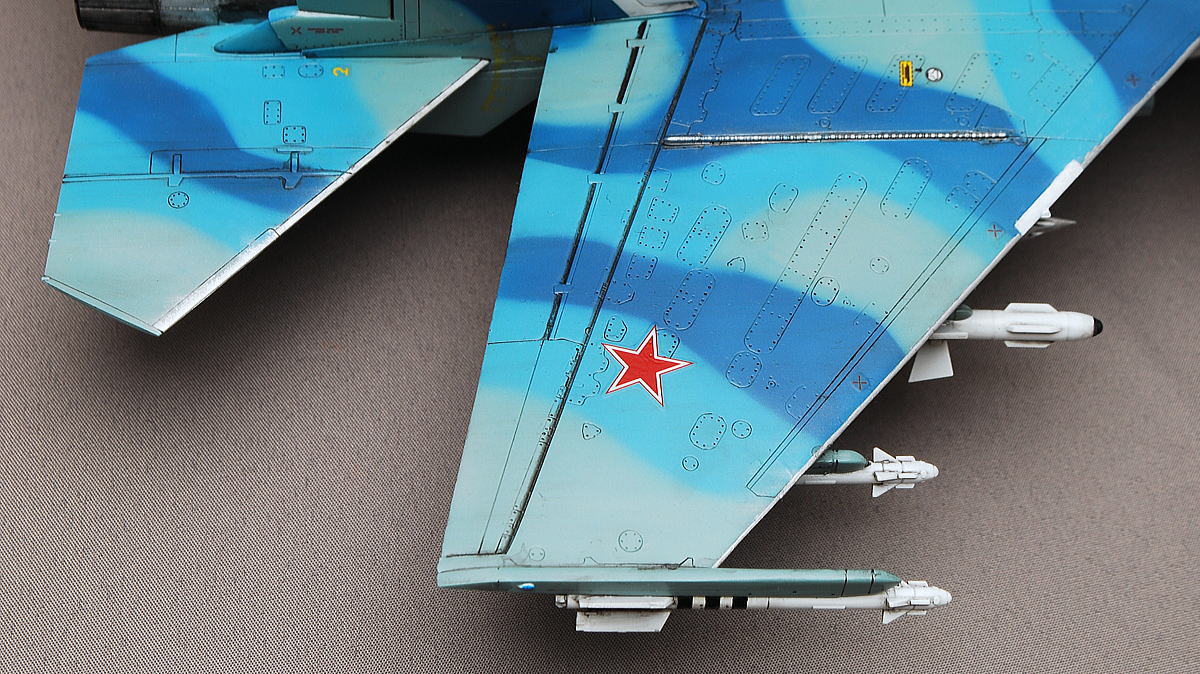 The silver part of the wing is bent like a hinge of the door. The horizontal tail also seems bent as the molds on it.
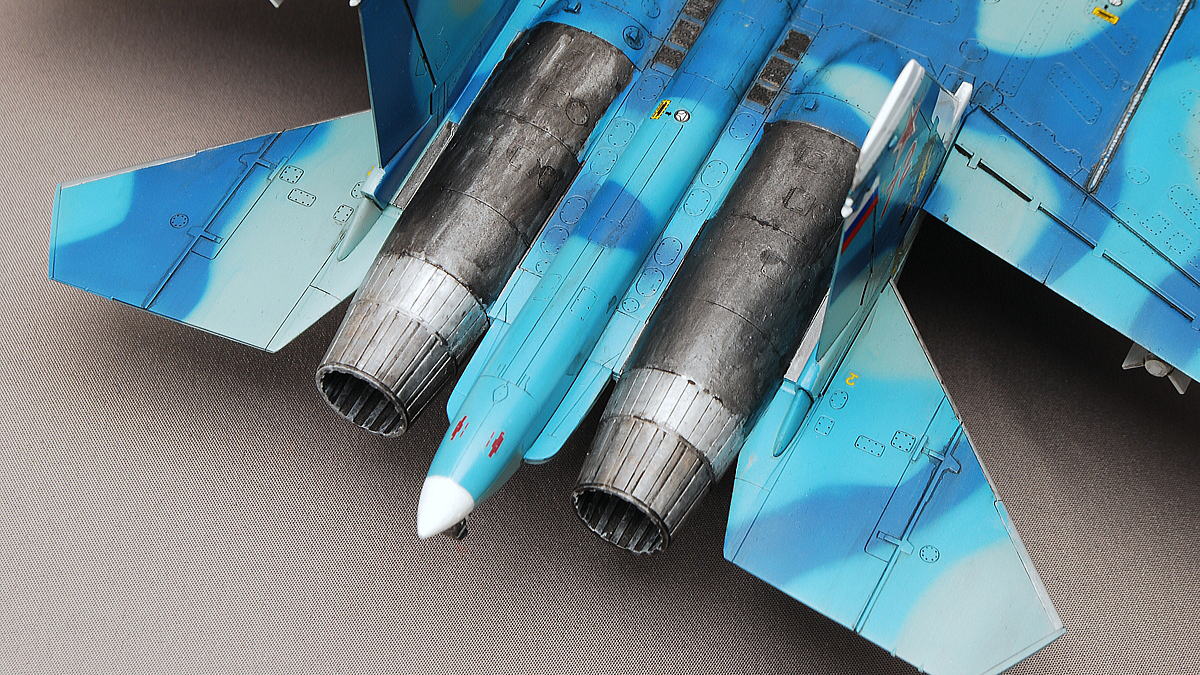 Engine nozzles are instructed to paint in three metallic colors. I didn’t struggle with this painting if I had splayed it earlier. At first, I painted the engine with bright silver, I tried detailed gradation with a brush, but it wasn’t easy.
The painting of the engine is much room for improvement, as in F-15E. Although I dry-brushed the inside of the exhaust nozzle this time, it became a little more realistic.
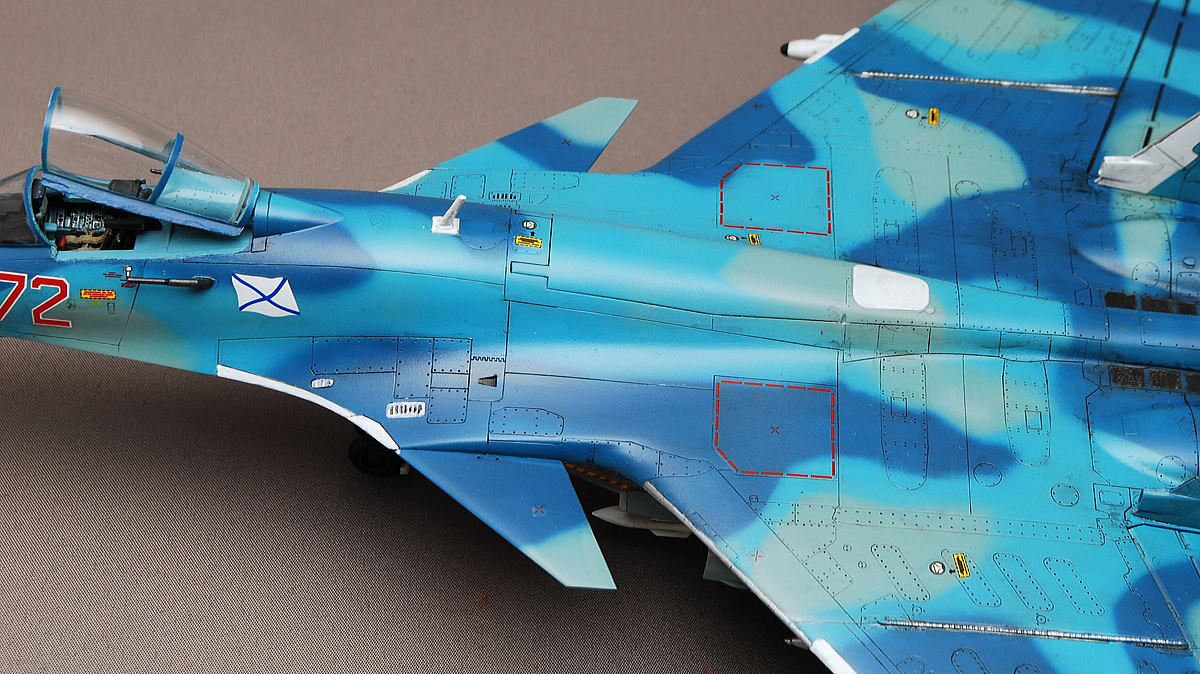 Many detailed paintings were required of the body. It’s better to paint in lacquer-based colors, the same as base colors. Since the modification is easy in the case of enamel used, I think it’s no problem when washing after being coated with lacquer clear. Sometimes the enamel paint melted when I washed it; the coating was not perfect.
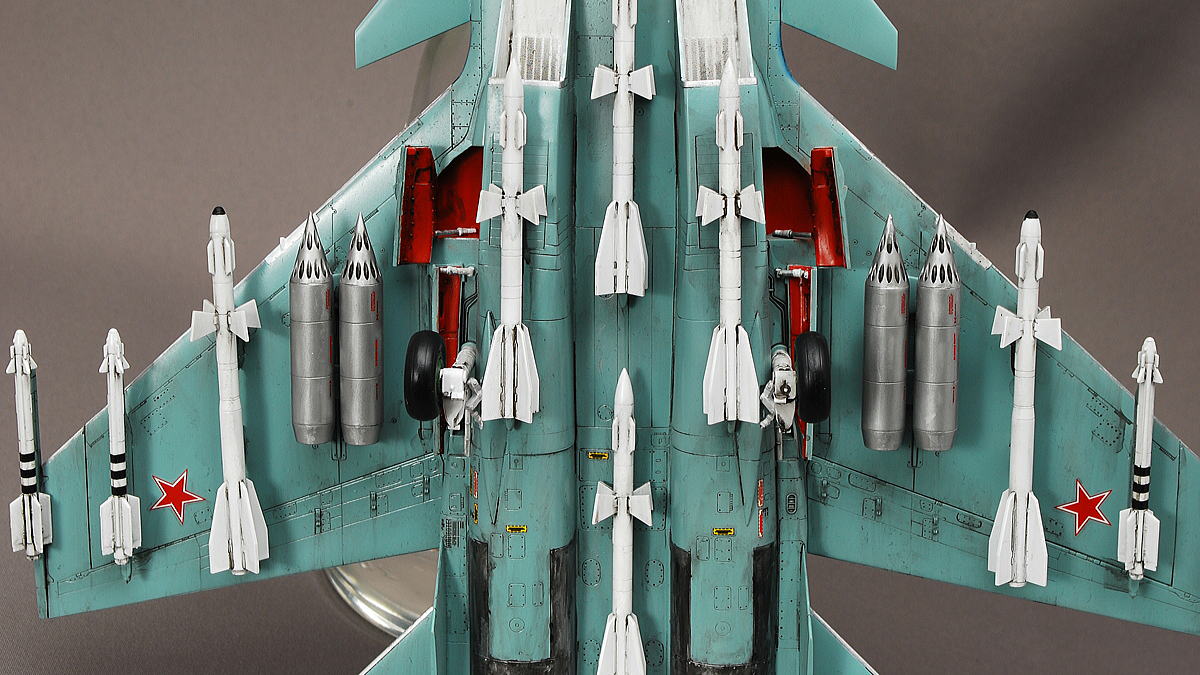 This time I set up all pylons in the full weapon. Two outside were R-73 Archer missiles. The inside was an R-27 Alamo missile, silver was the 80mm rocket pods, and four middle was the R-27 Alamo.
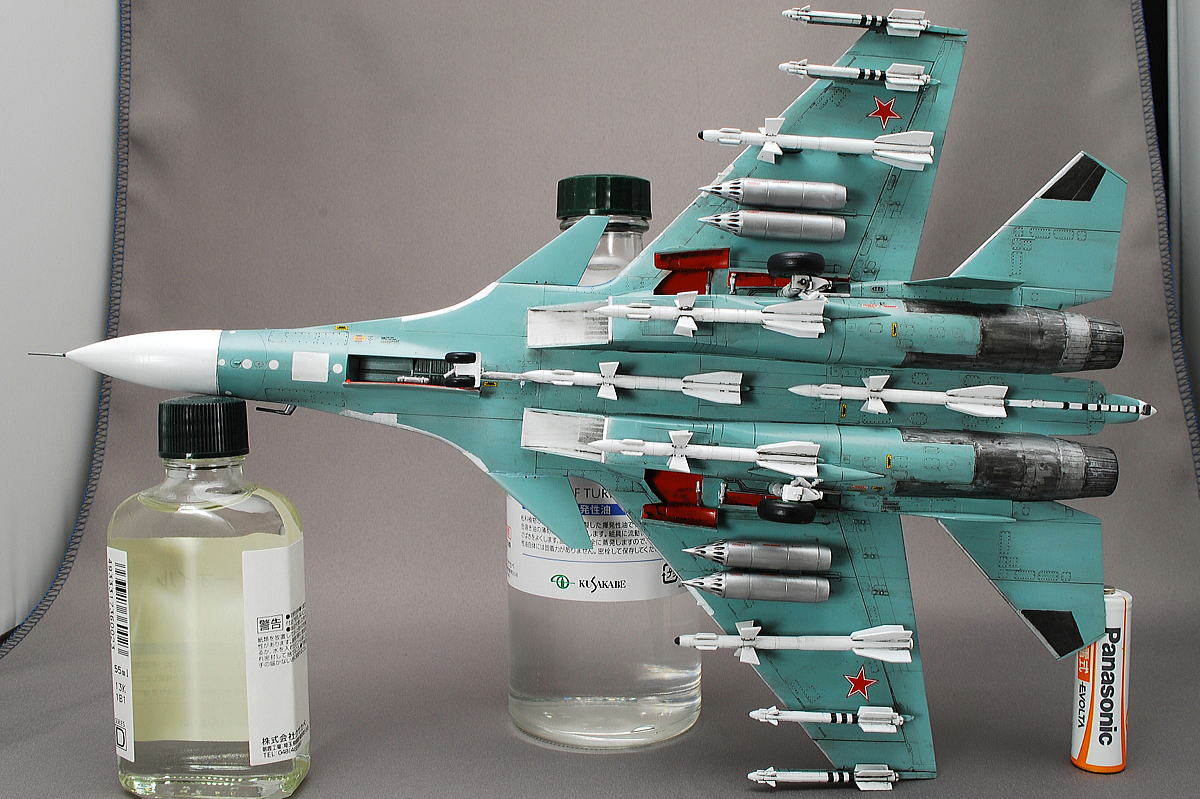 Rocket pods should be placed on the third pylon from the outside. I mistook it. Better to replace it with the R-27 Alamo missile location.
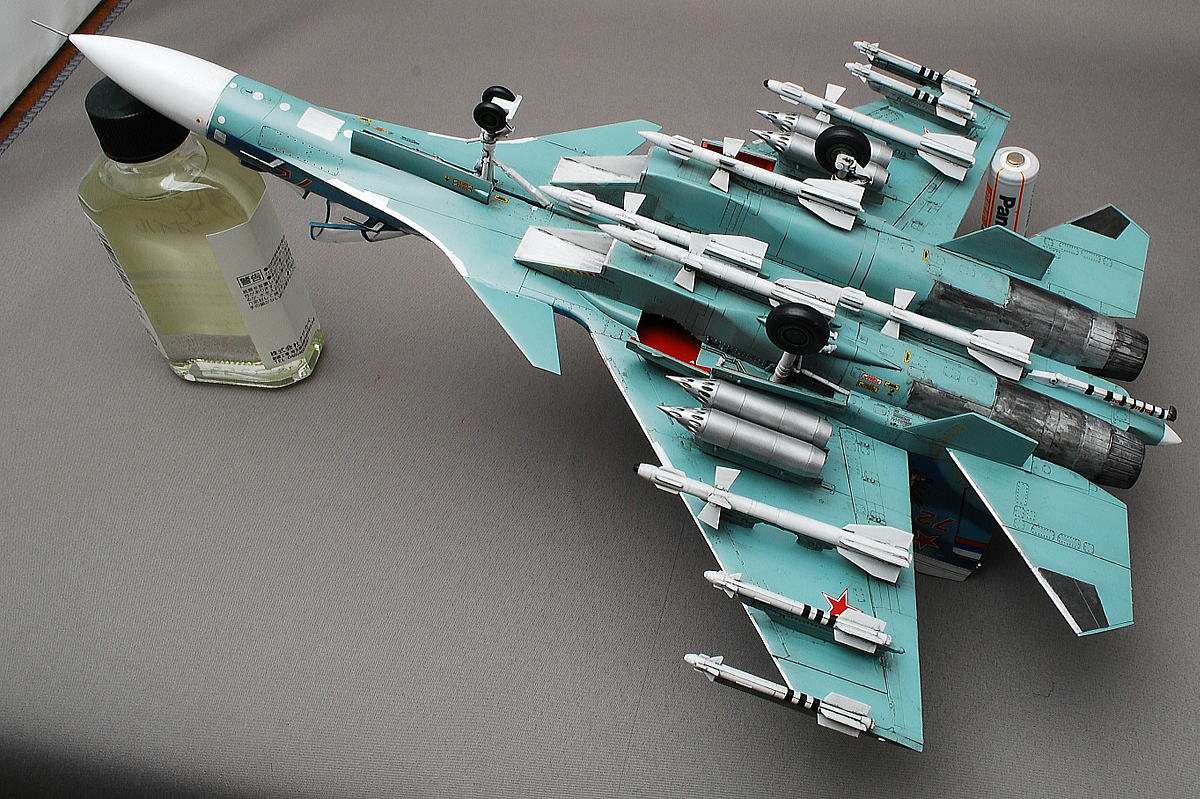 I did light washing and also white missiles. I wonder if the real missile is new and little weathering is better. I think it not used missiles in the mission or training was detached; maybe it’s cleaned by the next time.
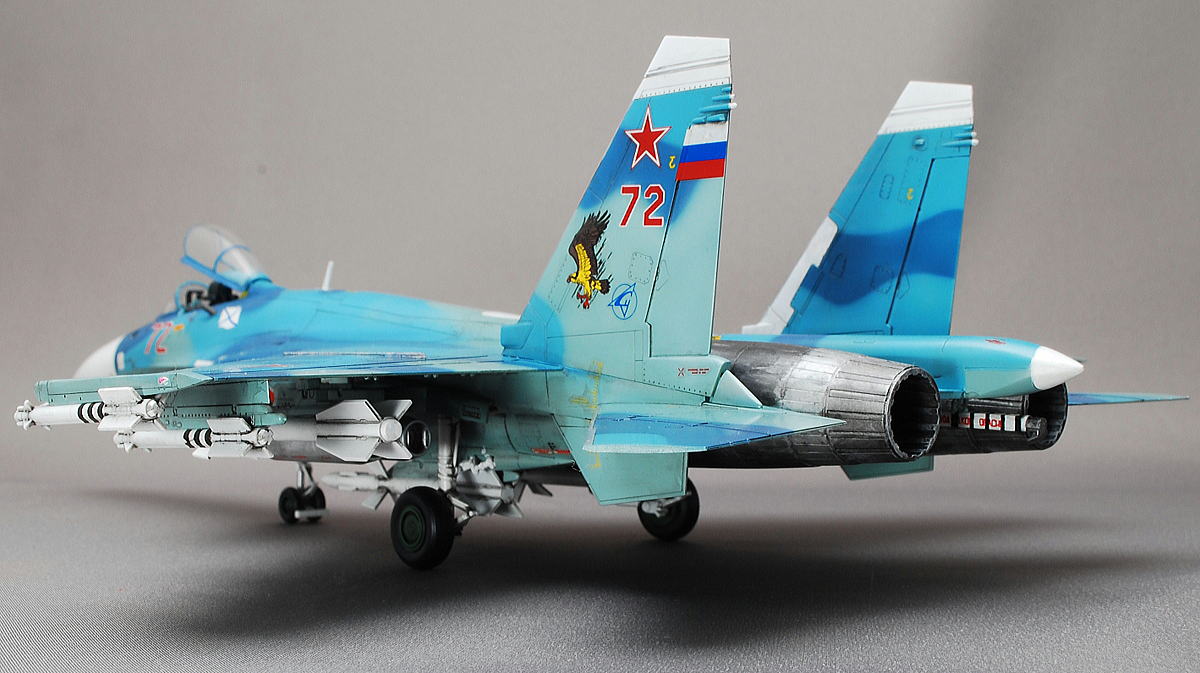 I’m still not familiar with the timing of the assembly and painting of jet planes. But now, I’m not resistant to mixing paints and assembly.
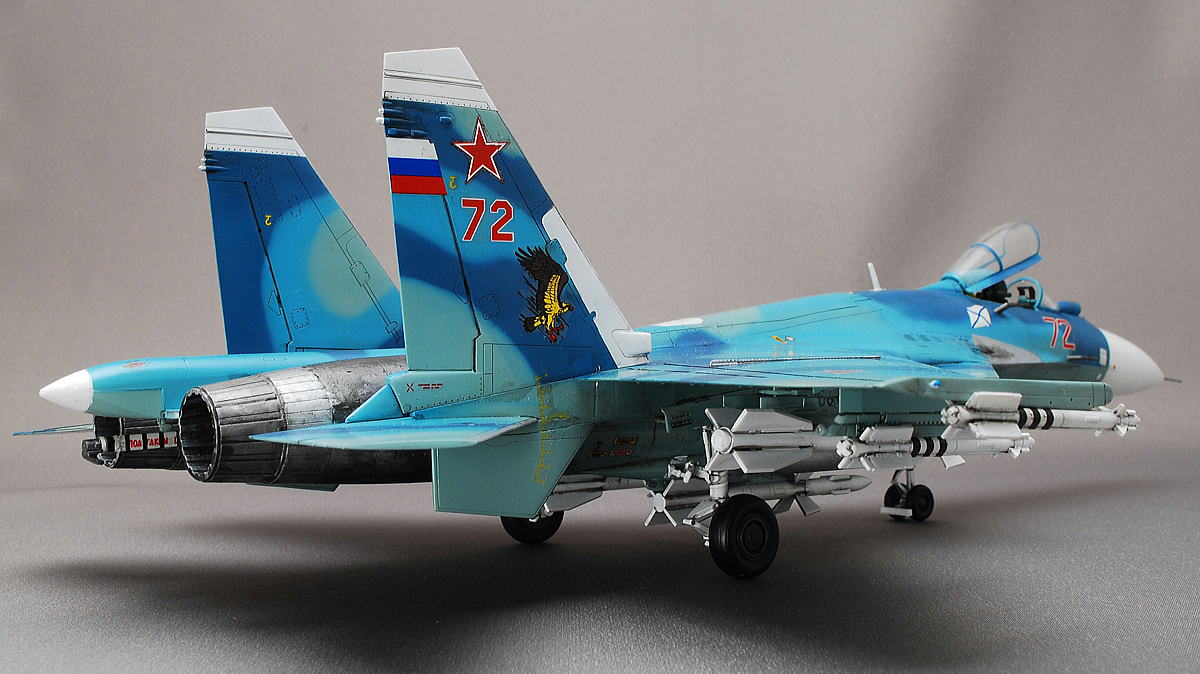 This time also I took large pictures boldly, not afraid to show rough looking. I wonder if its strong impression increased that the full-armed style can take off from the carrier.
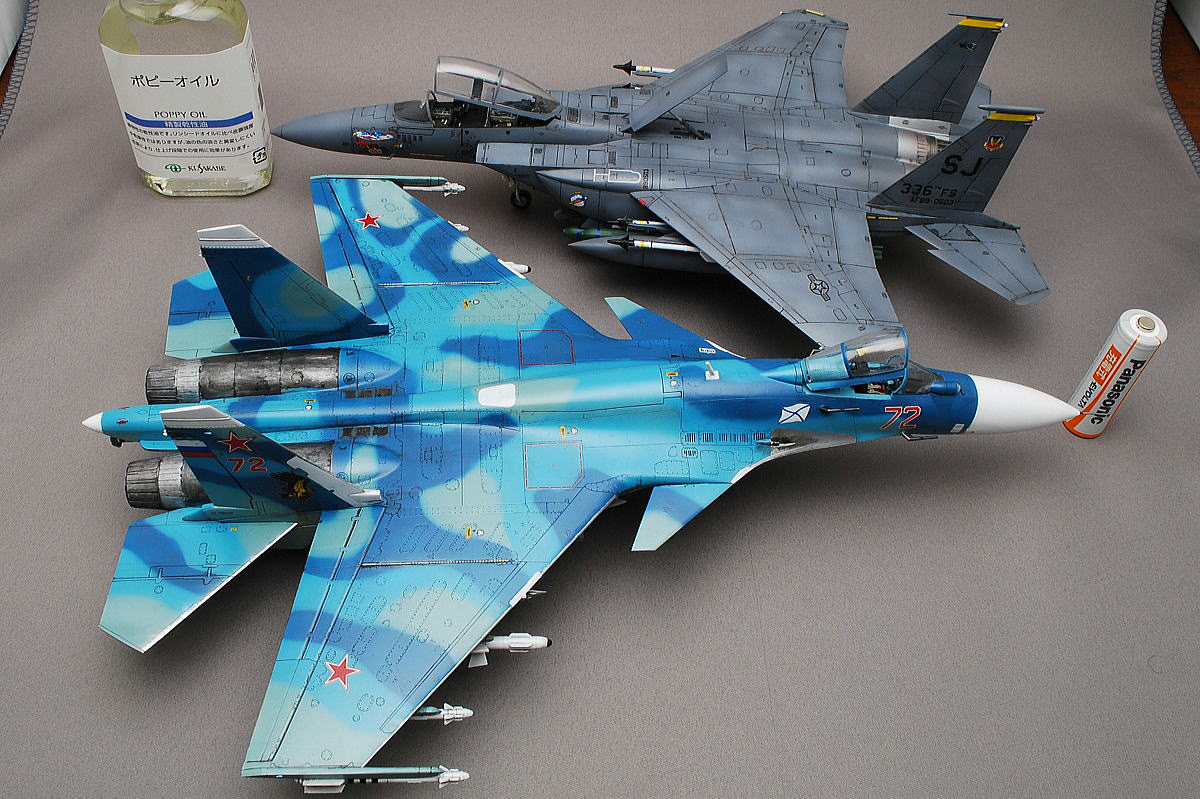 I took a photo with the F-15E I made before. The Flanker is a little larger than Eagle.
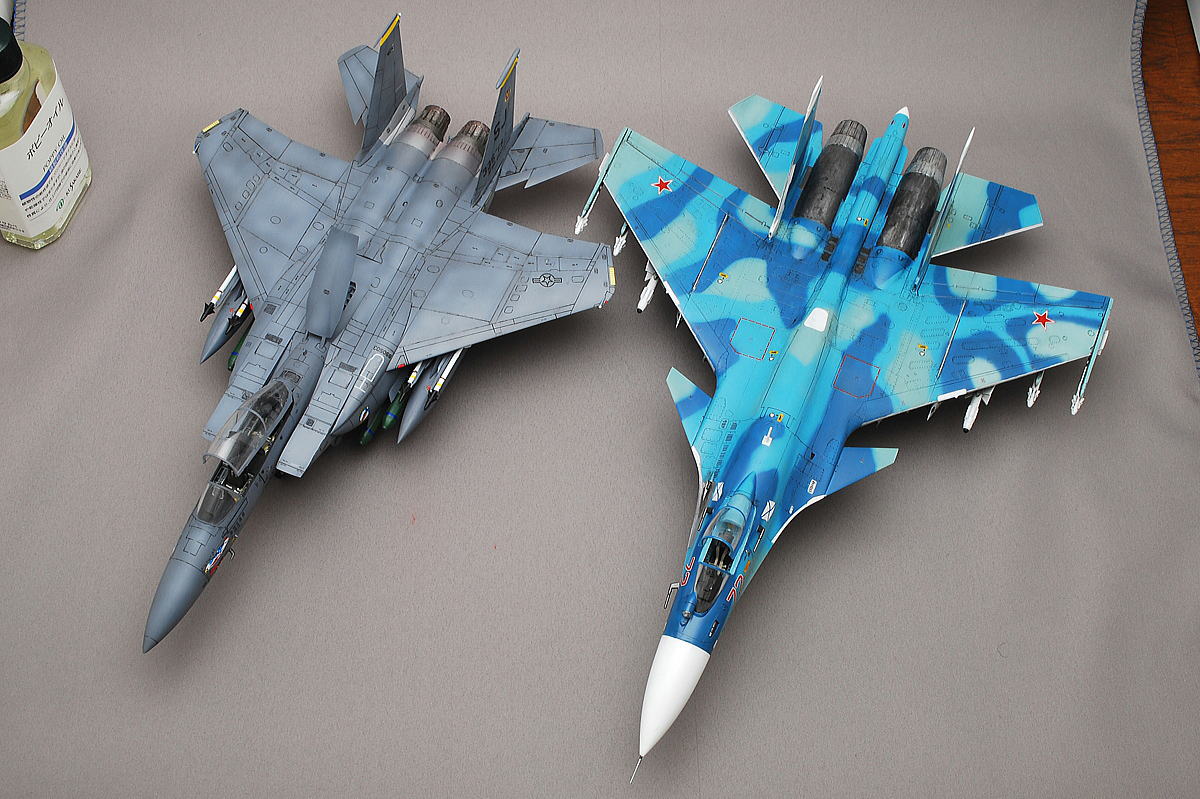 Comparison is easier to recognize in this photo. Display them required a larger space than tanks and ships. My shelves are not wide, so I keep them in my closet as a secret airbase.
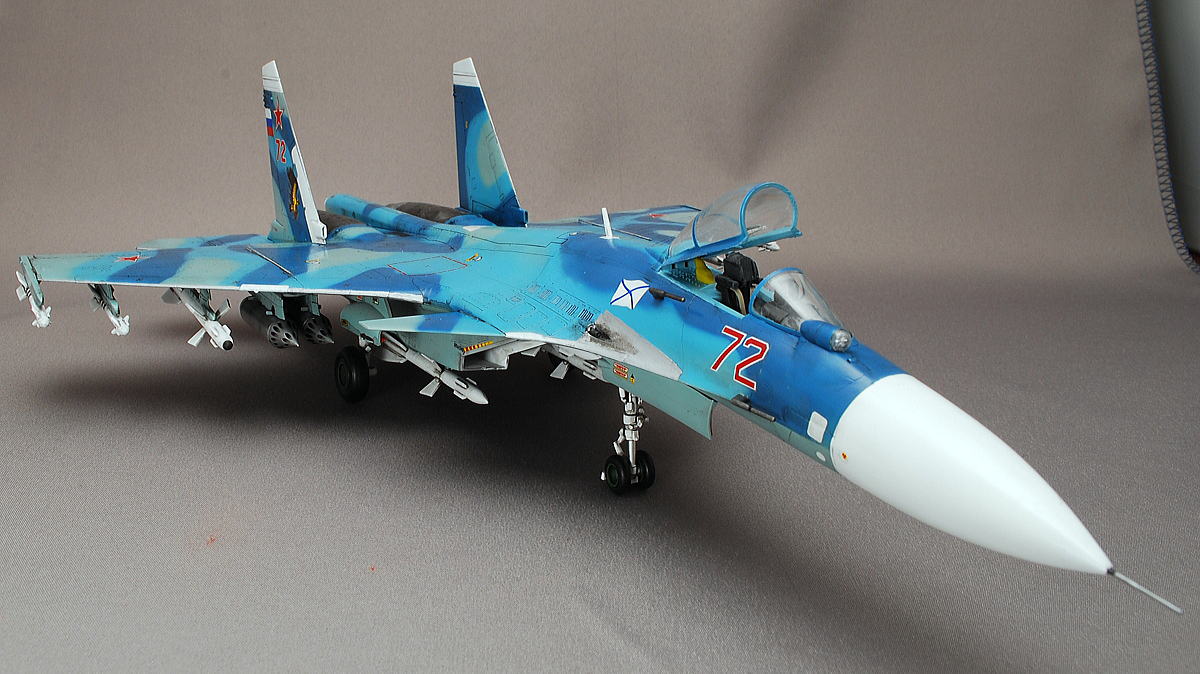 Camouflage paint was challenging. There were a lot of troubles and mistakes, but trial and error made my affection for this kit. The rare blue color pattern was a very new sense for me. Next time aircraft kit, I would like to finish up with better quality.
(20-April-2015)


コメント