

This time, I would like to make a modern jet for the first time in a long time. Great Wall Hobby’s F-15C. I bought it more than 5 years ago, but it has a lot of parts and is big, so I was hesitating. I thought I had to make a big box kit every time I move, so I will try my best.
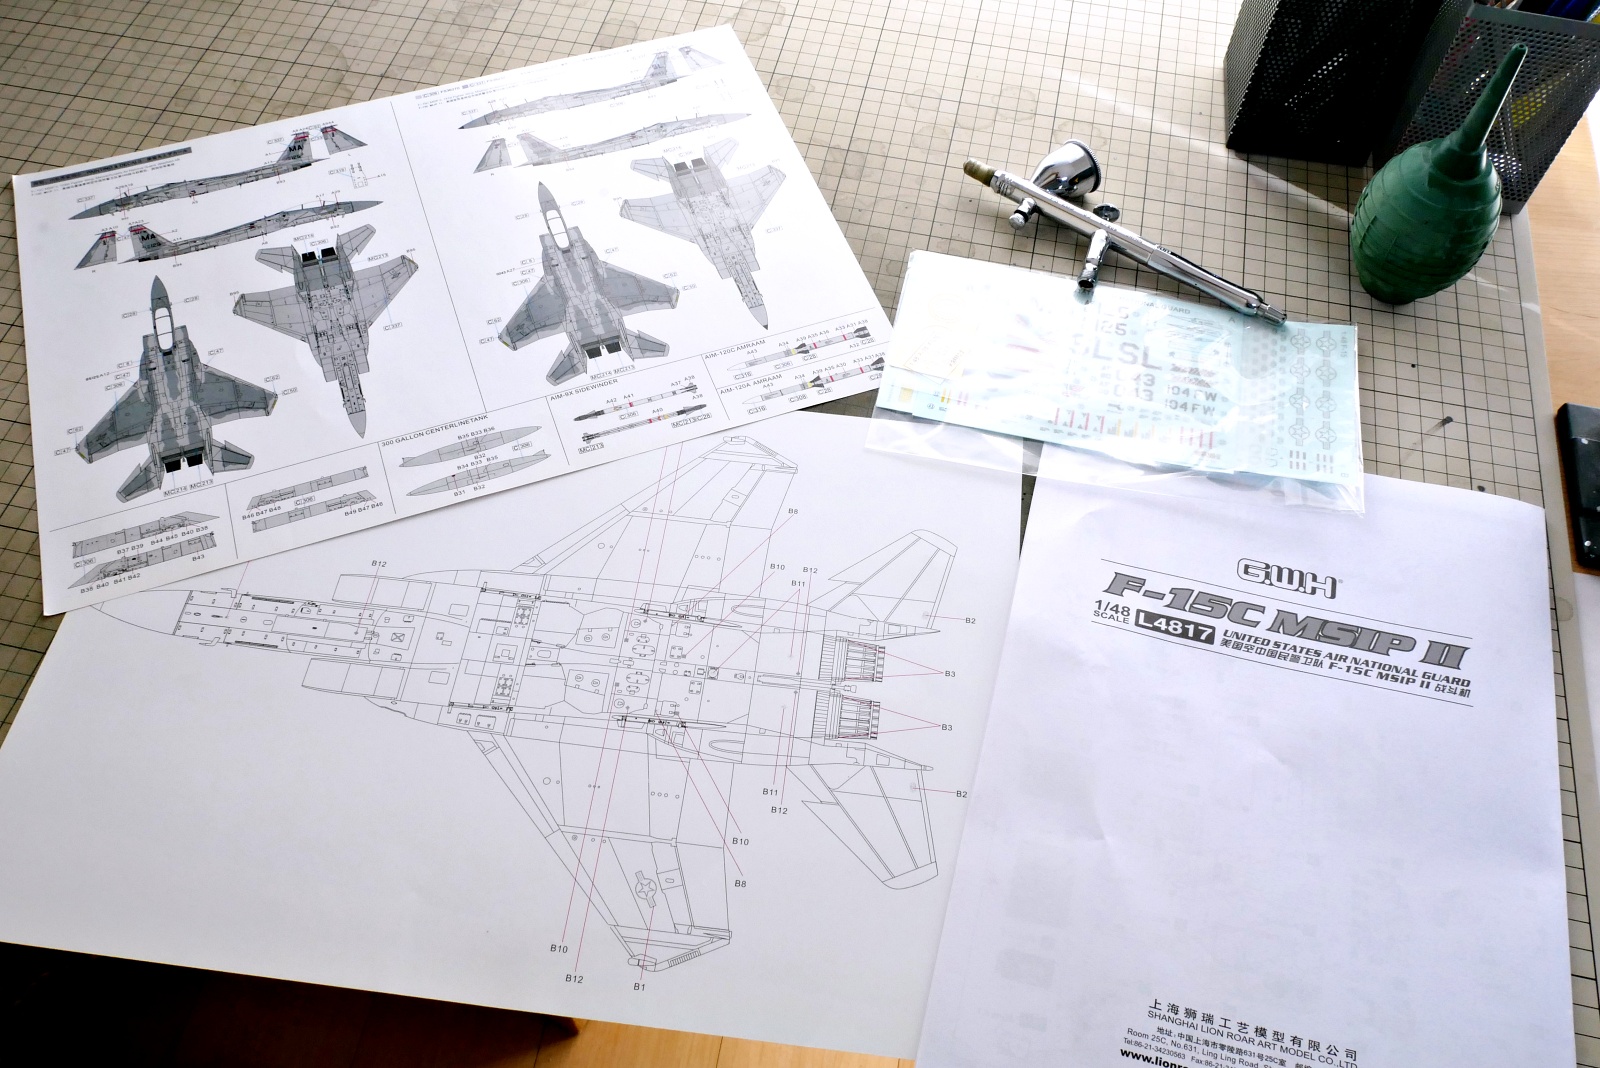
According to the manual, I can choose from 2 types of troops. If I purchase decals sold separately, I will have more options. I don’t know much about F-15, so I’ll choose the one this time.
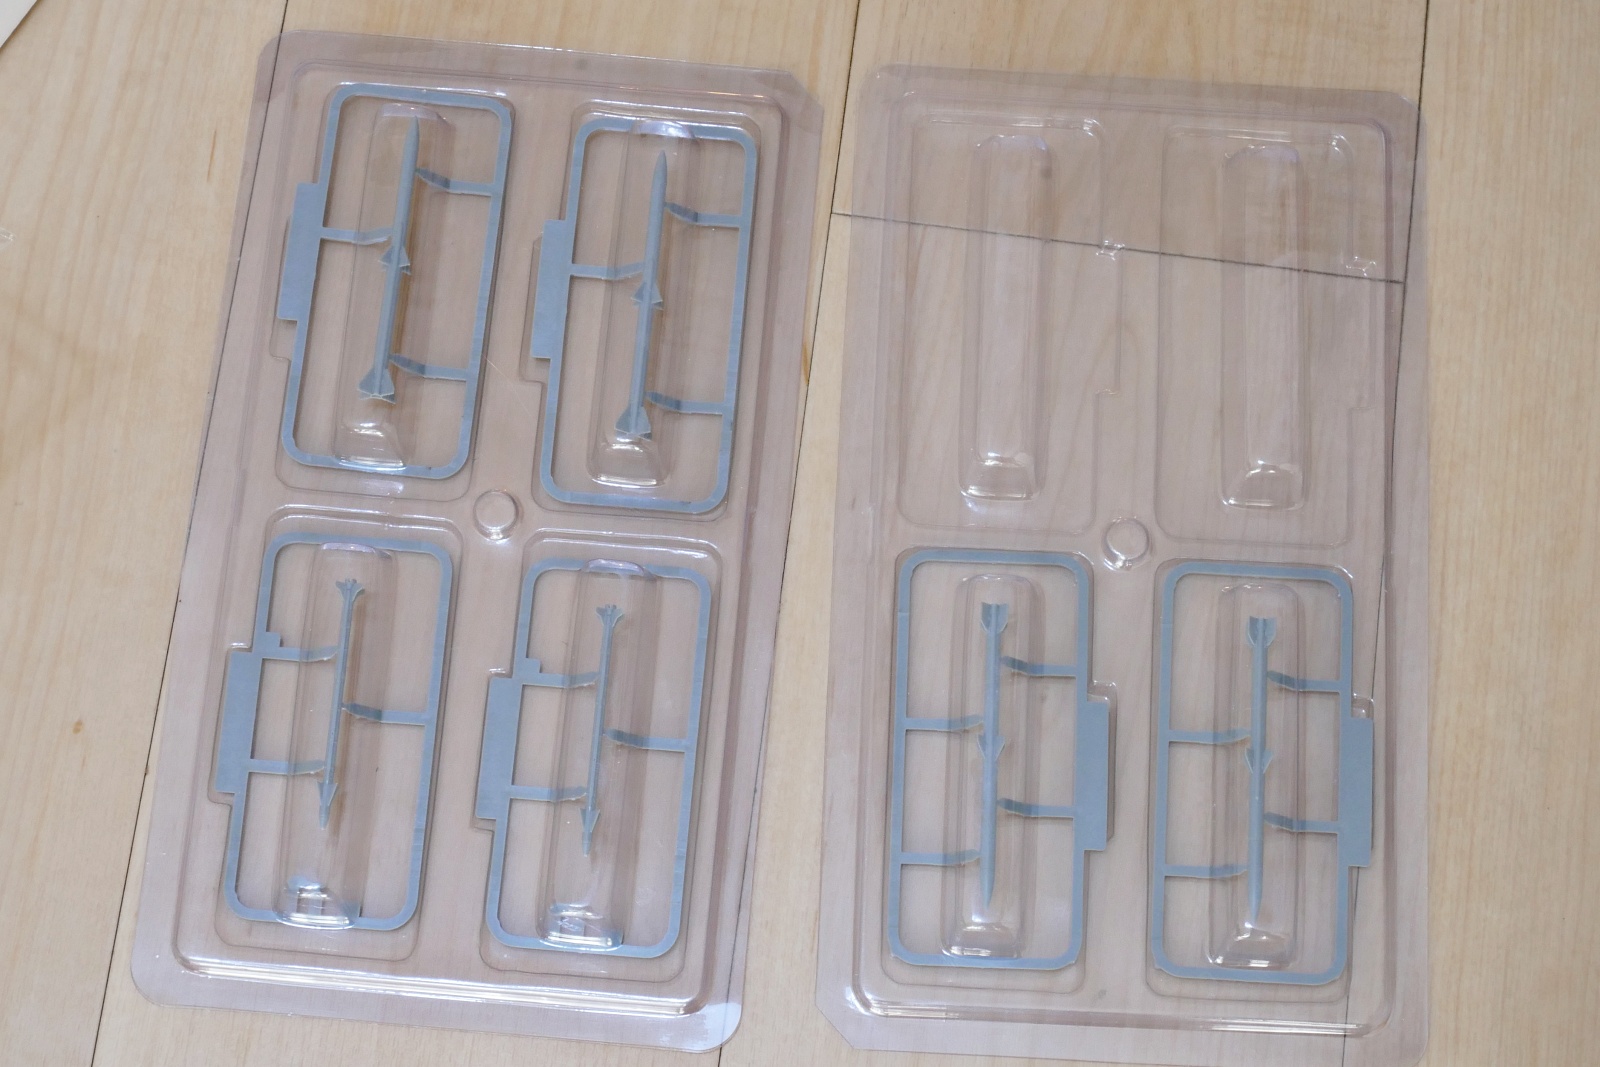
One of the reasons it seems like a high-class kit is that the missile parts are protected in a special plastic case like this.
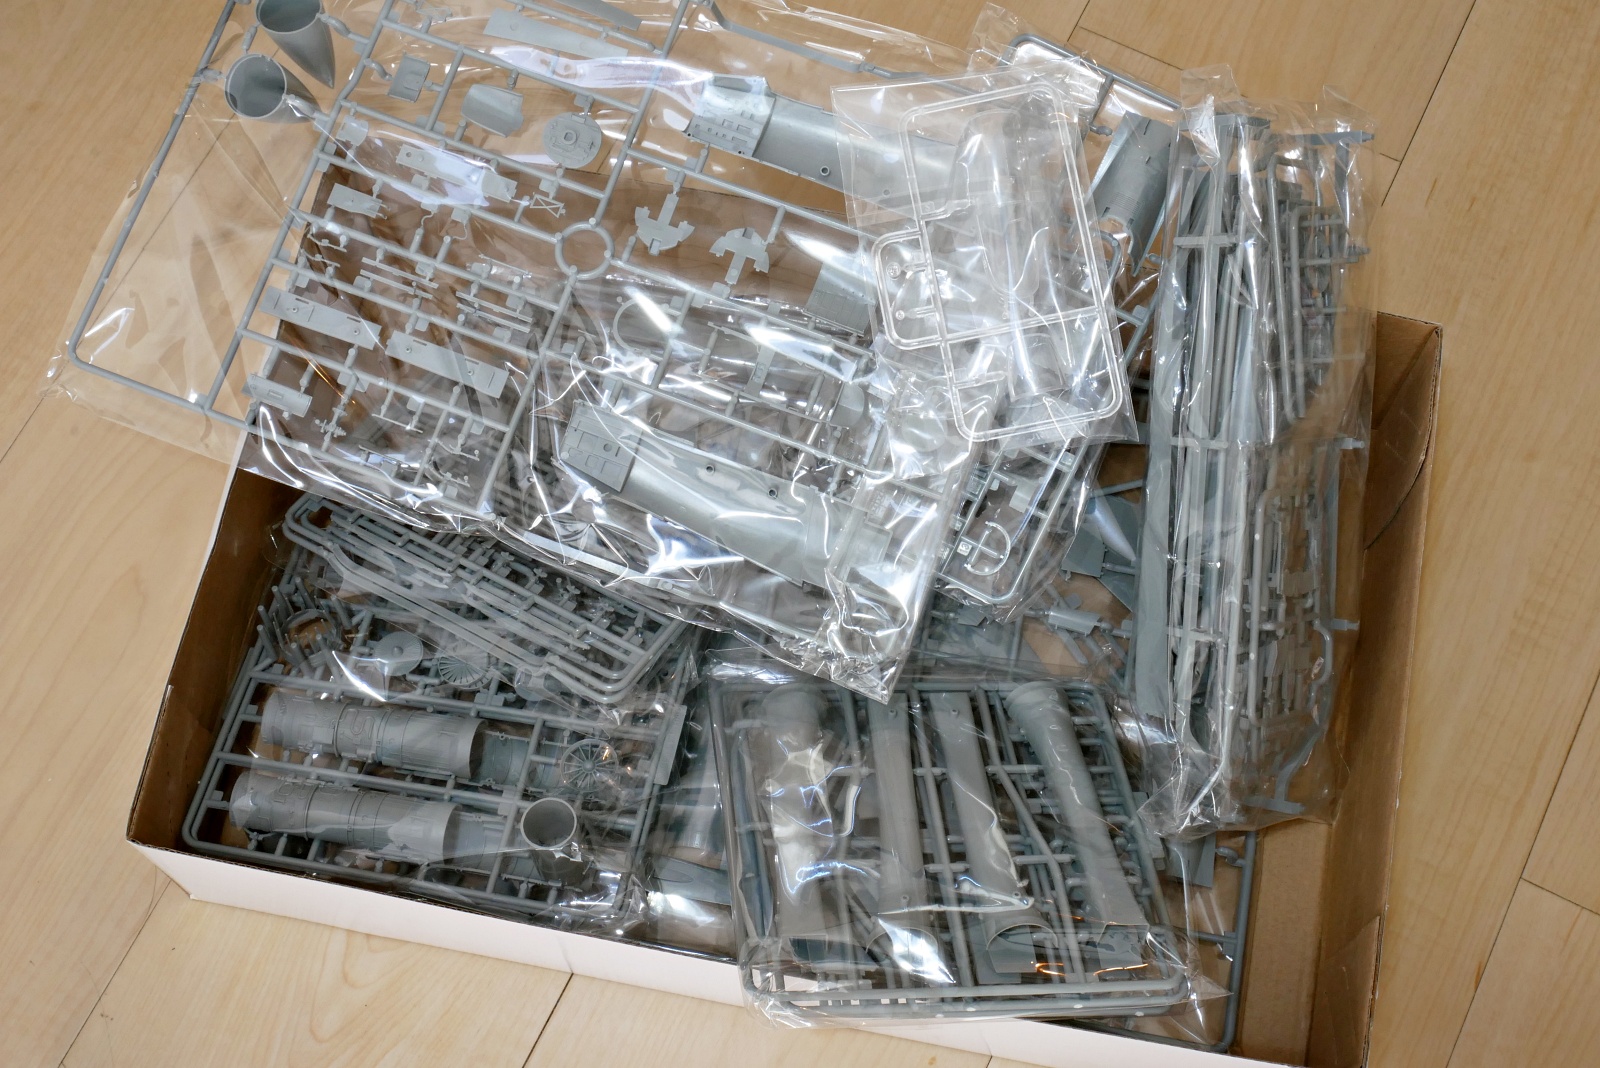
There are many parts. It looks not only big but also small. They are divided into small plastic bags so that they don’t scratch the parts.
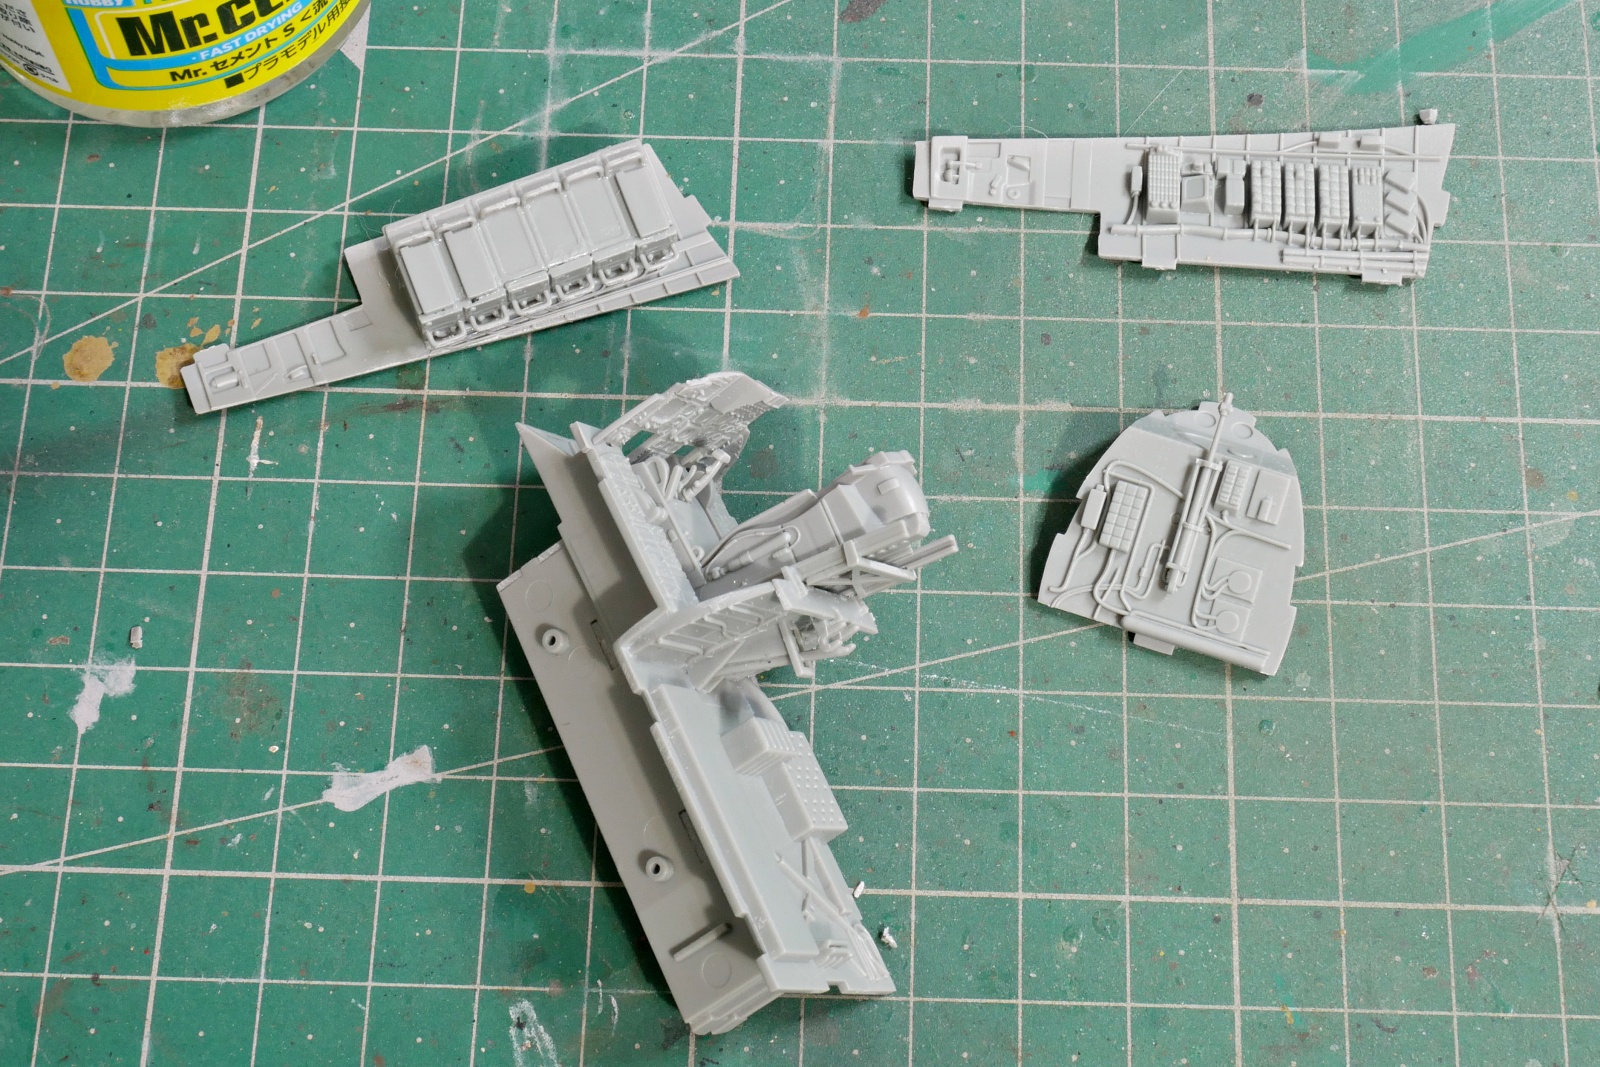
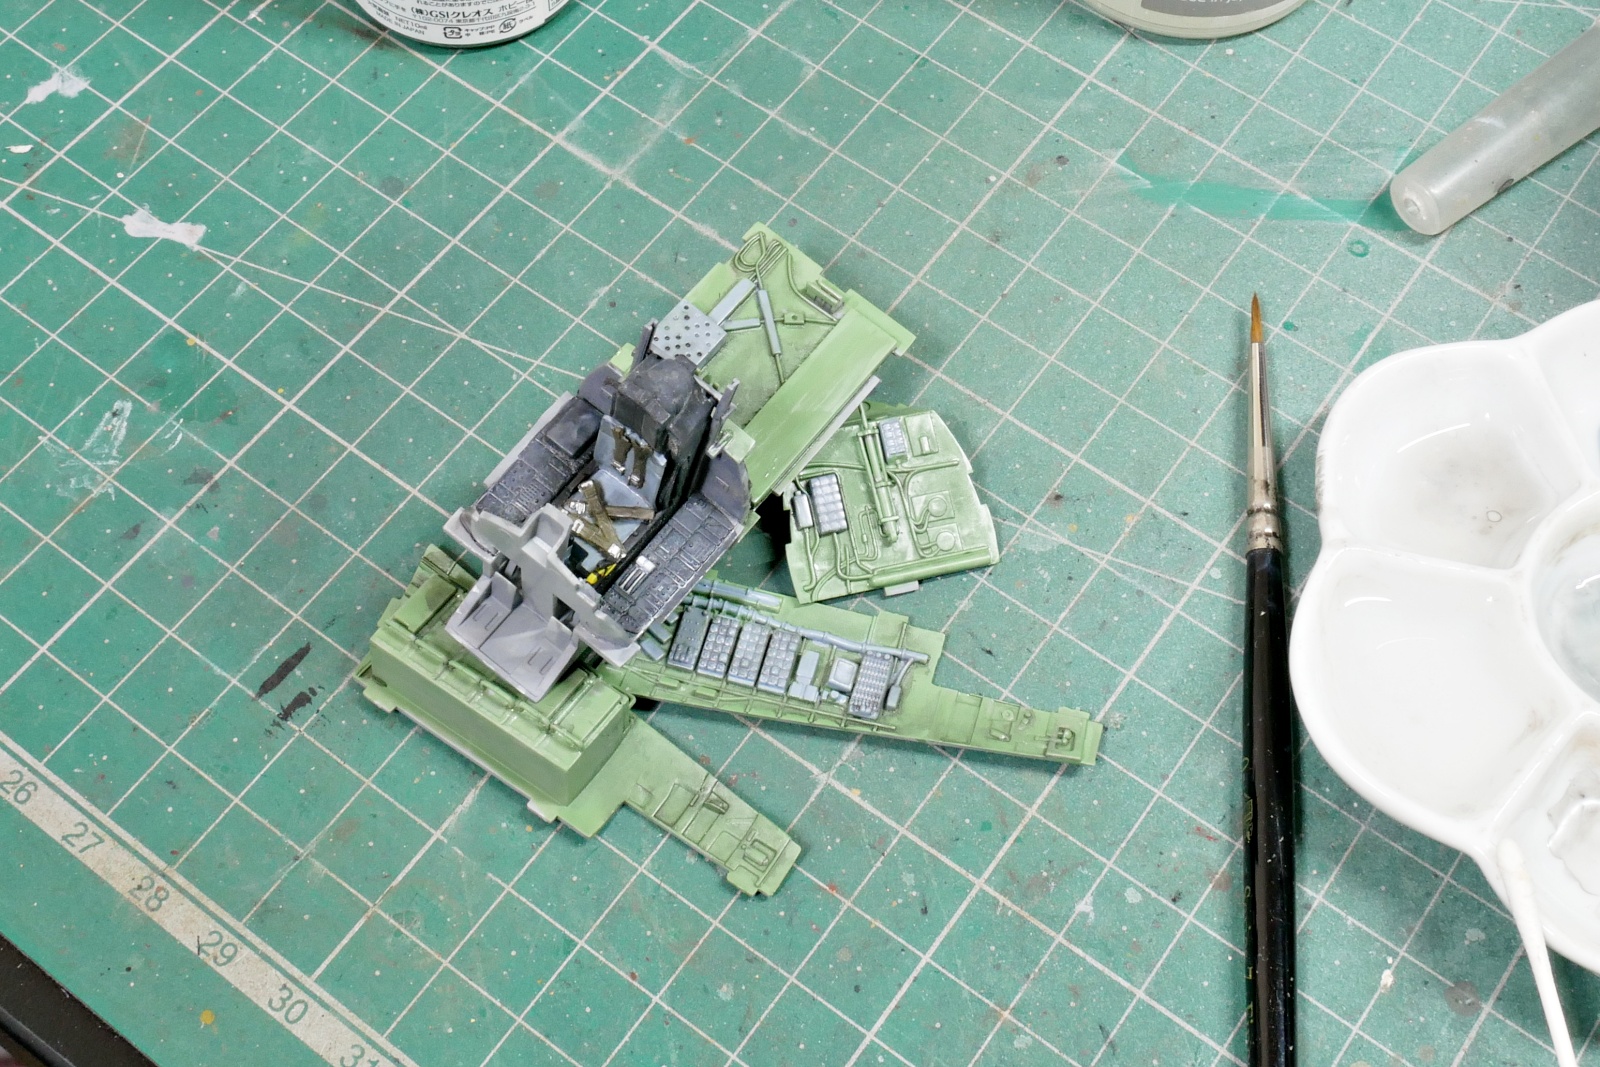
The cockpit is being built. The part mold is fine. But there’s not much of a seatbelt mold for that, and I thought it might have some belt etched parts, but it doesn’t. I thought it was expensive because it was a high-class kit, but it’s only expensive in Japan and not so high-class? I think it’s the best kit considering the quality of each part.
(2025/02/14)
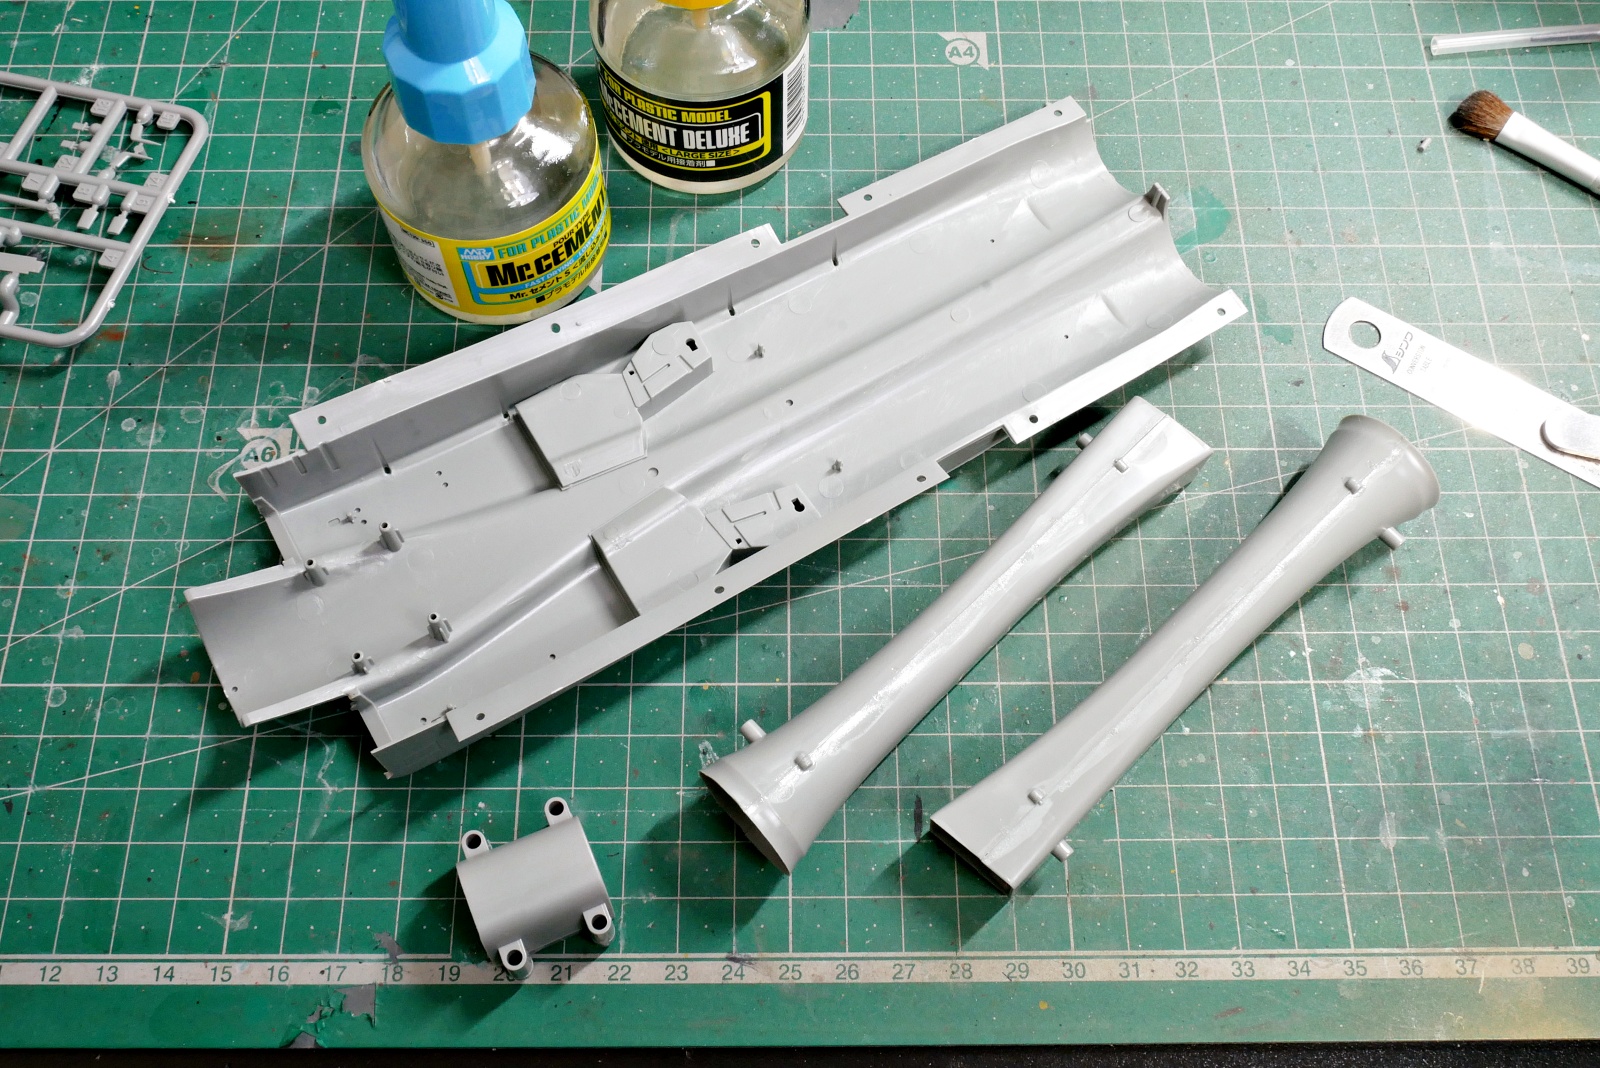
I am assembling the larger parts such as air intake. I am hesitant to do any more work because I think it would be better to assemble the modules around the cockpit and the upper and lower parts around here together. It’s easier to make adjustments when the match is bad.

Do jet engines store inside? I’m happy to see such a detailed reproduction, but it will be invisible if it’s glued.
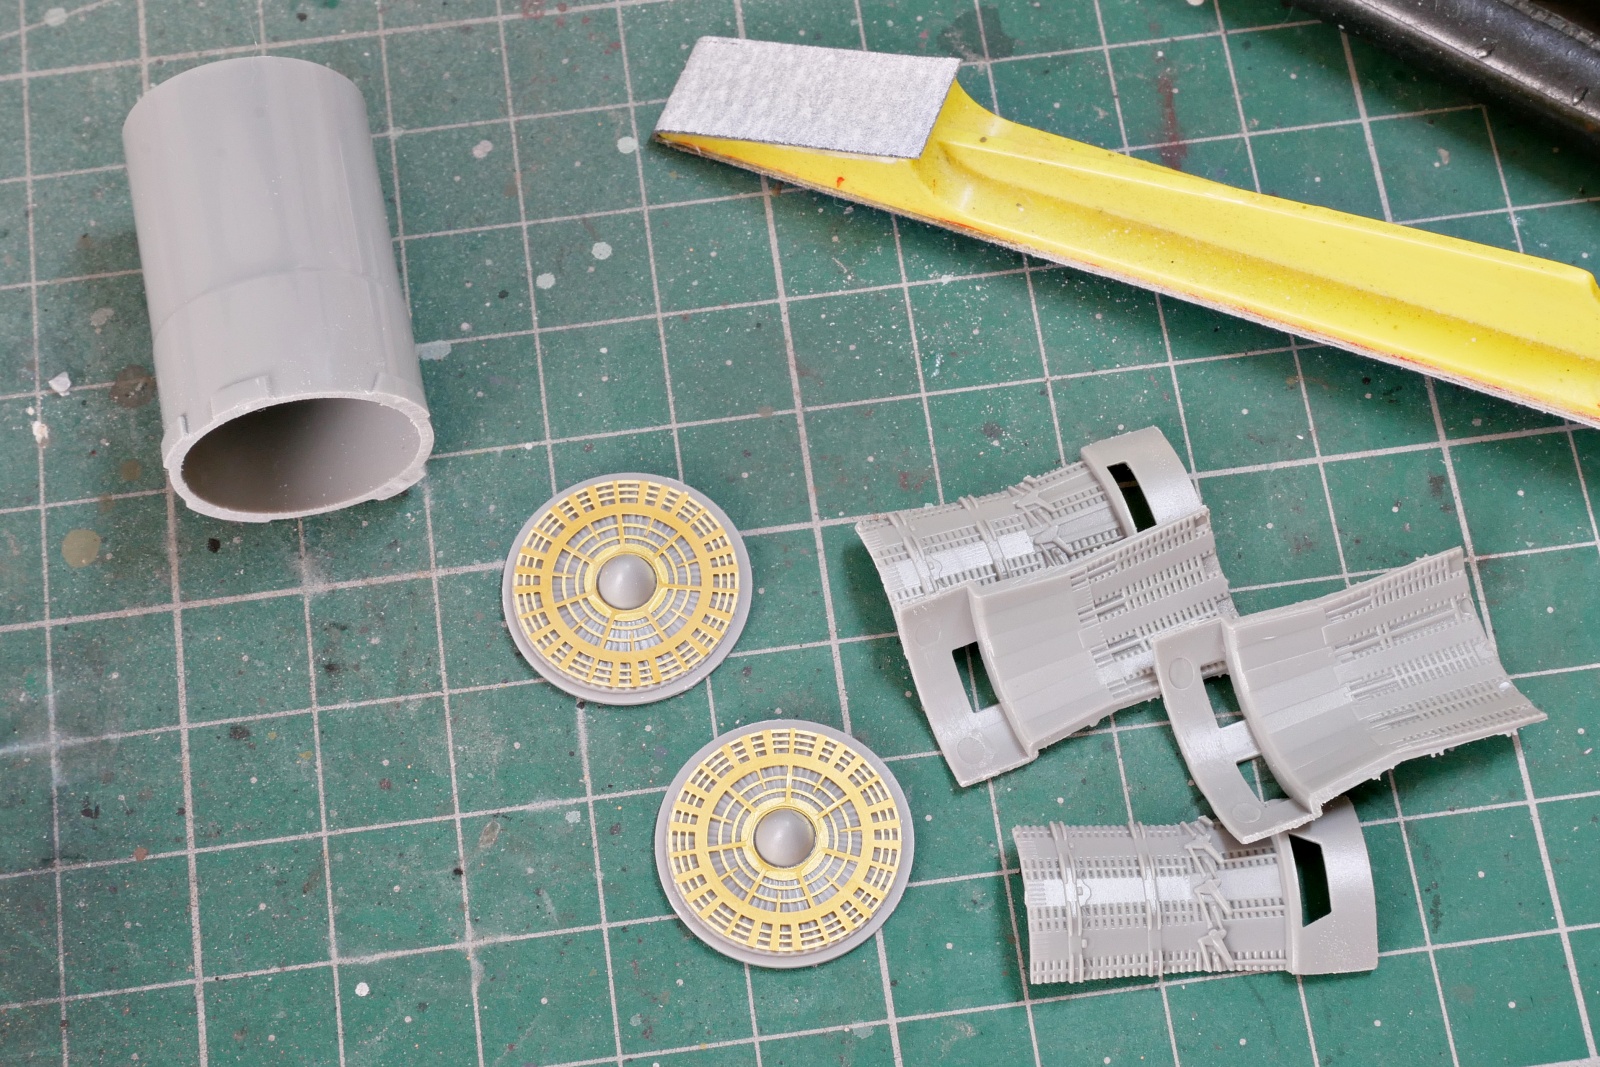
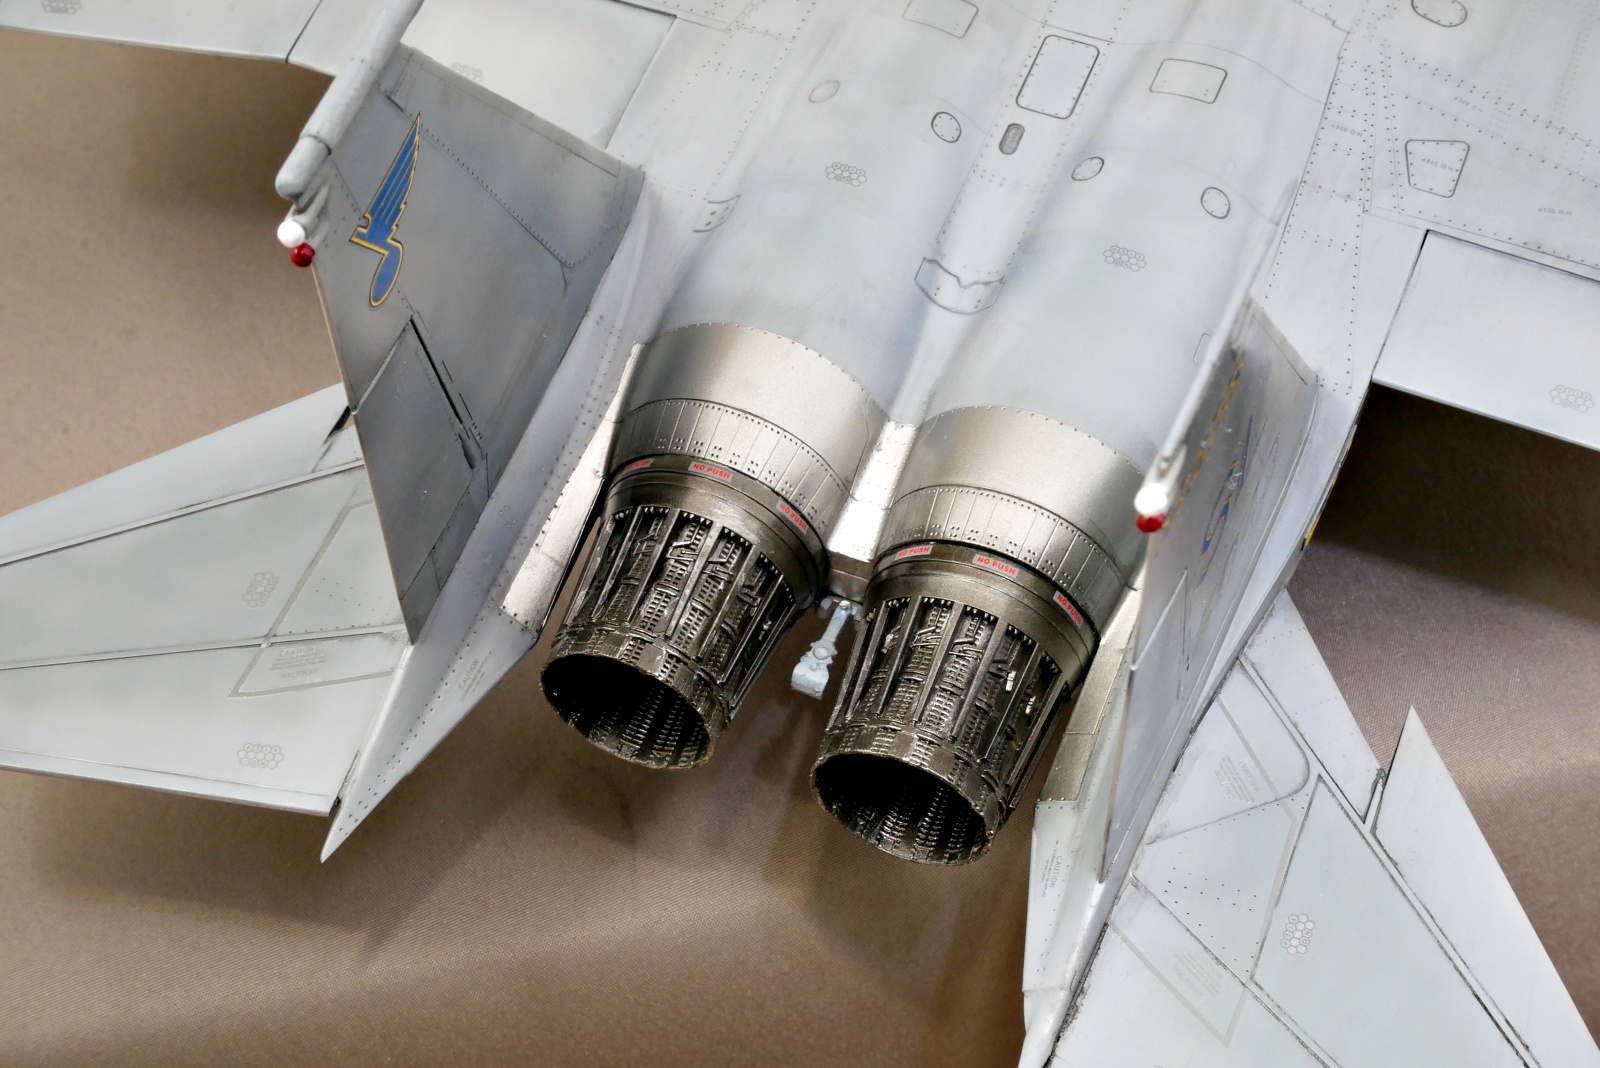
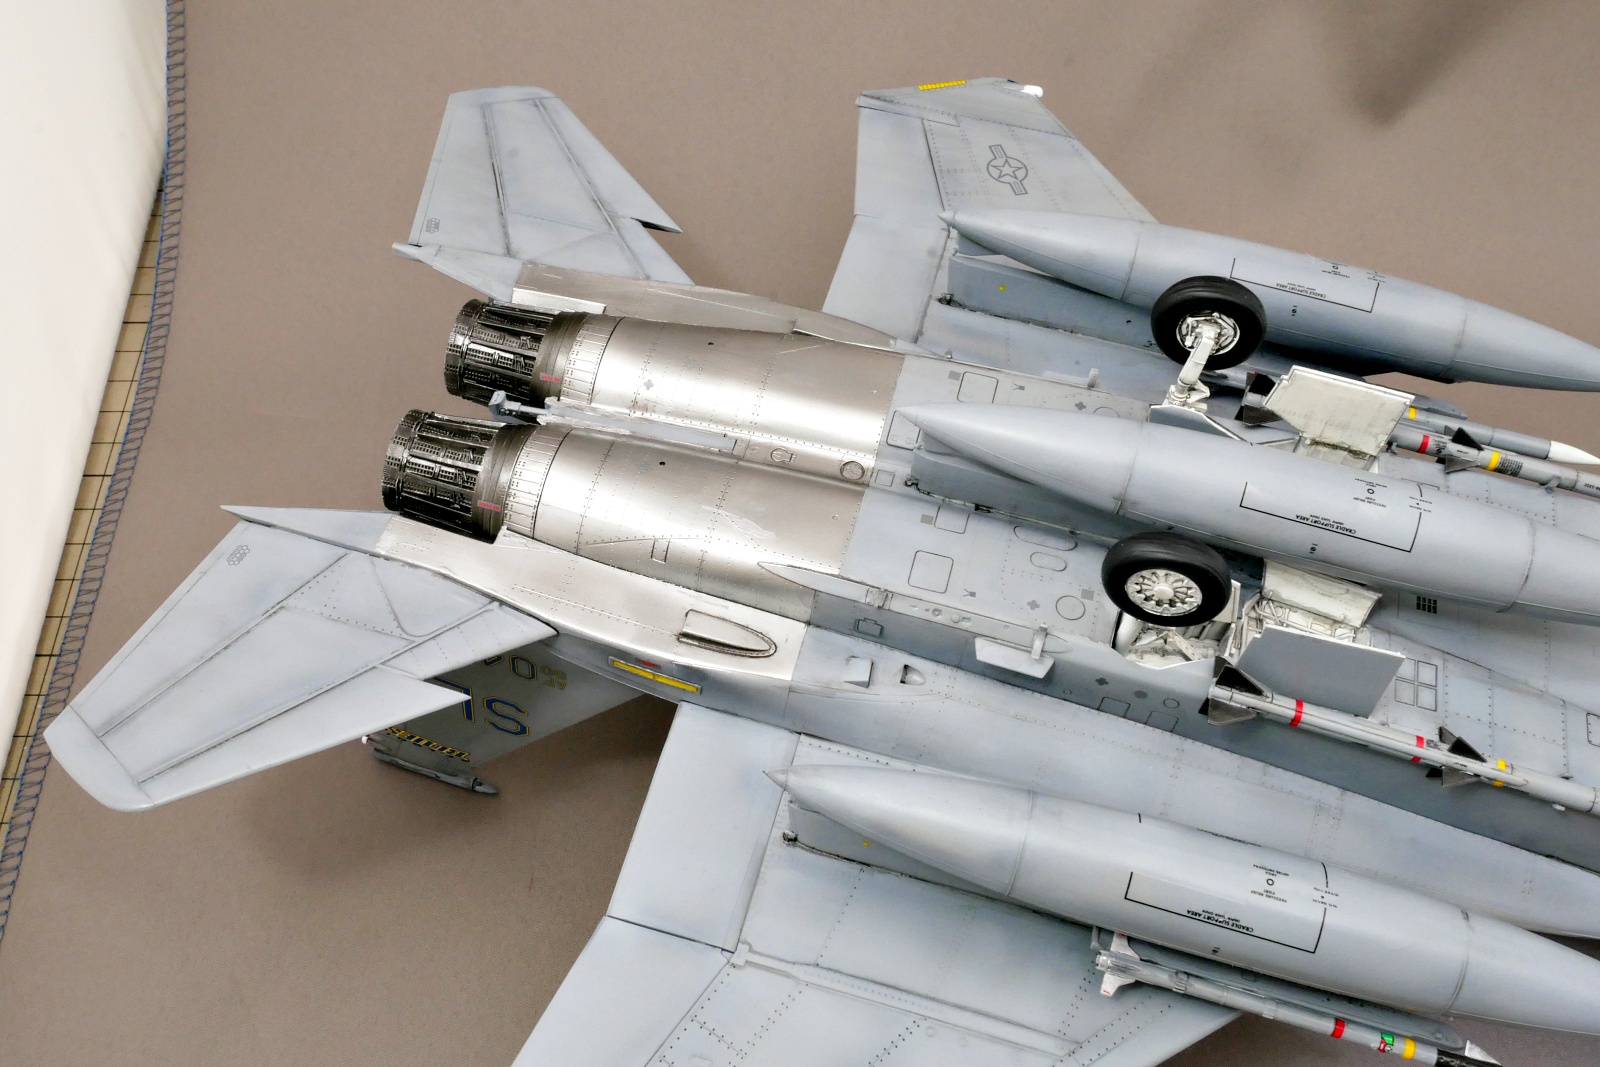
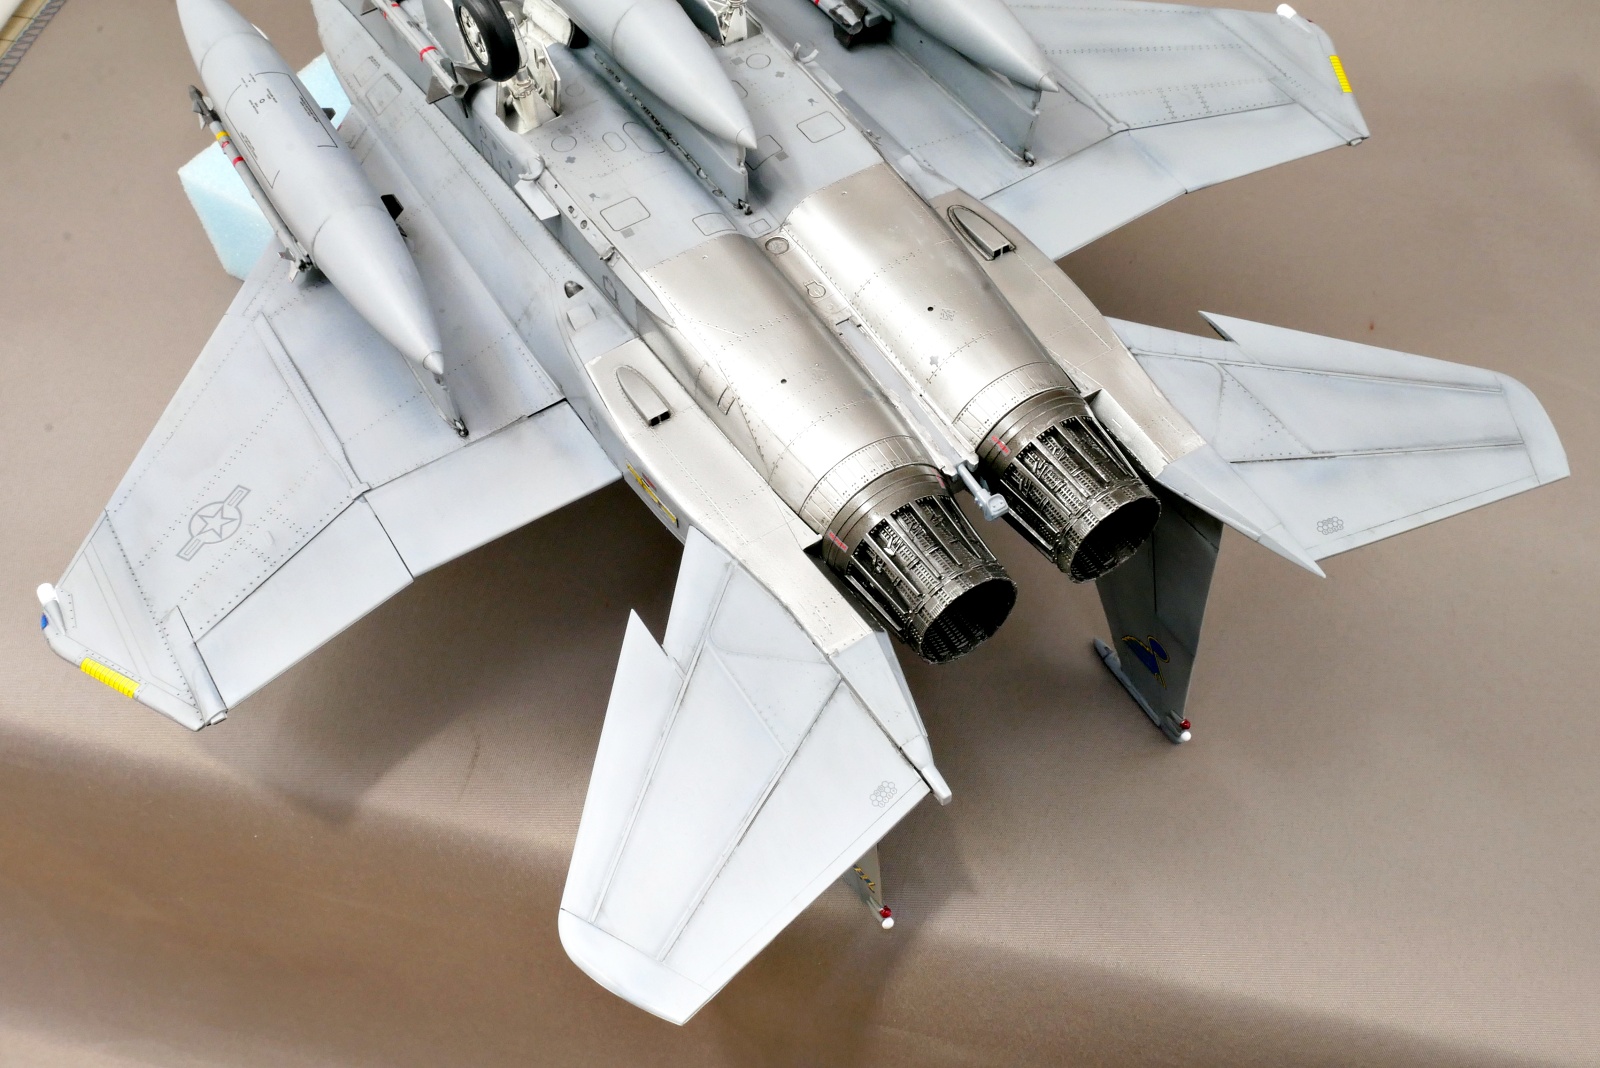
Jet engine nozzles are also very fine molds. The etched parts are also used.
I glued the wings and fuselage together. The parts are designed so that they can be properly combined. This area is easy to assemble. The overall fit of the parts is not as sharp as that of Tamiya. I don’t have any complaints so far, but I usually trim and adjust a little.
(2025/02/16)
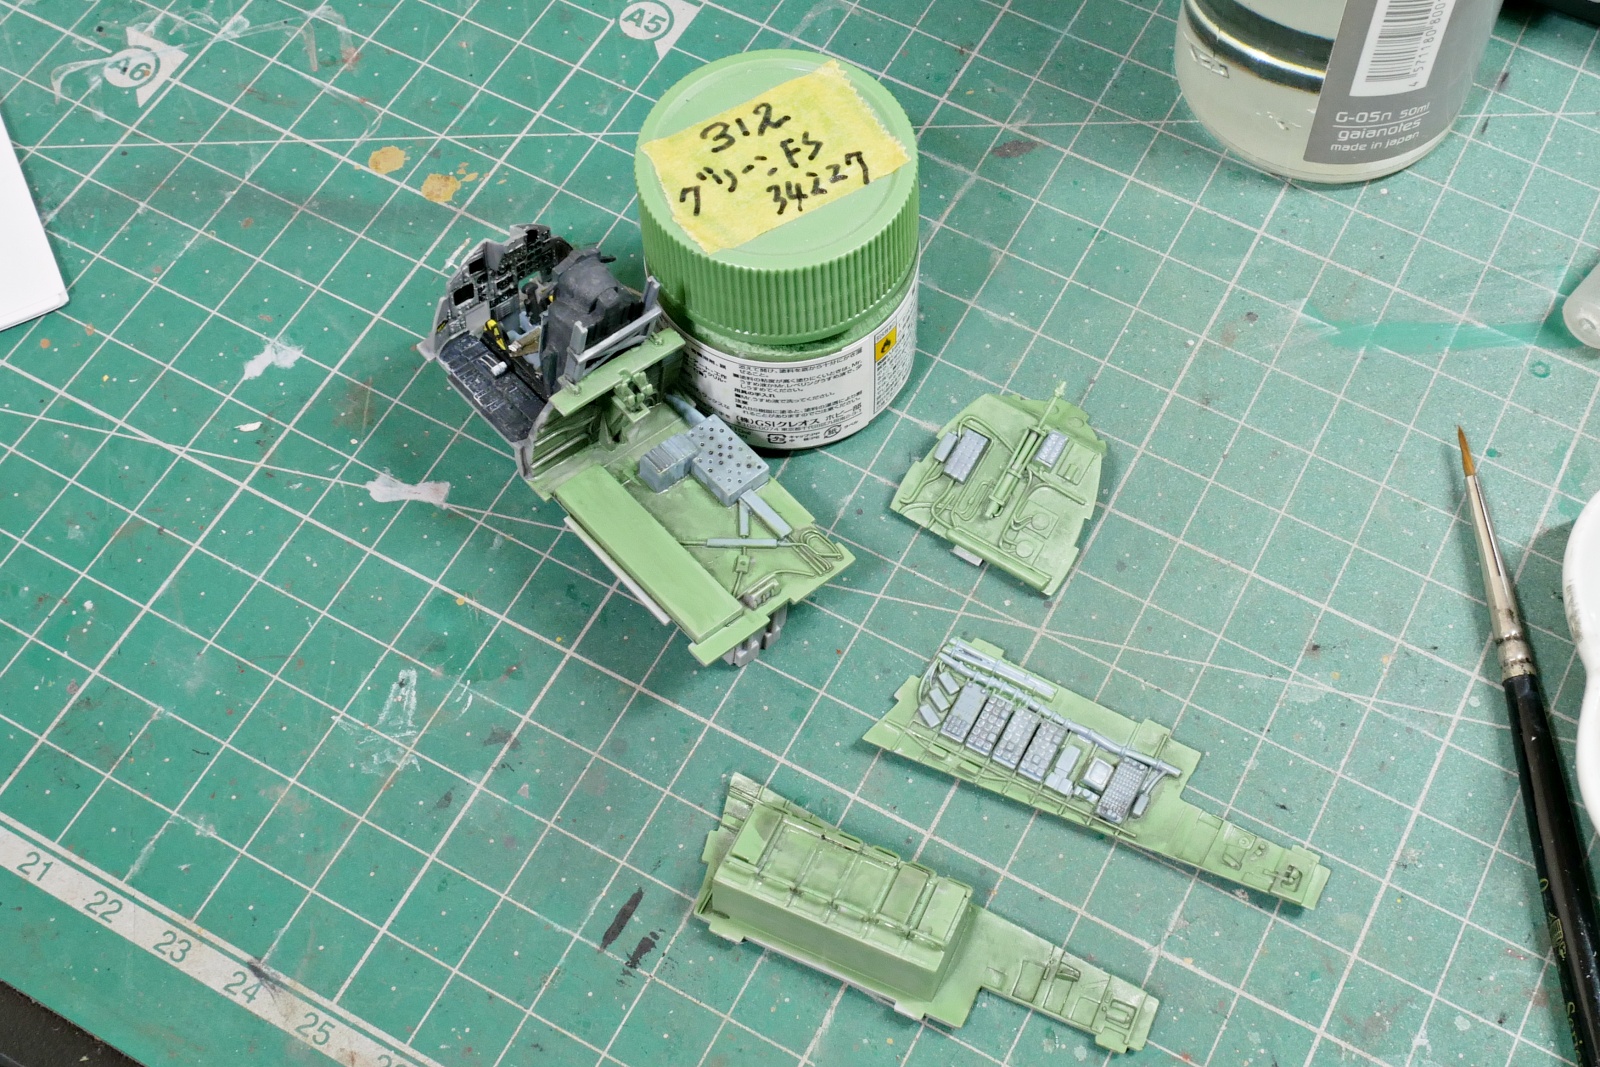
There are no detailed instructions for painting in the manual, but I painted it roughly. The conclusion is that the space behind the cockpit is invisible when the canopy is closed. But I painted it anyway.
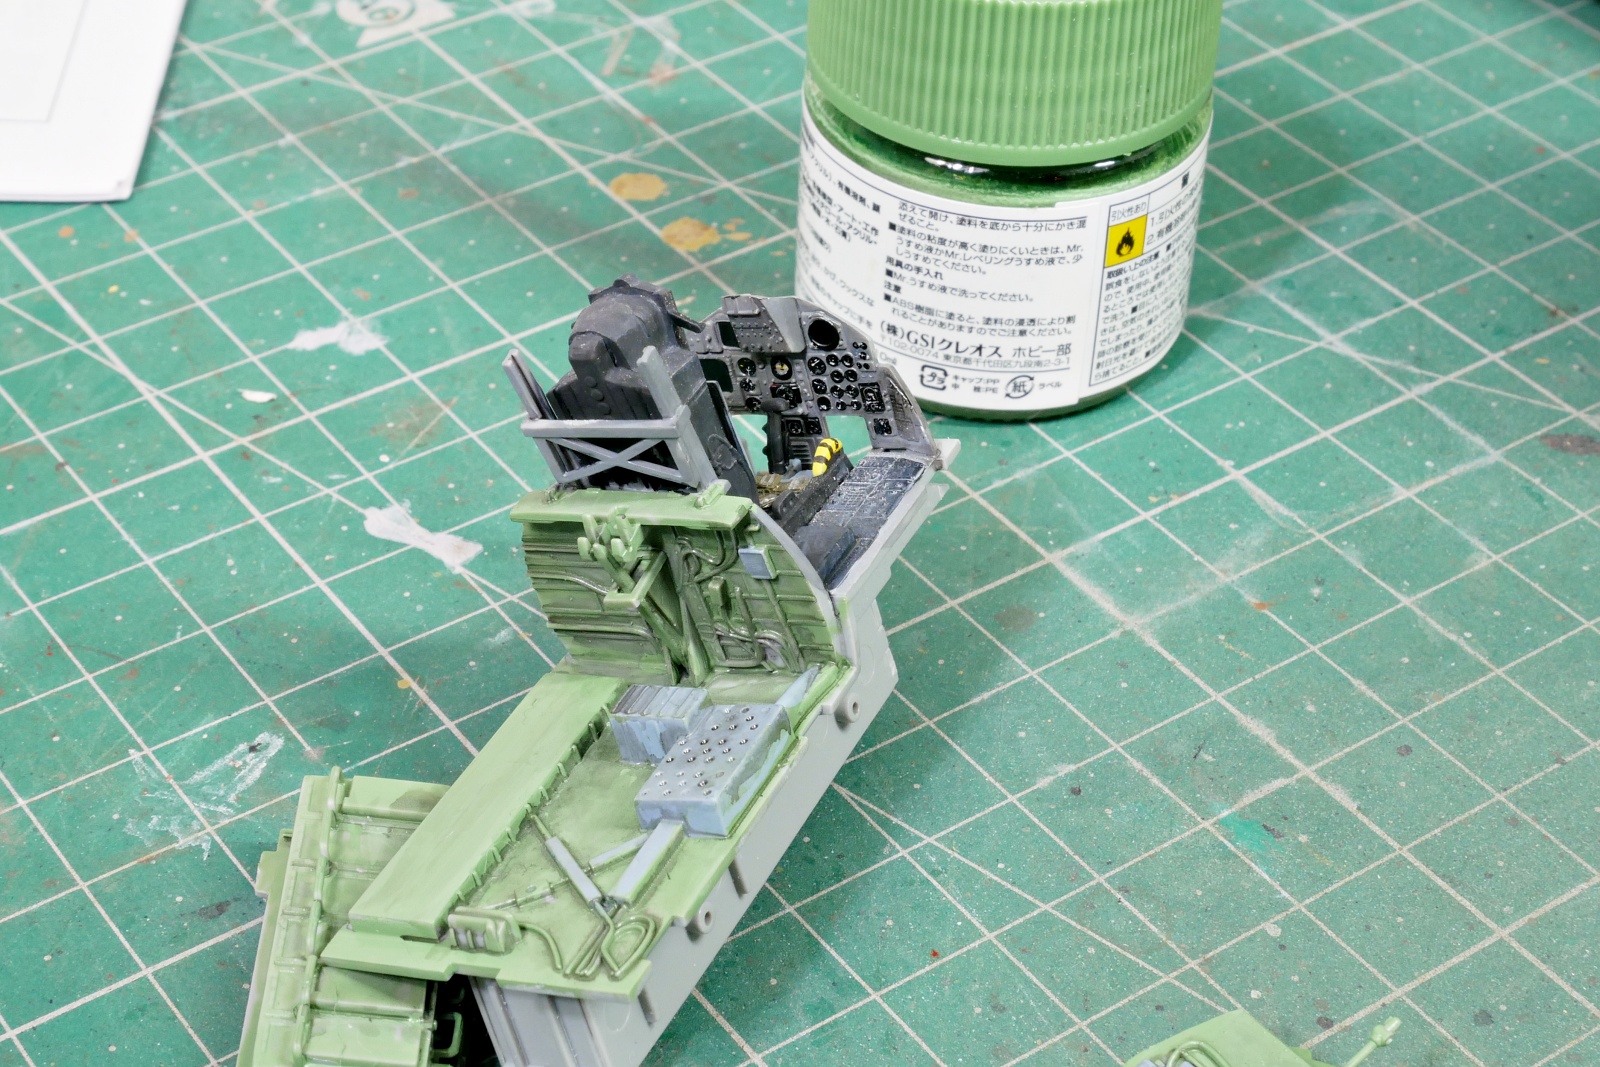
The decal of the meter is realistic and good because even the minute needles are drawn.
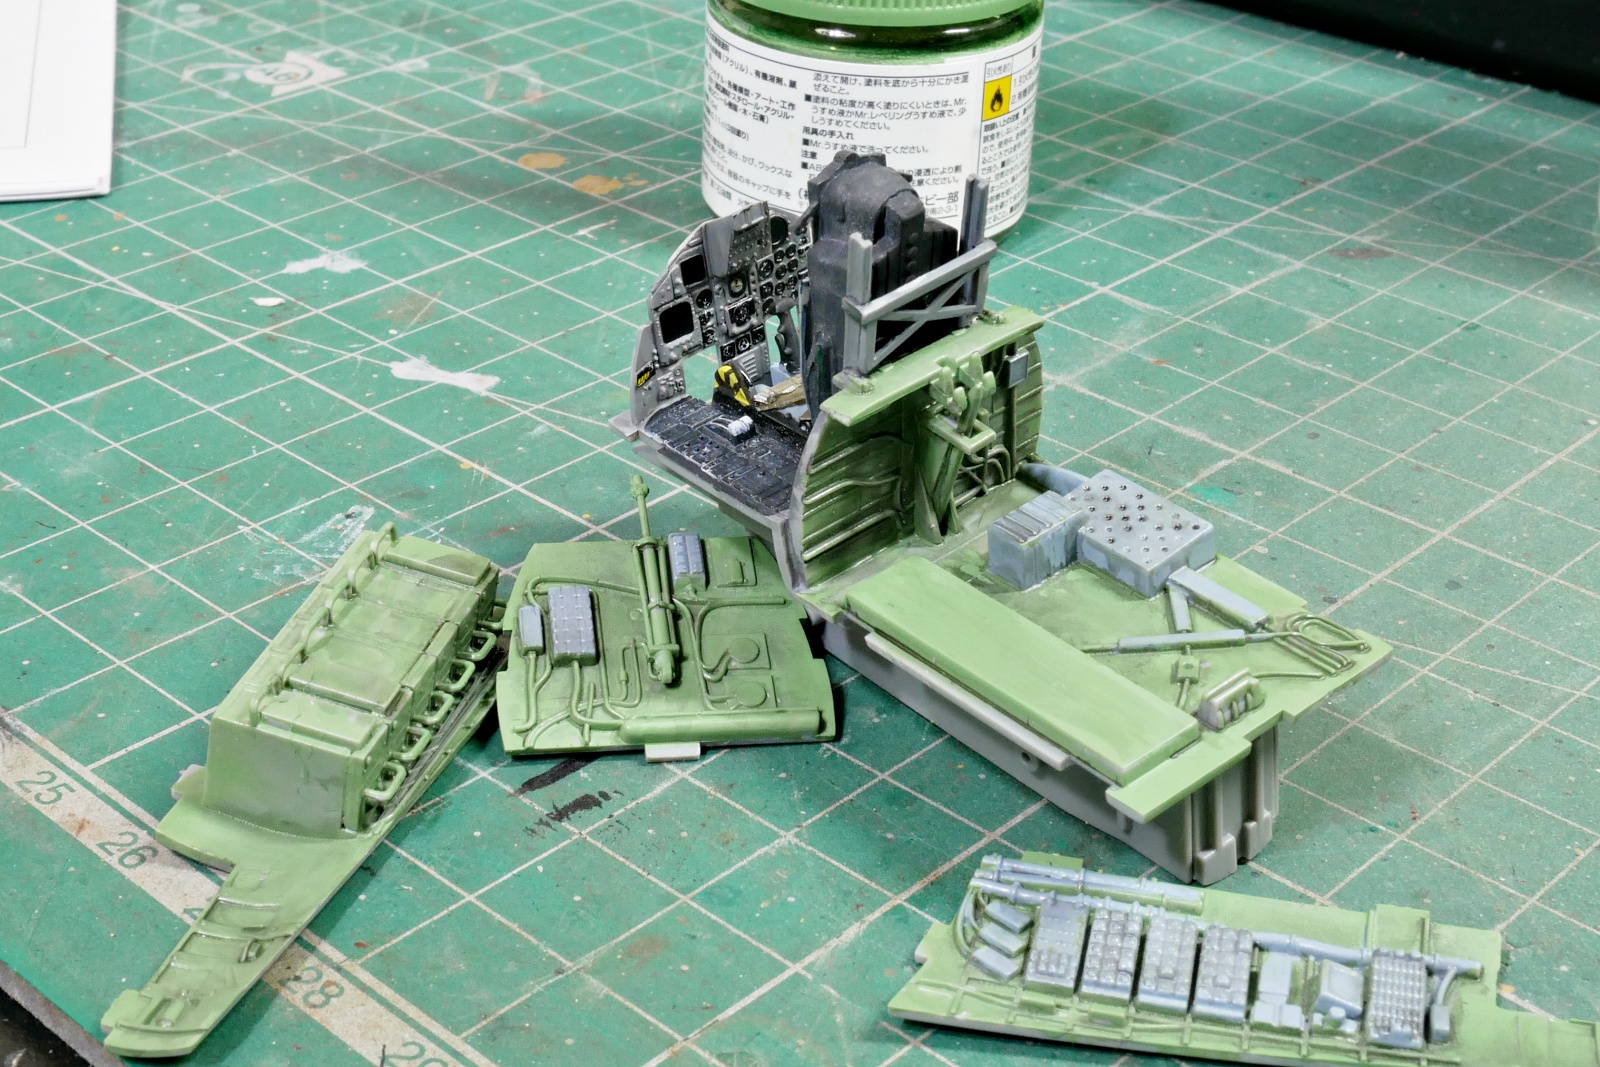
The space behind the seat and the cockpit is very detailed, but it’s hard to get an image of how much will be seen when completed. I think this is enough because it gives a precise feel even if I just paint it separately. I added a seatbelt which is sold separately. The meter decals on the cockpit panel came with small decals for each meter, so it was hard to attach them all. But it’s much more helpful than painting it myself. I don’t know if it’s a common decal for the F-15 series and it’s for multiple seats, however, since there are more meter decals, there may be some that can be used for other kits.
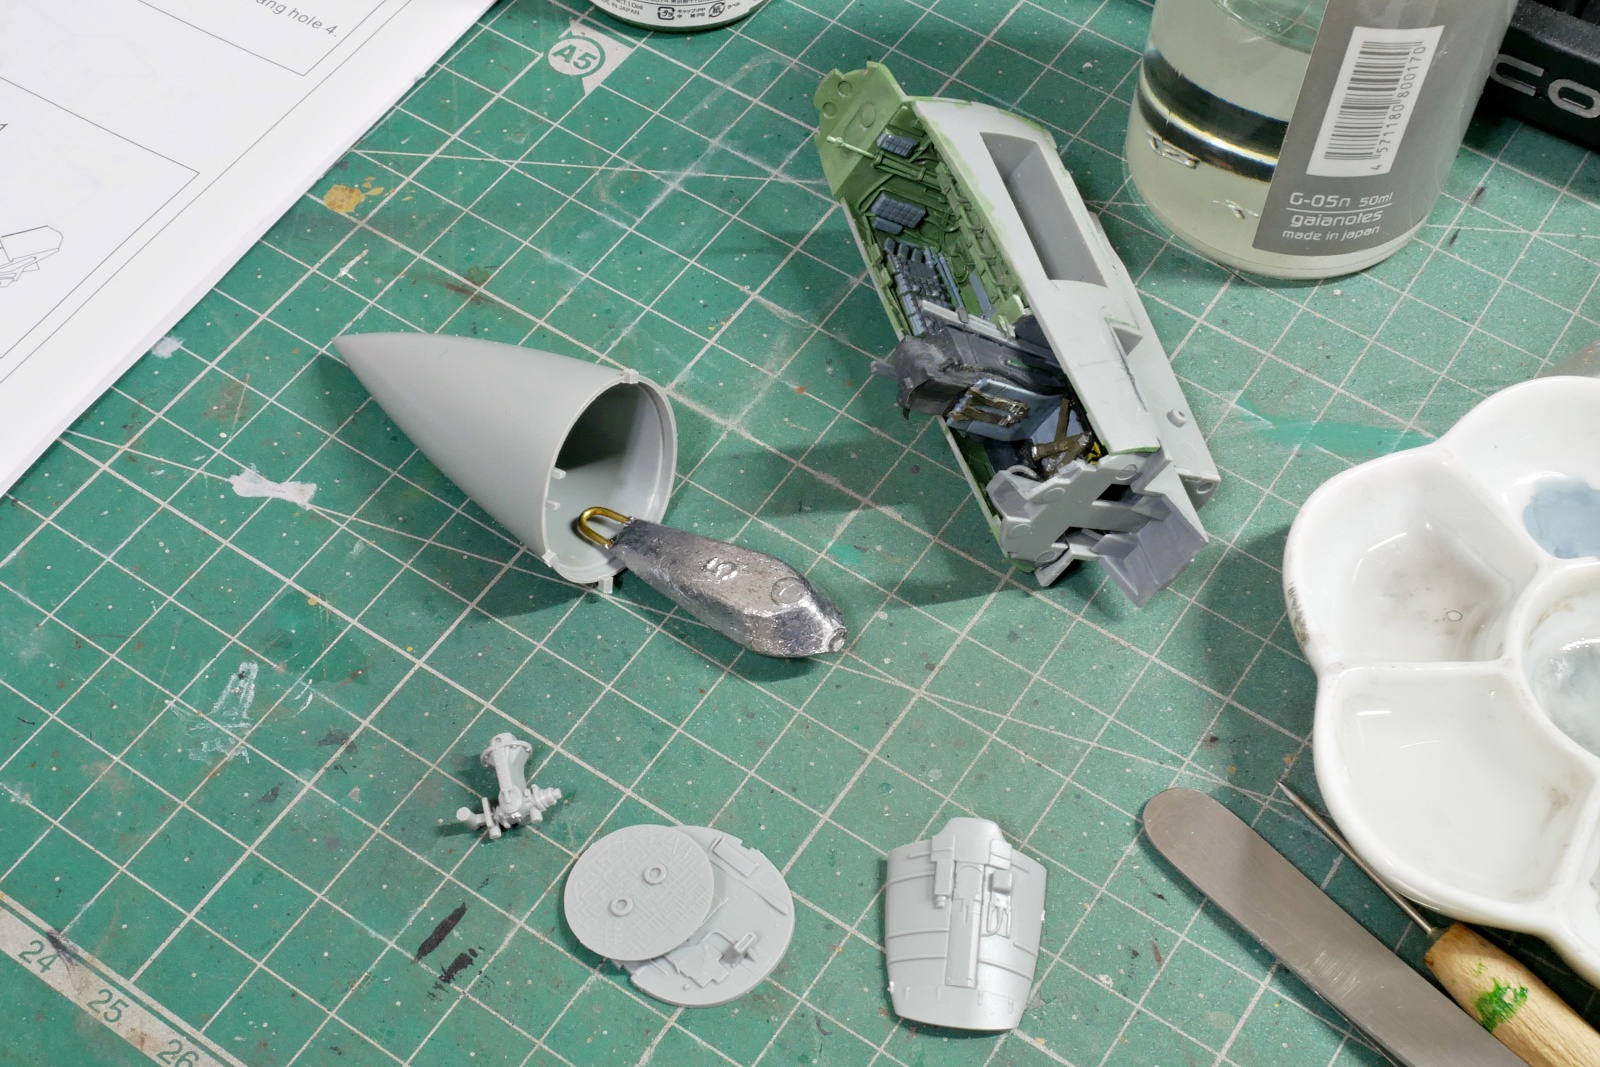
There is no instruction to put a weight in the nose of the aircraft in the GWH manual. But just in case, I’ll put one larger one inside the radome. It’s a fishing weight.
(2025/02/20)
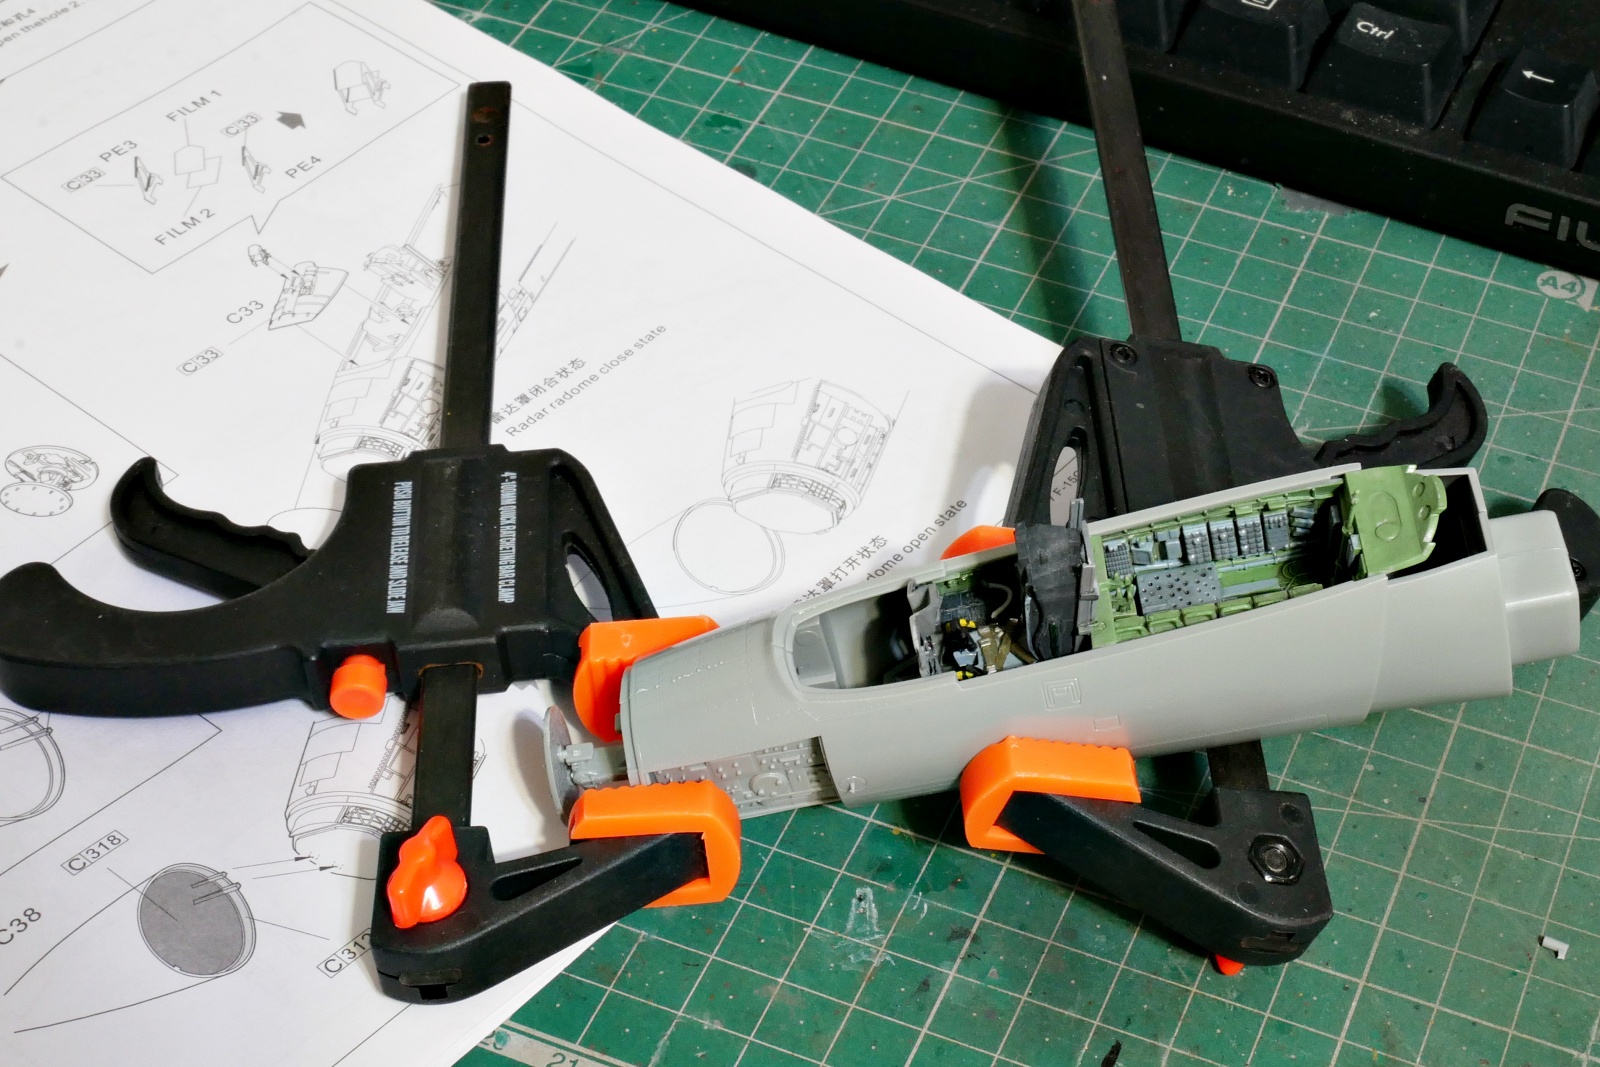
Now that the cockpit has been assembled and painted, at least roughly, I’ve glued the nose of the F-15. It is being bonded and fixed with a small vise.
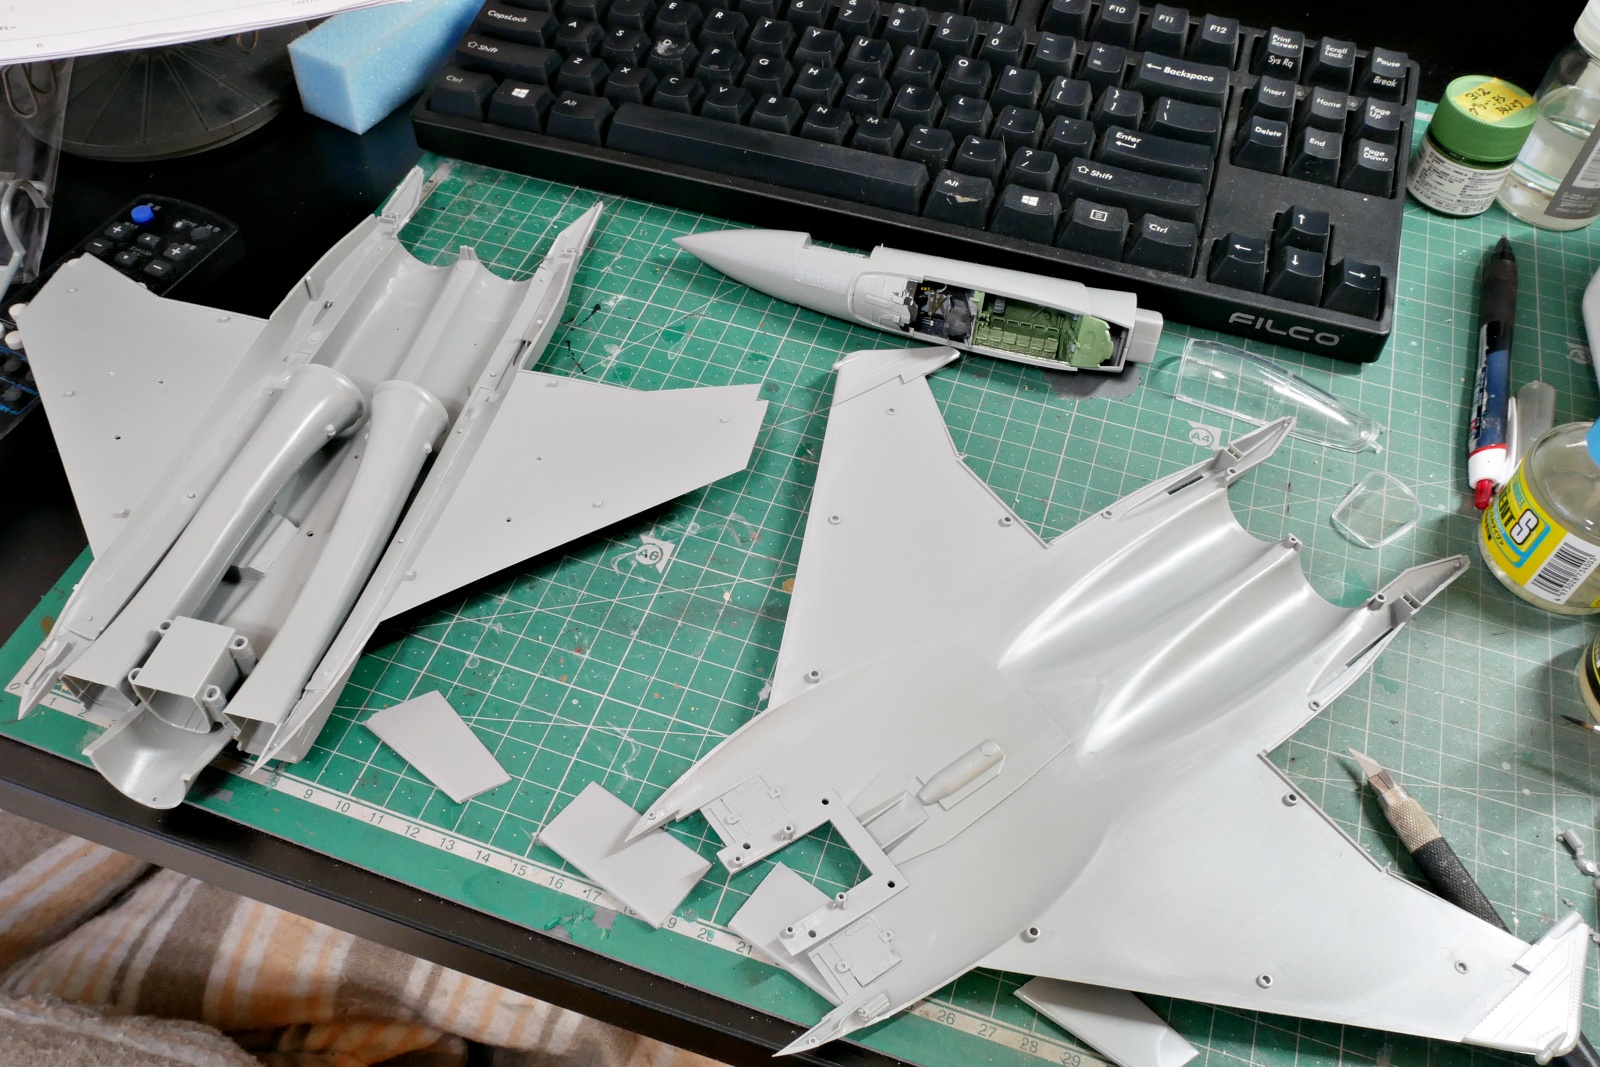
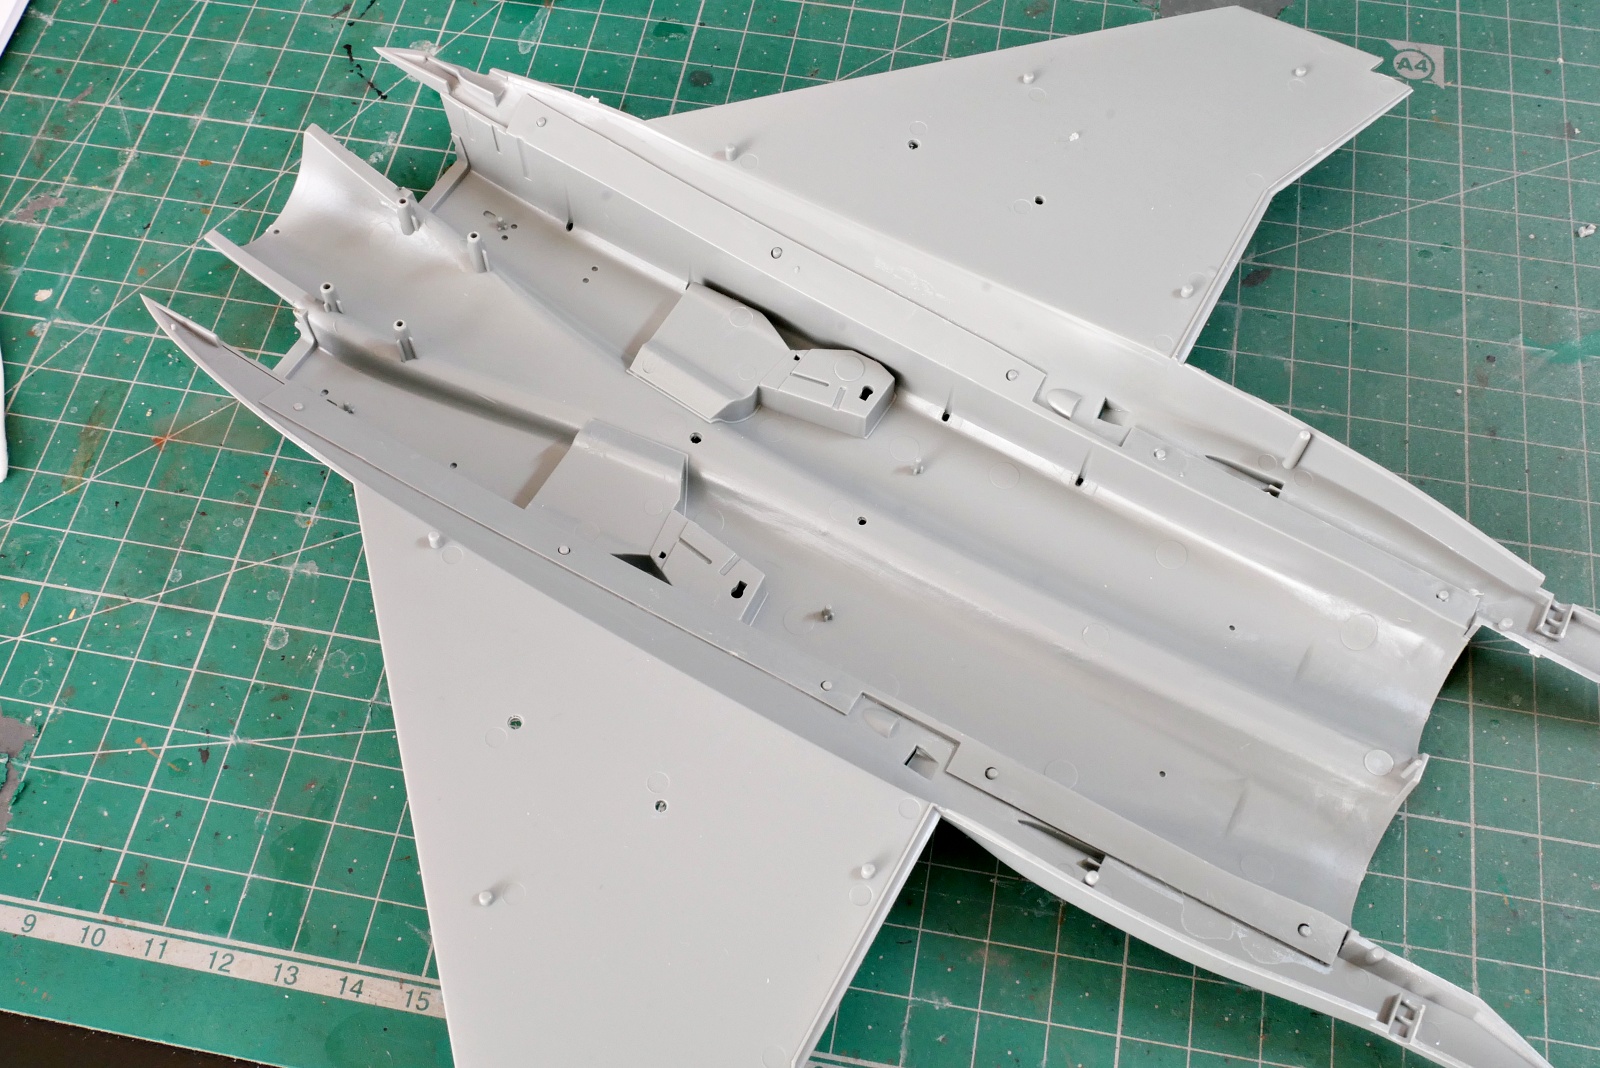
This is probably the most large-scale assembly. But basically, the parts fit well, so it wasn’t that difficult. The shape of the parts is unique for delta wings. The F-15 is actually called a clipped delta wing.

Take a photo before putting the engine in and bonding. Maybe it’s okay without gluing. But in my case, I’ll just glue it. I don’t want it to come off during painting.
Air intake, vertical tail, and nose have been glued together, and the shape of F-15 has been arranged. Yeah, it’s getting cool.
(2025/02/22)
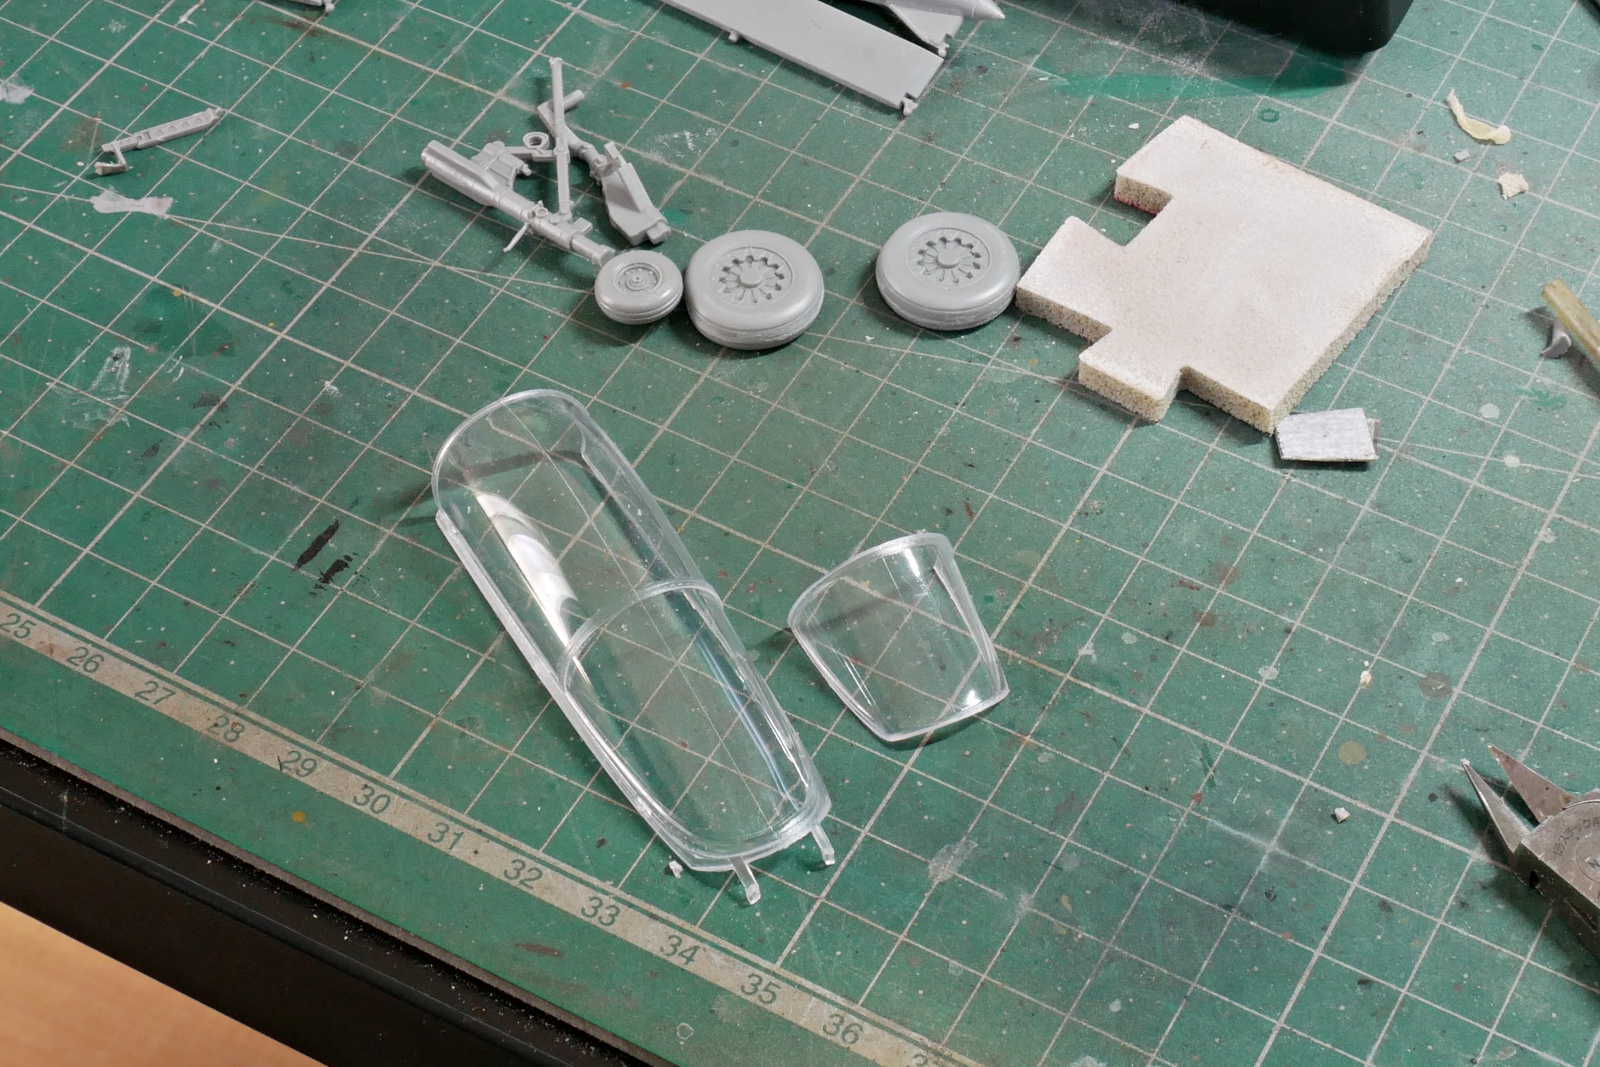
There is still a parting line in the center of the canopy, so I think I will polish it with a compound.
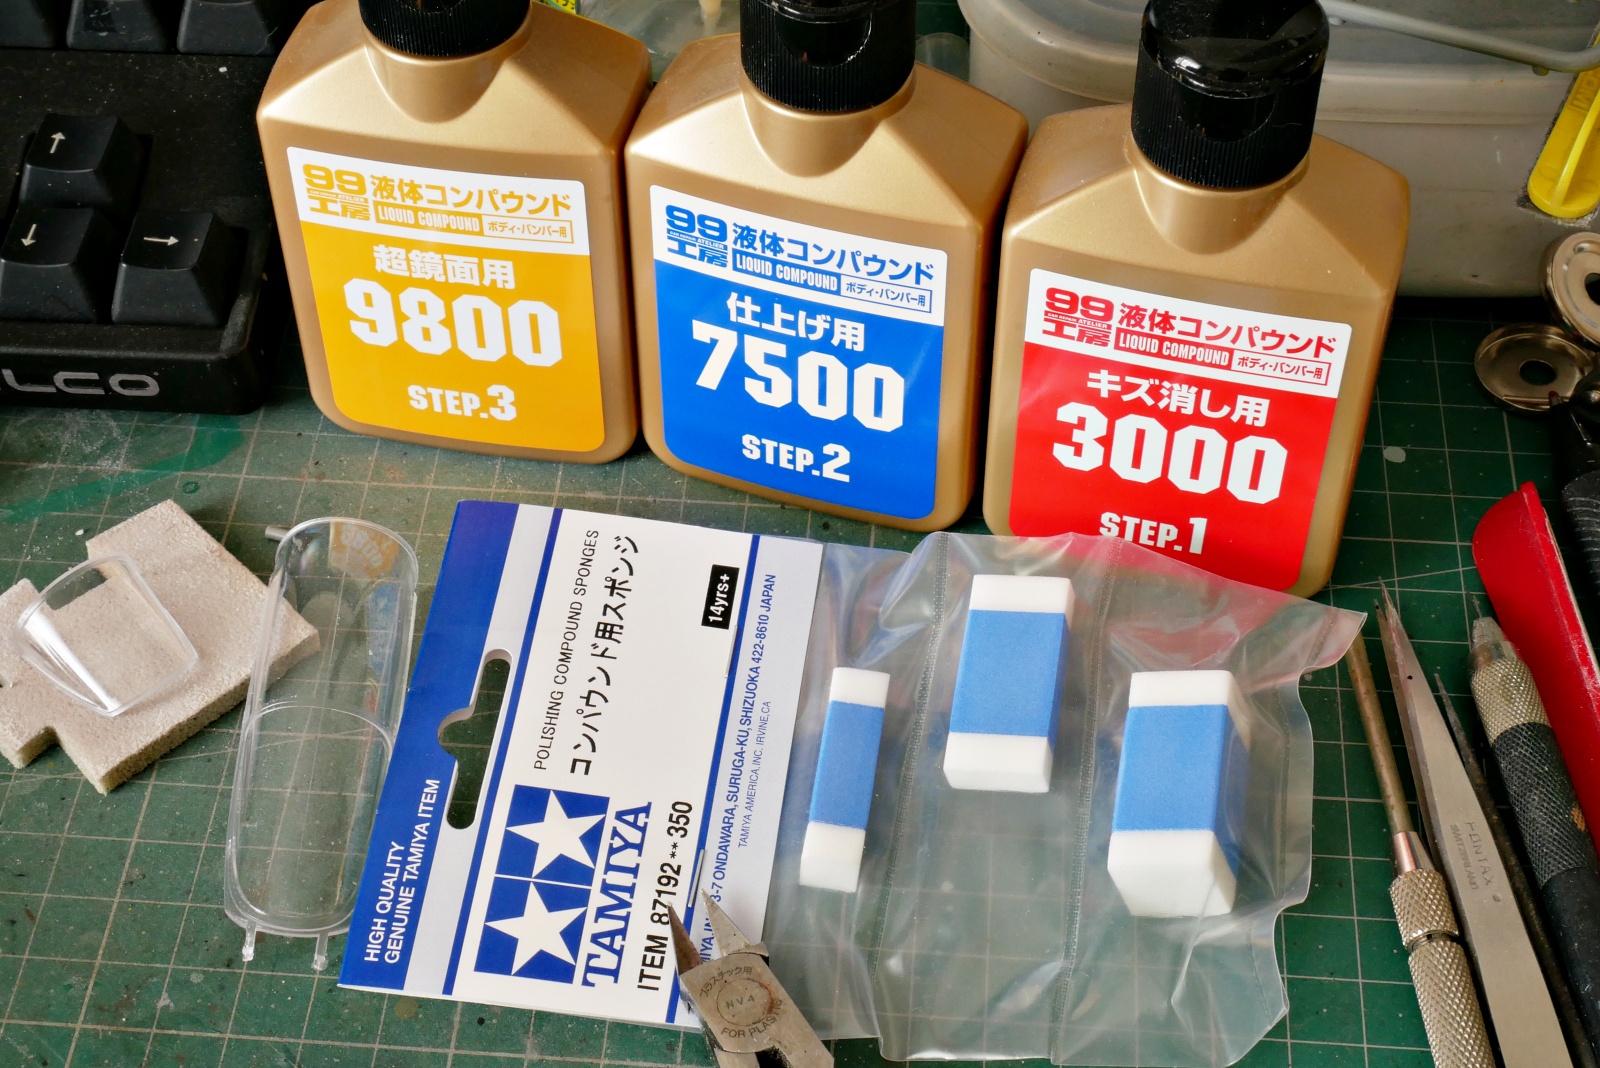
I will use this compound and sandpaper this time. The compound actually had a sponge, but I may have thrown it away with the outer box by mistake. I have no choice, so I will polish it with Tamiya sponge which I bought before.
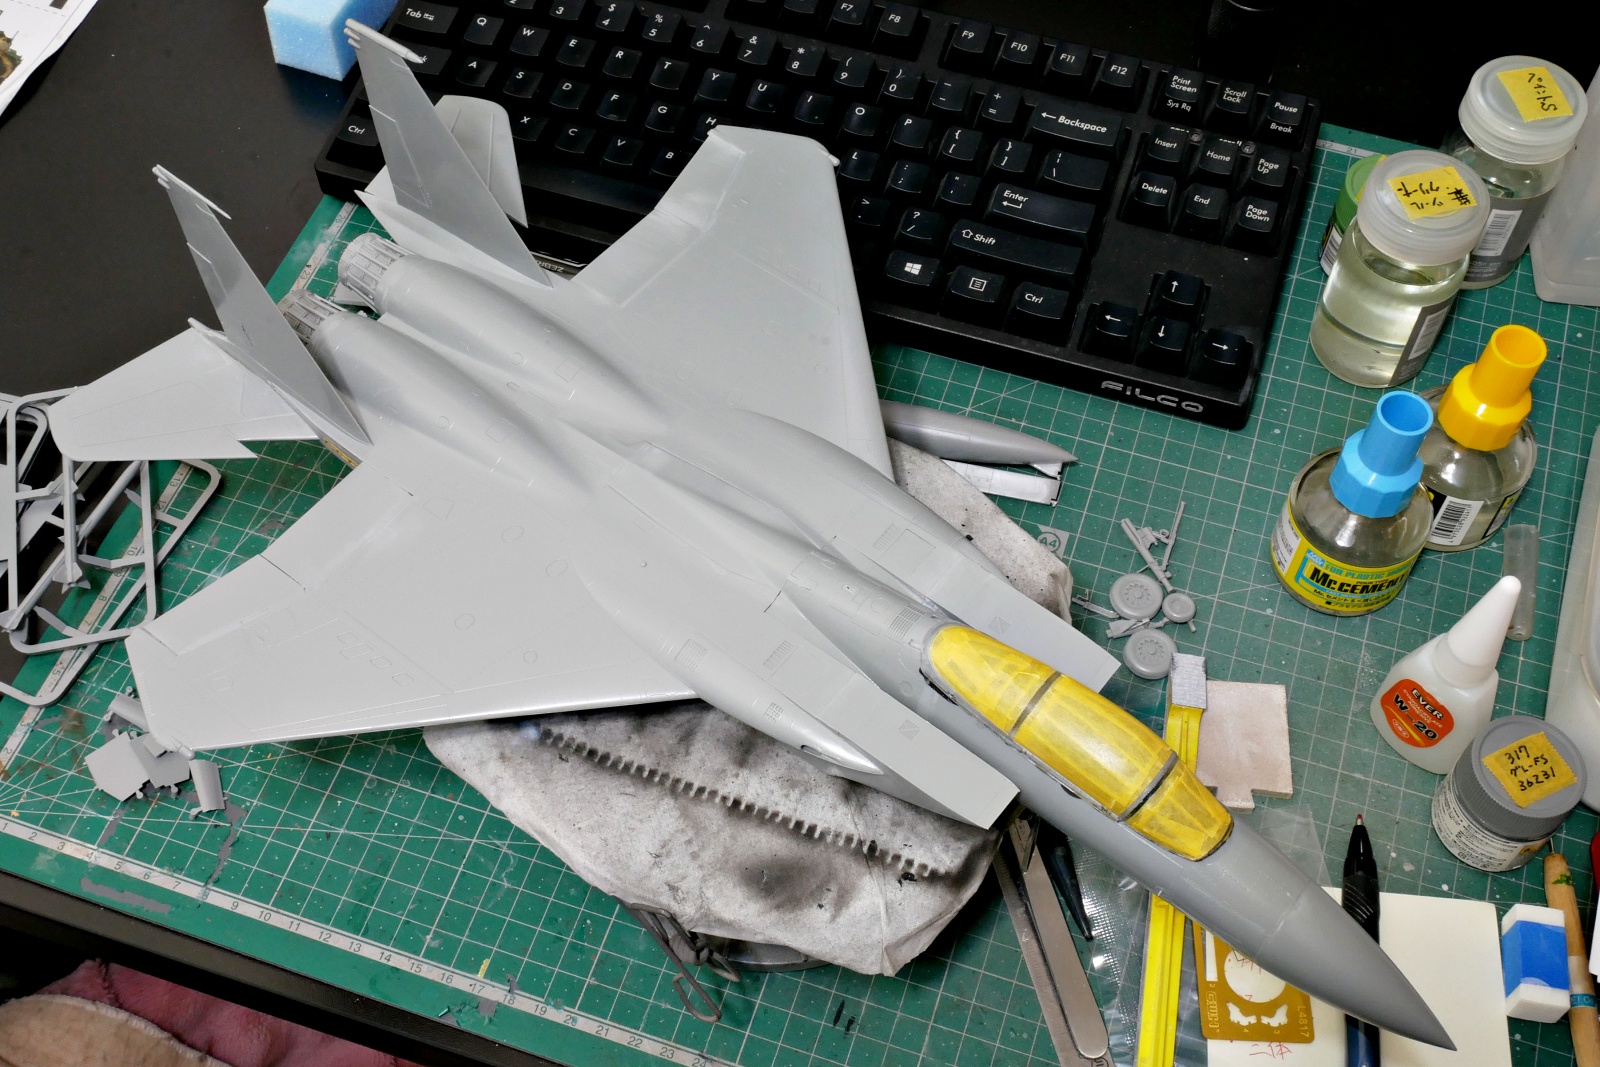
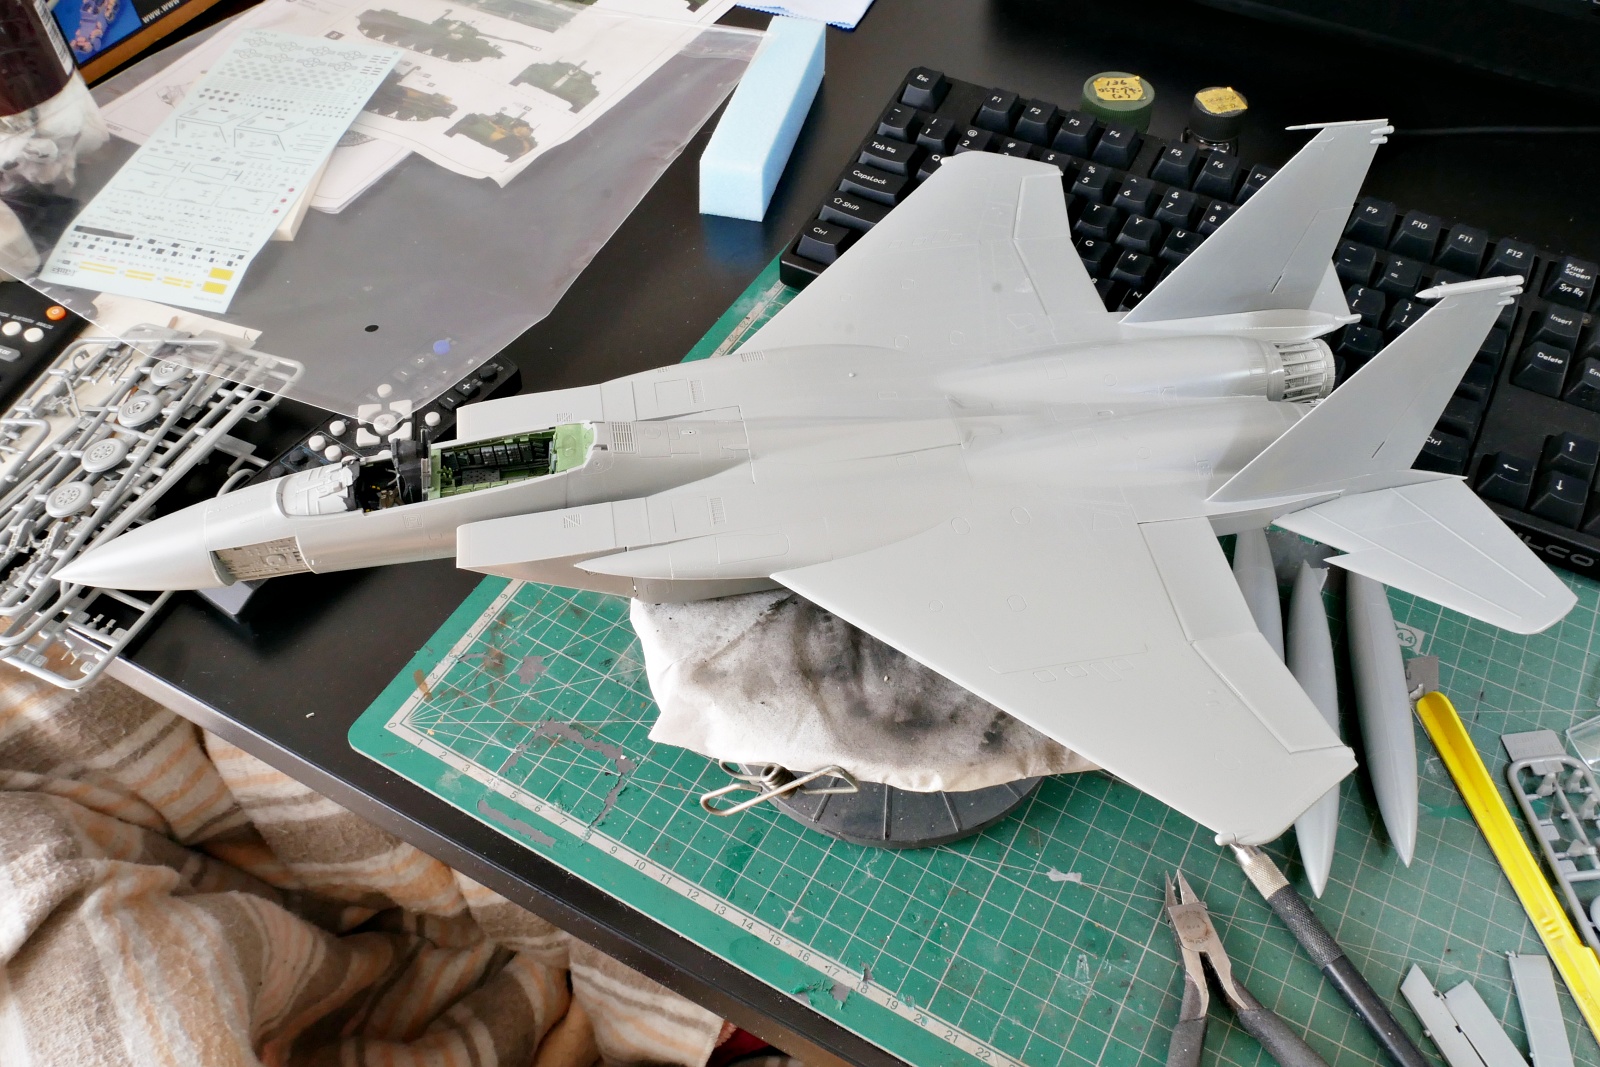
It’s gradually taking the shape of a jet. The large parts are well designed and easy to assemble. I wonder if the reason why there are gaps is because my assembly skills are low. I’ll fix that with putty later. Anyway, there is little stress about assembly.
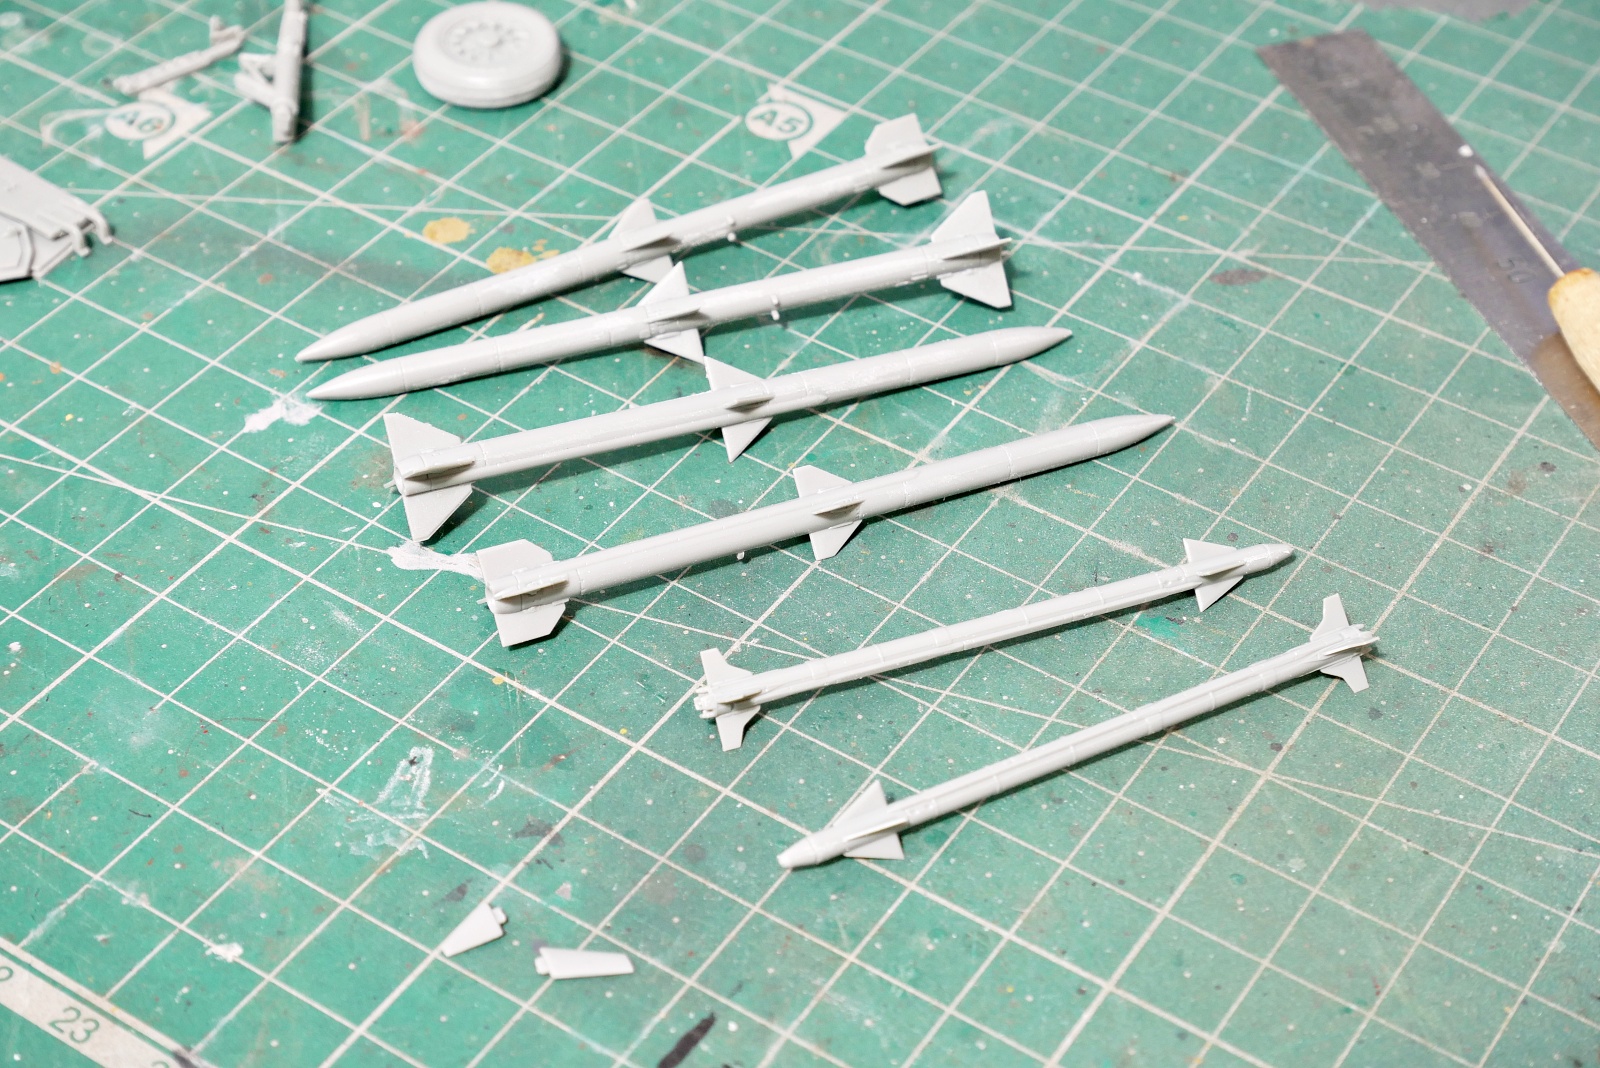
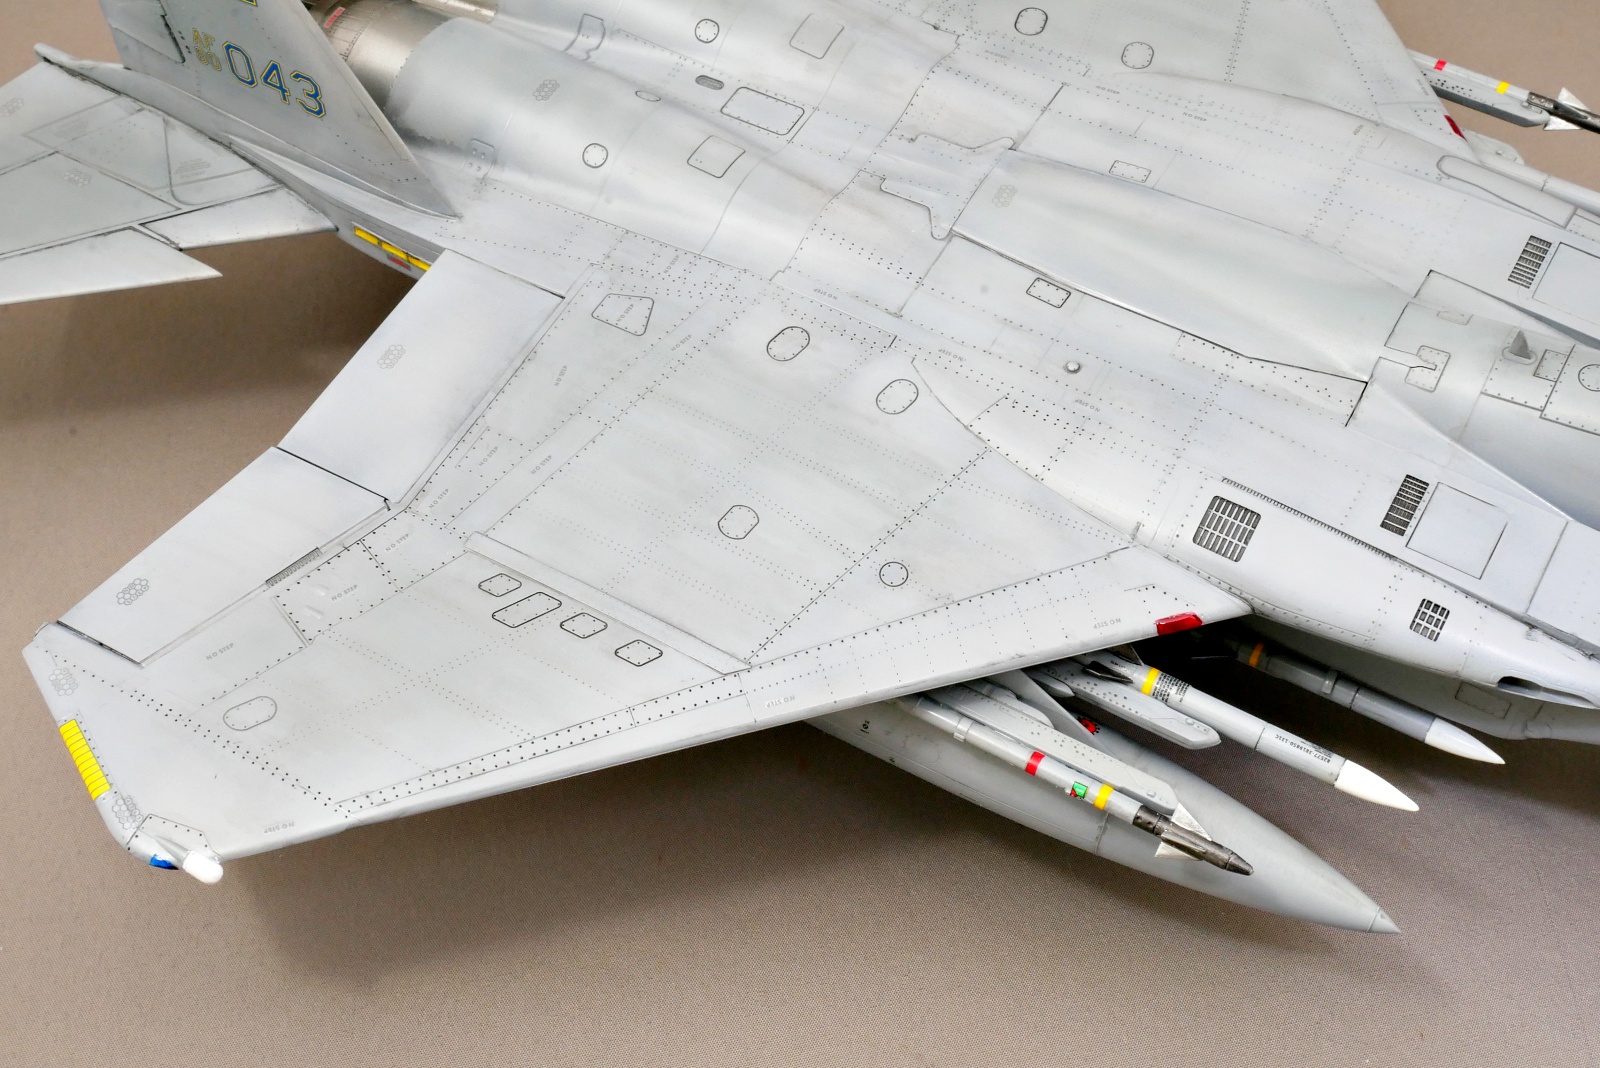
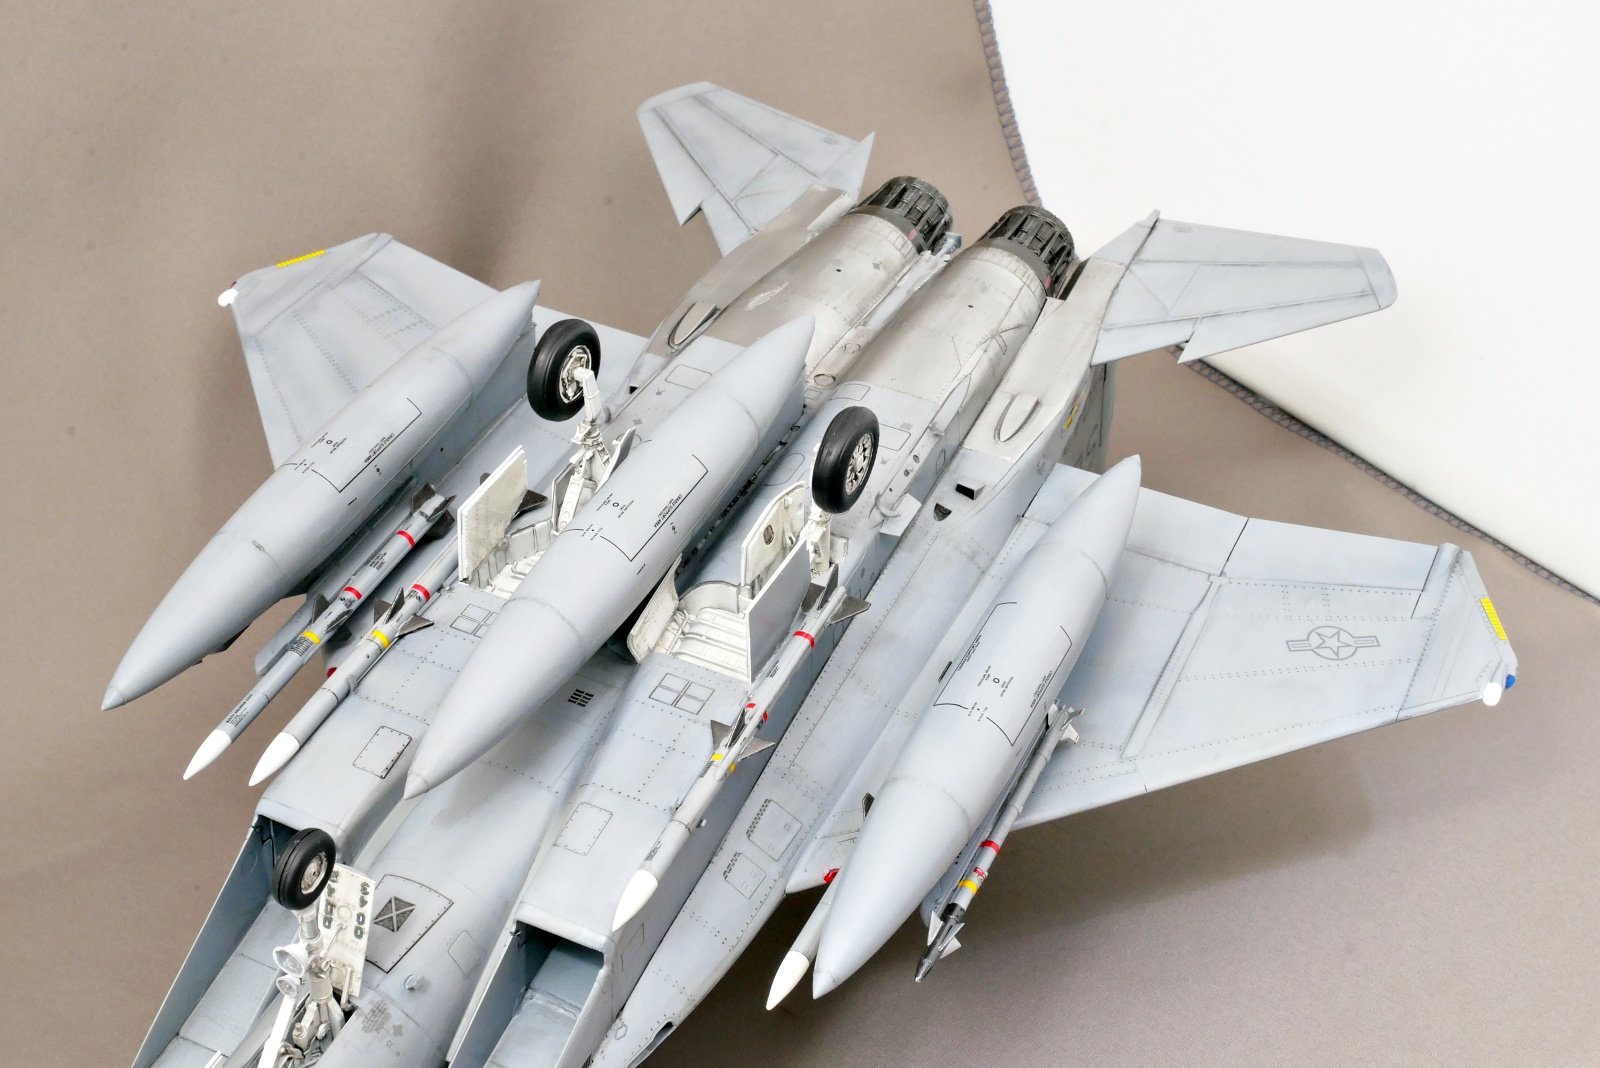
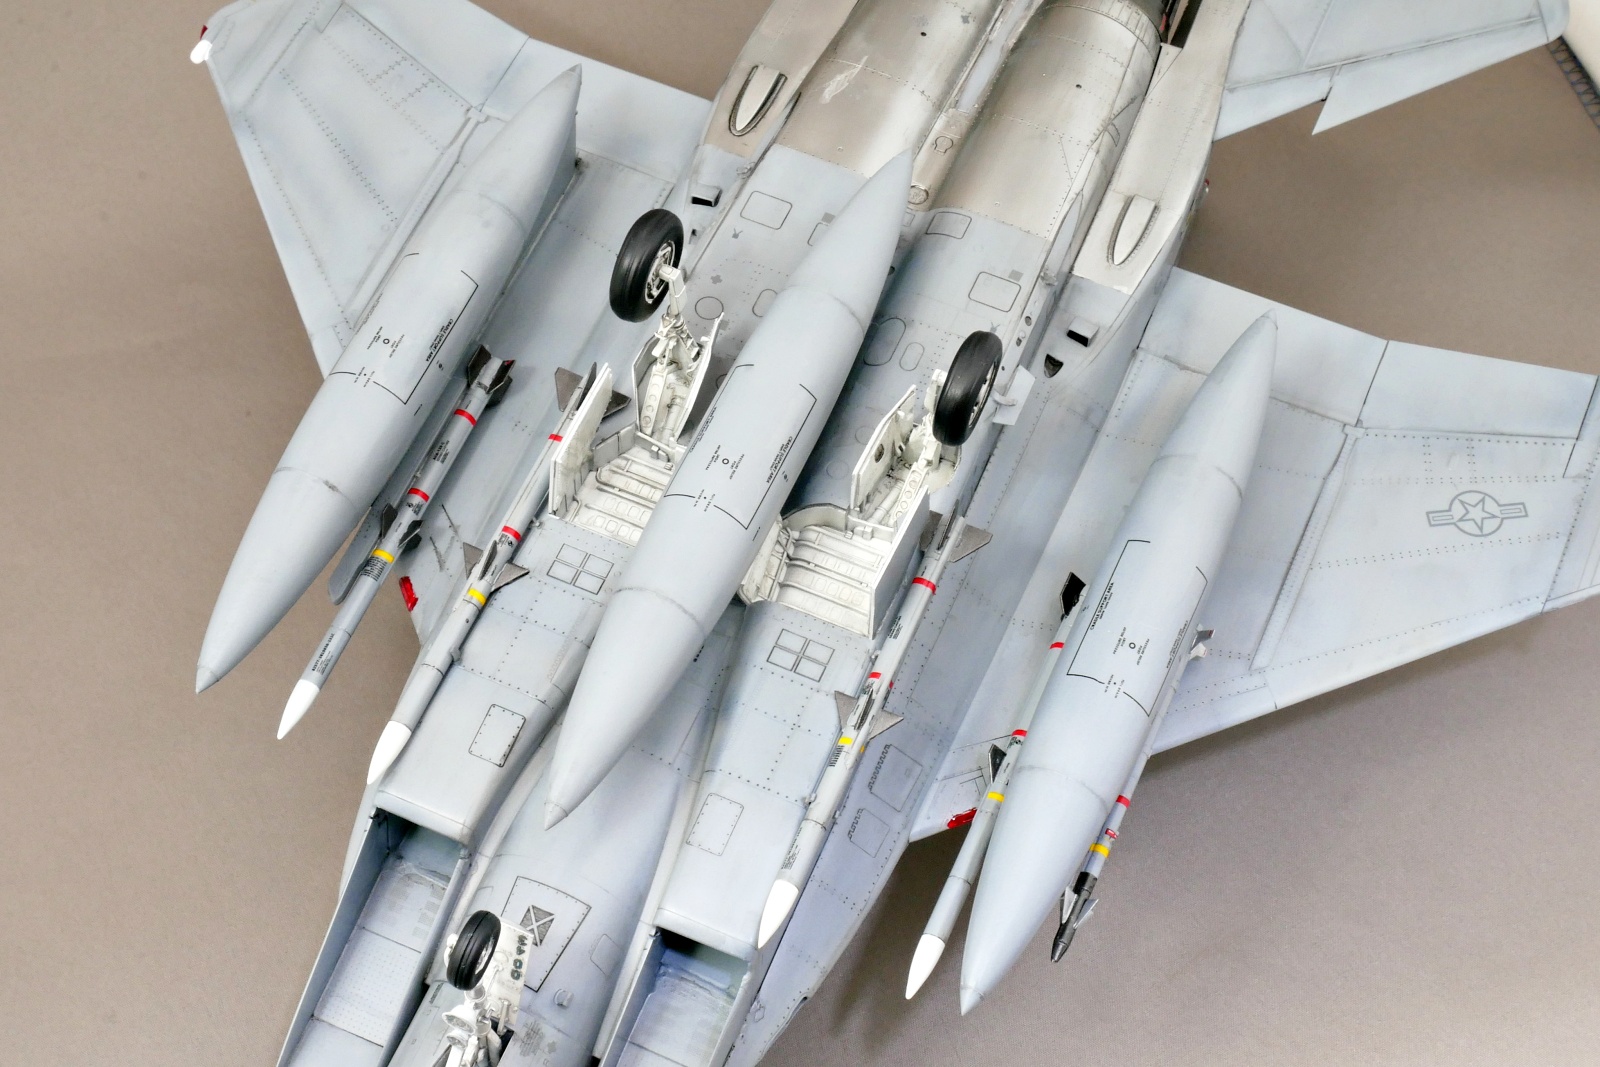
The missile parts do not need to be assembled and are very good. It would be better if I painted it and put a decal on it.
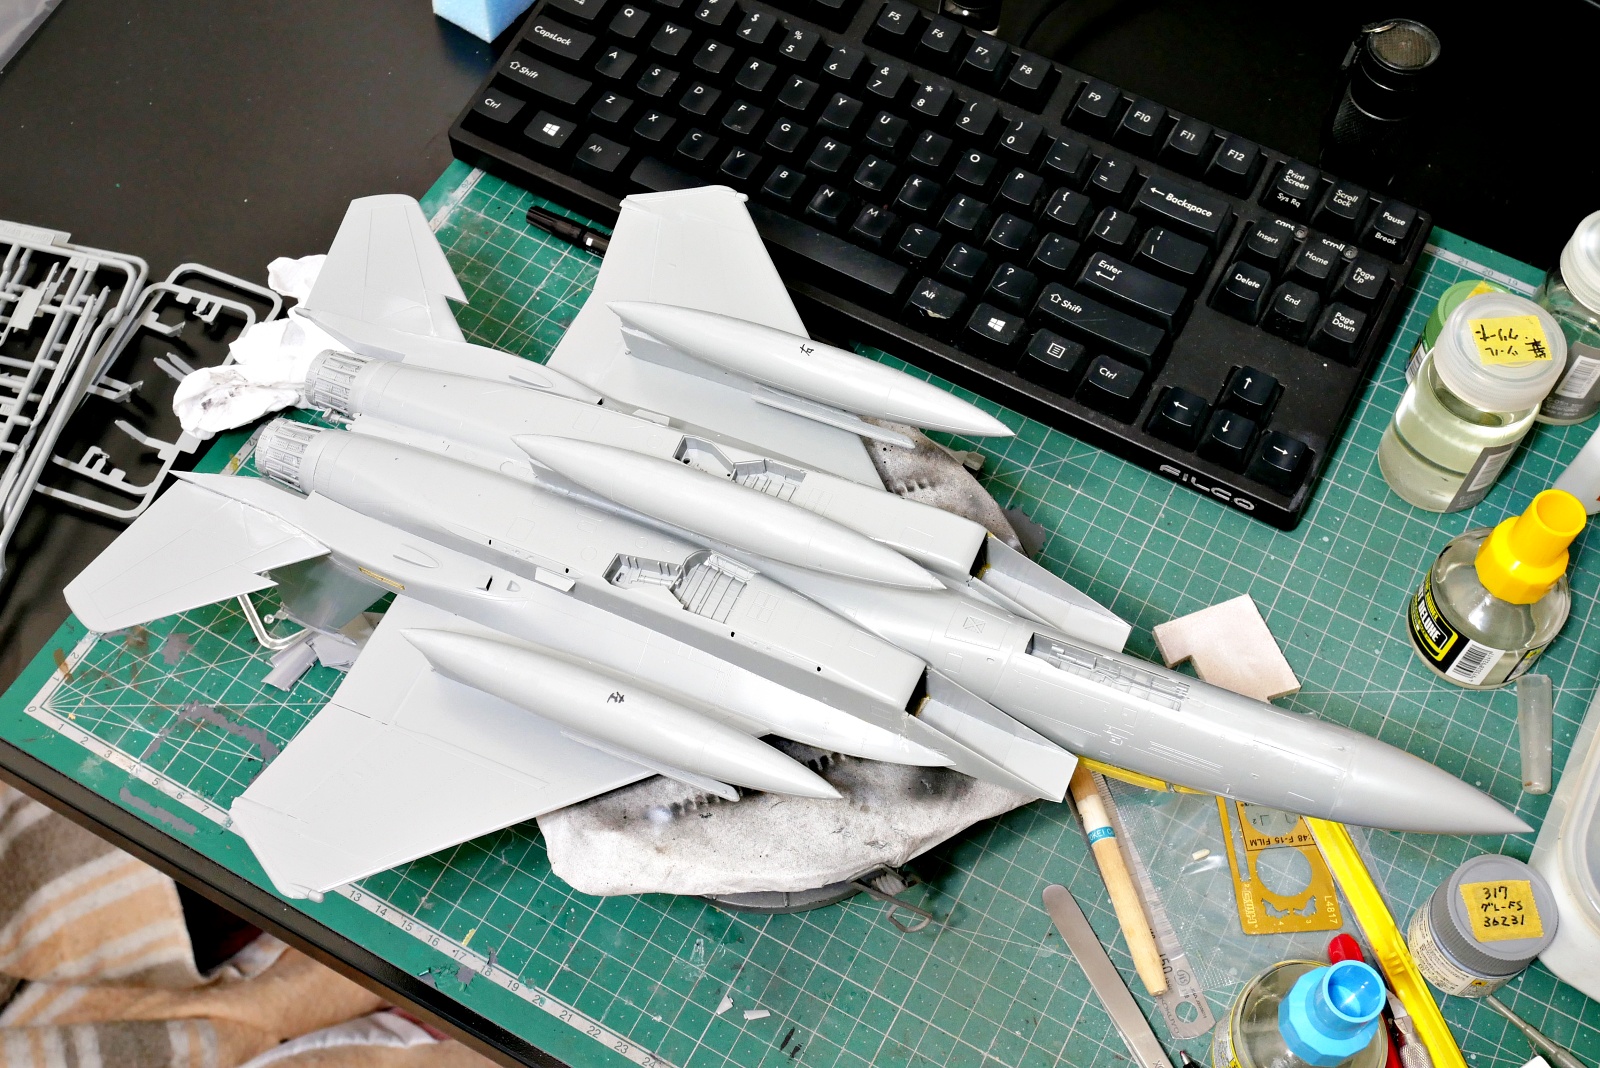
I mounted three large fuel tanks. I wonder if this part is the same color as the underside of the aircraft. Considering that it will get dirty by gluing it together later, it seems better to attach it.
(2025/02/23)
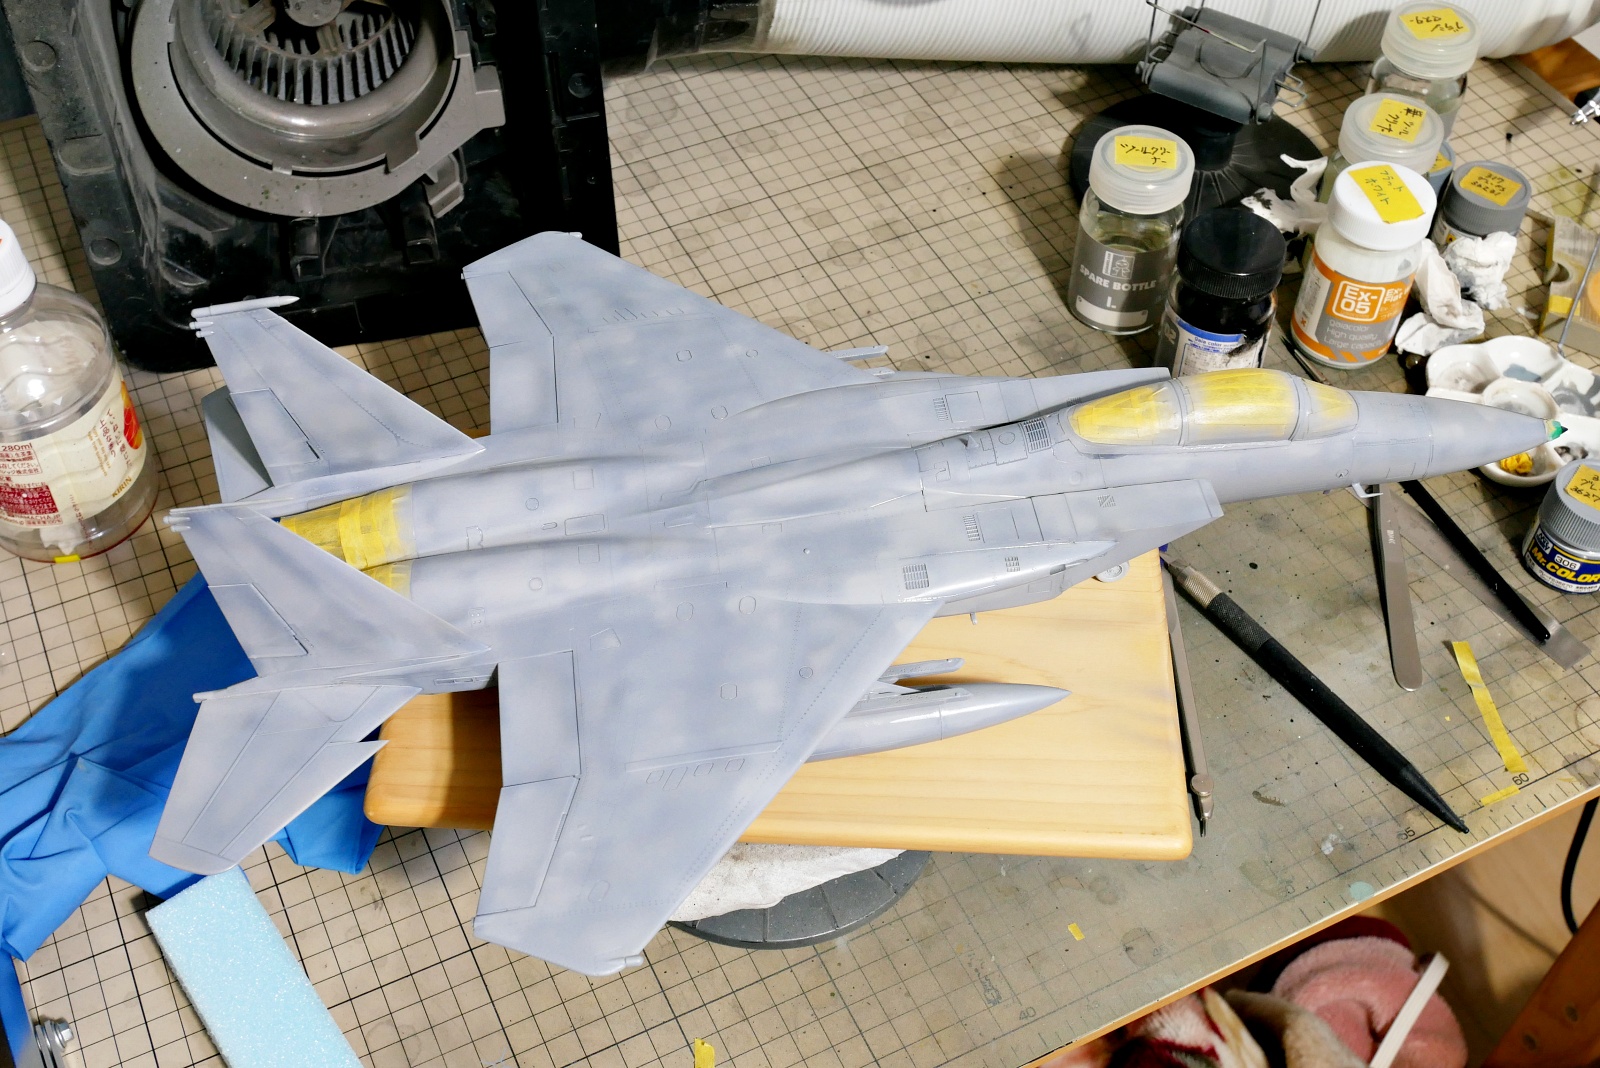
As I felt when I painted an old F-16 kit a long time ago, it was hard to tell the difference between the two gray colors. I don’t think I have a poor complexion, so I guess this is how low visibility painting works.
In order of painting, I painted the engine nozzle, the stainless-looking parts around it, the radome tip and the undercoat black, then the body gray in two colors, and finally the landing gear white. Maybe there’s a better order.
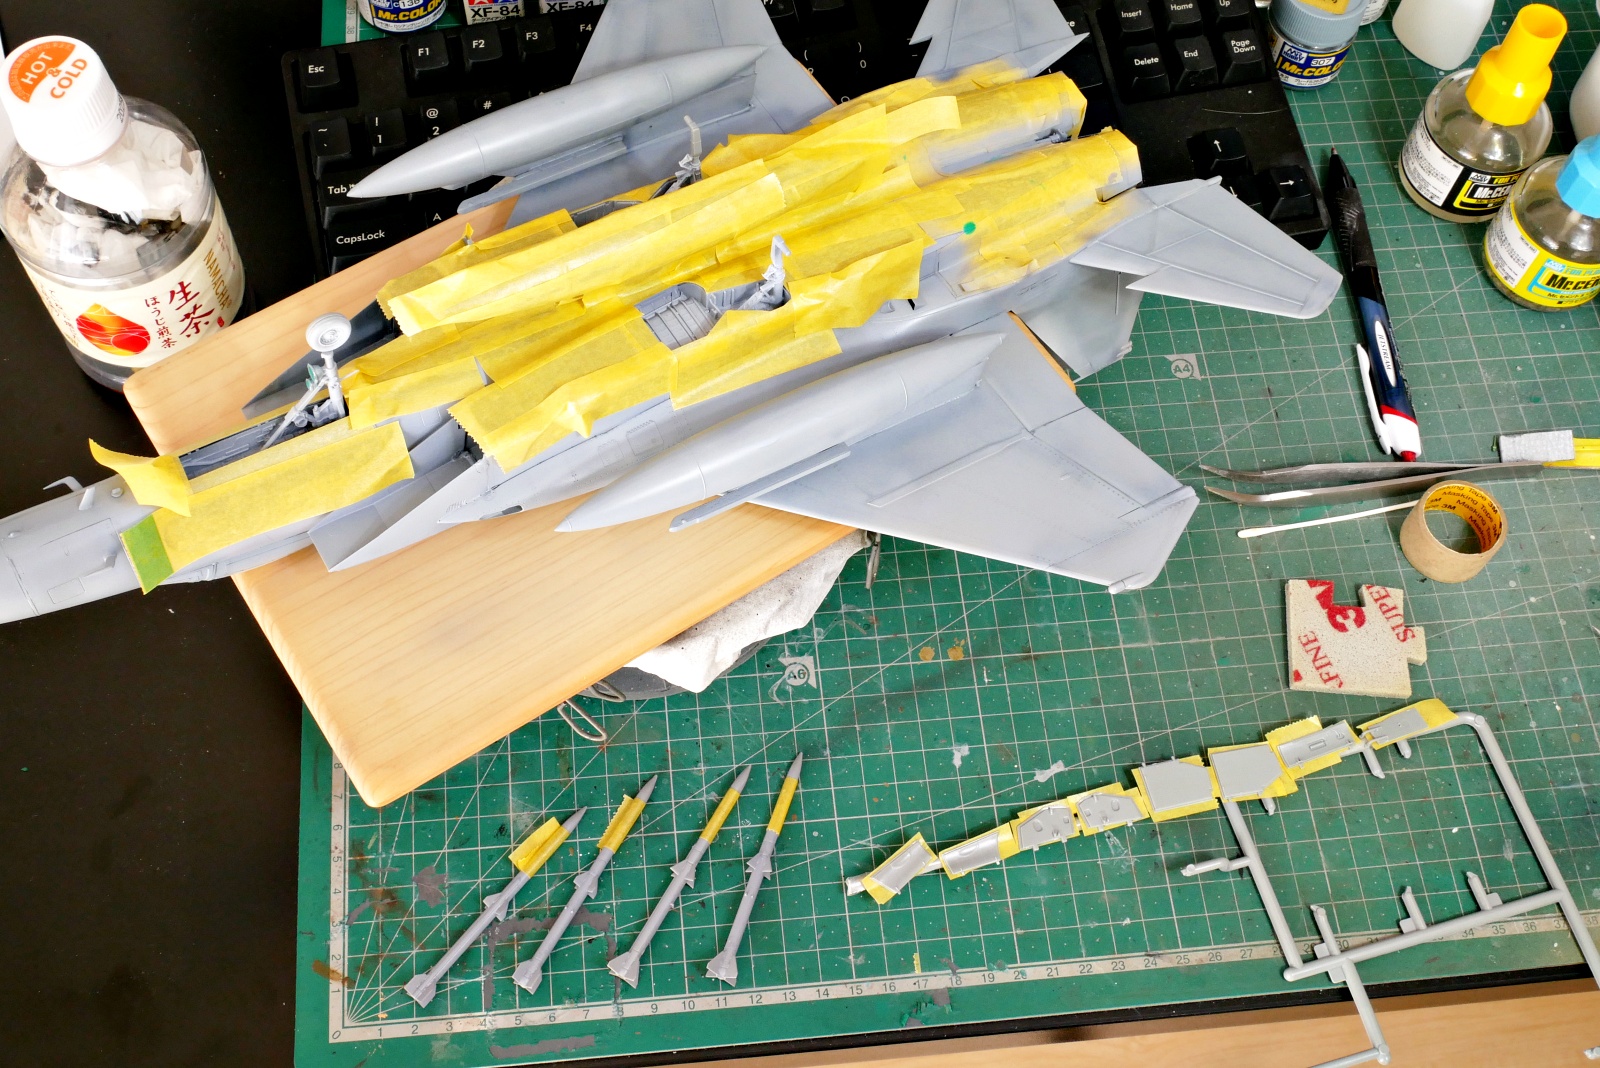
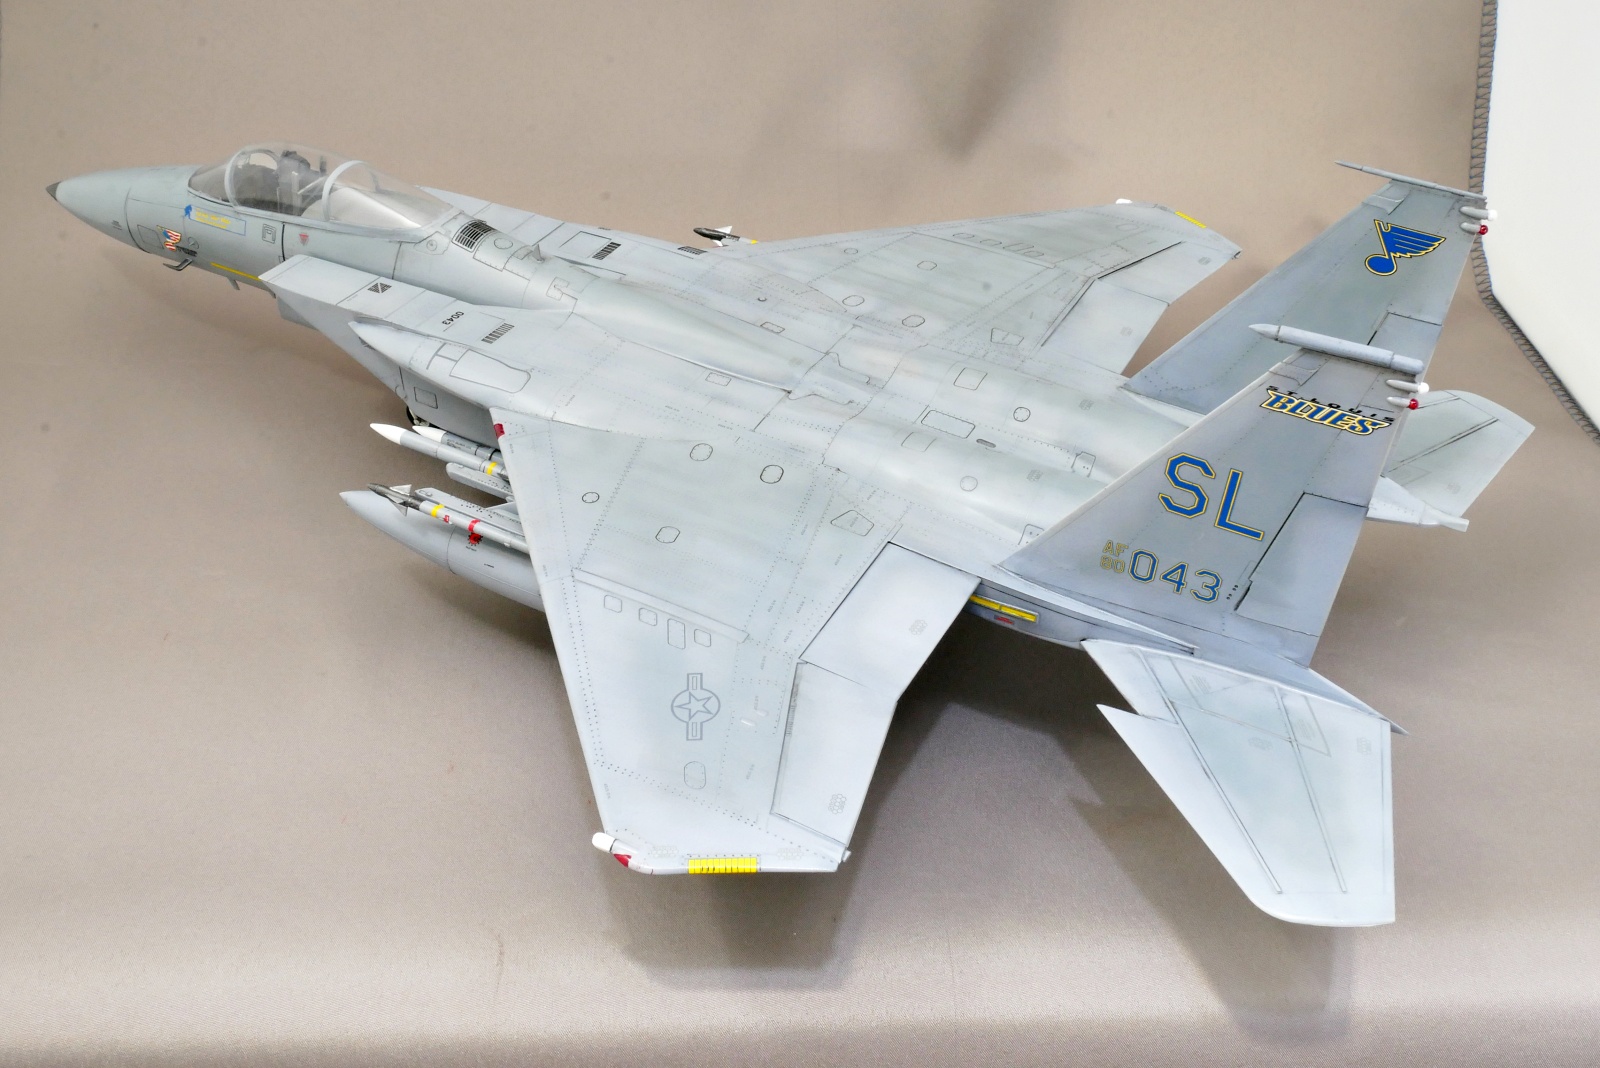
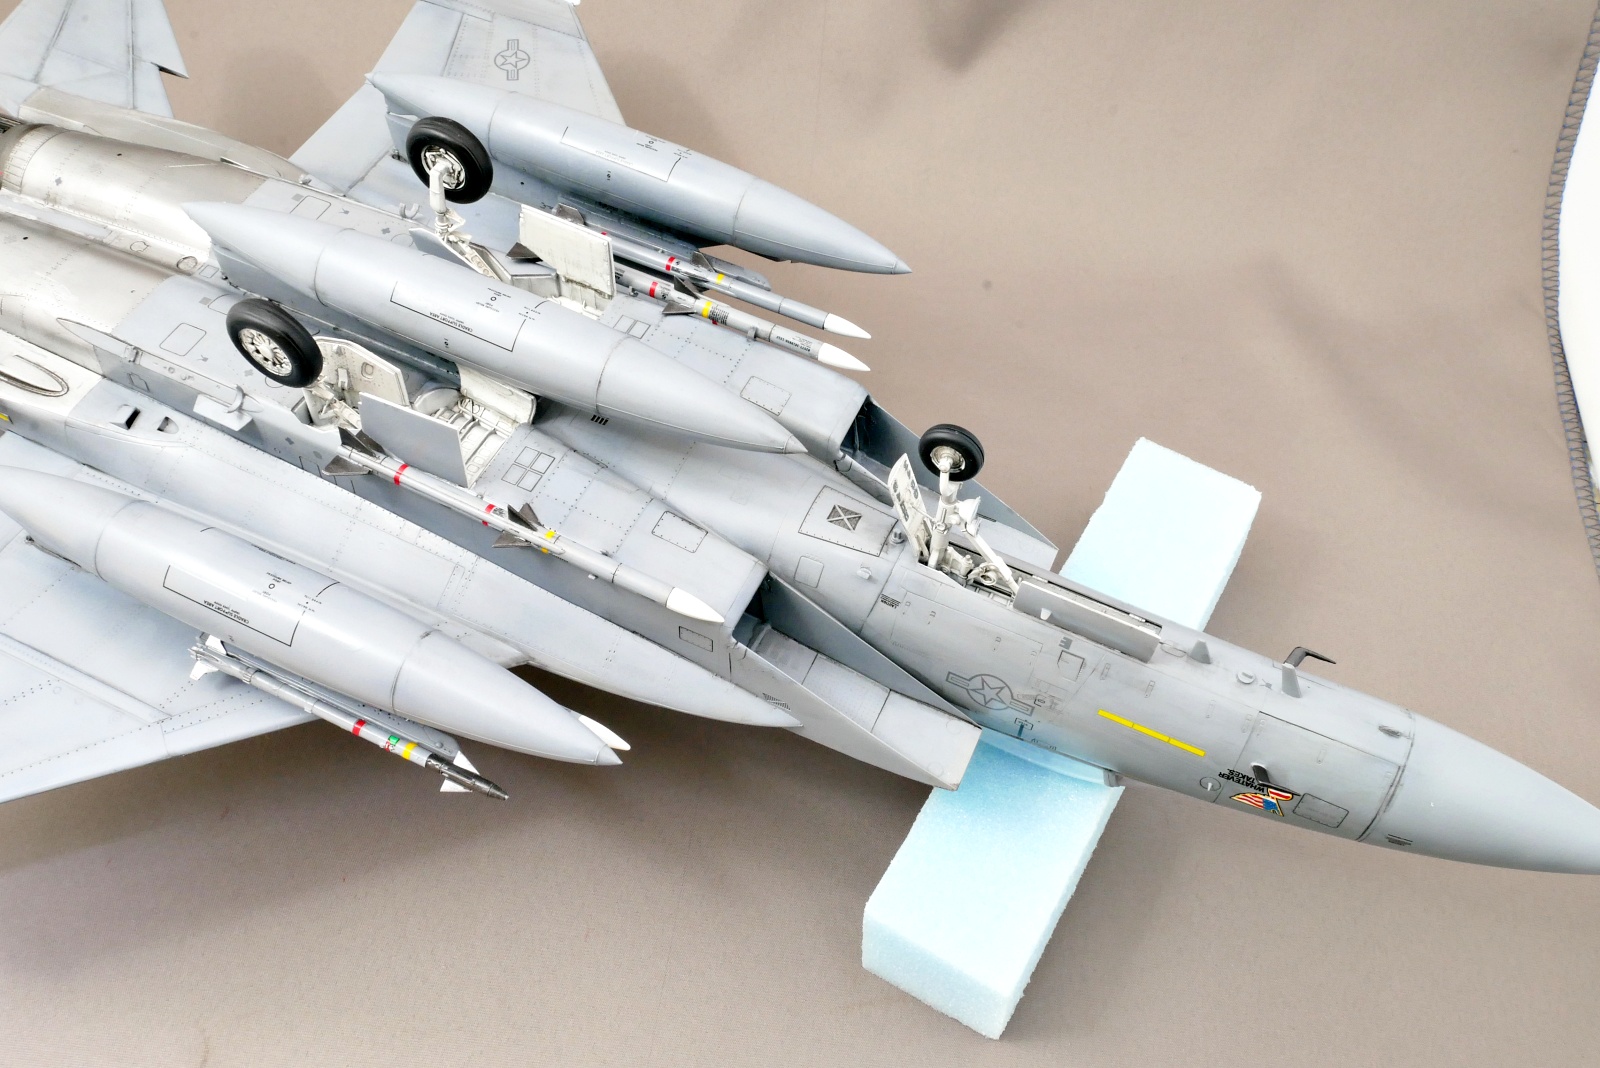
In the decal pasting work, characteristic markings such as troop marks are very few and plain. Instead, there are a lot of caution marks. Also, many decals are attached to missiles, so they look realistic when they are finished.
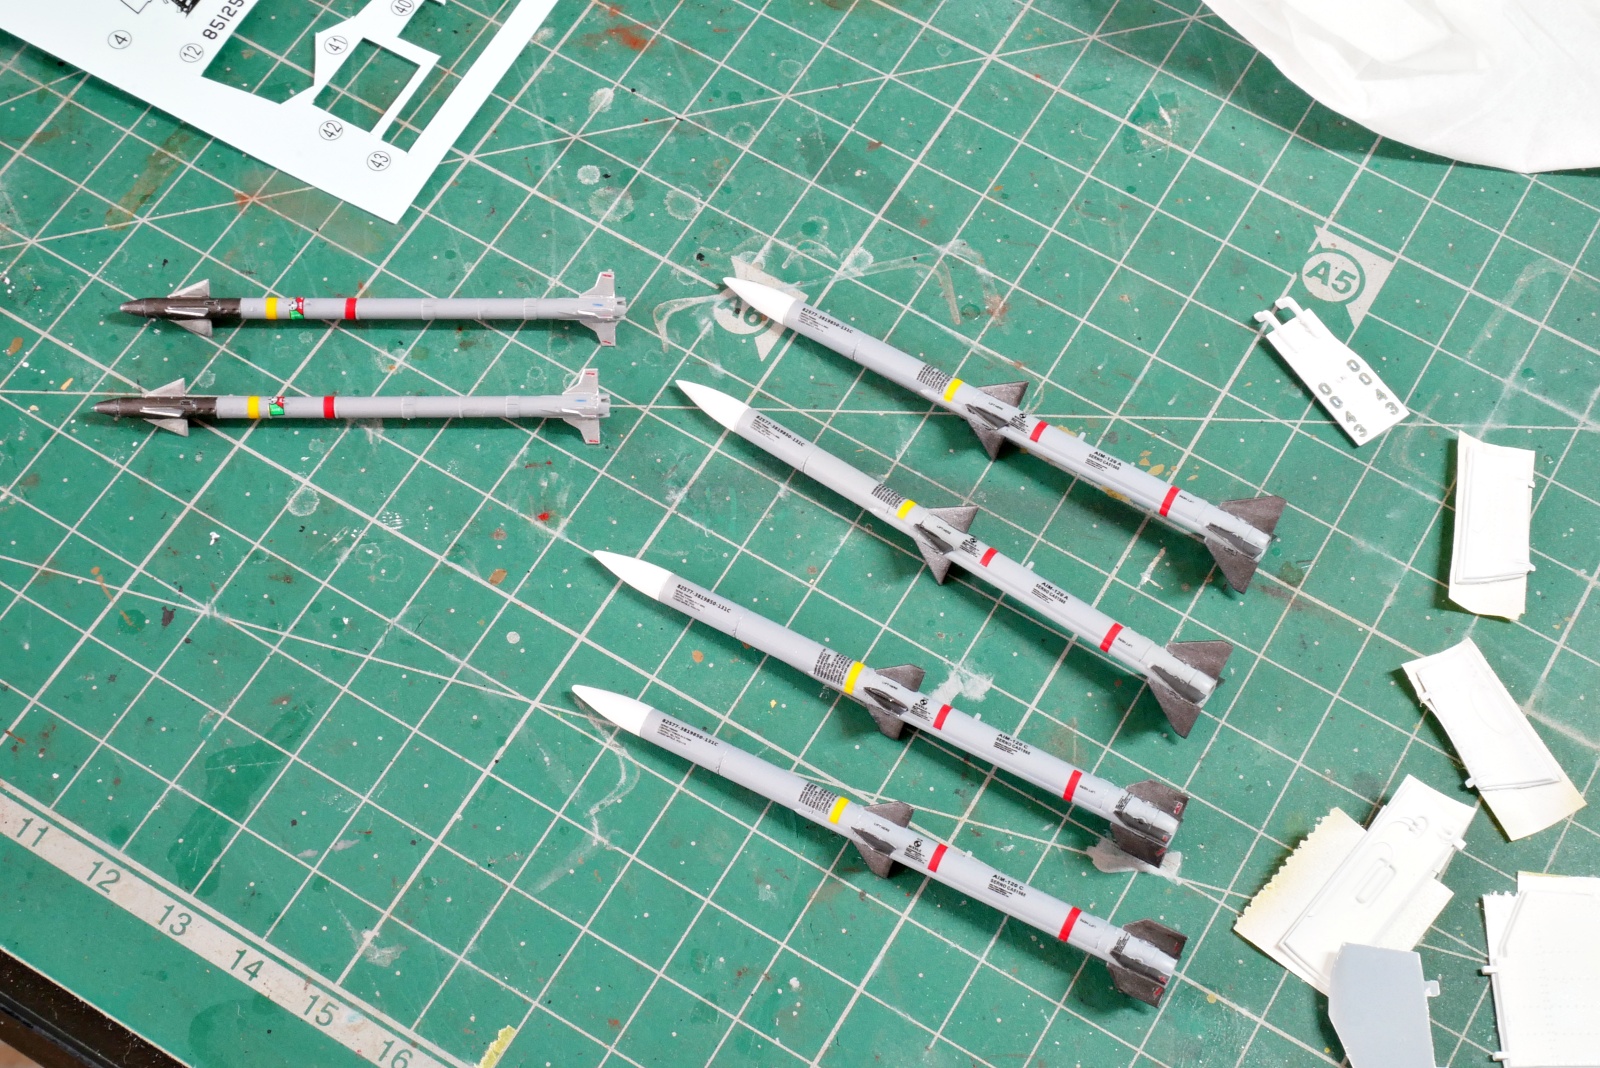
These are Sparrow medium-range air-to-air missiles and Sidewinder short-range air-to-air missiles that will be attached to the F-15. This GWH missile has not only excellent mold, but also extremely detailed decals. If it’s troublesome, I don’t think I need to use all of them, but this time, since it’s a good opportunity, I attached them properly. With such a good performance, GWH could sell the missiles separately. In fact, it might be sold already.
(2025/02/26)


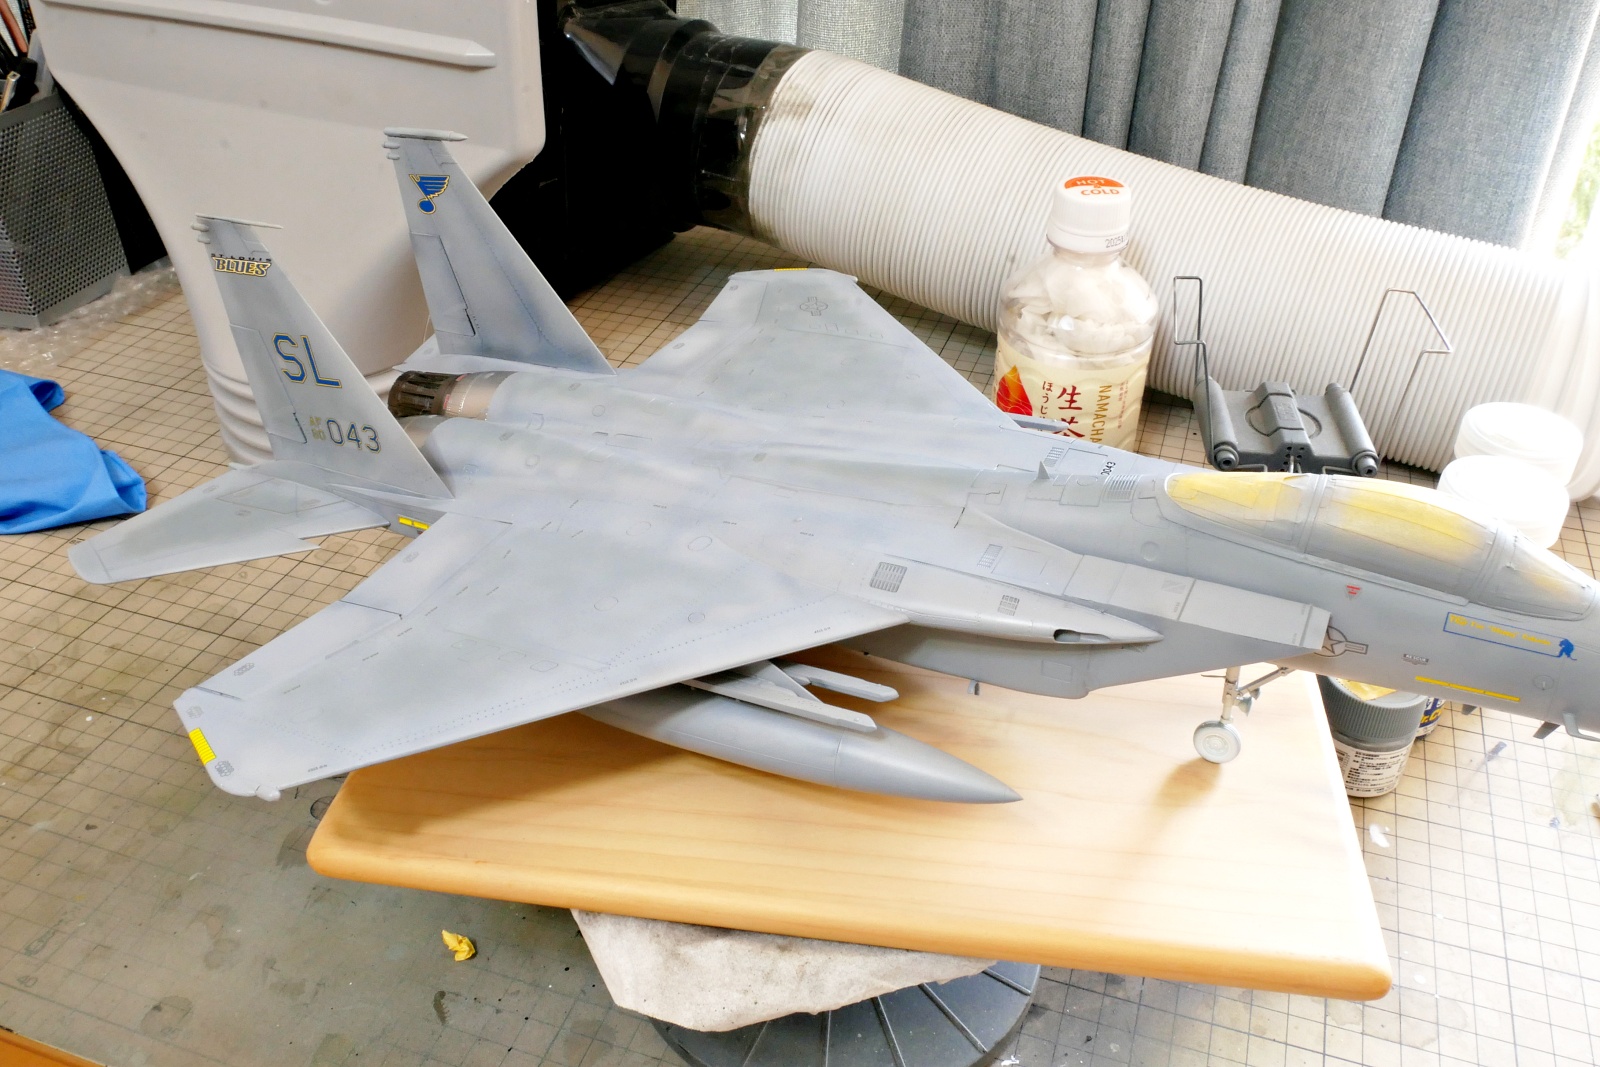
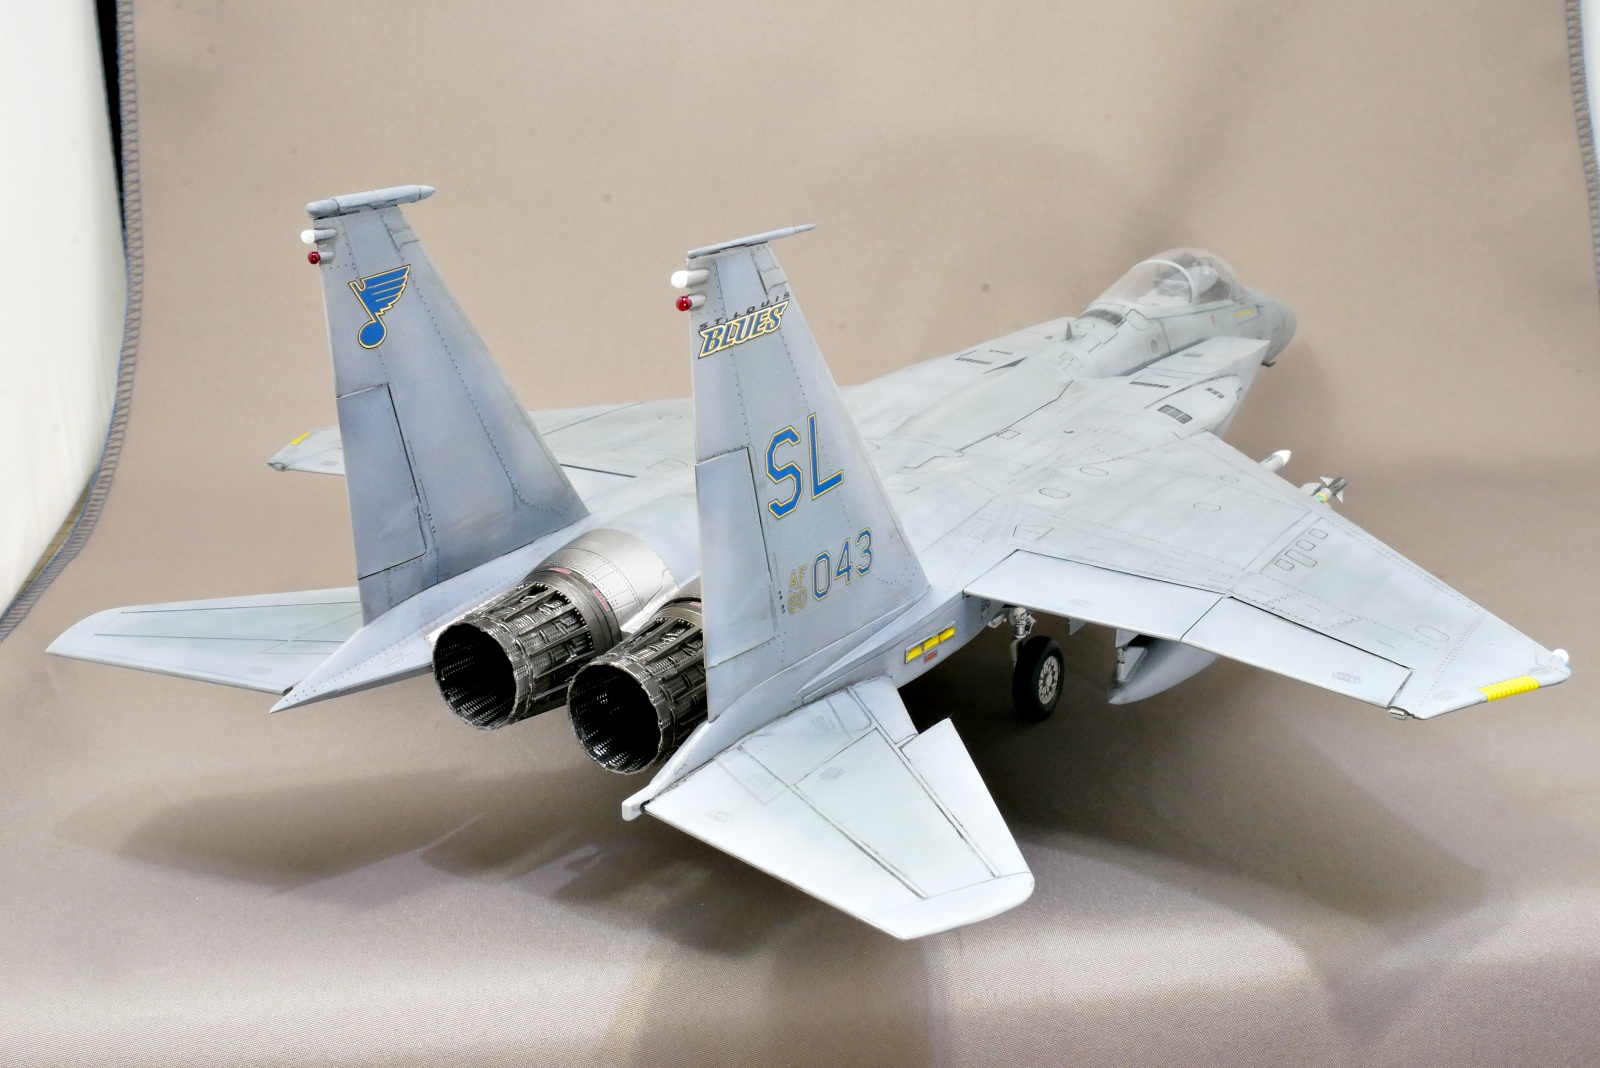
GWH’s F-15C has been completed. I have made several F-15E’s in the past, but this was my first F-15C. The F-15E has 2 crew, but this one has 1 pilot. The F-15E is a multi-purpose fighter that can do bombing missions, but the F-15C’s main mission is air defense.
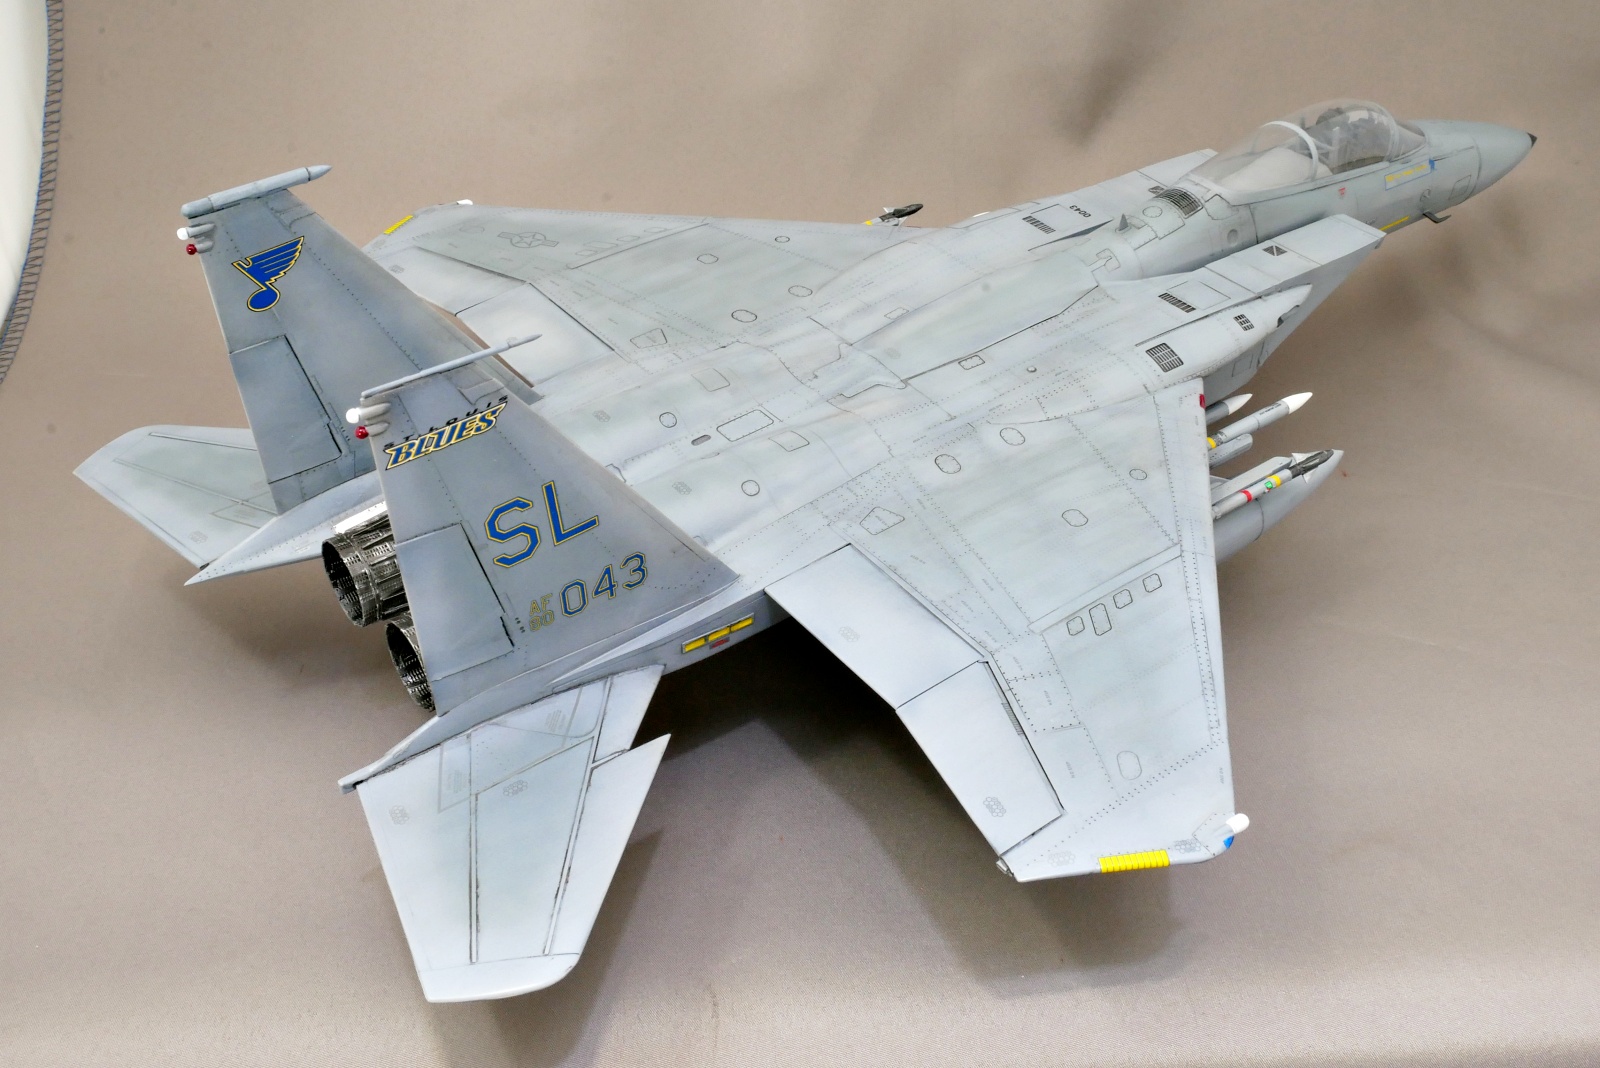
This kit’s F-15C is called the Multi-Stage Improvement Program II (MSIP II), a modernized model.

I think it is better to check the black part on the front of the cockpit and the interference with the canopy parts before gluing before positioning.
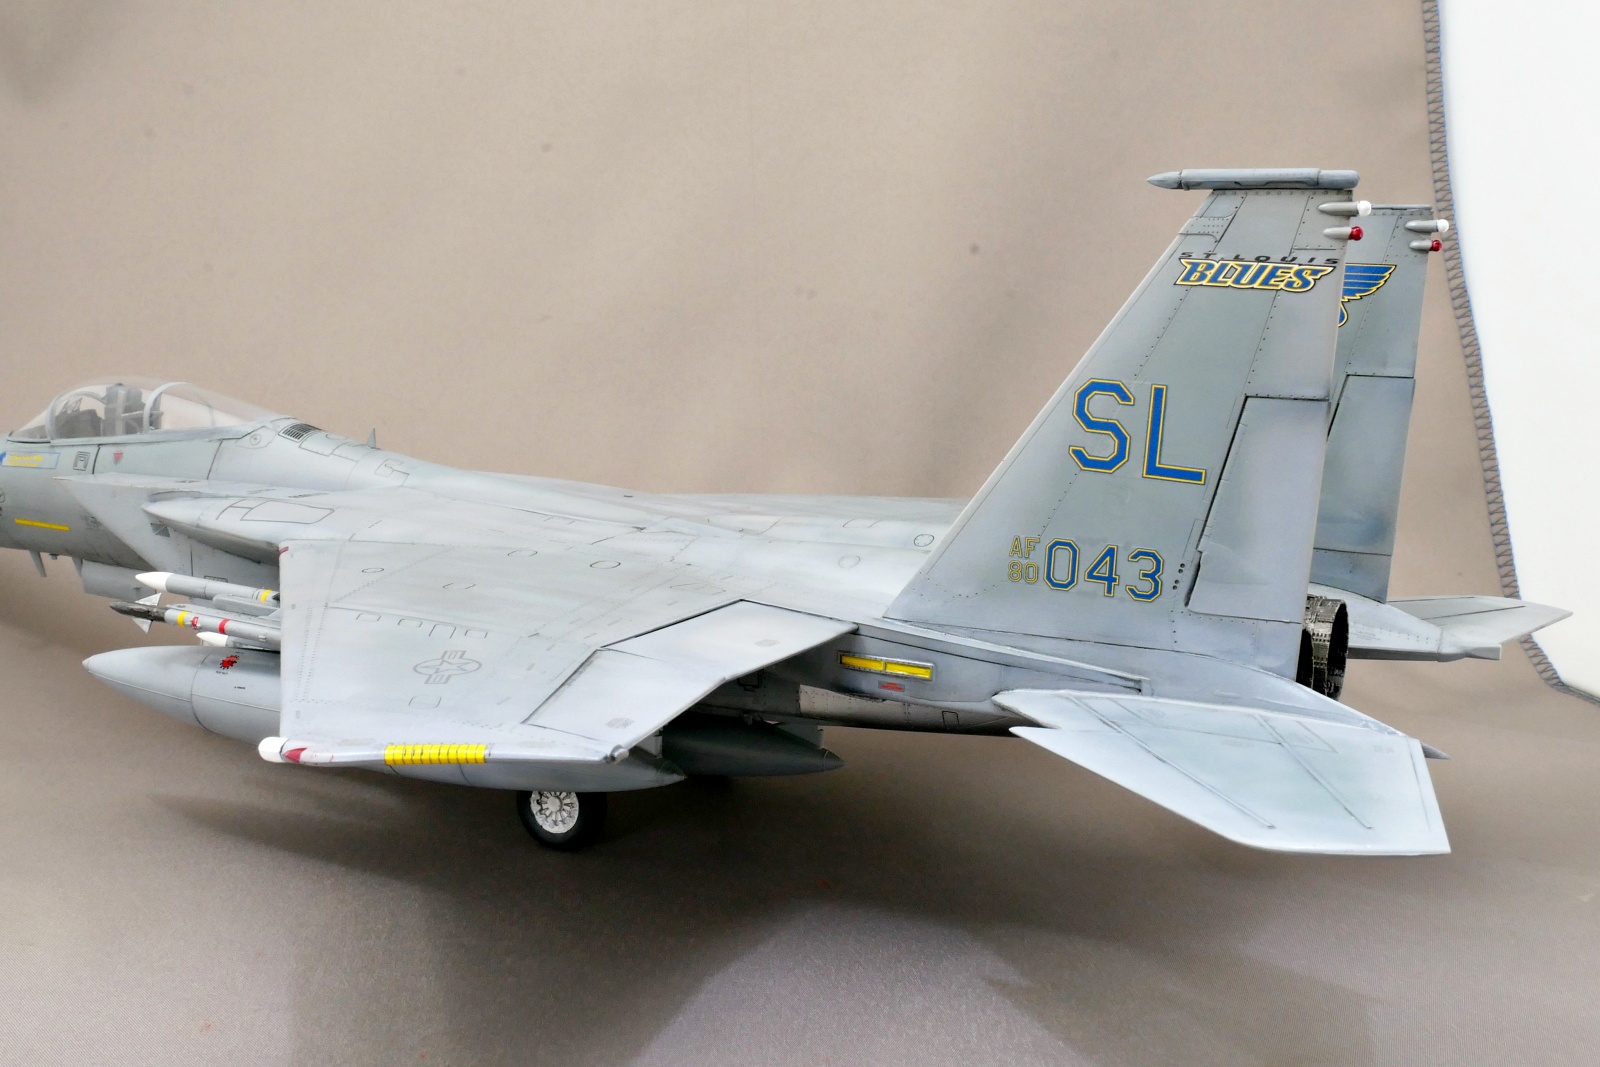
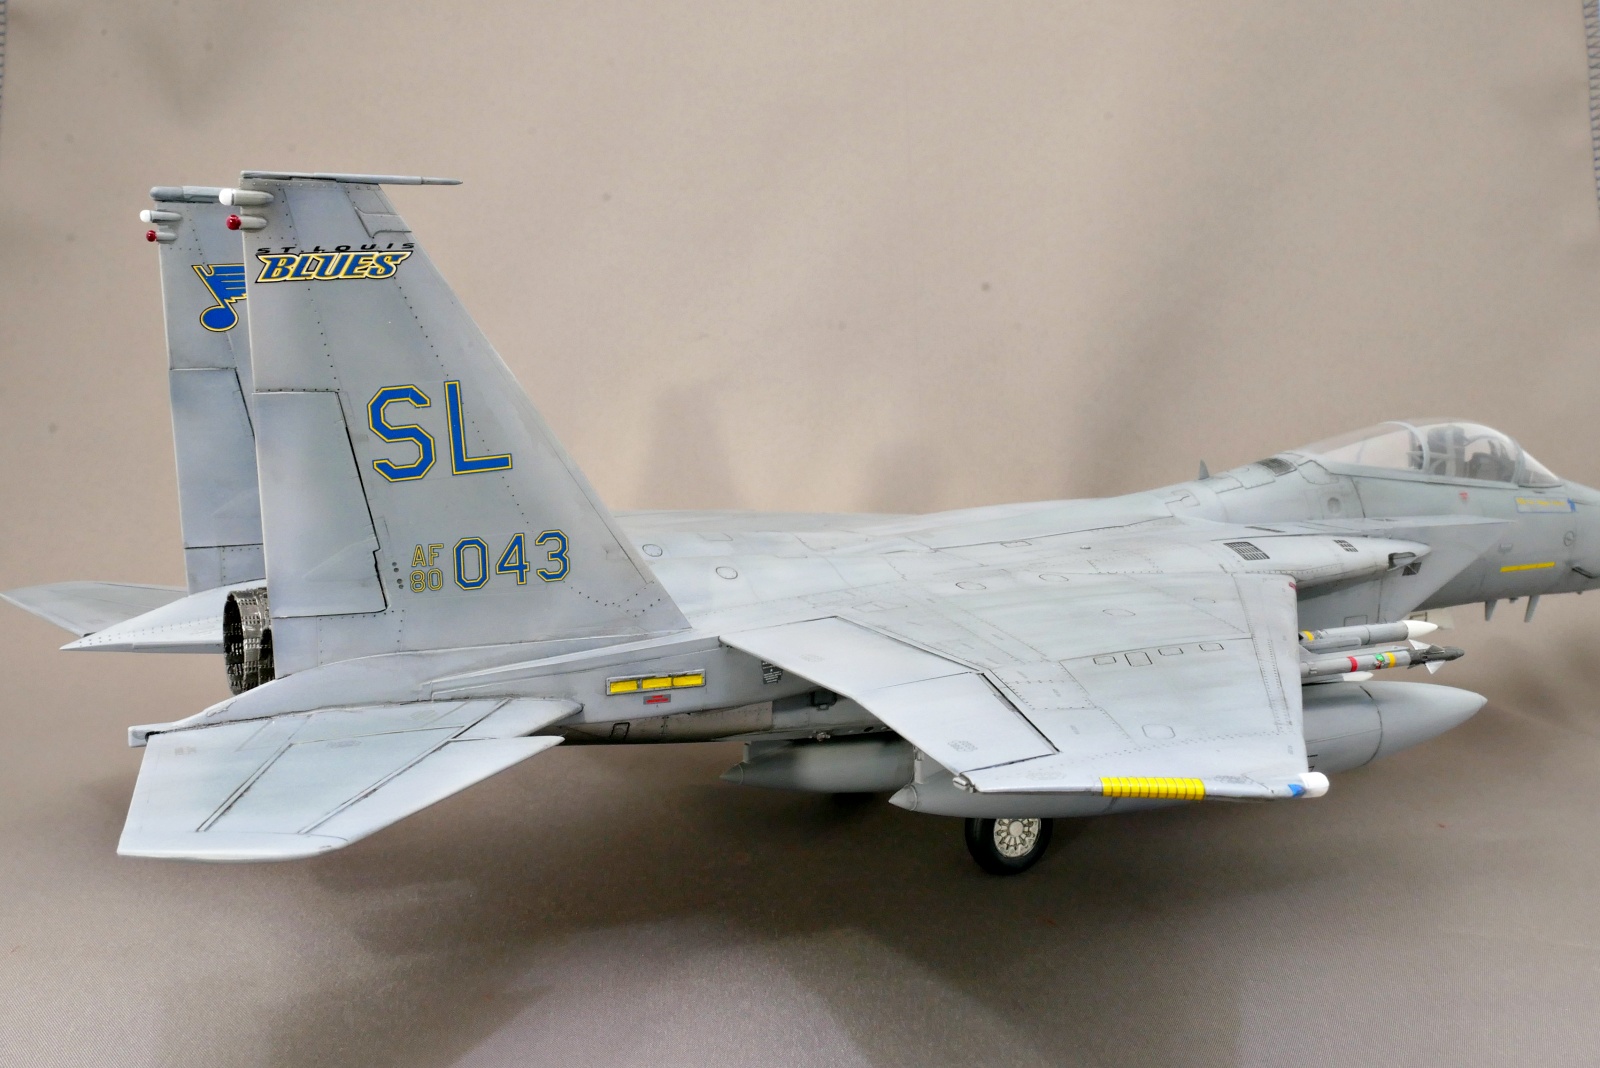
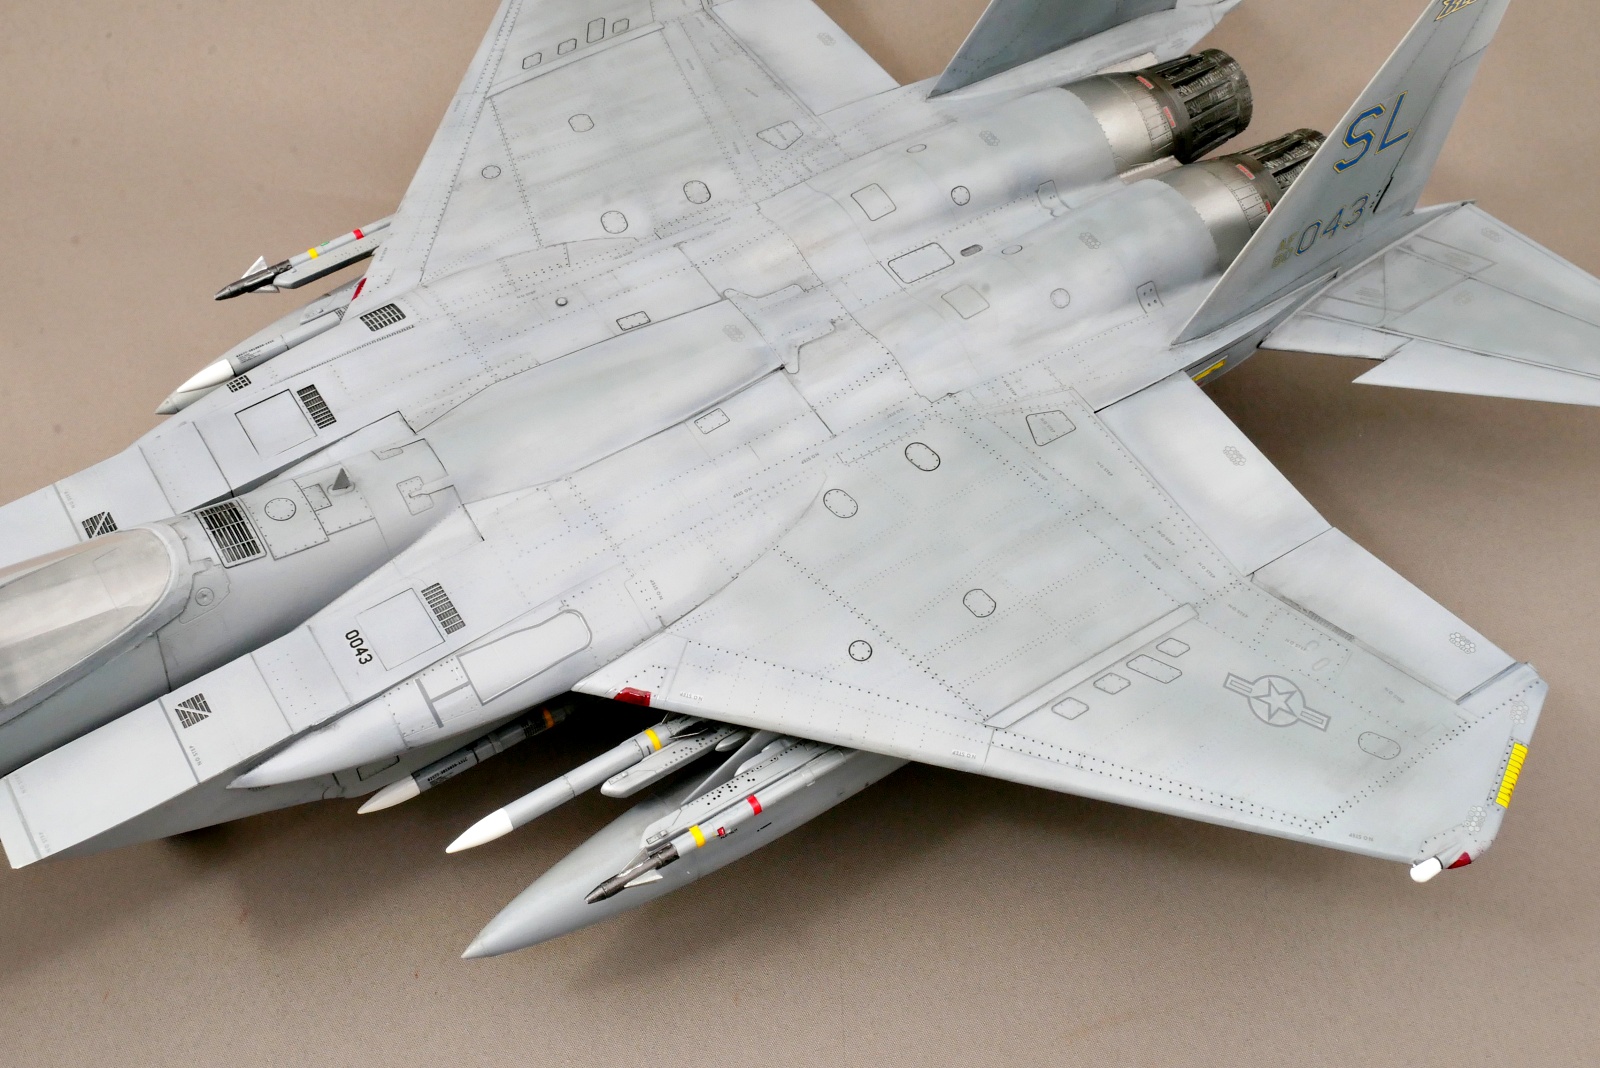
This F-15C’s marking is the 131st Fighter Wing, Missouri Air National Guard, Lambert International Airport.
The whole decal of this kit was very hard and I had a difficulty in sticking it to the aircraft. I think it’s better to have a strong decal softer.
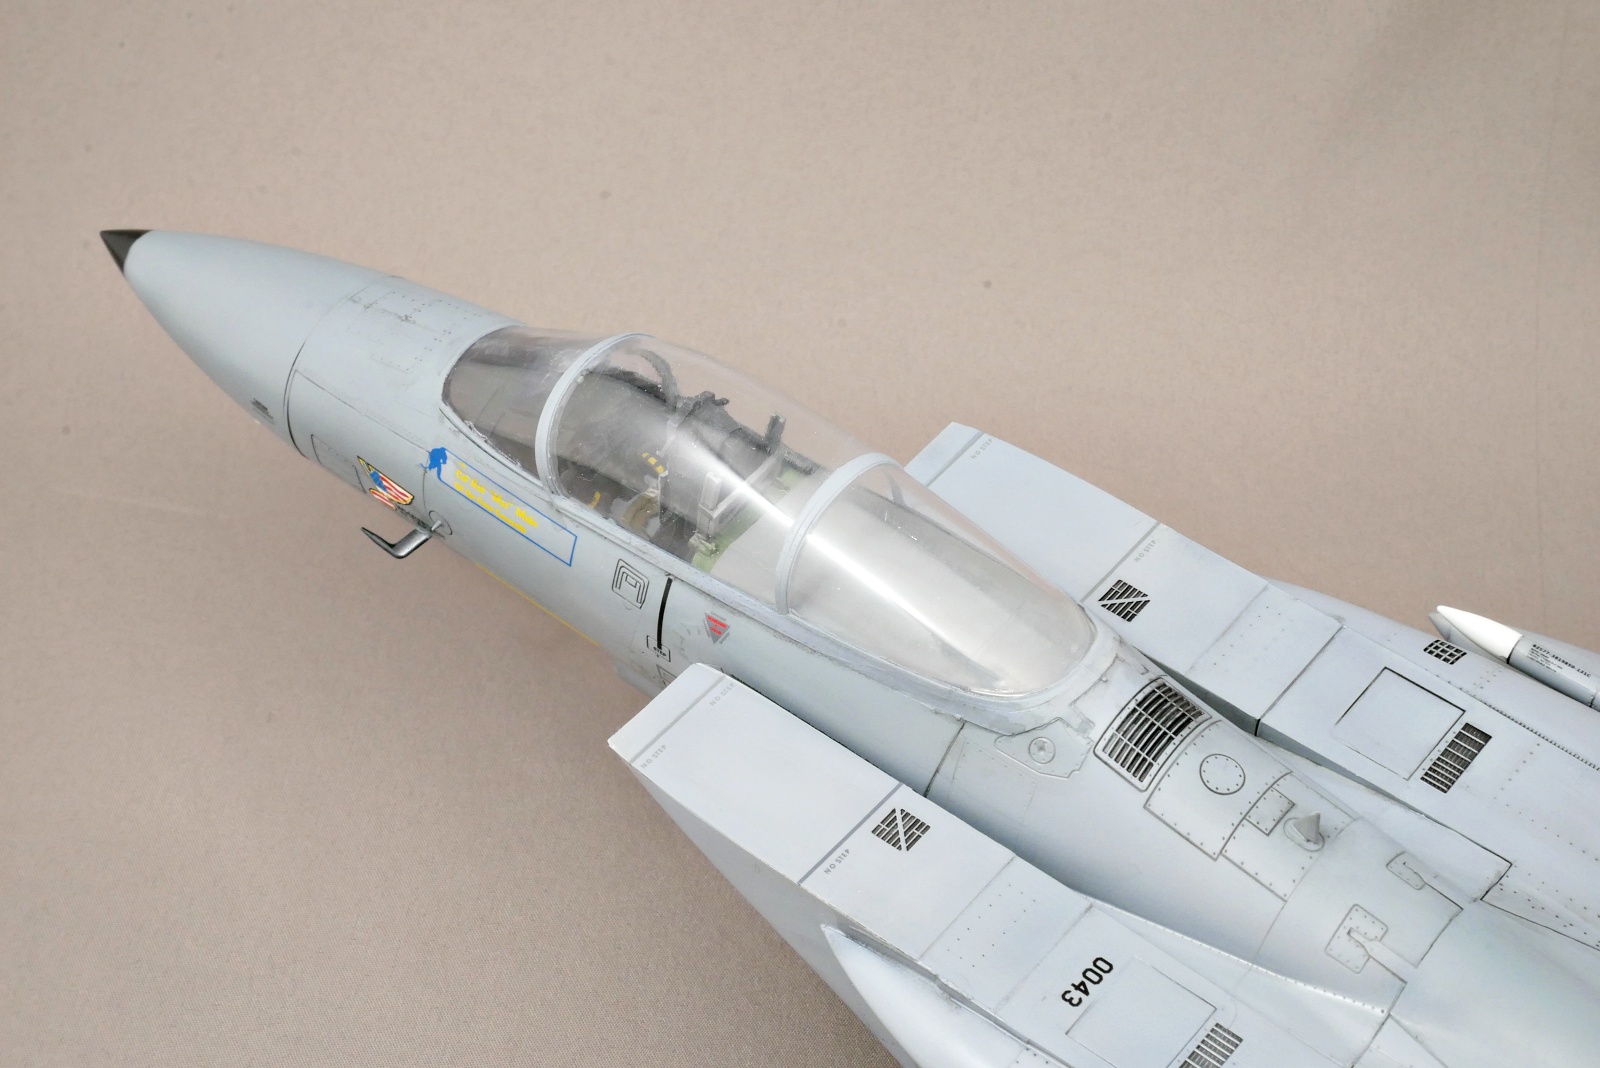
This time, I tried to make the canopy in a closed state, and when I glued it together, there seemed to be a slight step on the side, so I filled it with putty. I wonder if it would be easier for this kit to keep it open without thinking too much. I didn’t make it very well.

In every kit, the big fuel tank is a convex mold. Maybe the real thing is like that, so they reproduce it like this. It’s troublesome when it’s weathering, but it can’t be helped.
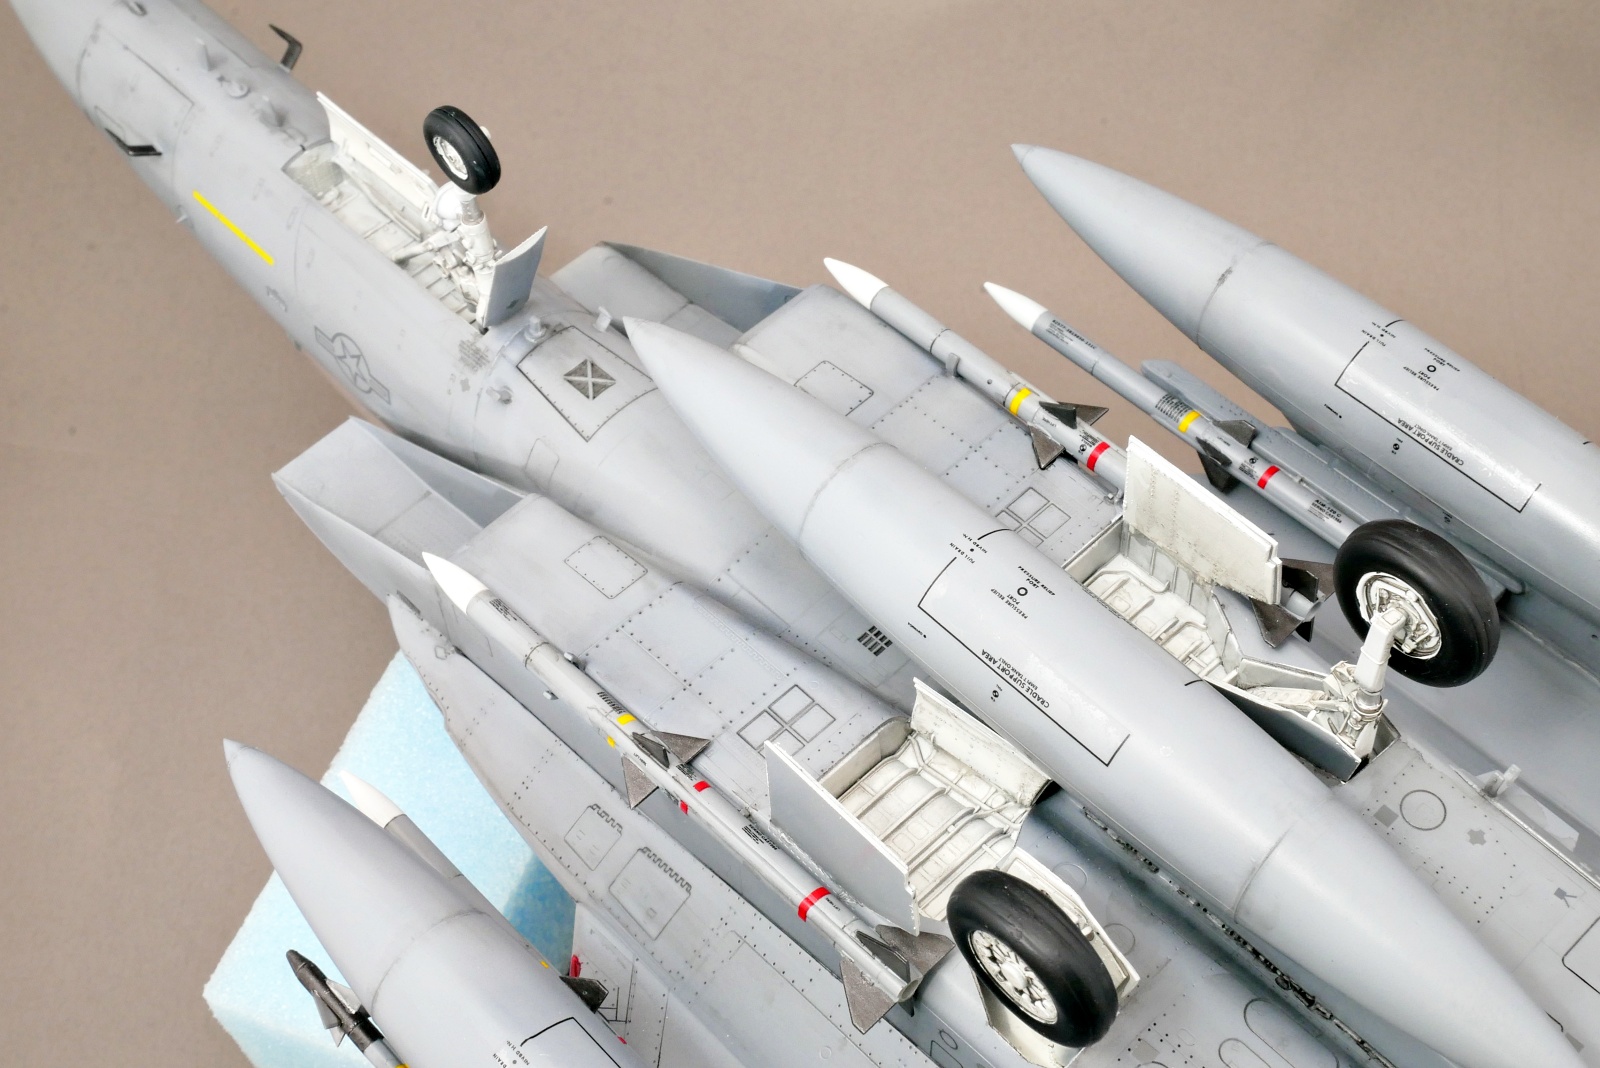
The mission of the F-15C is anti-aircraft fighting, and it has two sidewinders and four Sparrow missiles. It looks more like F-15 with a lot of large fuel
It was supposed to be an inking on the panel line, but it became like washing without realizing it, and it was hard to wipe off the part that came out afterwards. Even so, this process is quite interesting because the impression before and after weathering is quite different.
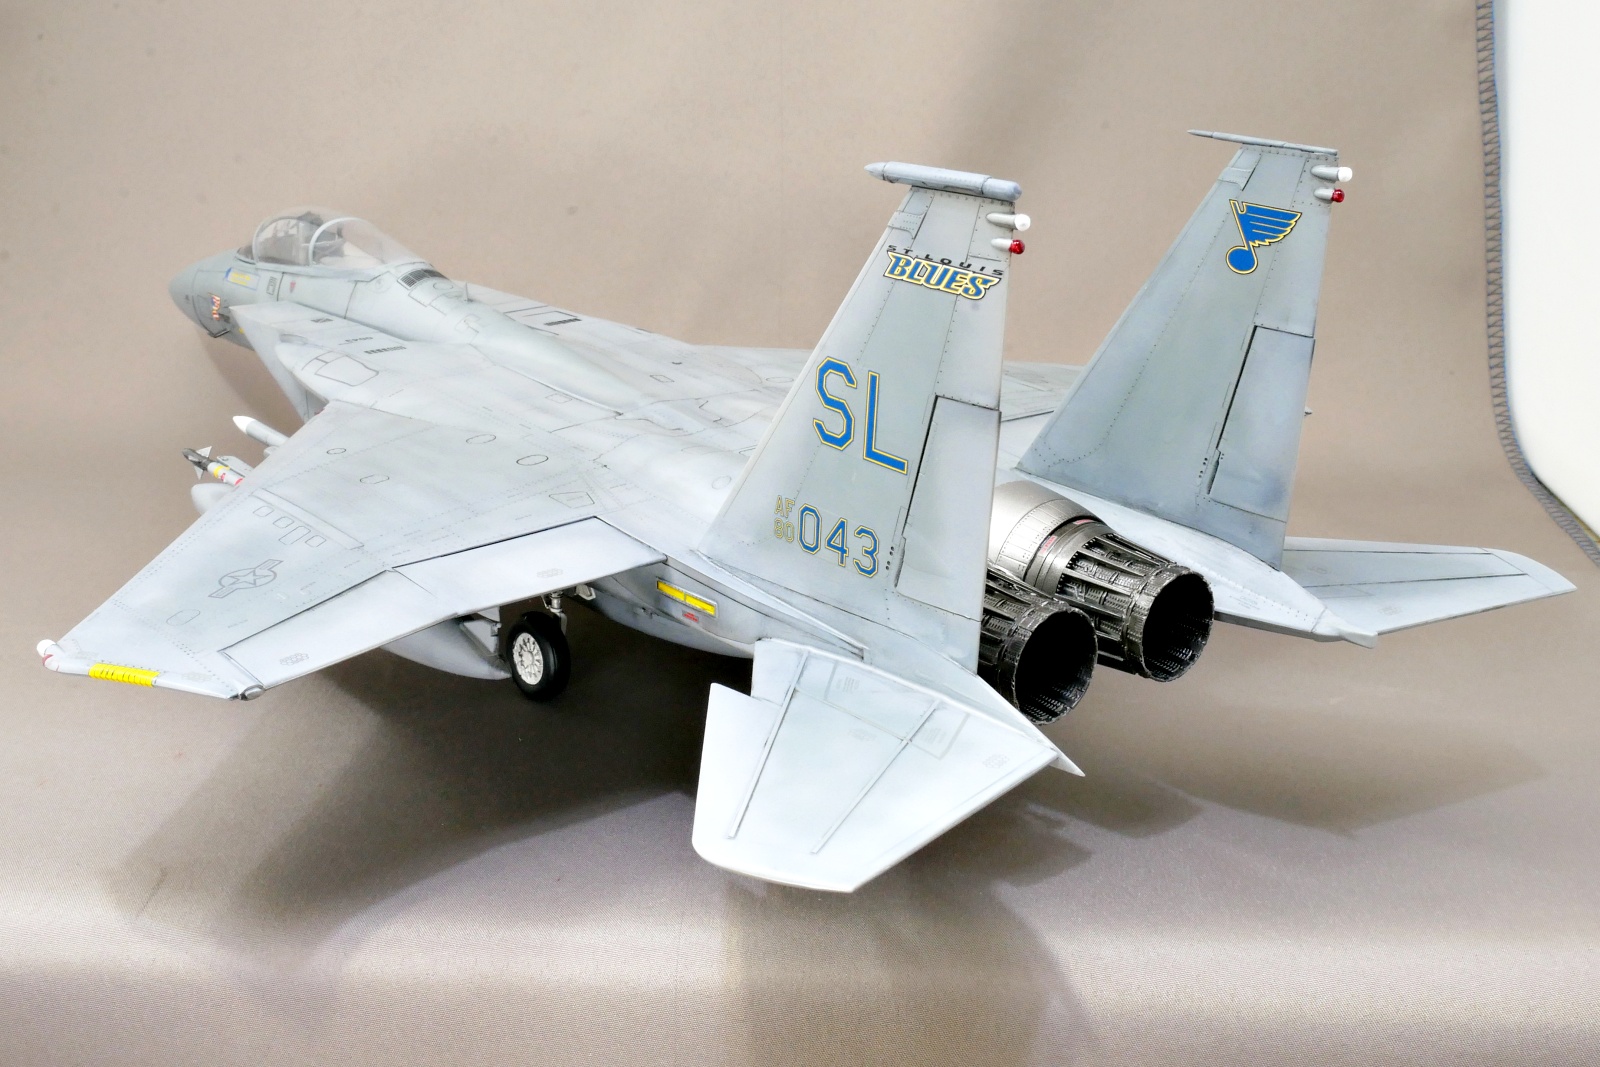
It is a bit disappointing that the canopy area was not finished so beautifully, but I am glad that it was completed this time too. As I mentioned above, the camouflage pattern of the USAF aircraft is difficult to understand the gray tone. I can still see the difference in green colors. Maybe it’s because I’m used to building tanks. I want to make a German aircraft next.
(2025/02/28)


コメント