
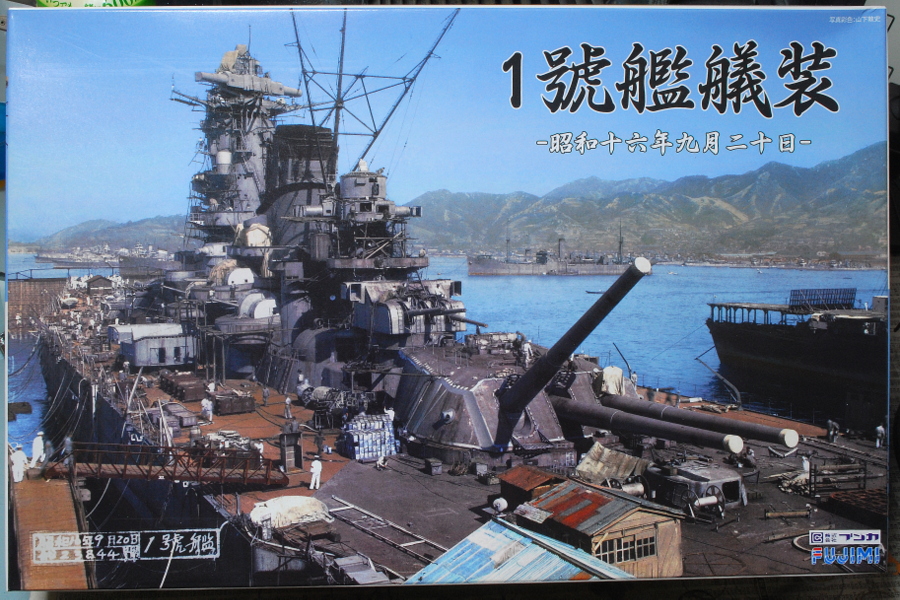
 When I bought Fujimi’s Fujimi’sappy New Year lucky bag last year, Surprising Fujimi’s ship’s set was sent; in short, it was only to dispose of bad stock in a lucky bag. I wrote that I felt angry about it in my blog before. This time I will build Fujimi’s battleship Yamato 1/700 scale.
This box included Yamato at the time of commissioning and CV Hosho and Yamato’s deck seal and parts. It seems to be the Yamato’sof something to make it like a diorama set.
 Yamato parts are in the box. I think that the original box picture of that kit is this one. It’s an ancient kit. Although I was deciding on the first Yamato series, “NEXT~~.” I will try to make only the battleship Yamato in the “et.
I t “ink this Yamato Kit was the first model. The product number is No. 1, and this kit has not gotten a sense of precision yet, but it may have led to Fujimi’s transcendental detail in many products. I think that Fujimi has withdrawn from the plastic model cartel of Japan and has escaped from the allocation rules of the waterline series and sent it to the world.
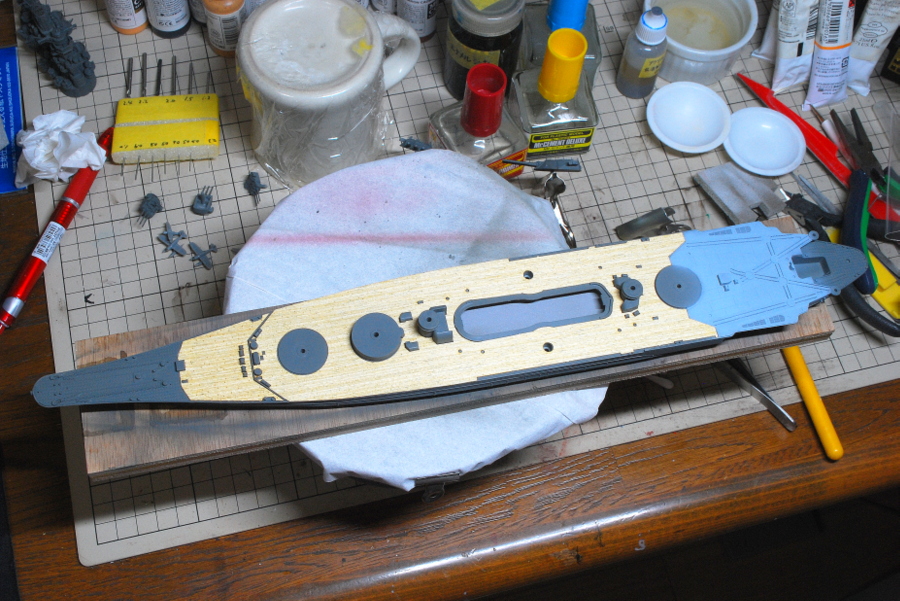
 Since the big Fujimi’s upper deck is distorted, I tried to parallelize it somehow with my hands.
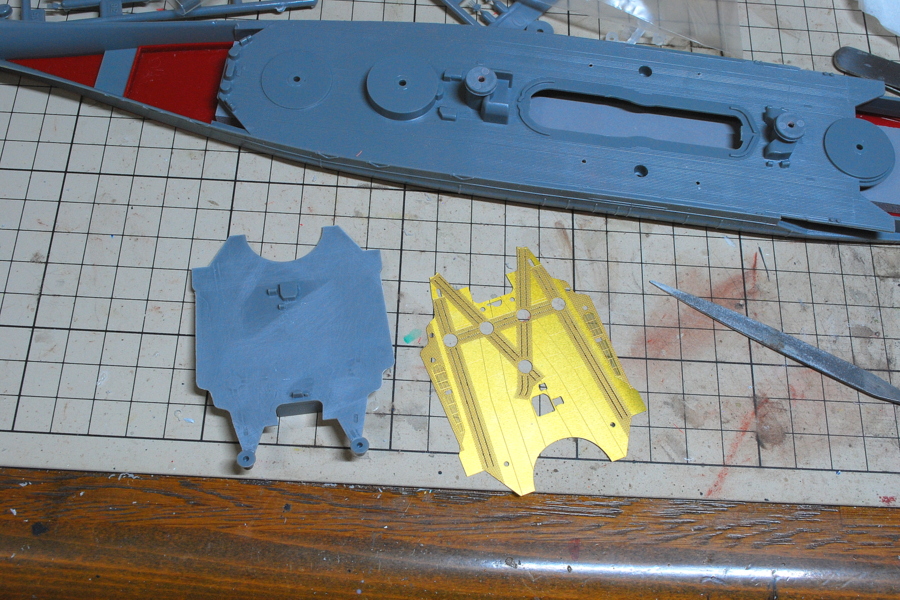 Large deck parts in the area to operate the reconnaissance aircraft in the rear deck.
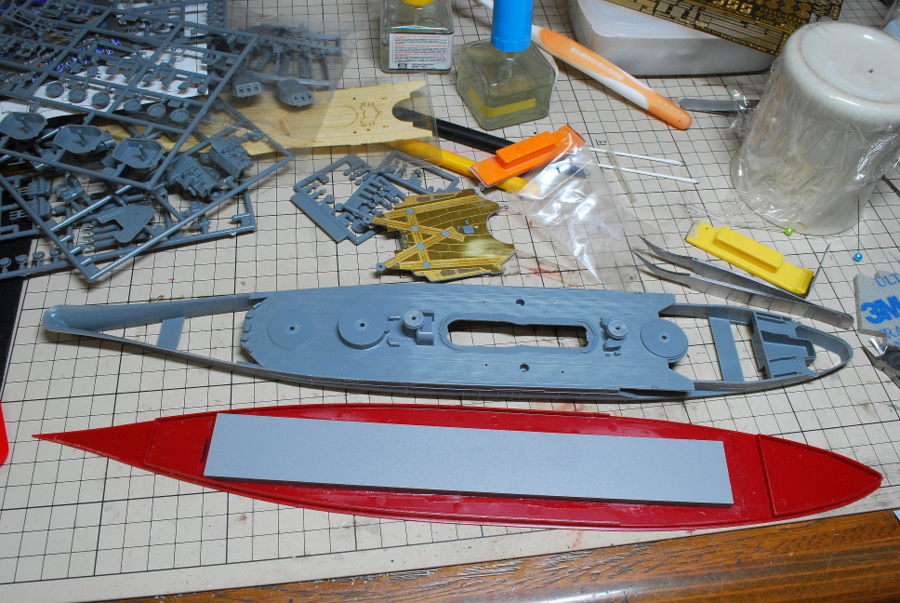 The hull is slightly distorted. I adjusted it by attaching a resin plate for the pier, which was included in this kit. It’s better than not using it, but it’s unlikely to be reinforcIt’so much.
(10-October-2018)
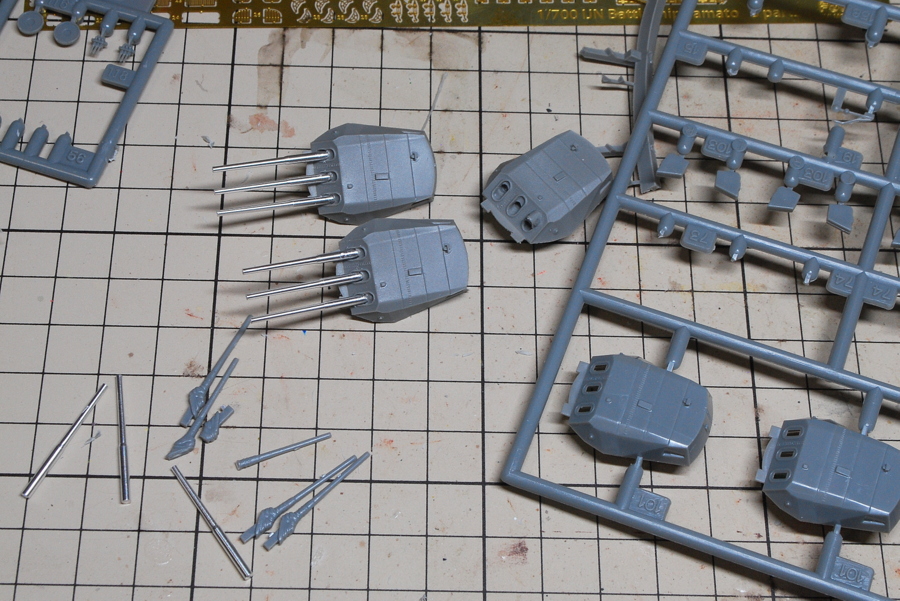
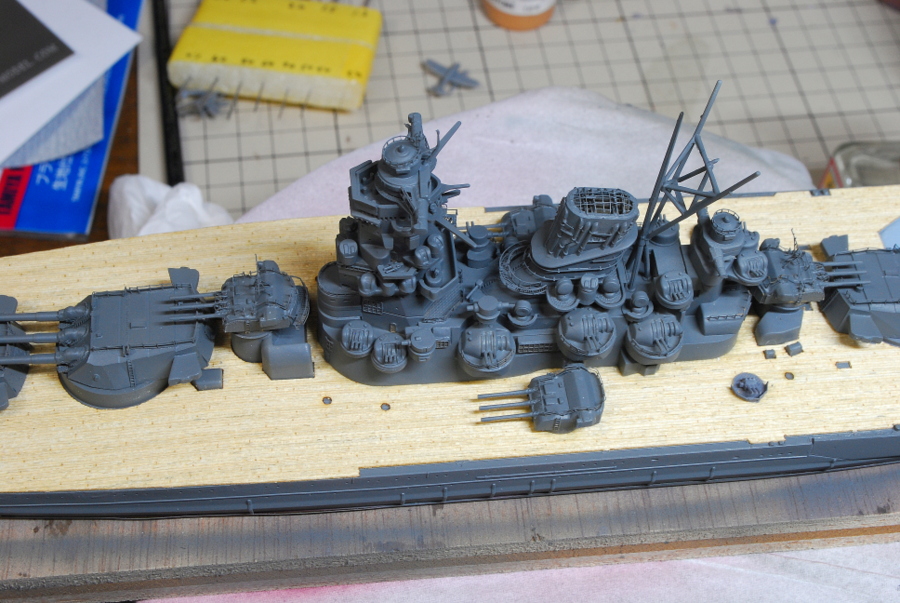
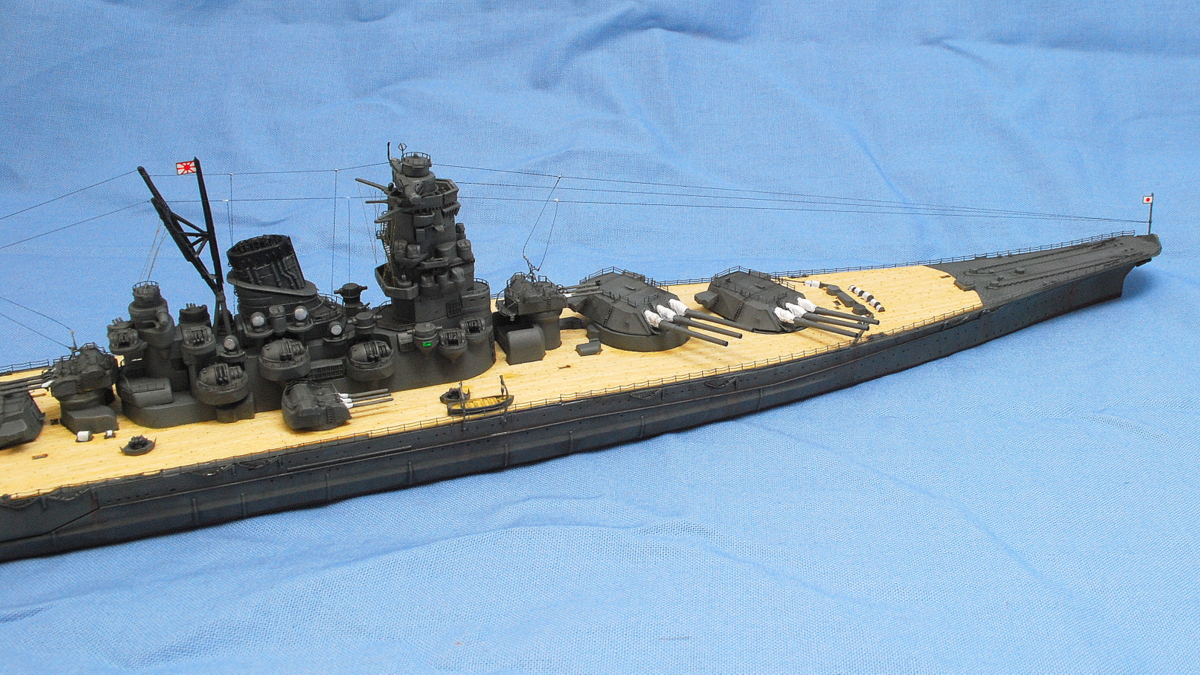
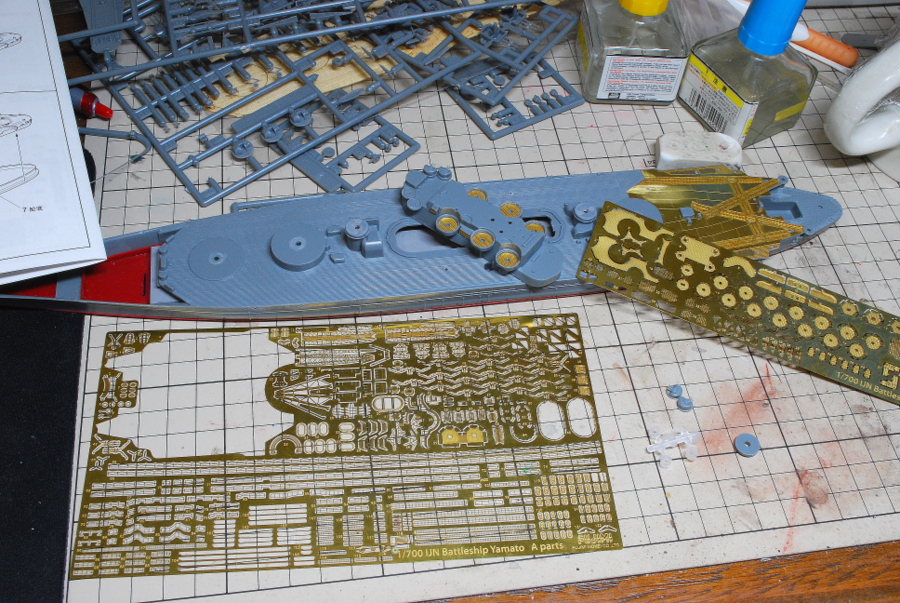 I use the photo-etched parts from somewhat eye-catching parts, but the photo-etched is for the armament and equipment of the last battle, and the kit and the manual are the timing of the outfitting construction. There are quite different parts. I also referred to the instructions at the time of commissioning on the Internet, and my head was confused. The 12.7 cm twin guns are covered with outer shells at the time of construction, so it seems they do not need the photo-etched parts of the floor. It seems to do many useless works.
 Even though the bridge is made, there are still many photo-etched parts. Perhaps I can use half of them.
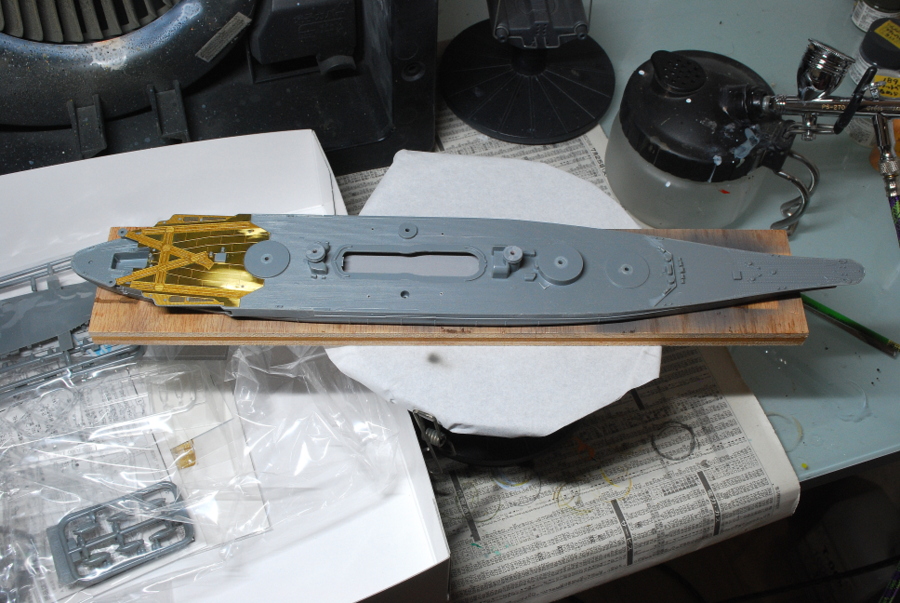 I decided to stick to hand-holding. The wood base was used at the time of the battleship Kongo before. When it is Yamato, it’s a little small for the Yamato size.
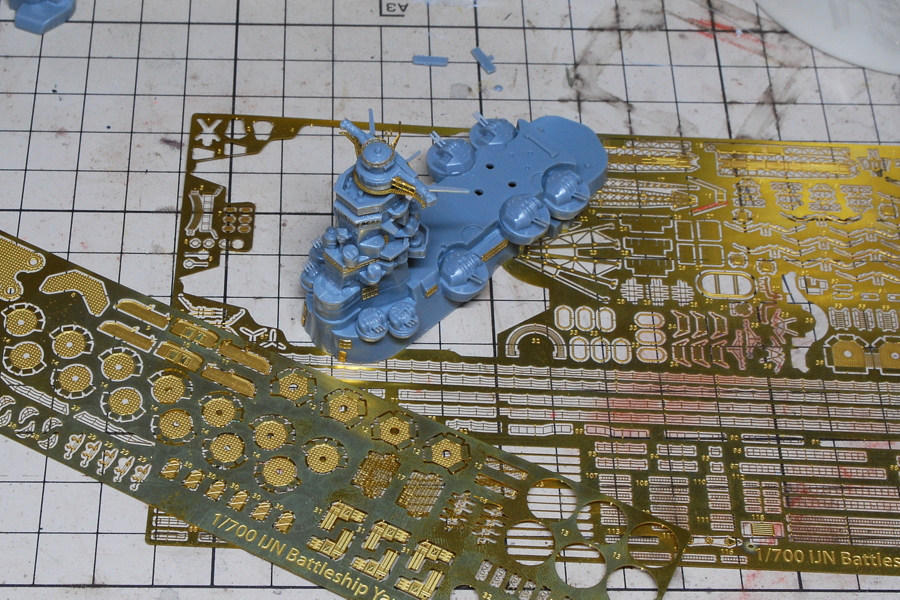
 Although it is still on the way, I assemble it gradually from around the bridge. I used the photo-etched parts positively.
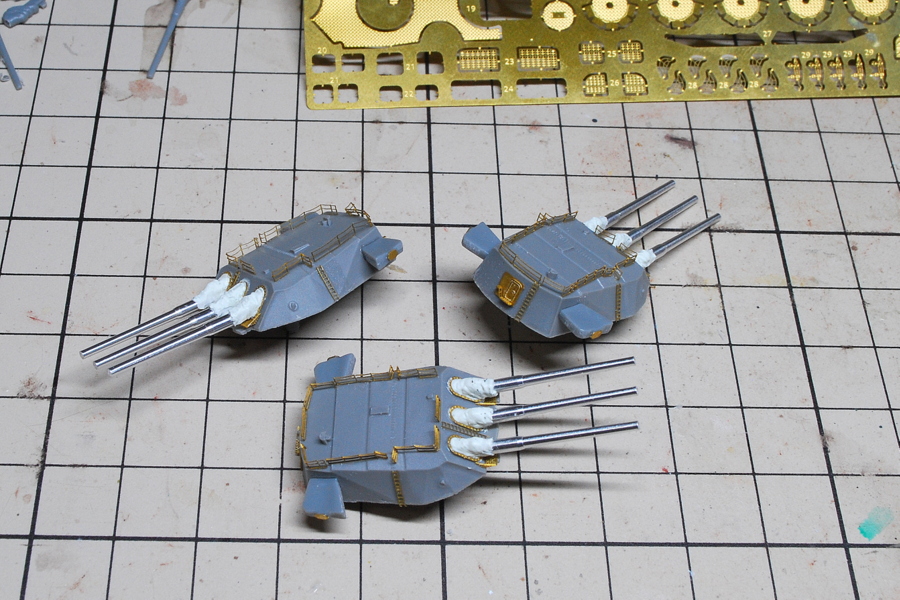
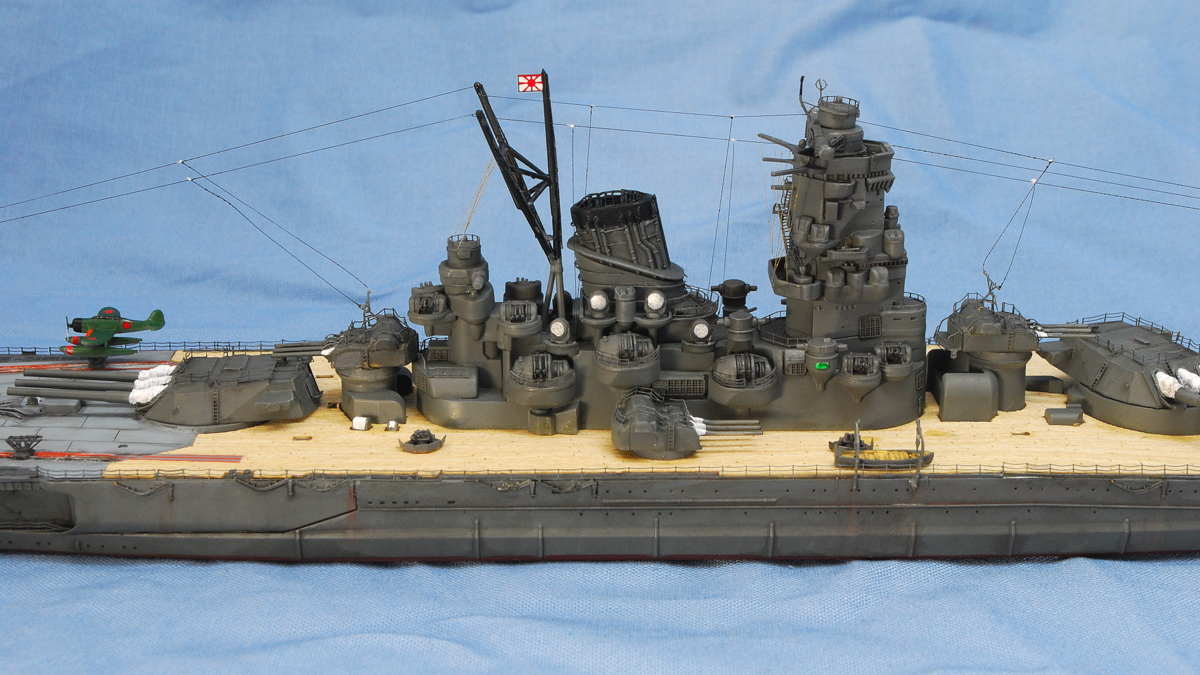
 These resin parts are attached to the main gun turret. One is reproducing the situation of the under-construction. It does not look much different from the plastic parts. It may be possible to use the other two.
Since the metal barrel was too thick to fit a hole in the plastic part, it did not fit very well, so it was screwed directly into the resin part. One of the resin part turrets is different from the shape, the root angle, and the canvas sheet’s shape, but I think to use it after shaping it.
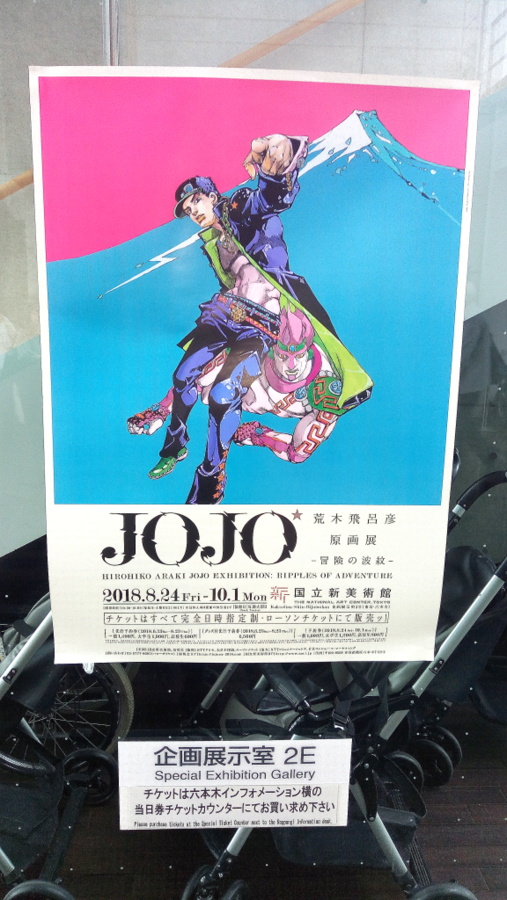 The other day, I visited the National Art Center, Roppongi Tokyo, Japan,” HIROHIKO ARAKI JOJO EXHIBITION: RIPPLES OF ADVENTURE.” Although” this exhibition was just an art exhibition, it was r “re that scheduled each visitor on the date and time. This is the first exhibition that was decided in detail, including overseas. There are many visitors from overseas. There were various exciting exhibits; for example, Araki Hirohiko’s movie depicting a life-size character poster.
I am rHirohiko’so again. Maybe it takes a long time to read from the beginning. By the way, I love every character, but especially my favorites are Noriaki Kakyoin, Bruno Bucharaty, and Rohan Kishibe.
(13-October-2018)
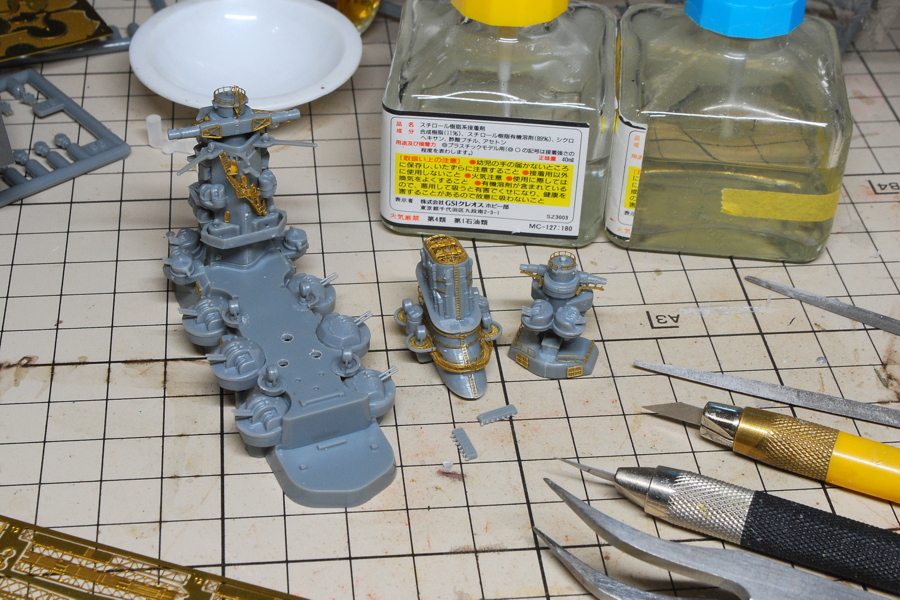
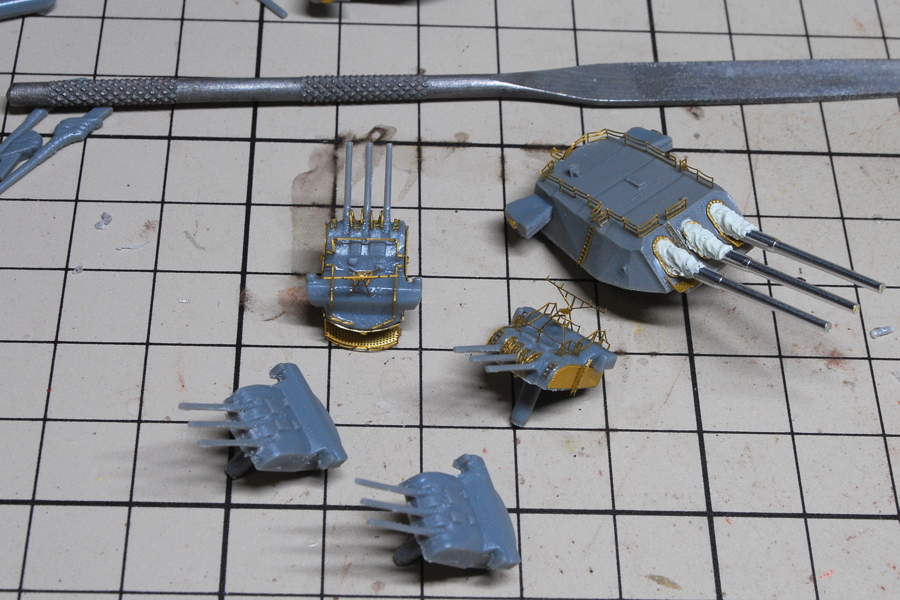
 I attached the metal parts to the turret made of resin and shaped it with epoxy putty. They are luxurious parts when I think about the process.
 Since the anti-aircraft gun seat is grounded on the top of the main gun, only a railing matches the last battle situation, so I used the remaining parts to make detail.
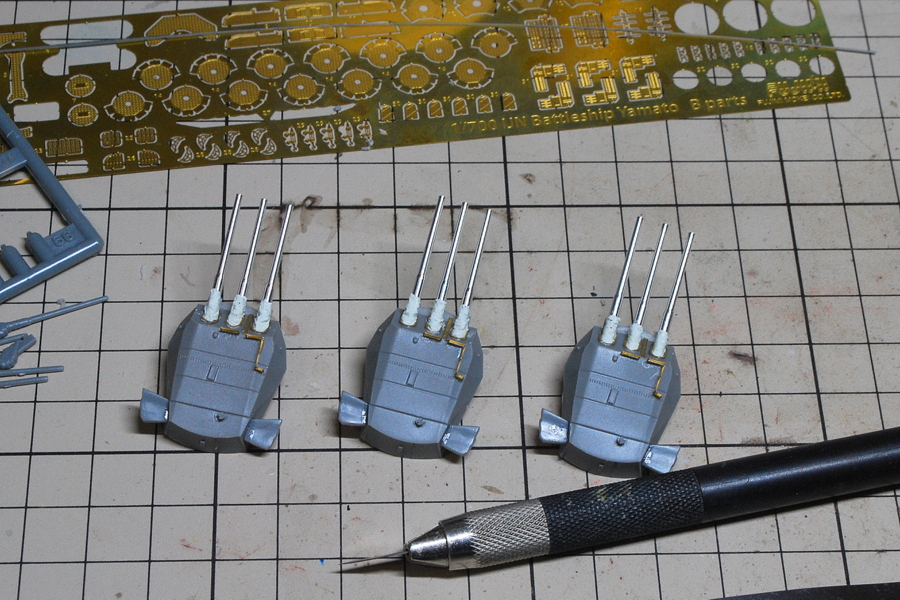
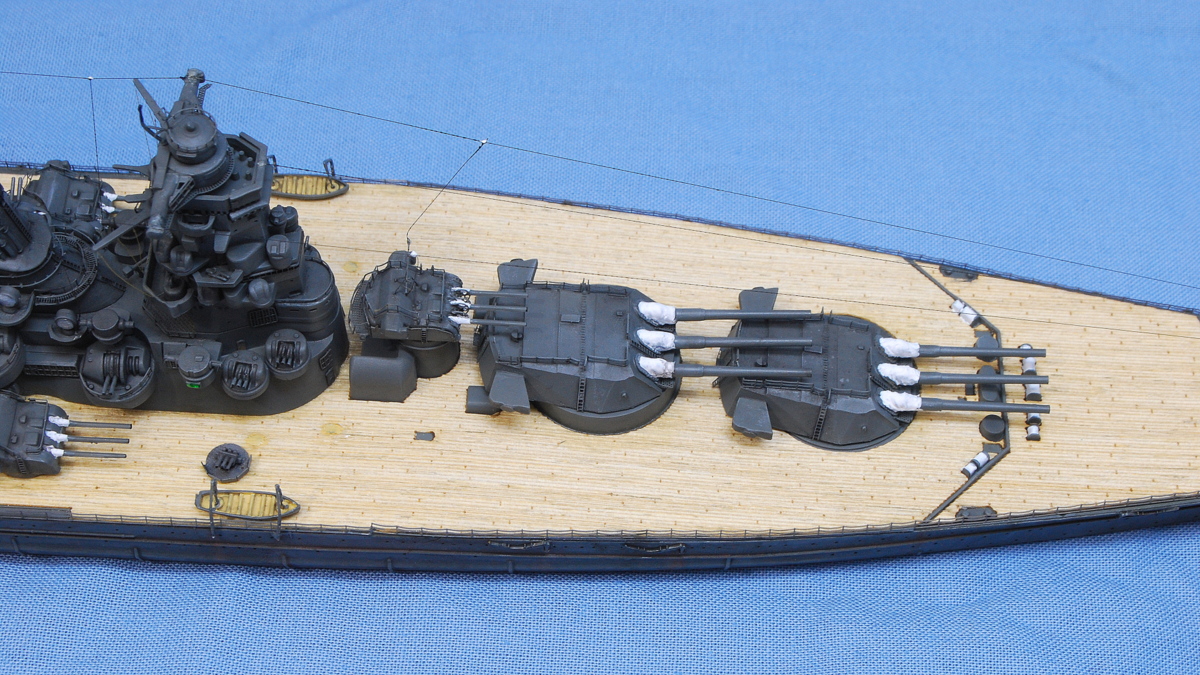
 There are only two photo-etched parts for secondary guns with the last type of armament…
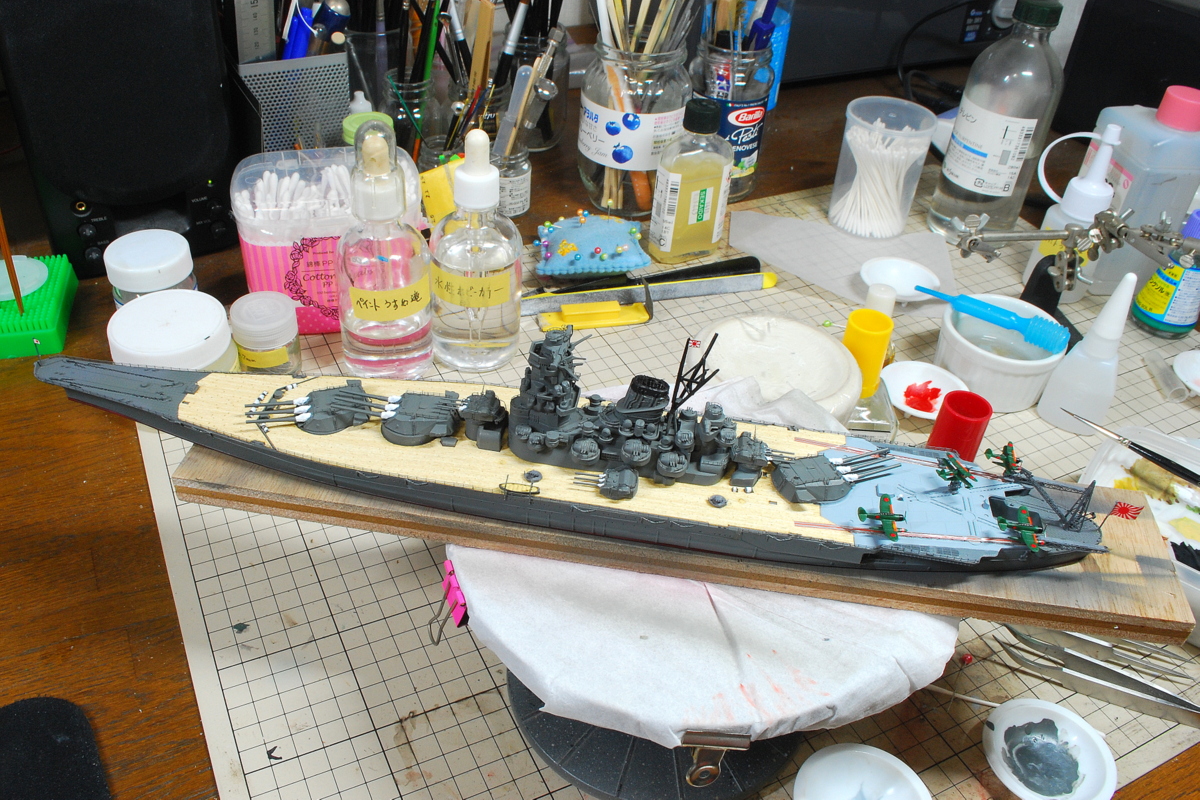
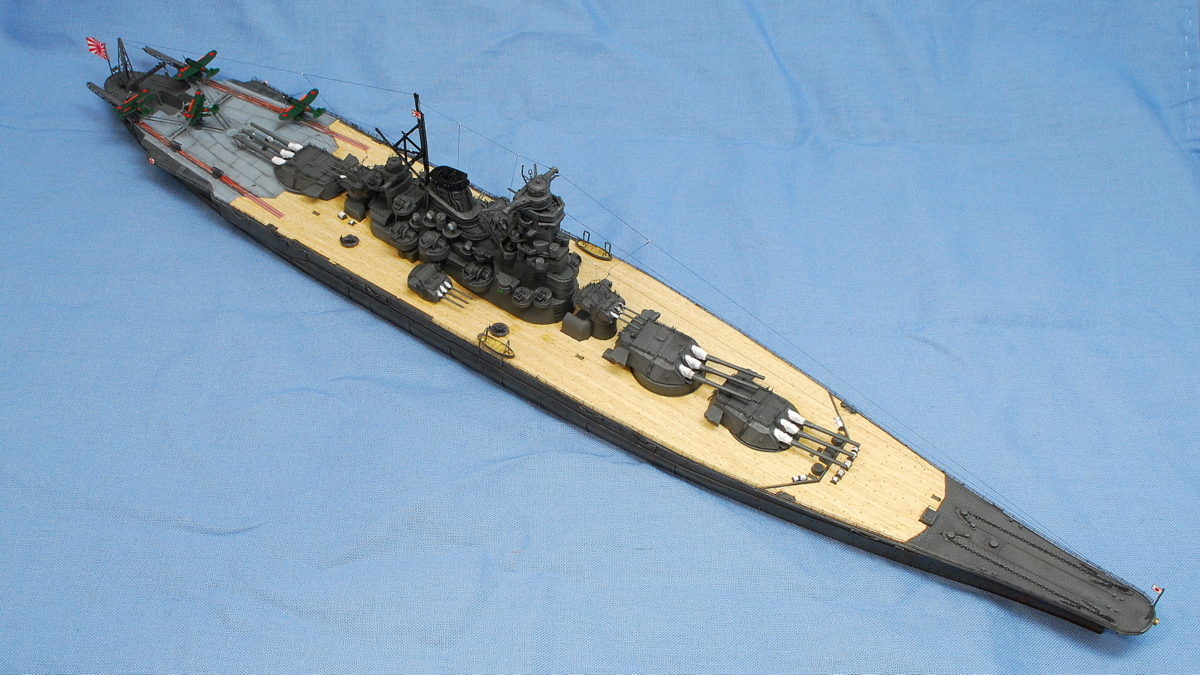
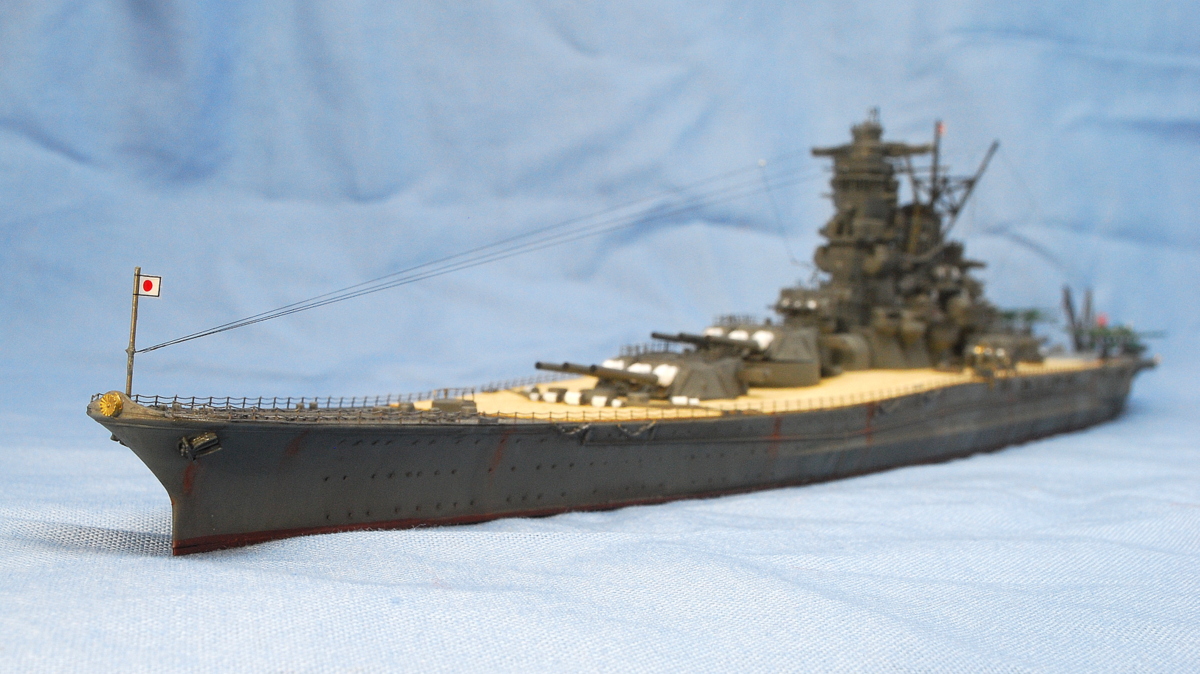
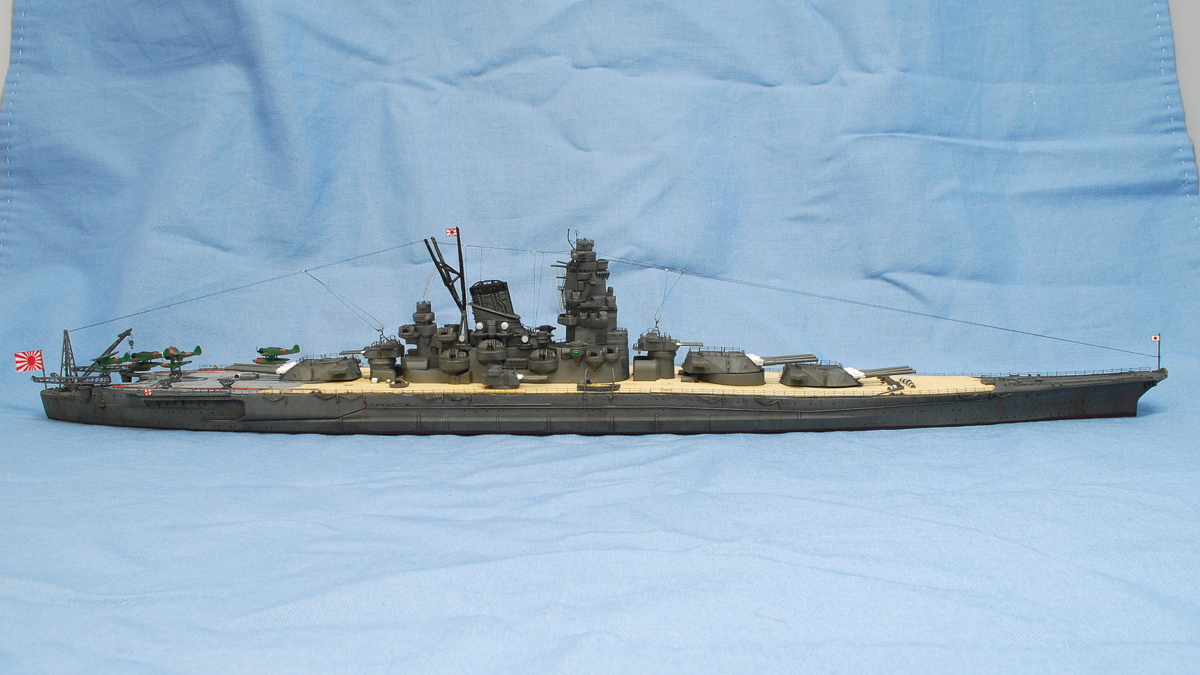
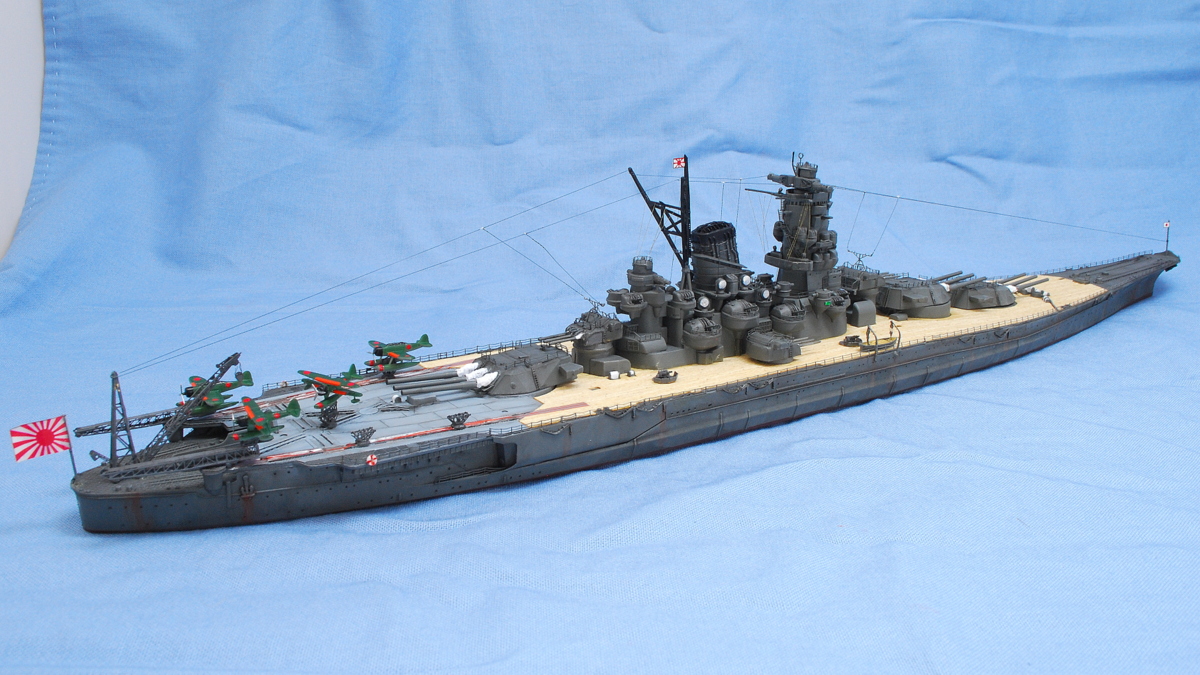
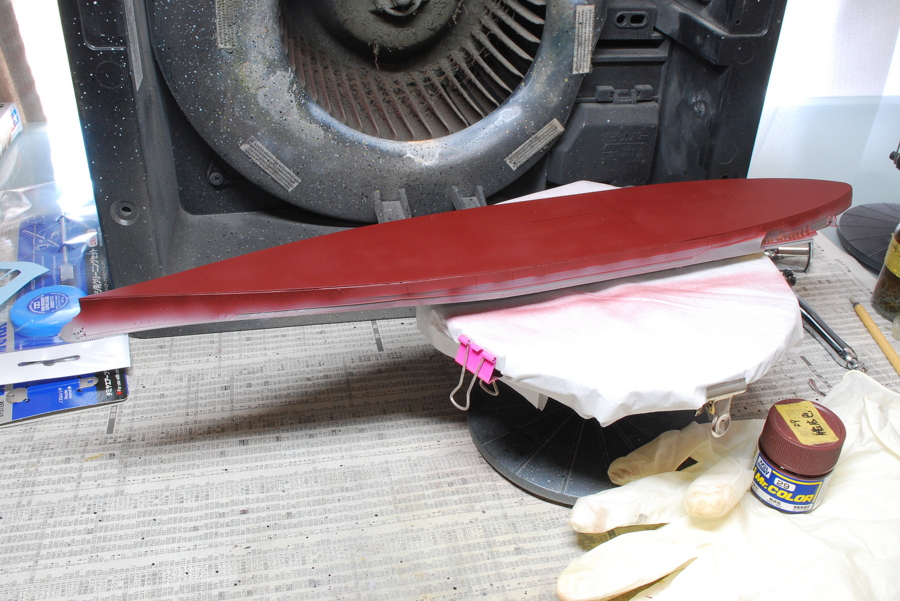 It is natural, the largest among the ship models I have made. Though it is 1/700, the ship’s bottom paint is excellent work.
 I bought a Rainbow Imperial ship sailing Set and attached railing and ladders to the secondary guns. With this, I can get a little balance of four guns finishing. It probably does not agree well. It may not be appropriate for historical research.
(16-October-2018)
 This is good. I put a deck seal and painted the rear deck.
 I bonded each painted part. It is plain. Also, the hole in the deck seal should be blocked and painted.
 I thought the rear deck parts were easy to assemble and install, but many were too tiny. I cannot see the end yet.
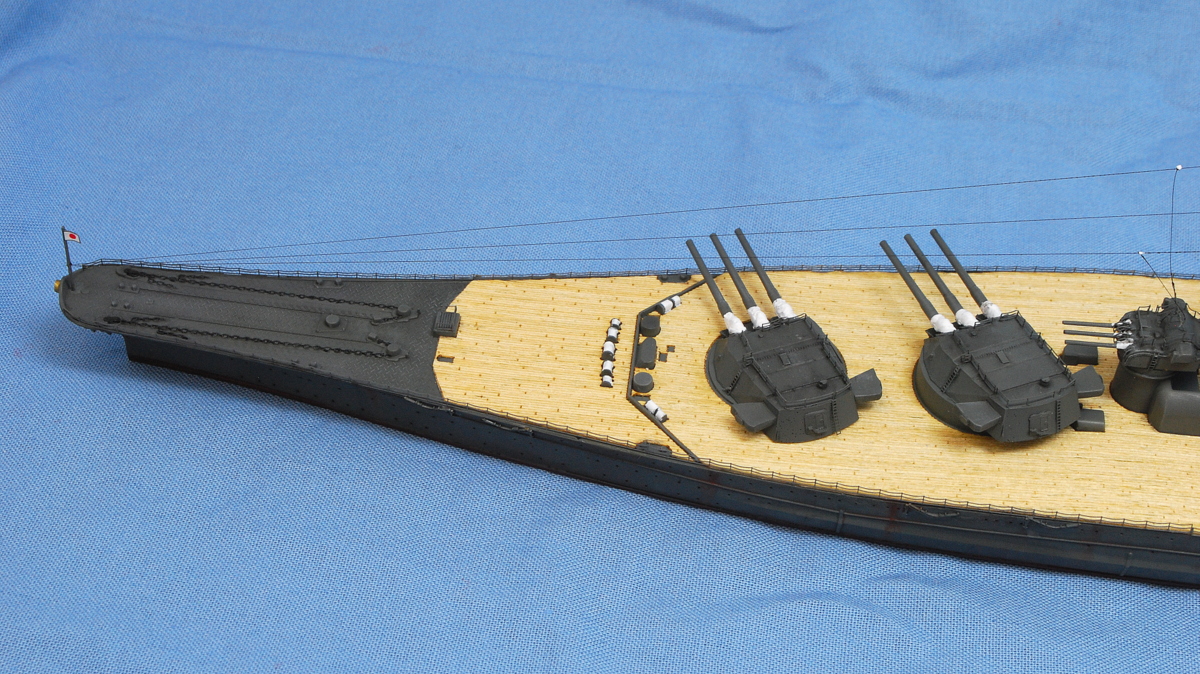
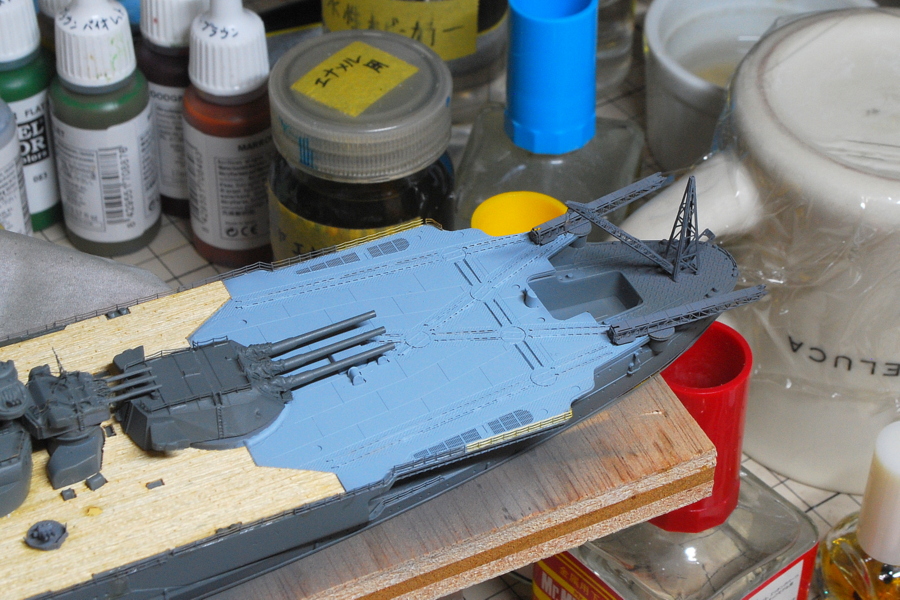 The deck of Yamato is pretty expansive unless we place nothing. By the way, in actual photographs, I saw what the sailors did in gymnastics on the front deck.
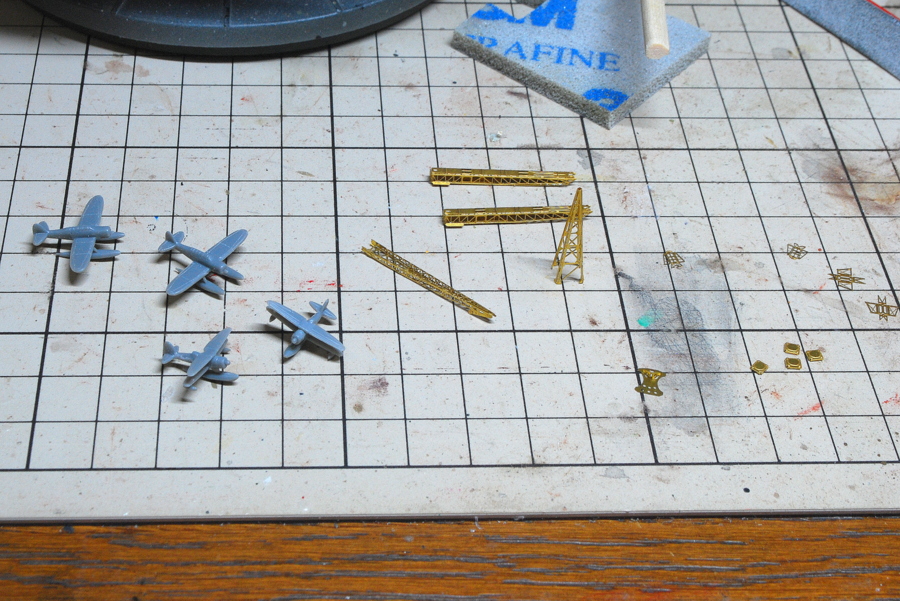
 I’m assembling small parts such as water planes. Assembled photoetched parts and blown airbrush. Attached are the parts painted and a little more until completion.
 I think it will be easier and better to install the railings on the deck after separating them one by one and painting with the airbrush than installing them before painting. Strangely, I will not be able to reach the goal, though it seems to be completed at a glance.
(19-October-2018)
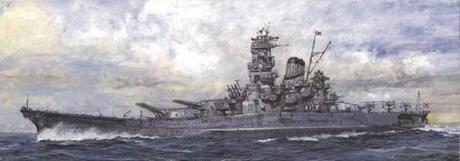
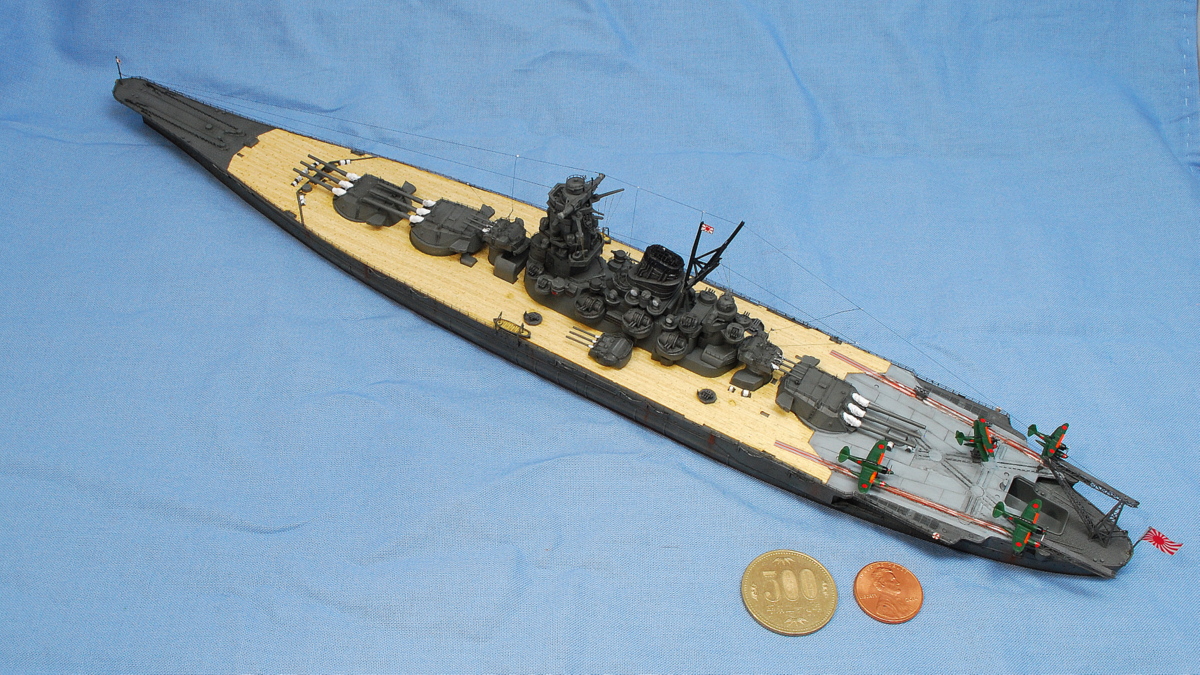
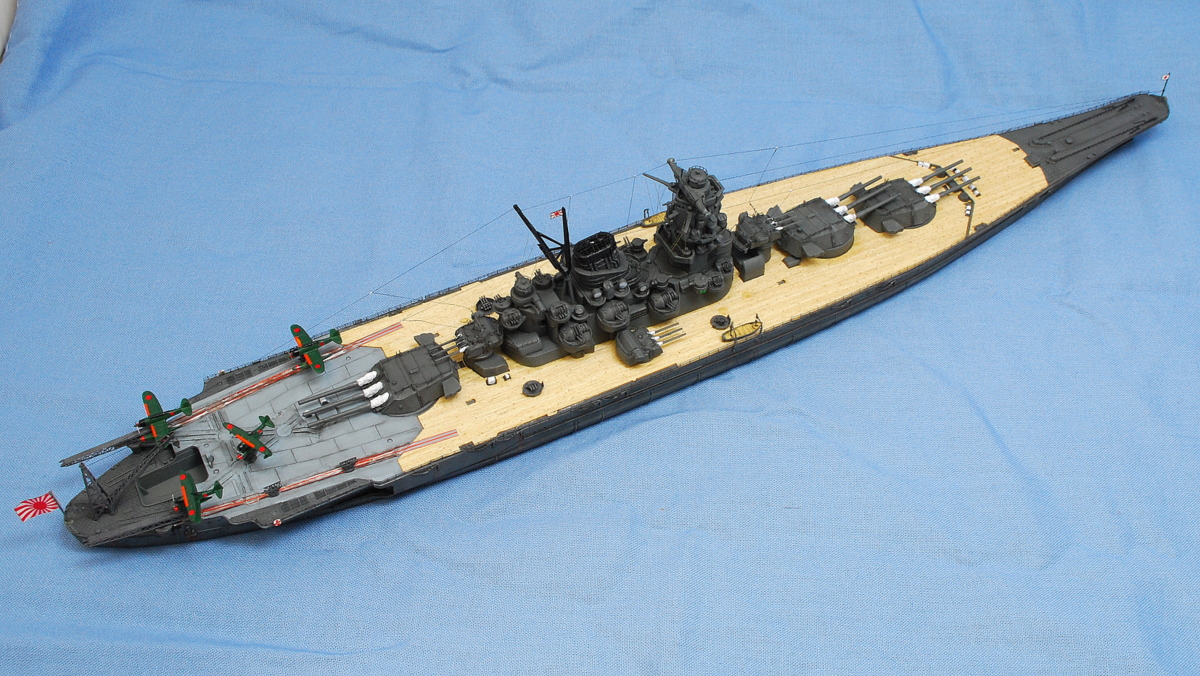
 An old battleship Yamato kit that was unexpectedly in a lucky bag was completed. The Japanese soul trembles when making Yamato’s kit. It was half a joke…, but, unfortunately, Yamato, was of Japan’s strongest battleships, sank. It is regretful that there Japan’stle opportunity for success because the main tactics moved from cannon shooting to air attack by the aircraft carrier.
 Commissioned: 16 December 1941
Displacement: 64,000 long tons
Length: 263 m (862 ft)
Beam: 38.9 m (127 ft 7 in)
Speed: 27.46 knots (50 km/h; 31 mph)
Complement: 2,500 in 1941 and 3,332 in 1945
 The main armament changed considerably during build completion, and the last sank in 1945. The anti-aircraft arms are being strengthened.
——————————————1941—————-1945
46 cm Type 94 guns (3×3) (3×3)
15.5 cm 3rd Year Type guns (4×3) (2×3)
127 mm Type 89 (6×2) (12×2)
25 mm Type 96 AA guns (8×3) (52×3)
13.2 mm Type 93 (2×2) (2×2)
Two catapults
Aircraft carried: 7 Nakajima E8N or Nakajima E4N
Armor:
Waterline belt: 410 mm (16 in)
Deck: 200–226.5 mm (7.9–8.9 in)
Gun turrets: 650 mm (25.6 in) (face)
Bridge: 500 mm (19.7 in)
 Battleship Yamato was sunk in the East China Sea on the way to Okinawa on 7 April 1945 as a series of suicidal attacks named Operation Kikusui. Most of the ten torpedo hits were centered on the port, with many other hit bombs. Yamato was sunk in two hours after the attack. 2740 deaths and 269 survivors.
 The performance of radar is quite different before and after the war, and the weaponry and outfit seem pretty different. The square-shaped radar is not used at that time.
 I used Fujimi’s deck seal. The deck of wooden material is thick and mFujimi’sried by some people. In my case, I did not care much about installing a handrail. The process of assembling and painting becomes complicated by affixing wooden decks on the way. Because my original experience with the plastic model is AFV, I wouldn’t say I like parallel assembly and painting.
 I arranged it on the deck. I guess it’s too messy.
 After painting the hull and the rear deck, I used a deck seal as an order. I love this deck seal because it looks good and is easy to work. Let’s try painting the wooden deck next time to raise my skill. I understand how to install the boat door and tried and error for a while. Perhaps it is like this? I cut the mold at the part where the photo-etched parts are to be attached and adjusted each part.
 Trial and error is also part of the enjoyment of model making. I got lost in the order of assembly and eventually assembled from the bridge according to the instructions. The hull is large, and the number of parts is small, so I thought it was easy, but the choice of the parts was difficult.
 When the assembly is interrupted due to a lack of handrails or other items on the way, the rate of not re-starting is relatively high. When I unexpectedly put my hand on another kit, I need the energy to return this kit. Motivation comes out again, looking at the bridge, main gun, and rear deck.
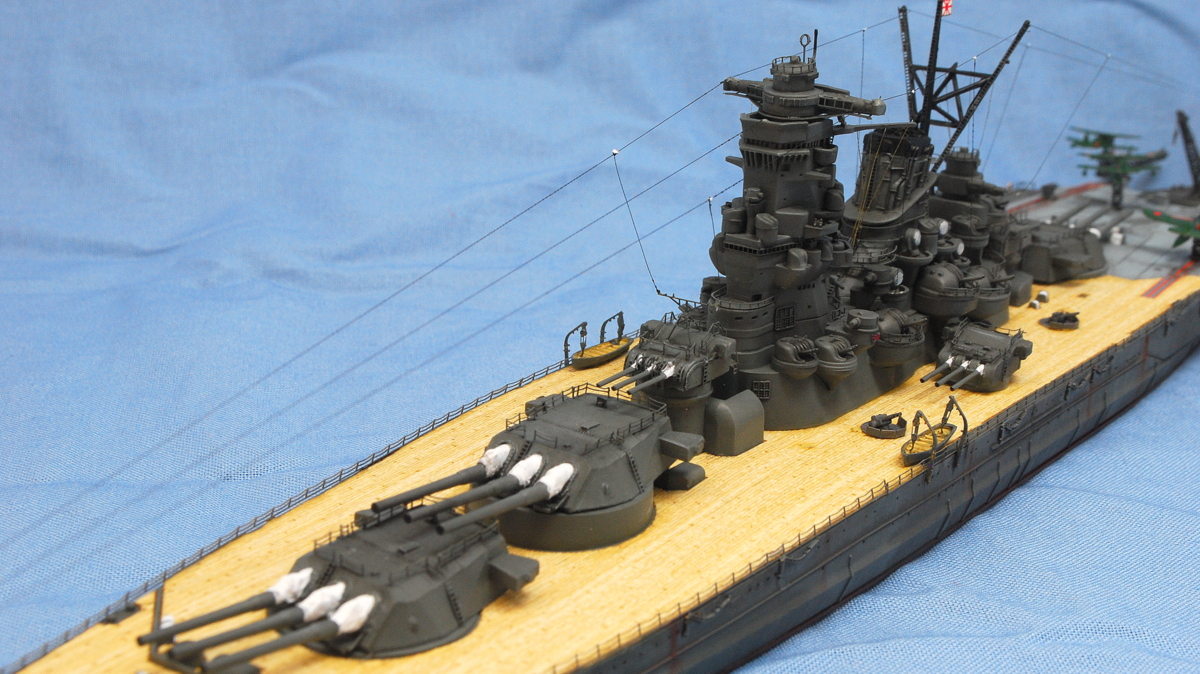
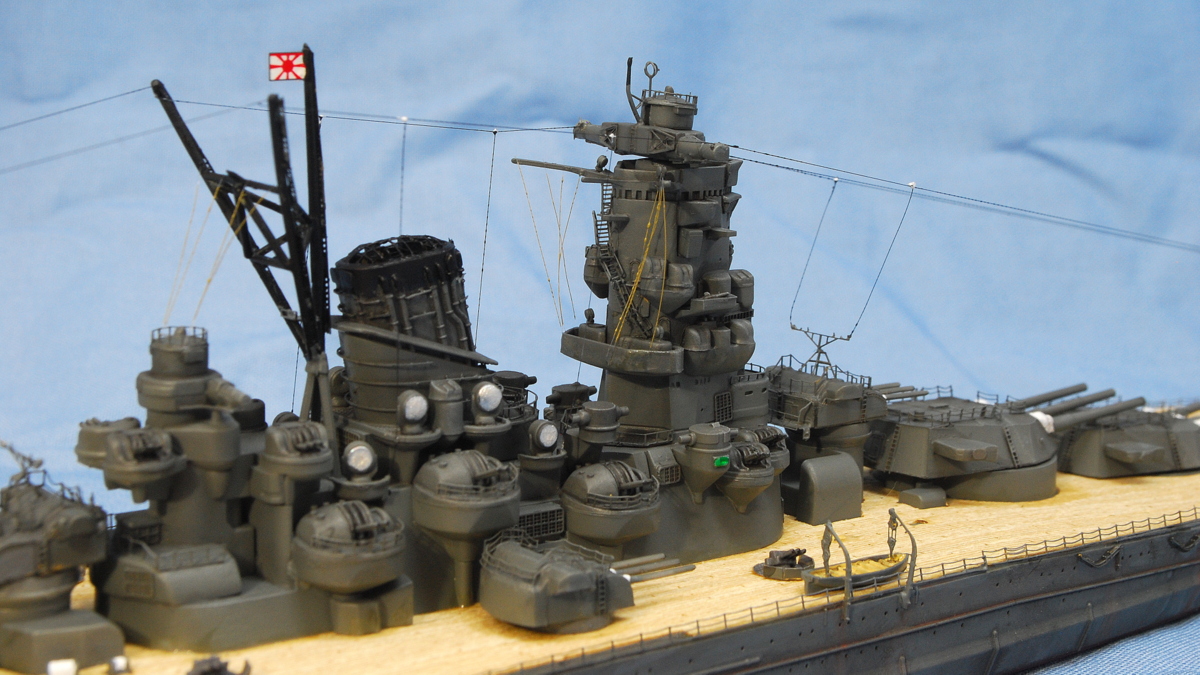 The antenna is complex. I don’t think the yards near the bridge need to be tautly stretched, and it’s hard to correct them if they’re twisted oddly.
 In conclusion, using the etched parts of the Yamato End type at the time of commissioning is a bit unreasonable, but it works. We can only divert the missing parts from others. In any case, the Toku series Yamato etched parts are not so expensive, so it is good to try them out.
 This Fujimi’s photo-etched parts instruction is difficult to understand. I needed to imagine or look up some pFujimi’she Kongo parts I made one year ago that were much easier to understand.
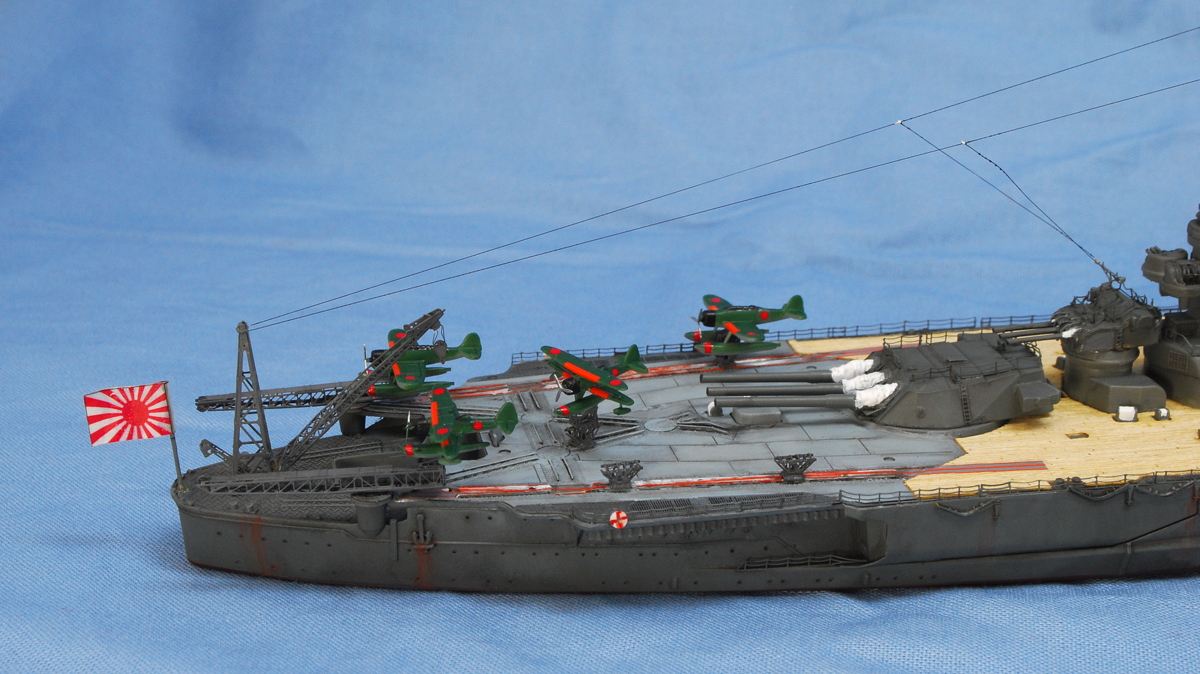
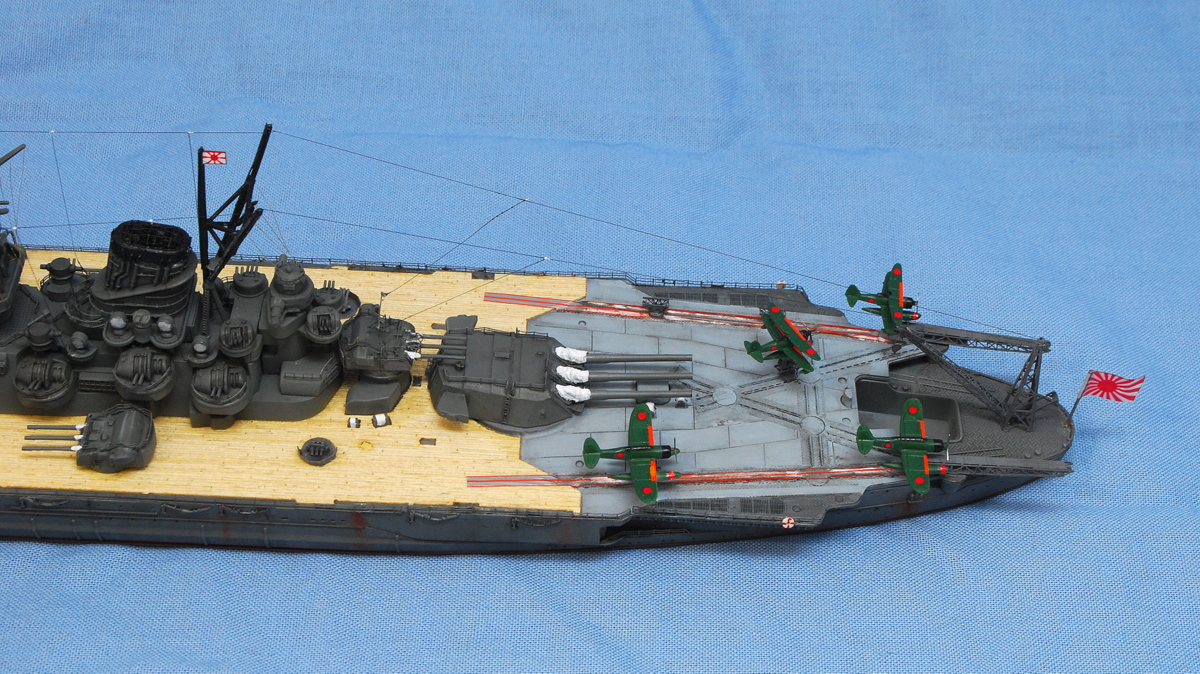
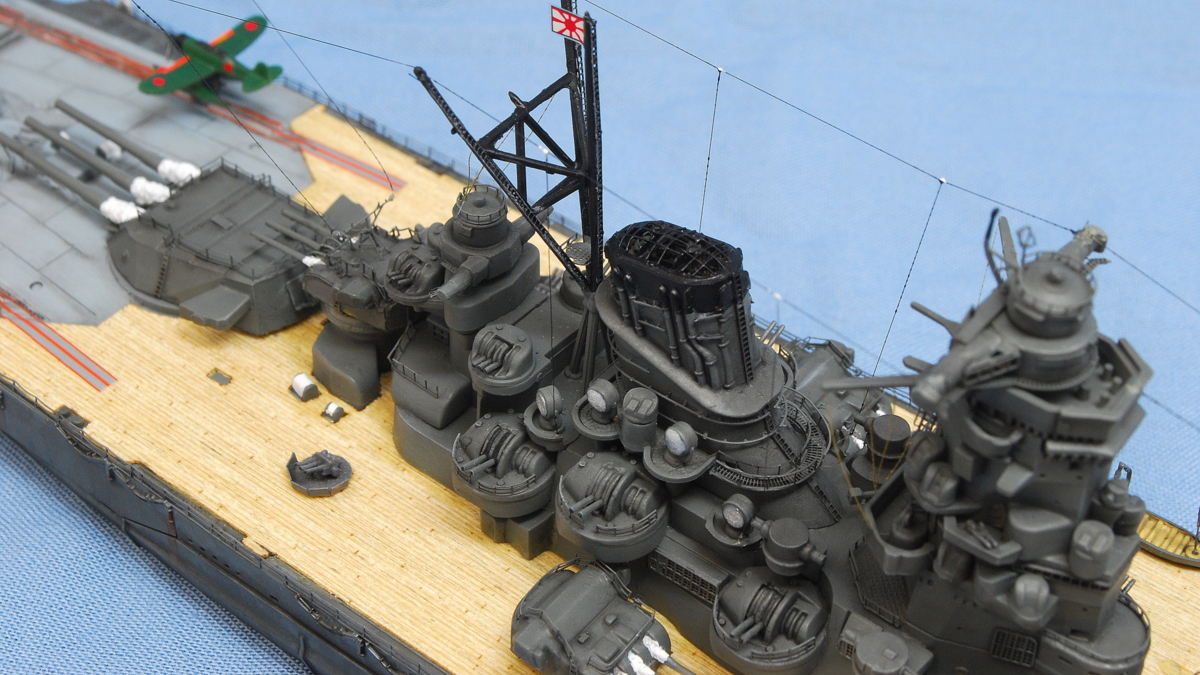
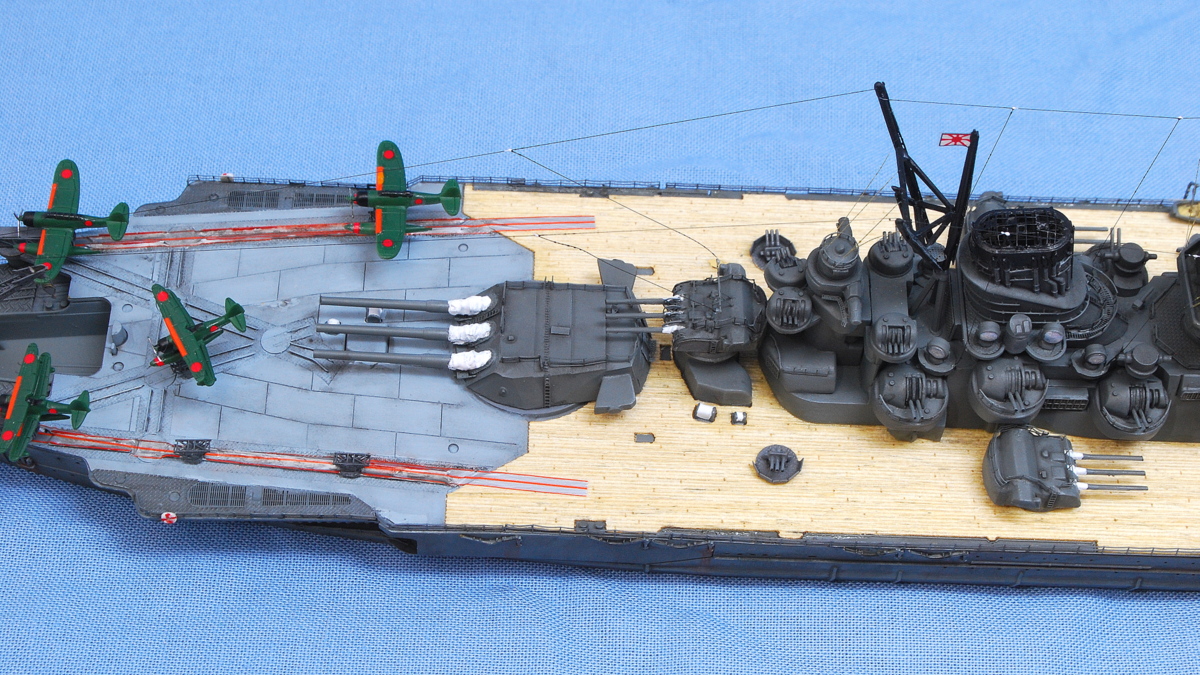 Battleship Yamato has a reconnaissance aircraft; unusually, a hangar was under the deck. A large opening was in the aft, and a crane carried the aircraft. The blast of the 46 cm cannon seemed too intense, and it was impossible to put the aircraft on the deck.
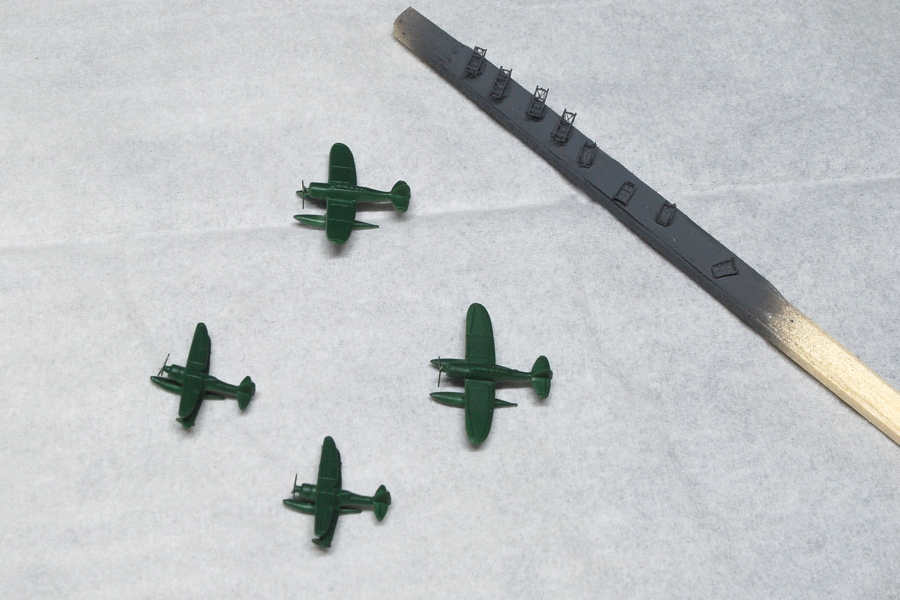
 There were seven aircraft on board. I arranged two Mitsubishi F1M water reconnaissance aircraft and Aichi E13A three-seat water reconnaissance aircraft.
 Right triumphs over wrong、, law triumph over right, power triumphs over the law, heaven triumphs over power; no man can oppose the divine. The decal sheet of this kit is attached to the Kikusui-mark and the Hiri Ho Tenken (mark and banner used by 14th-century samurai Kusunoki Masashige). Of course, they were not yet attached in 1941.
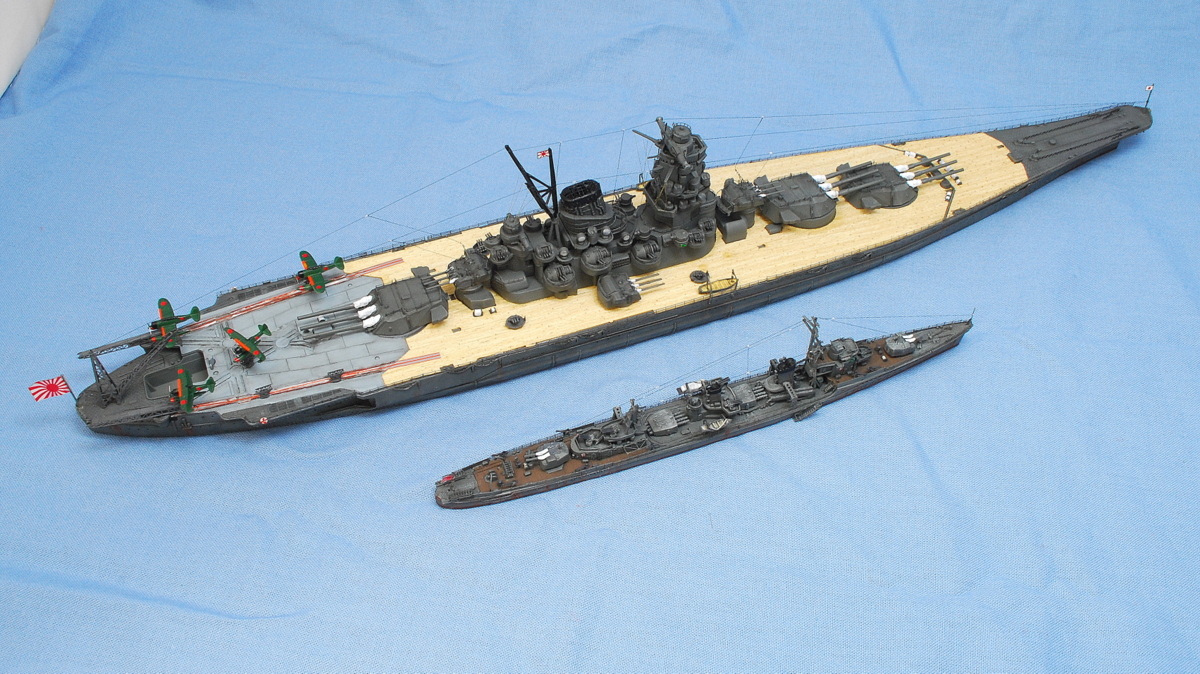
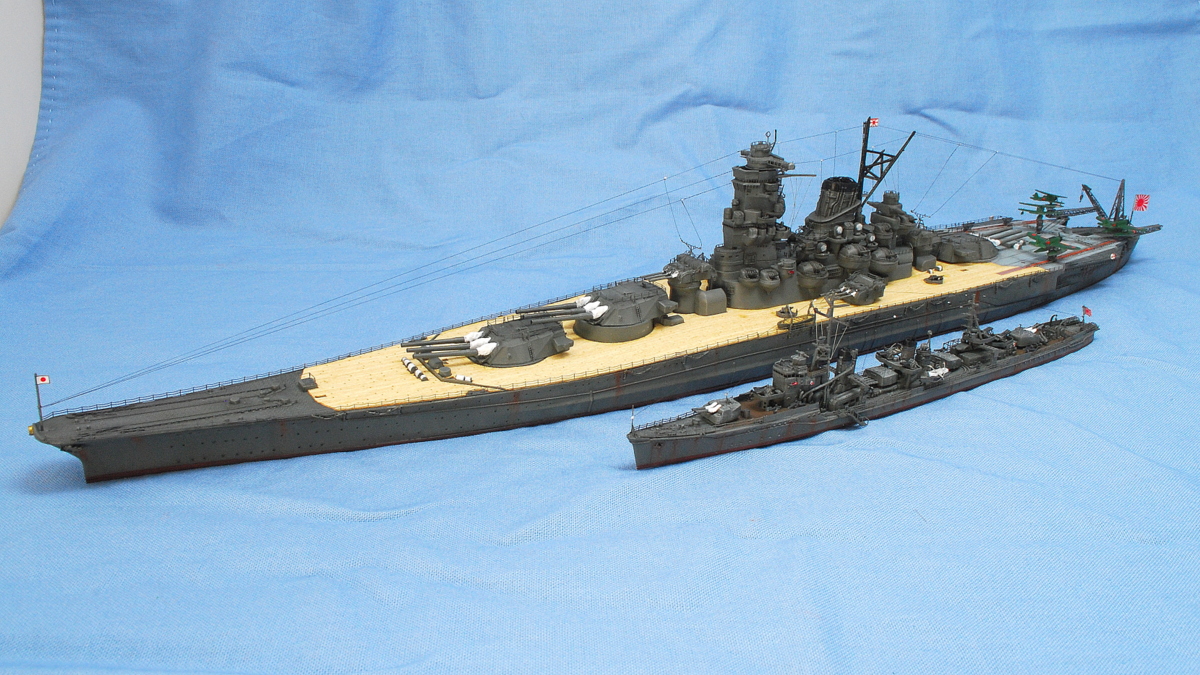 I took a photo of the destroyer Urakaze the other day. You can feel the size of the battleship Yamato. I want to try assembling the final armament-type Yamato next time. But perhaps I’ll build a Kan Next series battleship Musashi.
(22-October-2018)


コメント