
This is the article transferred from my former site; I built this from July to August 2007.
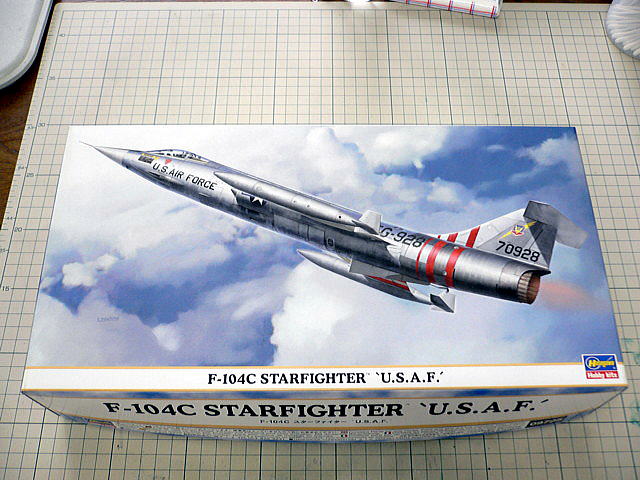 I want to make the jet plane this time because I completed the WWII plane last time. I chose the F-104C Starfighter. The long and slender body looks challenging to achieve.
(2007/07/12)
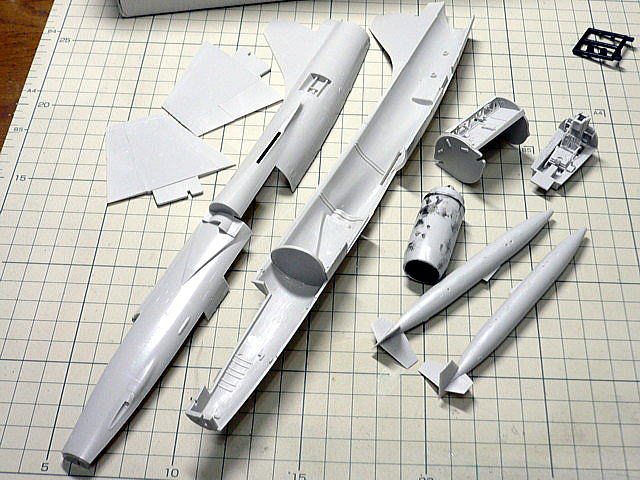 I wondered what procedure I should take, but I assembled the fuel tanks, main wings, and cockpit in the beginning.
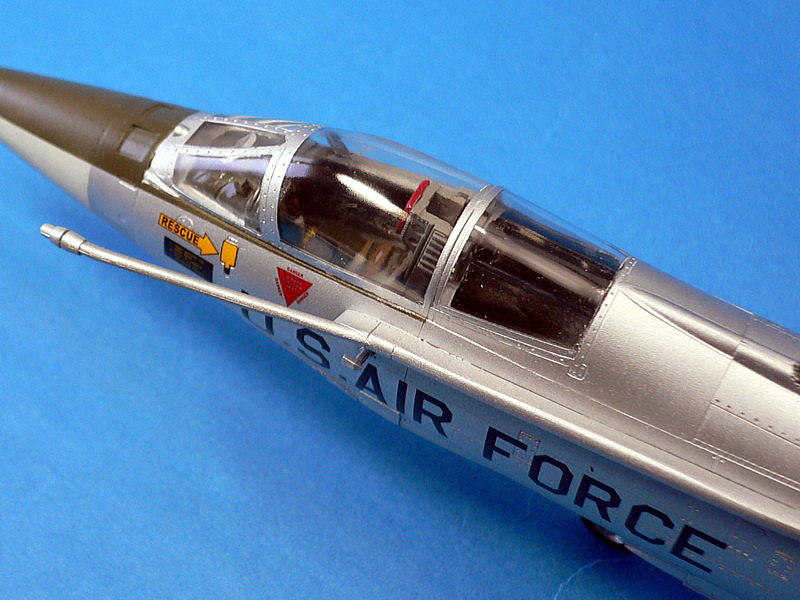
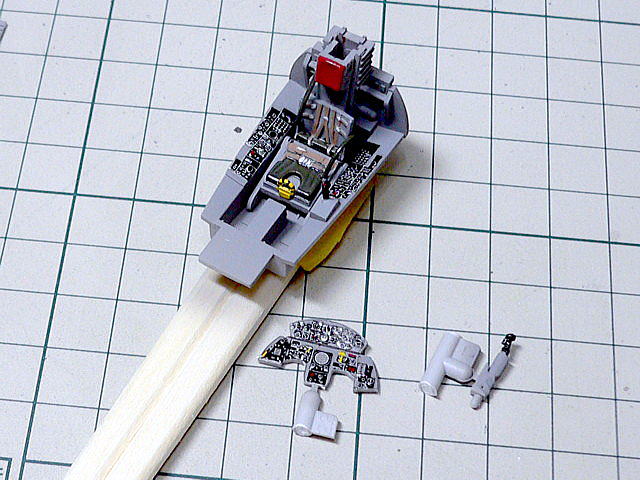 The cockpit is like this one. After I searched the photographs of the cockpit panel on the Internet, I pasted the decal and painted the seat belt, etc. I added the color on the panel a little in a red and yellow accent. (2007/07/14)
 Sticking the right and left of a large airframe together. After drying the parts, I found the gap and amended it with the patty.
 I completed the assembled rough shape. I smoothed the whole surface with about the #1500 sandpaper because the surface treatment was not so good in P-47 assembling before, and the painting was not so good.
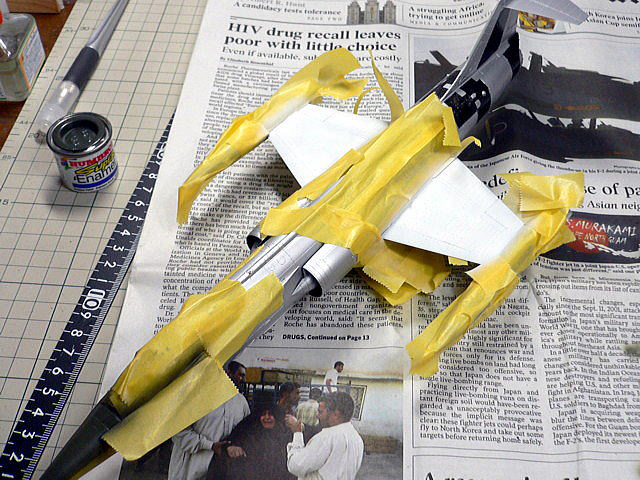
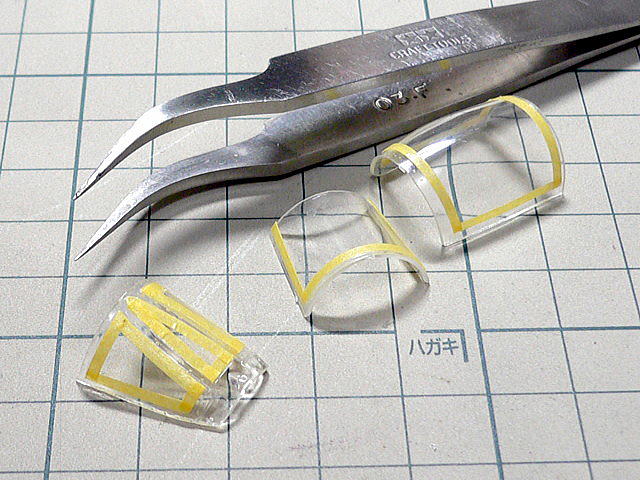 It is sliced masking tape and the canopy masking, as in this photo.
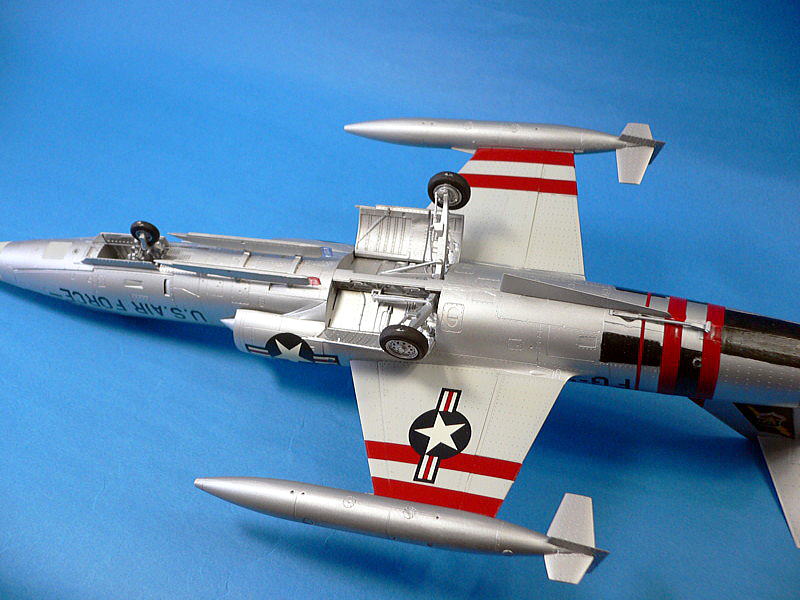
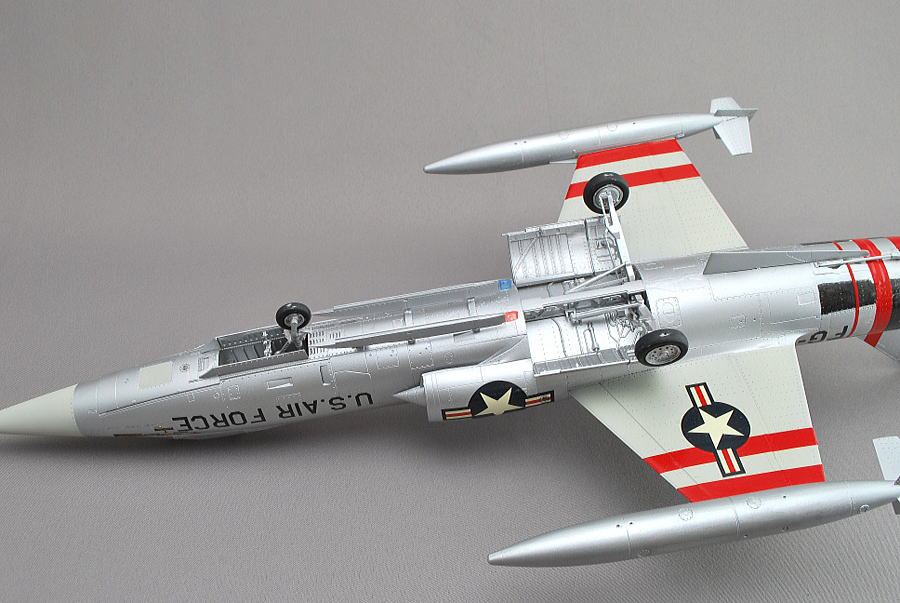
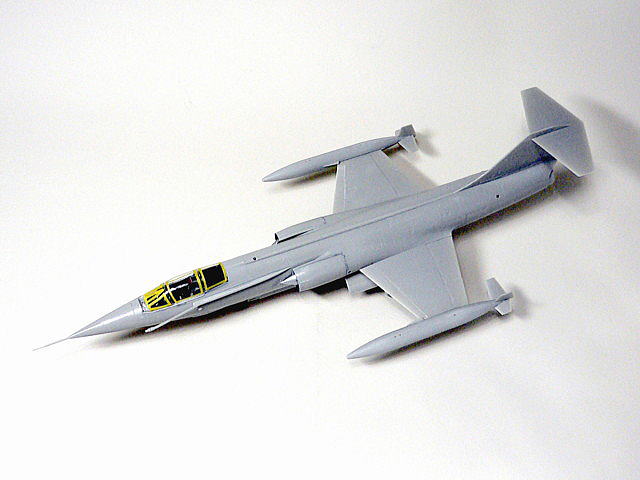 All the assembly processes were completed. Because this airframe is the overall silver painting, I have assembled the tire. I lost one or two small parts, but I don’t care to continue painting. Because neither the bomb nor the missile has been attached to this kit, it is pretty simple. I noticed there was not a pilot either.
(2007/07/15)
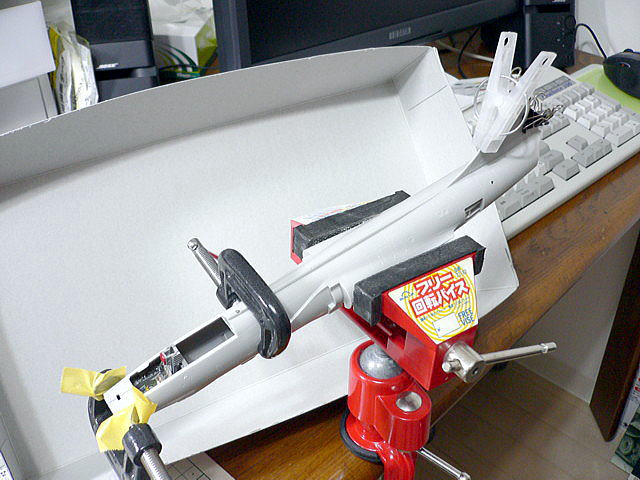
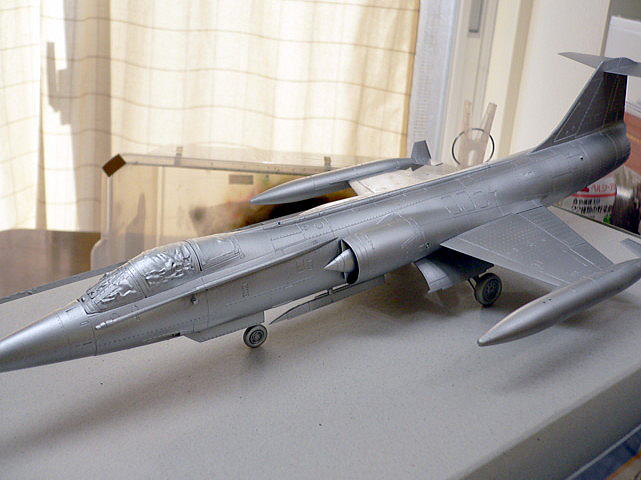 It is a silver paint finish though the picture is not bright enough. What should I do with the jet plane painting about holding it? In the case of tanks, I always fixed it on the stand and held it by hand, quickly blowing. I used chopsticks to have this plane insert its end in the jet engine exhaust opening. But it is unstable and not easy to paint the airplane. It is necessary to improve the next time.
(2007/08/09)
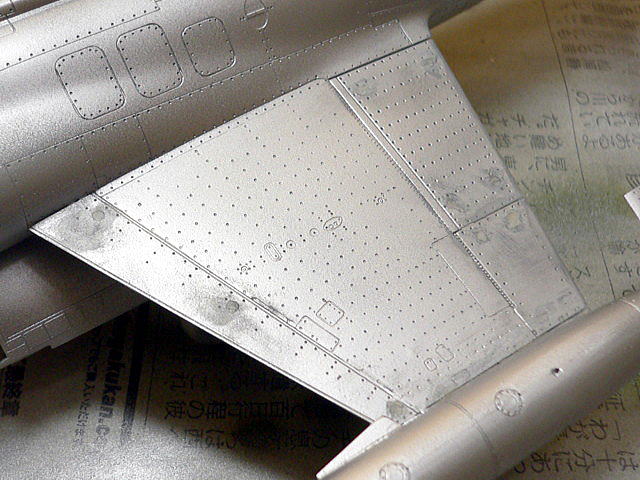 I was surprised the next morning after painting last night and being seen the next day. When I confirmed the surface after drying the kit, there were innumerable typing-out pin marks on the wing’s upper surface!!! Are there usually pin spots on the upper surface? Did I make a mistake in attaching the top and bottom of the main wing parts? Anyway, I amended with the putty and tried to paint again. The mistake stands out after I painted silver; if I finished up, the surface had not been cleared. The high-quality surface finishing is complex for me, even though it’s a fundamental skill for the airplane modeler.
(2007/08/10)
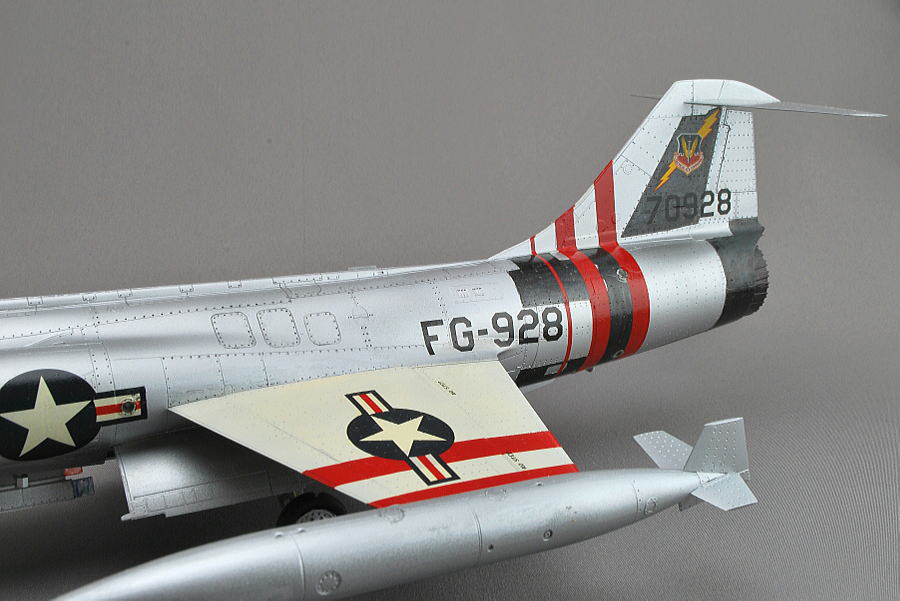
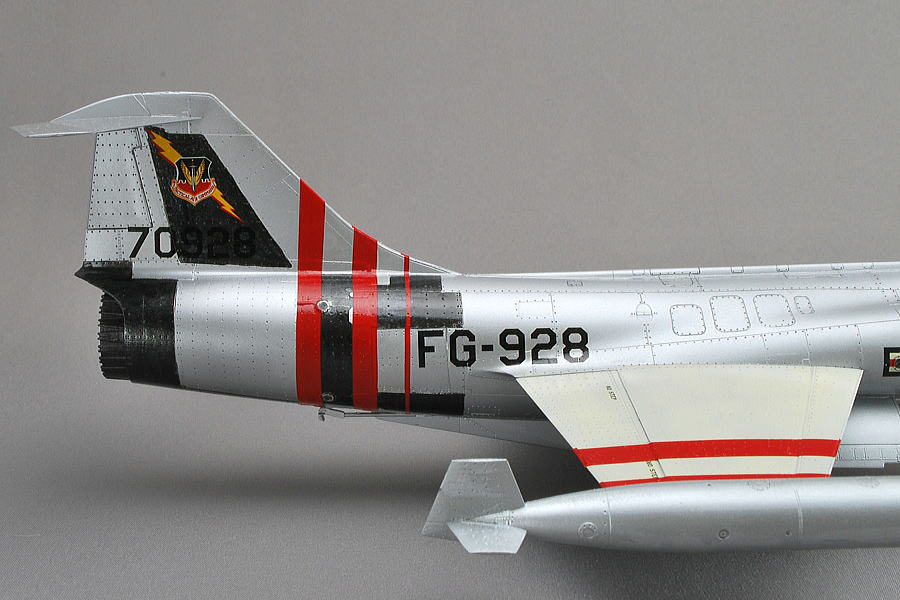
 I need to do masking again. I noticed, after all, that the wing’s upper surface should be white and the lower surface light gray. A lighter color was better though I had painted the tail with black iron. Because the black airframe and the decal number are the same color, it is not visible clearly. This black area was brush painted, but the surface didn’t smooth. I should have blown it with an airbrush, even if it takes much time to mask.
(2007/08/13)
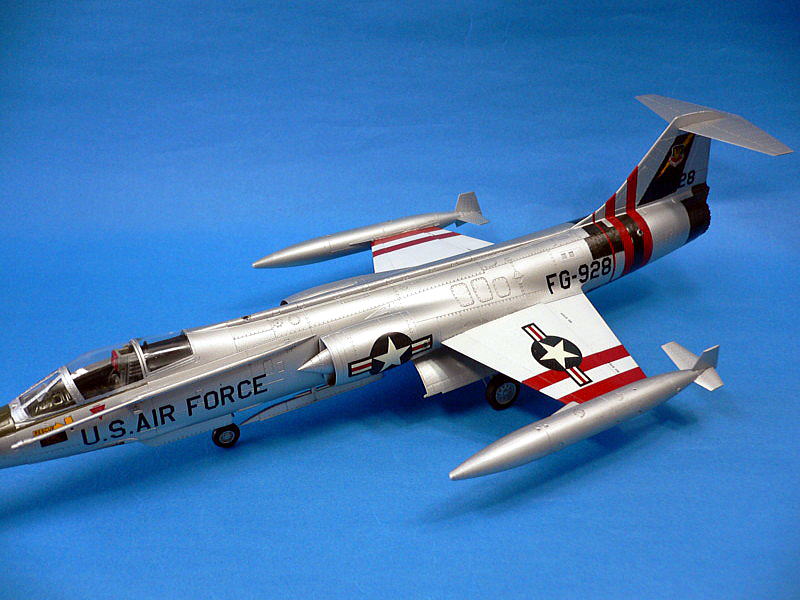
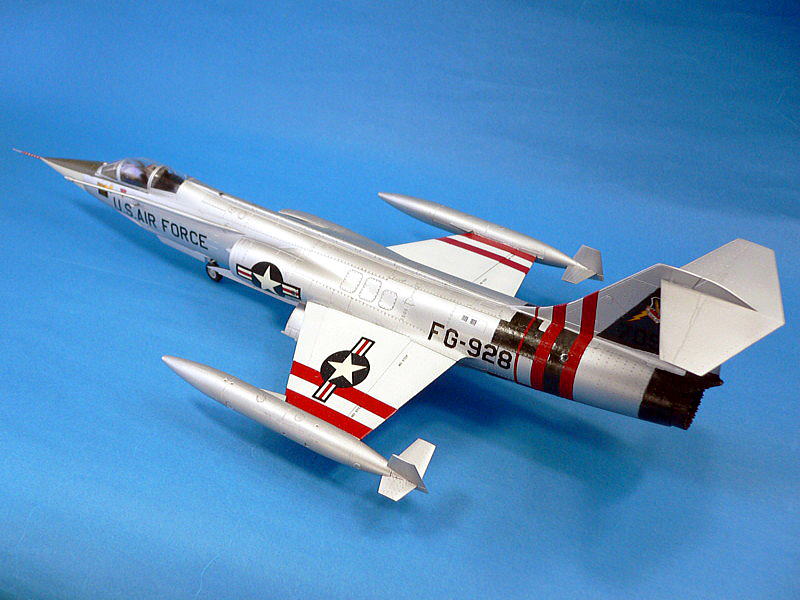
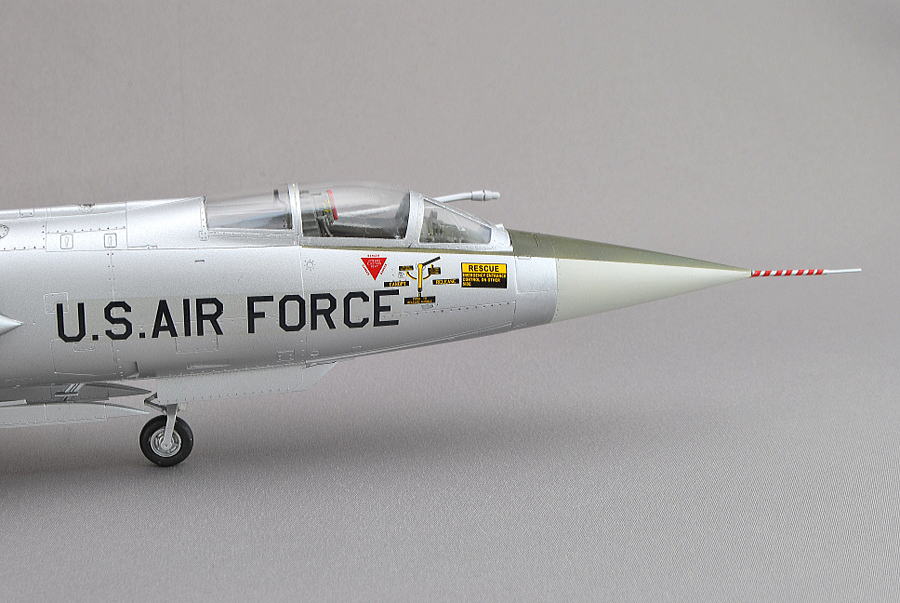
 At last, the F-104 was completed. I damaged some parts here and there but anyway finished up. This kit required painting with different colors on the nose part and the main wing; it took a lot of time. Though I thought it was simple assembling and painting.
 Painting with silver was difficult. This time, to avoid the paintwork of silver becoming impure, I made the ink putting minimum effect.
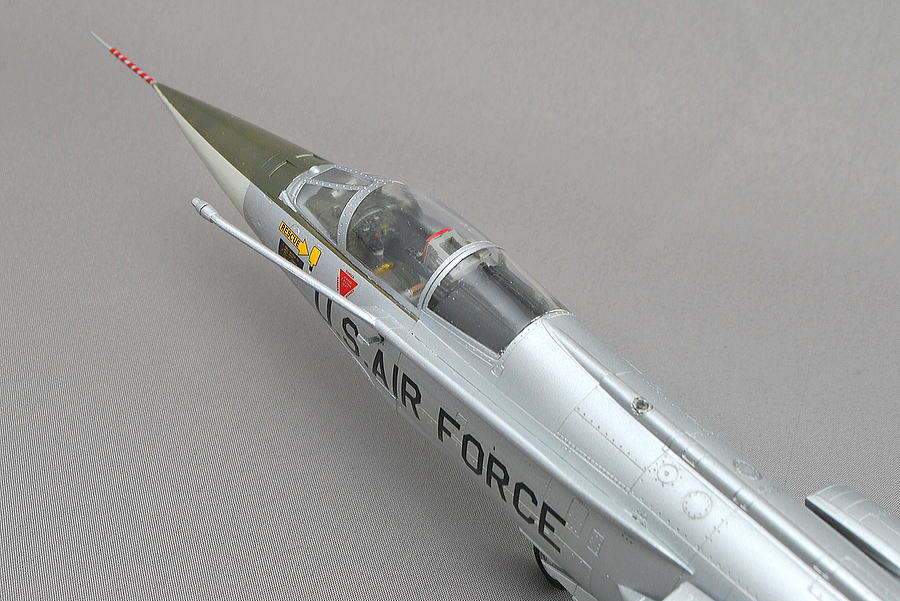
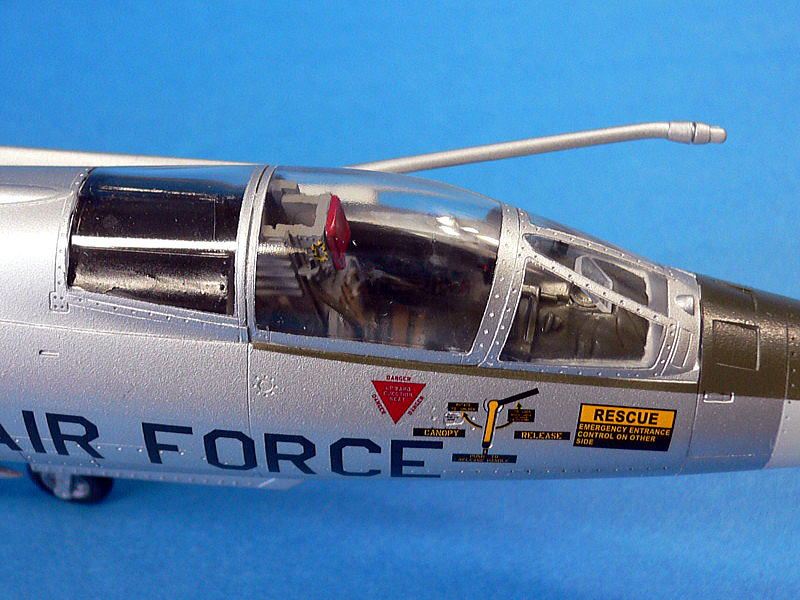 The aircraft modeler might be satisfied looking into the detailed cockpit inside through the canopy. This time, I spilled thinner on the clear canopy parts, which had become cloudy. I polished with the compound, and it’s the limitation around here. It’s happy to see the meter board and the seat belt.
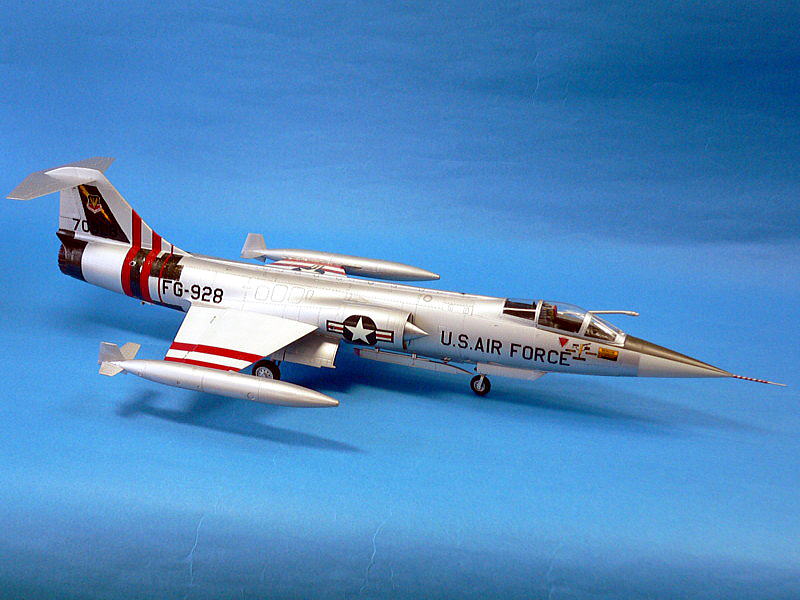 Decals were not shined strangely without my carelessness. I suppose the decal degree of adhesion was suitable for the paintwork of the clearing finish-up. There was no degree of adhesion problem though the silver paintwork had been roughly finished. The decal was softly transformed after using the decal fit, and I had to touch up to repaint some parts with a small brush.
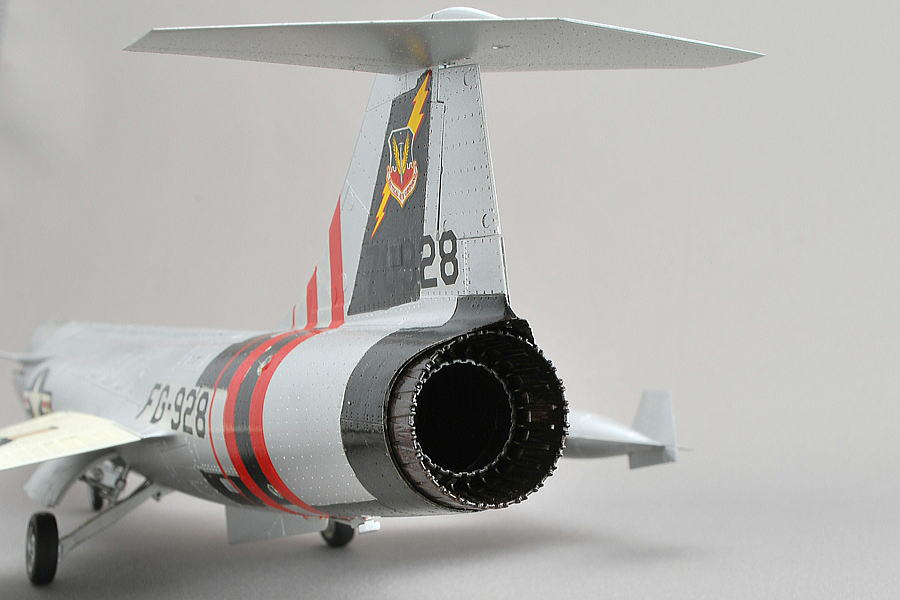
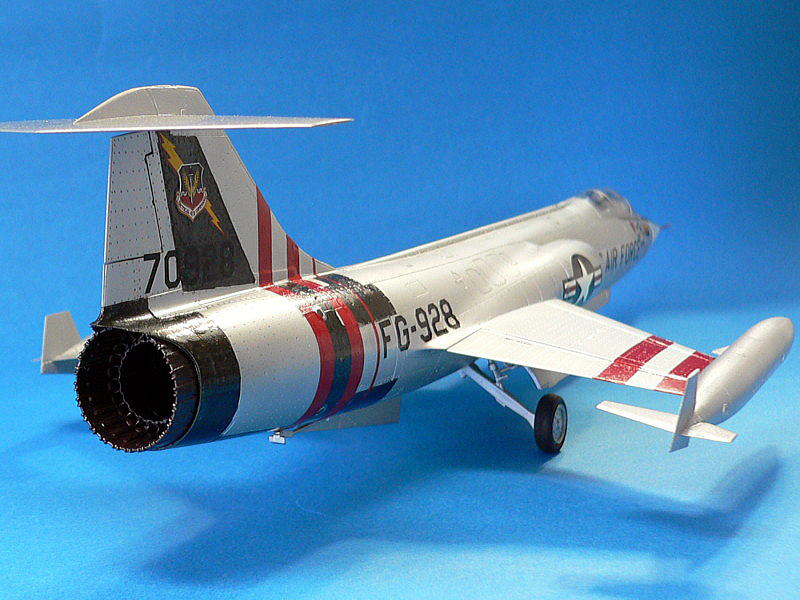 The panel of black iron paint was too dark. I should have mixed it with silver; that panel had a better color tone. Marking was the US Air Force’s 479th strategy combat Air Wing in 1964.
 It is very satisfactory though I didn’t arrange the extra work in the cockpit, simply making the following manual. However, it is not possible to make it beautiful easily.
 The decal of a red belt is an excellent accent to this airplane. It did not worry the under the surface because it was not so seen well. Even if it is completed, the aircraft model needs a large space. This is in 40cm×20cm. How do you keep your complete work?
 It is necessary to reflect on the point that is finishing quality was rough overall. Handling surface treatment before it paints, the density of spraying paints, decal quality, and the aircraft assembly should be taken care of with many points different from the AFV model. I was relieved because I could complete this work anyway.
(2007/08/14)


コメント